Ketchup – COLLECTION INDEX

Here is a collection of several recipes – some more complex than others, but all of them are good.

Easy Ketchup

Whitehouse Tomato Catsup #1

Grandpa’s Ketchup


Green Tomato Ketchup

Healthy Ketchup


Ketchup and Mustard

Recipe from www.NewScanCook.com

Ketchup

Fresh Tomatoes from the vine
Halve and grill tomatoes with sliced onions, garlic, bay, brown sugar until some of the edges start to blacken – – Optional: use broiler
Add pinches of cinnamon, cloves, coriander, caraway
While still warm, add a few fresh tomatoes, brown sugar, honey, white vinegar
Blend or puree, then cool
Pass through strainer or food mill

Mustard

Mustard seed . Soaked over night in white wine vinegar . Just to cover
Mash
Add Honey
Corriander seeds
Mash … Continue to taste
Mustard powder … Again to taste
Add white wine vinegar for desired consistency


Robert’s Jalapeño Ketchup

Use this link to view the recipe.

Olive Garden sliders

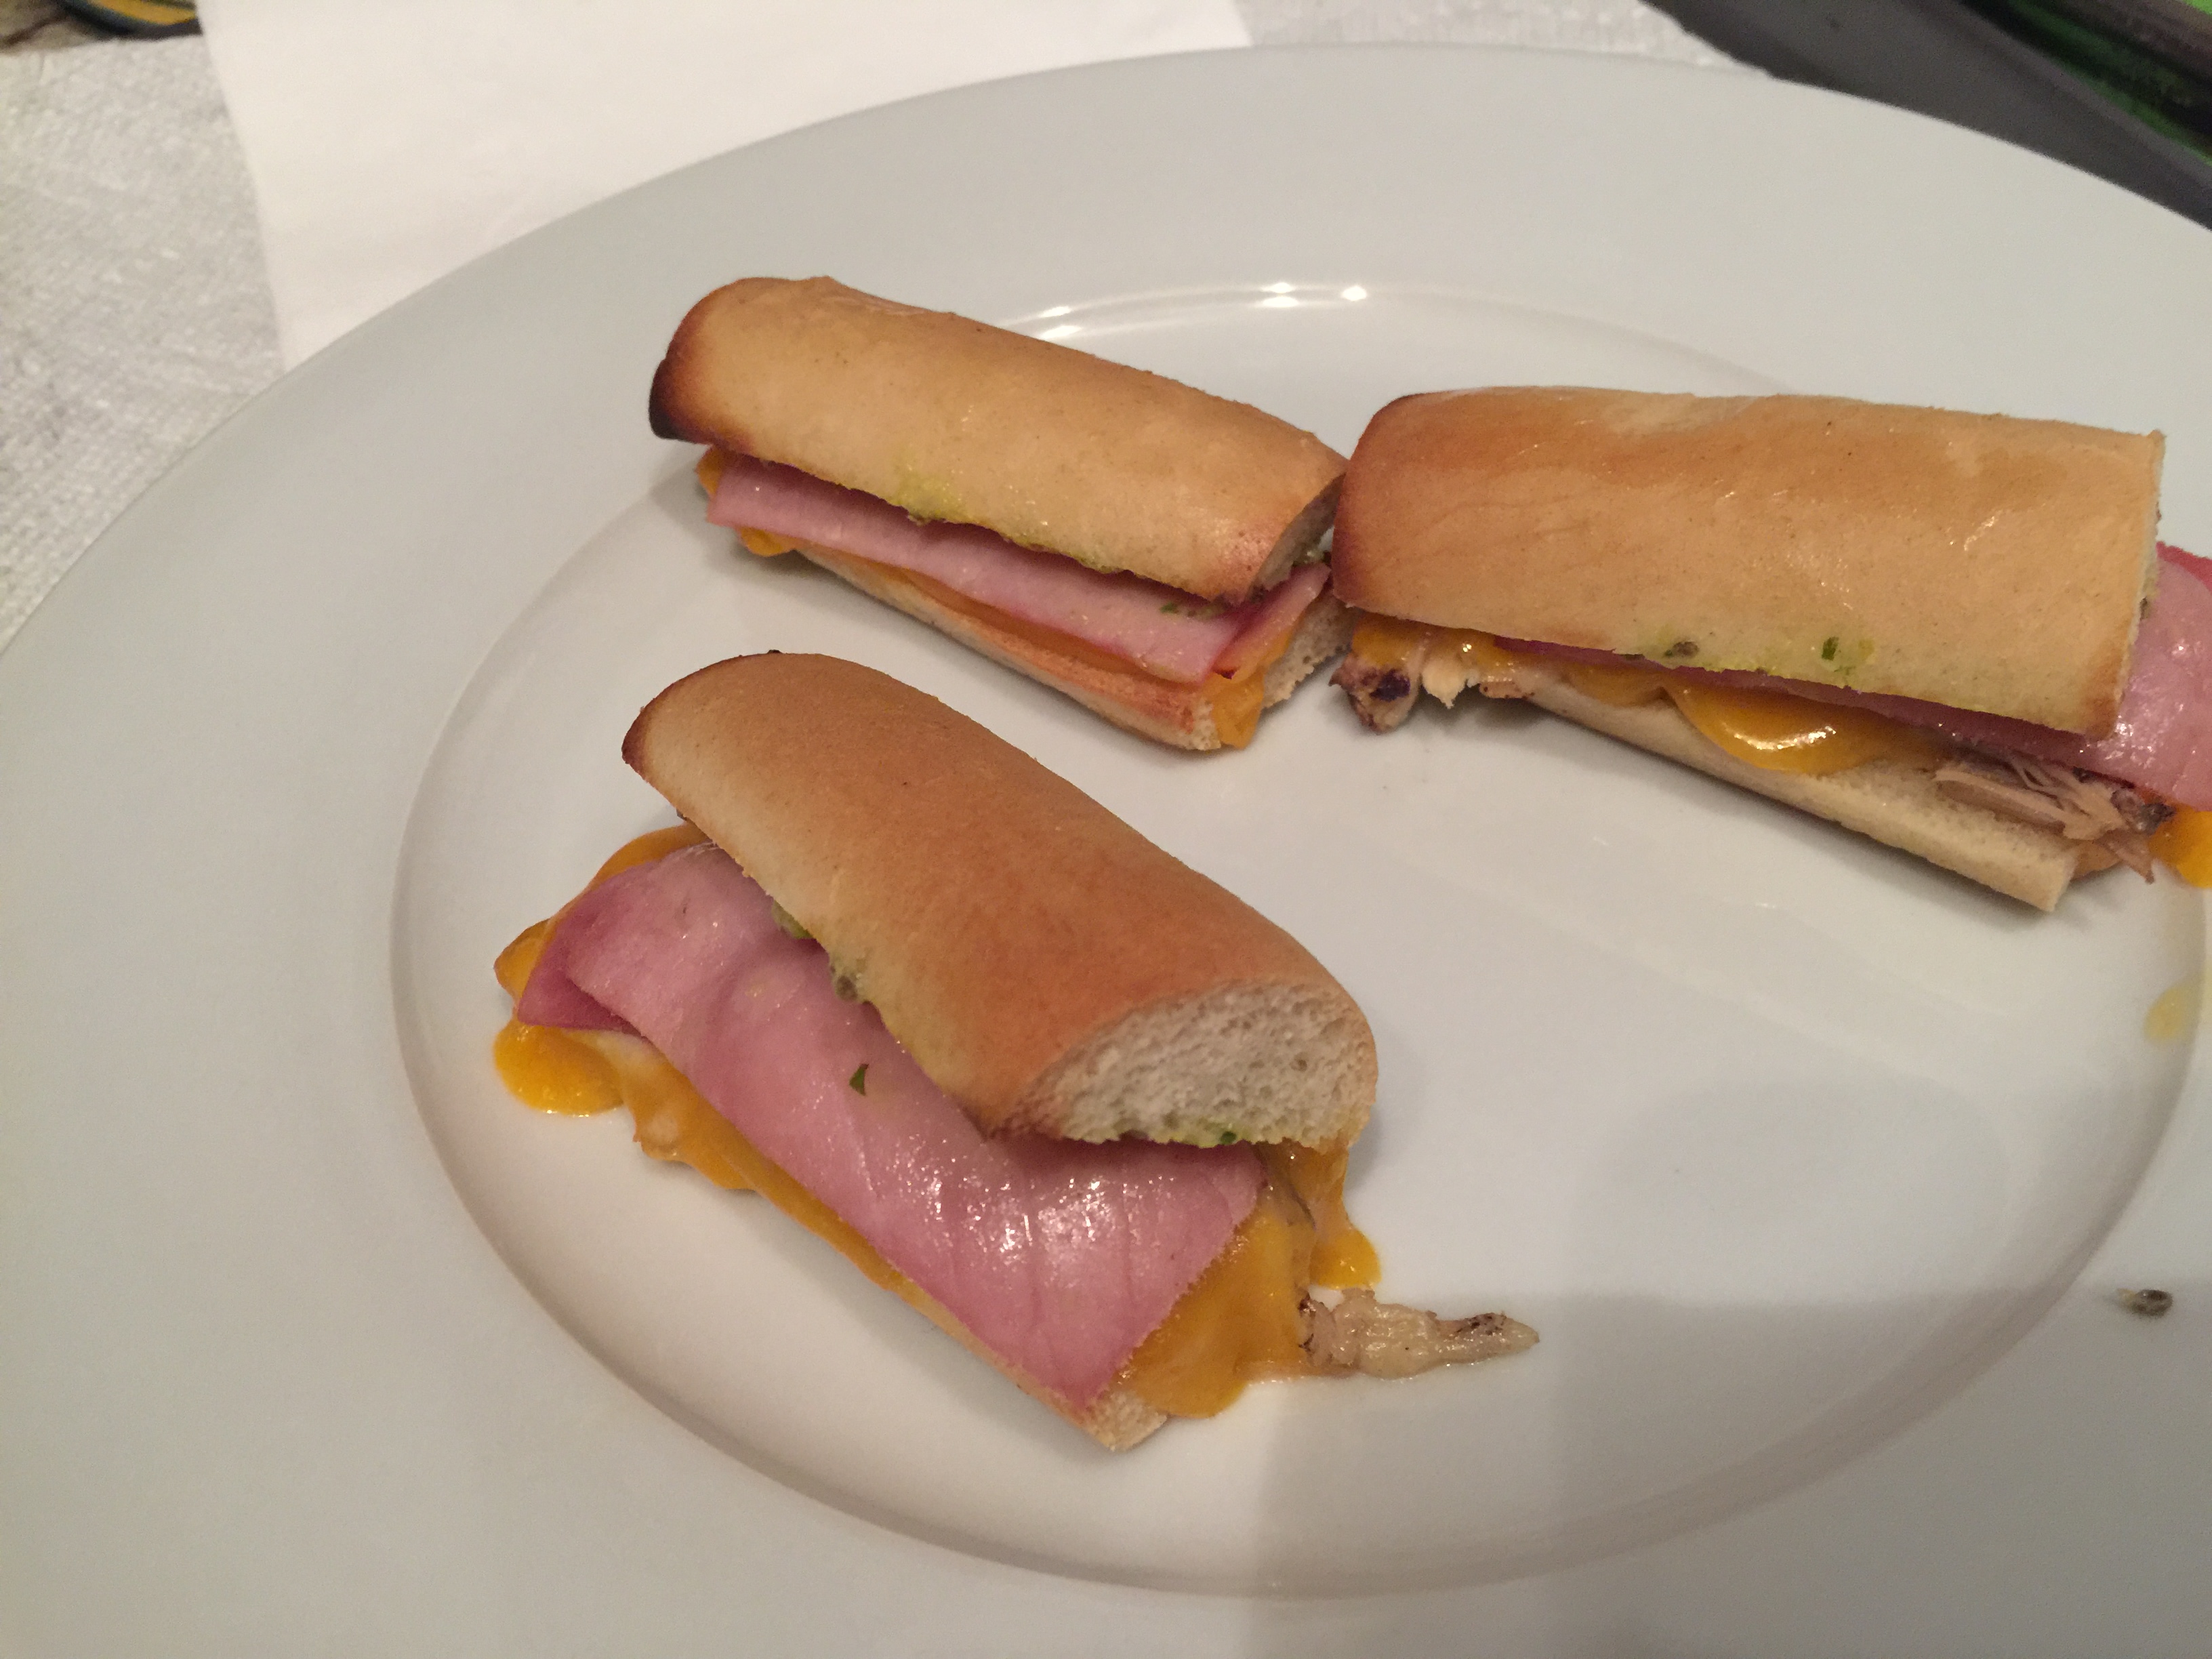
If you’ve ever eaten at Olive Garden, you are familiar with their buttery garlic breadsticks.  They just keep coming.  If you ask for some near the end of your meal to take home, they always oblige.


You can create tasty little sliders with the left-over bread sticks.

For Grandma, I used some thinly sliced chicken with some cheddar cheese.  For me, I used ham and cheddar.  Put both open faced in the oven at 350º for about 8 minutes and that’s it.  A little spread of mustard or mayo and they are ready for your mouth.

Ahi Tuna Poke

  • Sushi Grade Ahi Tuna cut into 1/2 inch small cubes
  • Ask for sushi grade – Whole Foods or AJ’s
  • Green onions
  • Cilantro
  • Jalapeño – deseeded
  • 1/2 Avocado
  • Pour in sauce (bottom)
  • Toss gently
  • Plate with Won Tons and Shrimps
  • Fry Won Tons – 145º – Fry up to a golden brown

Shrimp Side Dish

  • 6 C boiling water plus
  • 1 T lemon
  • 1 T lemon
  • 1 T Old Bay seasoning

Put shrimp in the boiling water mixture for two minutes
Put into ice bath after it loses ALL transluscency

Agave Ponzu Sauce

  • Lemon juice
  • Soy sauce
  • Agave syrup
  • Honey
  • Tobers Angry Sauce or Siracha

Mix sauce together

Machaca Beef

Thanks to Ninos Restaurant in Sun City and Macayos Restaurant in Phoenix for this recipe.

  1. Use a chuck roast or chuck eye roast or bottom roast
  2. Cut into large pieces – about 2-3 inches
  3. Put into a pot of water (or crock pot) and cover with beer plus two inches
  4. Add large pieces of celery, carrot and onion
  5. Add salt, pepper, oregano, cloves, and Grandpa's Thunder Powder or Arghhh Powder
  6. Bring water to a boil and simmer for 2-1/2 – 3 hours
    If using a crock pot, let slow cook on low for 6-8 hours.
  7. Let cool so you can handle it safely – KEEP the braising liquid
    Keep some for gravy, and use some to keep the meat moist in the refrigerator
  8. Shred while still warm – refrigerate for up to a week in the braising liquid
    Discard any large pieces of fat or gristle.
  9. When ready to serve, heat up a skillet with butter, onion and garlic
  10. Sear the shredded meat in the hot skillet  – this will create more texture in the meat
  11. Add 1 small (drained) can of diced tomatoes and 1 can green chilies
  12. Add salt, pepper and desired spices
  13. Rehydrate with a bit of the braising liquid
  14. Cook for about 20 minutes, then serve on taco shells, tostada shells or tortillas.
    This is also good when mixed with BBQ sauce and served on a hamburger bun

Asian Dipping Sauces – COLLECTION

Spring Roll Dipping Sauces

Peanut Dipping Sauce

Ingredients

2 TBL sesame oil
1 tsp garlic
1 tsp cumin
1/4 CU orange juice
1/4 CU smooth peanut butter (commercial, not natural)
1 tsp ketchup
1 TBL brown sugar or 2 TBL honey
handful of minced cilantro
1 tsp rice wine vinegar
1 TBL soy or balsamic vinegar
1 TBL lime juice
1 tsp minced fresh ginger
1/2 tsp corn starch

optional: 2 TBL Asian chili sauce or Cayenne pepper

Instructions

1. Heat canola up to smoke point 2. Add garlic 3. CAREFULLY add chicken broth 4. Bring up to a boil 5. Whisk in PB, ketchup, vinegar and soy. 6. Cook for 5 minutes 7. Add Corn Starch MIXED WITH WATER slowly to thicken 8. Add VERY thinly sliced thai chili peppers for heat

If you like things spicy, add 1/2 tsp chili powder

Teriyaki Dipping Sauce

Ingredients

2 TBL soy sauce
1 TBL sesame oil
4 TBL rice wine vinegar
1 TBL ginger (juice)
2 TBL brown sugar
½ CU minced pineapple
1 TBL cornstarch in ½ CU water
pinch of cayenne pepper

Instructions

1. Mix all together except cornstarch.
2. Heat to boil and cook 5 minutes
3. Add cornstarch ONLY as necessary to thicken.
4. Serve hot or cold

Notes

This is a good sauce for Lettuce Wraps

Use any of the following sauces for your Spring Rolls.

Sweet and Sour Dipping Sauce

  • 1 C sugar
  • 1/2 tsp salt
  • 3 TBL catsup
  • 1/2 C vinegar
  • 1 TBL cornstarch
  • 1 C water
Cook sugar, salt, catsup, and vinegar until like syrup. Mix cornstarch and water. Add to sauce and cook until thick. Keep warm.


Sweet and Tart Dipping Sauce

INGREDIENTS

  • 1/2 cup water
  • 1/3 cup Karo Syrup
  • 4 tablespoons fish sauce (called nuoc mam)
  • 1/3 cup fresh lime juice
  • 1 large clove garlic, minced and muddled
  • 1 tsp molasses

STEP BY STEP

  1. Put everything in a screw-top jar and shake together.
  2. Taste and adjust to your personal preference, adding more lime or Karo as needed.
  3. Let meld about 30 minutes before pouring into individual dipping bowls.
  4. Sauce keeps two weeks in the refrigerator.

OTHER OPTIONS

  • Hoisin Sauce
  • Oyster Sauce
  • Mirin is rice wine sweetened with a large amount of sugar

Vietnamese Fish Sauce

fish sauceVietnamese is light and clear.
Chinese is darker and thicker.

Use on your food instead of salt.

  • 2 TBL sugar
  • 2 TBL lime juice
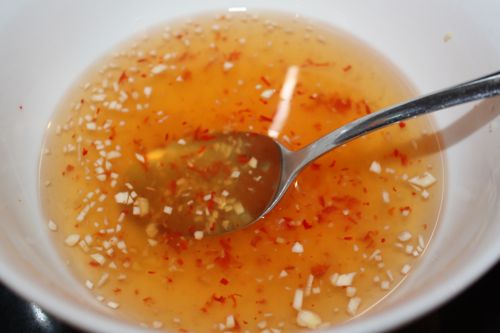
  • 3 TBL fish sauce
  • 2 TBL water
  • 2 Cloves garlic – minced
  • 3 Thai chilies cut into small rounds

Fish sauce (nuoc mam) is a pungent, salty liquid made from fermented anchovies. It adds depth and flavor to numerous Vietnamese dishes. For best results, choose bottles priced at $3 to $4 rather than $1, and pass on jars that are dark, which indicates oxidation or the presence of additives. From Epicurious

Granola Snacks

Healthy Granola Snack and Granola Bars

Granola Snack

This recipe was created by Grandpa, as he sampled Granola sold by Sarah Bea.  To buy directly from her, visit her website BY CLICKING HERE.

  • 1/2 C ready-to-eat almonds – * Pulse
  • 1/2 C ready-to-eat cashews – * Pulse
  • 1/4 C ready-to-eat walnuts – * Pulse
  • 1/4 C ready-to-eat coconut flakes
  • 1/4 C ready-to-eat sunflower seeds
  • 1/2 C ready-to-eat pistachios – * Pulse
  • 1/2 C raw oats – * Pulse
  • 1/2 C dried cranberries – * Pulse
  • 1/4 C chocolate chips – * Pulse
  • 1 tsp vanilla extract
  • 1 tsp sea salt
  • 1/2 C honey
  • 1/2 C sugar

* Pulse – This means to put them in a food processor and just pulse once or twice to break them from big chunks into smaller pieces

  1. Heat 1/2 C honey and 1/2 C sugar in a small pan
  2. When temperature reaches 255º mix all of the nut ingredients and 3 TBL butter into the sugar and spread it out on a pan to cool
  3. When it has cooled, you can crack it apart for easy eating

Alternately, mix all together, put on pan and bake at 300º for 20-25 minutes.  Let cool, then break apart.

Granola Bars

Here is a way to create a healthy Granola Bar.  Feel free to add and subtract ingredients according to your taste.

  • 1 C brown sugar
  • 1 C peanut butter
  • 1/3 C butter
  • 12 oz silken tofu
  • 1 tsp vanilla
  • 1 tsp cinnamon
  • 1/2 tsp nutmeg
  • 2 eggs
  • 1/2 apple juice
    – MELT ABOVE INGREDIENTS ONLY IN A PAN
  • 2 C regular (raw) rolled oats
  • 1/2 C sliced peanuts
  • 1/2 C sliced pecans
  • 1/2 C sliced cashews
  • 1/4 C sliced pistachios
  • 1/4 C slivered almonds
  • 1/4 C sunflower seeds
  • 1/4 C pumpkin seeds
  • 1/4 C coconut
  • 1/2 C golden raisins
  • 1/4 C dried cranberries or blueberries
  • 1/4 C dried cherries or apricots
  • 1/4 C chocolate chips and/or butterscotch chips
  • 1/2 C Protein Powder
  • 1 tsp coarse sea salt
  • 2 TBL wheat flour
  • 2 TBL wheat germ
  • 1 can sweetened concensed milk
  • 1 tsp vanilla
  • optional: almond extract
    MIX TOGETHER
  • Top with 1 whole package graham crackers and press down
  1. Melt first ingredients over a low heat
  2. Meanwhile, butter a 9×12 pan and line with parchment paper
  3. Combine dry ingredients in a bowl
  4. Mix well
  5. Pour melted mixture over dry ingredients and mix well
  6. Press into your baking pan
  7. Press down with dampened spatula or your hands
  8. Top with graham crackers and press to flatten
  9. Bake at 350º for 30-35 minutes
  10. Let cool 20 minutes then cut into bars before completely cooled
  11. Turn out and cut with a pizza cutter
  12. Wrap each individually in squares of waxed paper
  13. Freeze and store for up to 3 months :: in the fridge for up to 2 weeks

BBQ Ribs – COLLECTION

Beef Ribs

1. Cut rib rack in half to get 3-4 ribs per rack. Leave fat back on. Season/coat your ribs with Grandpa's Thunder Powder or Arghhh Powder depending on how spicy you want your coating, then let sit on counter 1 hour. Even better: In refrigerator overnight!
2. Cooking- 250°-300° in grill , 30 coals, use thermometer. Pile up on side of grill, wet wood on coals, trap down to regulate heat.
3. Ribs on – meat side down, fat on top, cook ribs 1 hour.
One hour add more coals and flip ribs, add 20 coals and another wood block, cook another hour.


BBQ Texas Beef Ribs

Also works for Baby Back Pork ribs

Instructions
1. Cut ribs to 3 or 4 per section
2. Use 1 tsp rub per section. Leave fat on the back, let sit on counter 1 hours.
3. Grill temp is KEY! 250° – 300°, 2 – 2 ½ hours
(30 coals). Pour coals to one side – preheat 5 min, put meat on opposite side.
4. Ribs – fat layer facing up, vent grill 2/3 open, maintain temp, cook 1 hour, put 20 more coals on and another steam log on, flip ribs, cook another hour.
5. Start testing for doneness, cook up to 45 more minutes. Done when you stick w/ fork and it releases fairly easily.


Baby Back Ribs

  1. Put your ribs on a baking sheet and cover loosely with foil.
  2. Bake at 300º for 2 hours on lower oven rack
  3. Meanwhile, cut 10 roma tomatoes in half and place on another baking sheet
  4. Cut one sweet onion into pieces and put it on the baking sheet as well
  5. Sprinkle with salt, garlic powder, dried oregano and basil
  6. Put on top oven rack for another hour – leaving ribs on the lower rack
  7. After another hour, remove tomatoes and run through a food mill
  8. Discard the pulp, and mix tomato and onion puree with 1/2 C brown sugar, 1/2 C apple cider vinegar and 1/2 C water
  9. Put 2 TBL butter and the tomato mixture into a pan and bring up to near boil, reduce heat, then simmer for 20 minutes
  10. Remove ribs from oven and turn heat up to 500º
  11. Put tomato mixture on the ribs, and when the oven is up to heat, put them in for about 20 minutes or until brown sugar starts to char

Dry Rubs – COLLECTION

Dry rubs can be used for both meats and vegetables. They can be mild or spicy. Browse the recipes below and find one that suits your palate.


Grandpa’s Dry Rub

Grandpa’s Dry Rub


Grandpa’s Thunder Powder

Grandpa’s Thunder Powder

LABEL


Grandpa’s Arghhhh Powder

This is something that I like to use for pizza toppings and to add an extra bit of heat to hot wings. It has the heat of crushed red pepper, but doesn’t get stuck in your teeth and gums. Just a bit of salt enhances the flavor too. This is also good for meat seasoning.

INGREDIENTS

  • 1/2 C ground cayenne pepper
  • 1/2 C ground red pepper
  • 1/4 C sumac
  • 1/2 C salt (fine or course)
  • 2 TBL garlic powder
  • 2 TBL onion powder
  • 1 TBL black pepper
  • 1 TBL cumin

Mix all of the above together well and store in a sprinkle jar.


Tony Chachere’s Creole Seasoning

Recipe By : Tony Chachere

WEBMASTER NOTE: You can buy this amazing seasoning mix already packaged for you at www.tonychachere.com but for those of you who want to try to make it yourself, Tony himself has provided the recipe, which is presented here. My modifications (are in parentheses)

INGREDIENTS

  • 26 ounces salt
  • 1 1/2 ounces black pepper — ground
  • 2 ounces red pepper — ground – – (I use red chili powder)
  • 1 ounce garlic powder — pure
  • 1 ounce chili powder – – (I use cayenne pepper powder)
  • 1 ounce Monosodium glutamate — (Accent)

STEP BY STEP

  • Mix well and use like salt.
  • When it’s salty enough, it’s seasoned to perfection.
  • For barbecue and fried foods: Season food all over.
  • Cook as usual.

WEBMASTER NOTE : Tony Chachere is from Opelousas, Louisiana. He was 11 years old when his first cookbook came out. This is the first recipe in his “Cajun Country Cookbook”. In the cookbook, he says “THIS RECIPE IS WORTH THE PRICE OF THE BOOK”. He’s right.

Right after the cookbook came out, everyone was making this and storing it in those large plastic ice cream cartons. Within a short while, he started marketing this himself. Now you can find the green cans of this stuff all over the country. Where I’m from, this is the only seasoning anyone uses. That sounds kind of strange, but try it and you’ll see.

There might be such a thing as “too complex.” Tony’s Creole Seasoning is simple and really great. It suits the palate of 90% of Middle America. It is better than salt and pepper, but doesn’t pack quite the kick as Grandpa’s Thunder Powder. I personally like a huge kick, that’s why I invented Thunder Powder, but as a staple in our house, Tony’s still has a place. My recipe that is a bit less spicy is Grandpa’s Dry Rub and a lot less spicy than Grandpa’s Arghhhh Powder.

Robert Andrews (Grandpa of Grandpa Cooks and Webmaster)


BBQ Dry Rub Marinate

This mix is adapted from Alton Brown’s Pork Rib Dry Rub recipe

INGREDIENTS

  • 1/4 C FLAVOR MIXTURE – See below
  • 1 C (packed) brown sugar
  • 1/2 C salt
  • 1/4 C chili powder

STEP BY STEP

FLAVOR MIXTURE – Makes 1/4 Cup of seasoning

  • 2 tsp salt
  • 1 teaspoon each – Modify to your own tastes
    • Black pepper
    • Cayenne pepper powder
    • Onion powder
    • Garlic powder
    • Ground mustard
    • Ground coriander
    • Ground tarragon
  • 1/2 tsp each – Modify to your own tastes
    • Ground bay leaf or Old Bay Seasoning
    • Ground clove
    • Ground cumin
    • Ground nutmeg
    • Ground ginger
    • Thyme

NOTES

  • For a dry rub, you basically need salt, sugar and heat.
  • I create the Flavor Mixture separately, because it is good for many things: Soup, sandwiches, pizza, etc.
  • Alton Brown called his dry rub 8, 3, 1 + 1 Dry Rub because of the proportions. Use this link to see his original recipe.
  • I changed things up just a bit in my recipe to suit my personal preferences

Buccaneer Dry Rub

This is a good rub to use on hamburgers, wings, ribs, etc.

INGREDIENTS

  • 3 TBL coarse salt
  • 3 TBL brown sugar
  • 1 TBL garlic powder
  • 1 TBL onion powder
  • 1 tsp black pepper
  • 1 tsp cinnamon
  • 1 tsp alspice
  • 1 tsp cayenne

Kansas City Dry Rub

There is a mix called Sticky Fingers Dry Rub, but this is actually what Grandpa’s Thunder Powder was based on, so just use Grandpa's Thunder Powder or Arghhh Powder depending on how spicy you want your coating.


BBQ Sauces – COLLECTION

BBQ RIBS

It sounds simplistic, but ribs are ribs. OK, not really, but tips for beef ribs can also apply to pork ribs and short ribs. Here is a collection of recipes that I’ve collected, led by the best recipe.  Mine.


BBQ Sauce by Region

  • Carolinas WEST – Tomato-based – Pork only
  • Carolinas EAST – Vinegar-based – Pork only
  • Carolinas SOUTH – Mustard-based – Pork only
  • Kansas City – Tomato-based – Thick and sweet
  • Texas – Simple dry seasoning – Beef only
  • Memphis – Dry Rub cooked – web sauce optional

Grandpa’s BBQ Sauce

  • 1 C ketchup
  • 1 C Guiness or dark beer
  • 1/4 C apple cider vinegar
  • 2 bay leaves
  • 2 TBL brown sugar
  • 2 TBL molasses
  • 2 TBL butter
  • 1 TBL Worcestershire sauce
  • 1 TBL whole pepper corns
  • 1 TBL instant coffee
  • 6 oz orange or lemon marmalade
  • 1 6 oz can tomato paste
  • 1 tsp hot pepper sauce (Frank’s or Sriracha)
  • 1 tsp salt
  • 1 tsp celery seed
  • 1 tsp Grandpa's Thunder Powder or Arghhh Powder
  • 1 tsp granulated garlic
  • 1 tsp ground onion
  • 1 tsp cumin
  • 1 tsp oregano
  • 1 tsp paprika
  1. Combine all ingredients in saucepan.
  2. Bring to a boil, reduce heat and let simmer 60 minutes.
  3. This makes enough sauce to baste 4 lbs. of baby back ribs.
  4. For quicker sauce, buy ‘off the shelf’ BBQ sauce and add to whatever above ingredients you have on hand to give it that ‘home cookin’ taste.

Third Party Recipes


The information below this section is from a third party. It is part of Grandpa's Personal Recipe box. Feel free to browse, but know that this information is from someone else.

• Savory Sauce


• Cindy’s BBQ Sauce


• Classic Texas Style Rib Sauce


• Cajun BBQ Sauce


• Fresh Pepper BBQ Sauce


• Tennessee Savory BBQ Sauce


• Kansas City Sweet BBQ Sauce


Simple BBQ Sauce

  1. In a mixing bowl, put 3/4 C Heinz or Sir Kensington ketchup.
  2. Mix in 2 TBL each molasses, apple cider vinegar, Worchestershire sauce.
  3. Mix in 1 TBL each Dijon mustard, Grandpa's Thunder Powder or Arghhh Powder
  4. Mix in 1/4 tsp Liquid Smoke.
  5. Finally, thin it all out with 1/3 C apple juice.
  6. Simmer and reduce for 15 minutes.
  7. Brush on at the last minute and put the meat under a broiler.

Unknown Source

  • Chili sauce
  • Heinz 57 ketchup
  • Honey
  • brown sugar
  • YellowMustard
  • Garlic
  • Apple cider vinegar
  • molasses
  • onion powder
  • Salt
  • Liquid smoke
  • Pepper
  • Bring to a simmer and cook 45 minutes


Ready-to-eat Meusli

INGREDIENTS

  • 1 C raw oats (not instant)
  • 2 TBL chopped almonds
  • 1 TBL chopped pecans
  • 1 TBL chopped walnuts
  • 1 TBL chopped pistachios
  • 1 TBL pumpkin seeds
  • 1 TBL chia seeds
  • 1 TBL sunflower seeds
  • 1 TBL flax
  • 2 tsp cinnamon
  • 1/2 tsp salt
  • 3 TBL melted butter
  • 2 C yogurt
  • 1 C whole milk
  • 2 TBL apple cider
  • 2 TBL honey
    To taste – mix in:
  • raisins, cranberries, blueberries, craisins, strawberries, chopped banana, raspberries, diced apples, etc

STEP BY STEP

  1. Mix all ingredients ABOVE yogurt, spread out on pan and toast for 10 minutes at 400º
  2. Let cool, then mix with the rest of ingredients
  3. Refrigerate for up to a week.  Spoon directly into your breakfast bowl

Alternate storage

  1. Store the toasted dry ingredients in a jar in the refrigerator for up to three weeks
  2. Mix 1/2 C of the mix with 1/2 C yogurt, 1/4 C whole milk and 2 tsp honey
  3. Mix with 1/4 C of whatever fruit you desire at the time

SM – Sour Orange Marmalade

4 Jar – Overview

This recipe makes enough marmalade to last you for a couple of months.   If you want enough marmalade to last you through to next season, CLICK HERE for the amounts used to make a larger batch.

Marmalade is traditionally made with Seville oranges (also called sour oranges) which are FAR too sour to eat. They do, however, have a high amount of pectin in them. With the proper amount of sugar, this makes a great marmalade base to which other fruits can be added.  Prep your oranges the day before, so they can soak overnight.  Total hand-on time for this recipe is 3 – 4 hours, so make sure that you allow yourself enough time to cook safely.

PREPARATION

  • Wash one lemon and 3 Seville oranges thoroughly.
  • Peel the orange skin using a peeler.  Don’t peel too deeply, you do not want the white (pith) which tends to be bitter.  The orange peel will remain in the marmalade after cooking.
  • Cut apart, discarding any bad spots
  • Separate the innards and pith from the outermost orange peel.  Keep the innards and tie them into a cheesecloth bag.  This is where most of your pectin lives.

OVERNIGHT SOAK

  • Pulse pith, pips and guts in food processor
  • Place 2/3 C  pips, guts, seeds, membrane innards into 1+1/3 C  of water
  • Pulse peel in food processor – only briefly
  • Place 2/3 C peel into a second bowl containing 1+1/3 C of water

You should put the cut up and pulsed skin and innards into bowls covered with water overnight in the refrigerator.  This will soften them so that the pectin is more easily released.

FIRST BOIL (90 MINUTES)

  • Strain innards, pouring the soaking water into your stock pot
  • Put innards into a cheesecloth – a bouquet garni – and secure with a string, keeping the end available for easy removal.
  • Pour water and peel into your stock pot
  • Add 1/3 C orange juice into your stock pot
  • Bring up to boil, then reduce heat to simmer
  • Skim foam as necessary.  Stir with a WOODEN spoon.  Metal will react with the acids in the orange
  • Simmer for 90-120 minutes over low heat – this will release much of the pectin
    If the oranges have not been soaked for at least 8 hours, go ahead and simmer for 120 minutes.

The seeds contains the pectin, and will be discarded after about 90 minutes. The outer orange peel will become the meat of the marmalade. I prefer to dice half and mince half of the rind, so that you have a variety of sizes of orange rind in your marmalade.

Definition: bouquet garni – A bag (frequently in a cheesecloth) that is used for infusions, and removed later as the recipe progresses. CLICK HERE to read more.

NOTE: DO NOT ADD SUGAR YET.  If you add sugar too early, it will freeze the production of pectin, and your jam may not set properly, so don’t add it until after the 90 minute boil.

SECOND BOIL (HEAT TO 221º F – 105º C )

  • Remove pips and pith in the mesh bag at 208º. Use a tongs to squeeze the juices from the bag back into the pot. Discard the bag.
  • Increase heat and stir to dissolve. If sugar is added too soon, peel may become tough. Wait until temperature reads at least 210º
  • BRING HEAT UP TO 210º BEFORE ADDING SUGAR
  • 1 1/4 C  granulated sugar
  • 2 TBL  Karo Syrup
  • 1 TBL lemon juice
  • Add the Second Boil ingredients slowly, stirring continually
  • As soon as it starts boiling, stop stirring.  Stir very infrequently.
  • IMPORTANT NOTE:  Until most of the water boils away, the sugar may stay at 215º for about 10 minutes.  Once it hits 216º it will increase about one degree per three minutes.
  • Keep heating until the temperature reaches 221º This could take up to an hour. I’ve had success with 119º but only marginally.  Be patient and wait until it reaches full jell temperature.  A few minutes will make all the difference.  If possible, use a calibrated thermometer (or a scientific thermapen) to make sure your thermometer is not off by 2-3 degrees.
  • Meanwhile, sterilize canning jars. Details not included on this page.
  • When 221º is reached, remove the pot from the heat and let rest for 5-10 minutes.  Skim off any scum or foam.
  • Orange rind will rise to the top.  Stir the rind back into the mixture before canning.
  • Put into canning jars and cover with a lid put into hot water for at least 60 seconds.  When properly canned and cooled, this will last you for about a year.

NOTE:
Temperature will plateau at 215 for quite awhile – for as long as 15 minutes
After that, you will get 1º increase in temperature about every 3 minutes
Be patient.

MORE INFORMATION

Alternative Recipes

There are SWEET ORANGE marmalades which do not use as much sugar as this recipe. CLICK HERE for Alton Brown’s recipe for Sweet Orange Marmalade, or USE THIS LINK for Strawberry Marmalade.

A Word of Caution

A word about POT SIZE. The first time I made this I nearly boiled over. It was a constant battle between foam and the size of my pot. This will foam up about 400% of its size.  NO KIDDING.  Make sure you use a pot large enough, or you will end up with a huge dangerous mess.  This does not ALWAYS happen, but you can be prepared if it does.

I reuse my canning lids. If they fail to seal, I eat that jar first. Put an X on the failed lid so you don’t save it after the jar is empty. If they seal, they will generally not fail after cooling.  I prefer to use the small canning jars, because once exposed to light and air, the marmalade starts to lose its flavor.

The canned jars will last longer if you process them in a water bath for 10 minutes after putting into jars.

        1. Put marmalade into sterilized canning jars
        2. Soak lids about 60 seconds in boiling water
        3. Wipe rim clean and put lids on
        4. Tighten only finger tight
        5. Submerge in water (1″ over top) and process 10 minutes
        6. Cool (undisturbed) on the counter

What is shown in the photos are quantities to make two entire large batches of marmalade.

Optional Ingredients

Optional ingredients reserved for the very end:

Minced strawberries, blueberries, rhubarb, shredded carrot, or other contrast

Chemistry

If you do not use enough sugar, the liquid will be unable to reach 221º (as water only gets 212º) and it will NEVER set. Sugar can get up to 300º   If you try to decrease the calories, and use a marginal amount of sugar, you may heat it too long and you will get inverted sugar which has a longer shelf life, but is similar to high fructose corn syrup and is not as good for you as regular sugar.

Realistically, if you don’t have a thermometer, you can test the gel level but putting glass plates in the fridge, and then dripping jam onto the plate to see if it runs or just sits there.  CLICK HERE

  1. If desired, after the temperature has reached 221º you can mix in some contrast fruit such as minced strawberry – but something that is ready to eat just as it is. Don’t use anything that needs cooking or softening.
  2. Pour into canning jars. If you completely can the marmalade, it should last for up to a year. Otherwise, refrigerate it for up to six months. I personally just put them on my shelf for up to a year, but if you do this, proceed at your own risk.

If your marmalade does not set, it is still good for steamed marmalade pudding, marmalade tarts, marmalade ice cream and much more. CLICK HERE if your marmalade did not set properly.


Bottom right: Some of your oranges may be older and nubbly. You will need juice from many oranges, but the peel that you want to use is from about eight oranges that have fairly smooth skin.

Top right: To get the amount of pips and pith that you need for the larger sized recipe, you will have to juice a lot more than eight, but just throw the extras into the trash.


The ingredients freeze really well. Hot pack canning is another good option. If you freeze, be sure to leave an inch of headroom in your water bottles.

Another photo

This photo gives you a good close up of the smoother skinned oranges and the older nubbly ones. The juice from the older oranges is perfectly usable, but the skin will be a bit more bitter than the younger oranges, so get rid of them.

I prefer just a few larger dices of orange, but most of the skin that I use is minced in a food processor.

Another good way to do it is with a zester. It takes more oranges, but you can leave the white pith behind, which actually gives you a better end product.

Lemon Curd and Tarts – COLLECTION

Basic Lemon Curdkey-lime

Basic Tart Crust

Advanced Tart Crust

Lemon Lime Tart

Key Lime Tart

Apple Tart

Peach Tart


THIRD PARTY RECIPES – RecipeBox.XYZ


The information below this section is from a third party. It is part of Grandpa's Personal Recipe box. Feel free to browse, but know that this information is from someone else.

– Grandpa’s Recipe Box: CLICK HERE


Dutch Baby with Lemon Curd

– Third Party Recipe: CLICK HERE


Portuguese Custard Tart

– Third Party Recipe: CLICK HERE


Spinach and Ricotta Lasagna

Ingredients

  • 1 onion – diced and sauteed in EVOO
  • Garlic – minced
  • 1 can crushed tomatoes
  • 1 can tomato sauce
  • 1.5 C water or chicken broth
  • Lasagna noodles – cooked
  • 1 LB Ricotta cheese
  • 3 eggs
  • handful of minced scallions
  • Grated Parmesan and Swiss cheese
  • salt, pepper, parsley (chopped)
  • dash of grated nutmeg
  • Spinach – cooked or sauteed

Step by Step

  1. Prepare Ricotta Mixture
    – ricotta, 3 eggs, salt, pepper, scallion, parsley, nutmeg – mix well
  2. Prepare Sauce
    – Mix onion, garlic tomatoes, water or broth – simmer 8 minutes
  3. In a baking dish put 1/2 C sauce in the bottom
  4. Add a layer of pasta sheets to cover the sauce
  5. 1/2 of ricotta mixture
  6. pasta sheets to cover
  7. 1/2 C sauce
  8. layer of spinach
  9. pasta sheets to cover
  10. remaining ricotta mixture
  11. pasta sheets to cover
  12. remaining red sauce
  13. grated Parmesan and Swiss cheese
  14. Cover baking dish with foil
  15. Bake 400º for 45 minutes
  16. Remove foil
  17. Bake an additional 15 minutes
  18. rest 5-10 minutes before cutting
HTML Snippets Powered By : XYZScripts.com