Ready-to-eat Meusli

INGREDIENTS

  • 1 C raw oats (not instant)
  • 2 TBL chopped almonds
  • 1 TBL chopped pecans
  • 1 TBL chopped walnuts
  • 1 TBL chopped pistachios
  • 1 TBL pumpkin seeds
  • 1 TBL chia seeds
  • 1 TBL sunflower seeds
  • 1 TBL flax
  • 2 tsp cinnamon
  • 1/2 tsp salt
  • 3 TBL melted butter
  • 2 C yogurt
  • 1 C whole milk
  • 2 TBL apple cider
  • 2 TBL honey
    To taste – mix in:
  • raisins, cranberries, blueberries, craisins, strawberries, chopped banana, raspberries, diced apples, etc

STEP BY STEP

  1. Mix all ingredients ABOVE yogurt, spread out on pan and toast for 10 minutes at 400º
  2. Let cool, then mix with the rest of ingredients
  3. Refrigerate for up to a week.  Spoon directly into your breakfast bowl

Alternate storage

  1. Store the toasted dry ingredients in a jar in the refrigerator for up to three weeks
  2. Mix 1/2 C of the mix with 1/2 C yogurt, 1/4 C whole milk and 2 tsp honey
  3. Mix with 1/4 C of whatever fruit you desire at the time

SM – Sour Orange Marmalade

4 Jar – Overview

This recipe makes enough marmalade to last you for a couple of months.   If you want enough marmalade to last you through to next season, CLICK HERE for the amounts used to make a larger batch.

Marmalade is traditionally made with Seville oranges (also called sour oranges) which are FAR too sour to eat. They do, however, have a high amount of pectin in them. With the proper amount of sugar, this makes a great marmalade base to which other fruits can be added.  Prep your oranges the day before, so they can soak overnight.  Total hand-on time for this recipe is 3 – 4 hours, so make sure that you allow yourself enough time to cook safely.

PREPARATION

  • Wash one lemon and 3 Seville oranges thoroughly.
  • Peel the orange skin using a peeler.  Don’t peel too deeply, you do not want the white (pith) which tends to be bitter.  The orange peel will remain in the marmalade after cooking.
  • Cut apart, discarding any bad spots
  • Separate the innards and pith from the outermost orange peel.  Keep the innards and tie them into a cheesecloth bag.  This is where most of your pectin lives.

OVERNIGHT SOAK

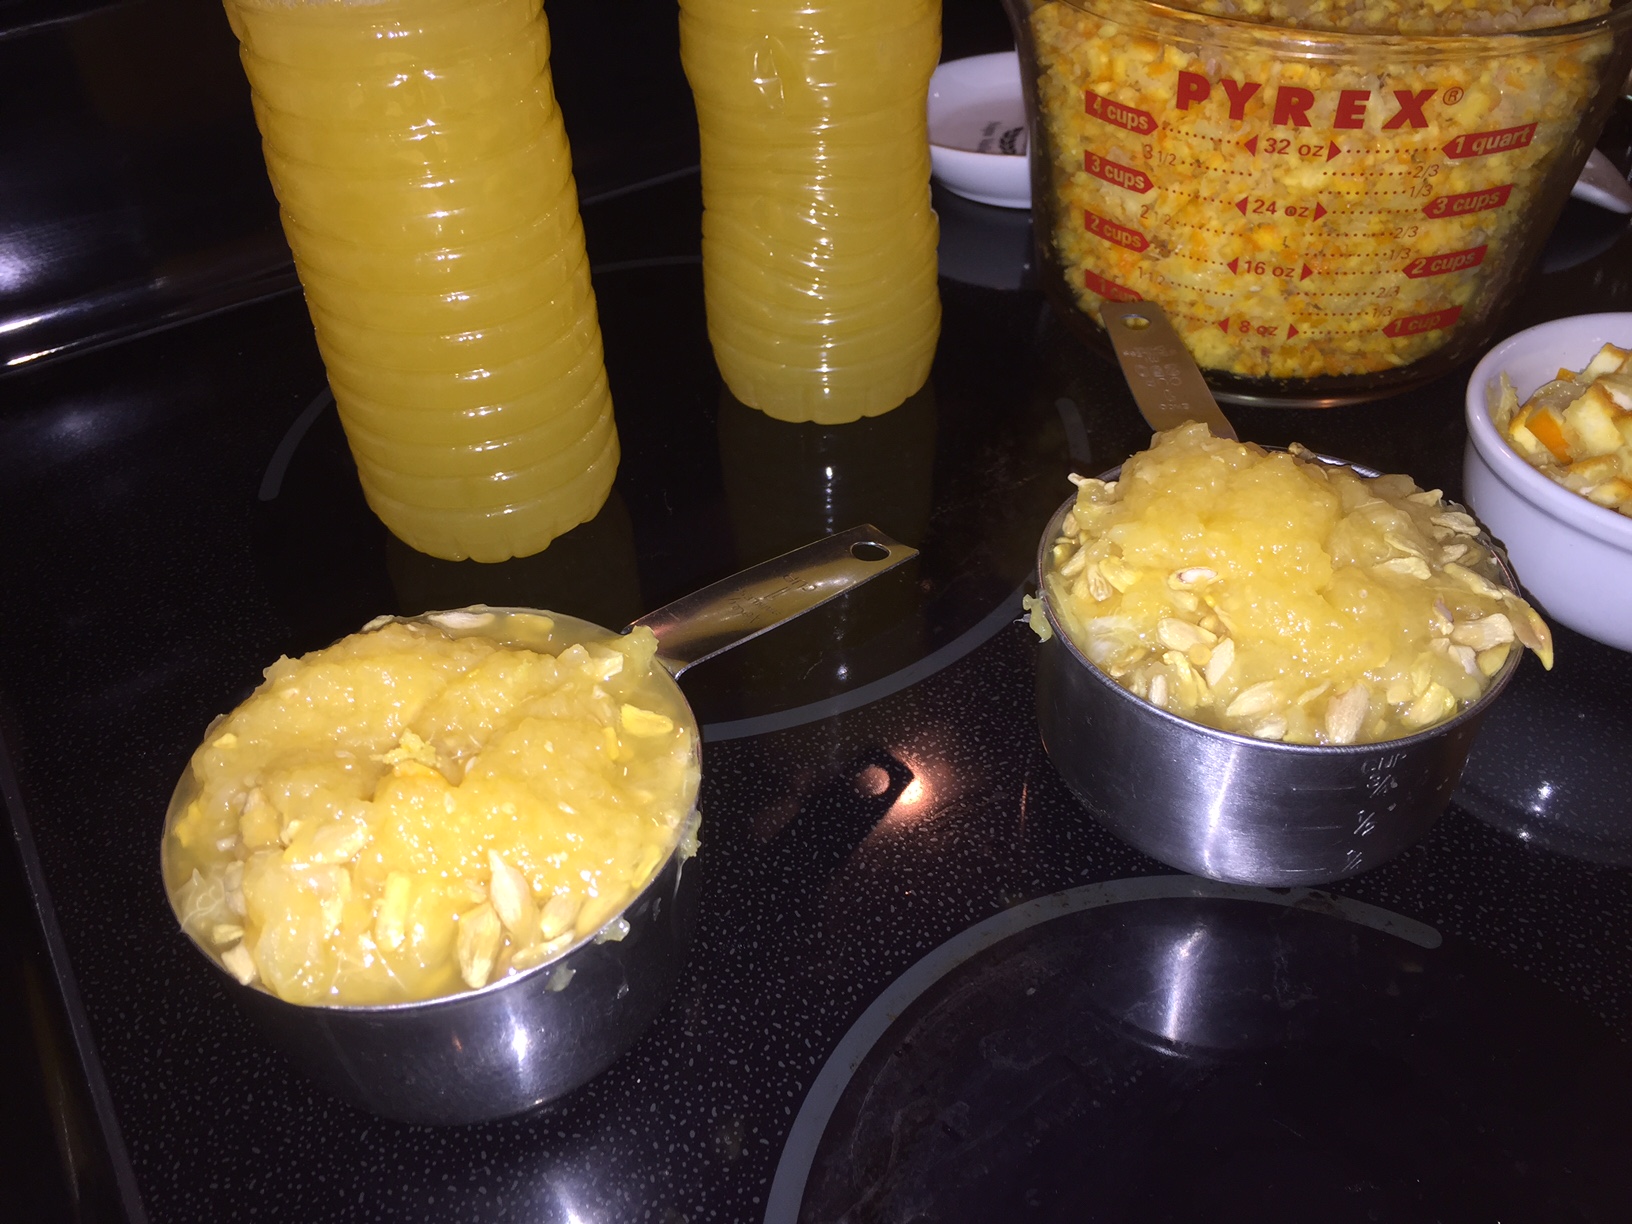
  • Pulse pith, pips and guts in food processor
  • Place 2/3 C  pips, guts, seeds, membrane innards into 1+1/3 C  of water
  • Pulse peel in food processor – only briefly
  • Place 2/3 C peel into a second bowl containing 1+1/3 C of water

You should put the cut up and pulsed skin and innards into bowls covered with water overnight in the refrigerator.  This will soften them so that the pectin is more easily released.

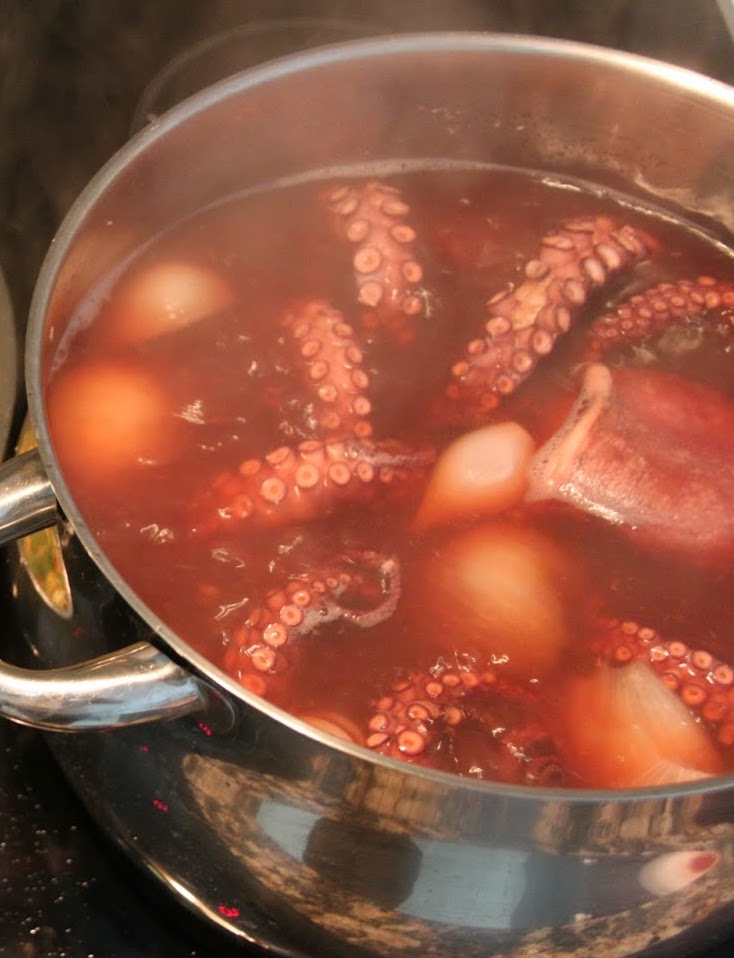
FIRST BOIL (90 MINUTES)

  • Strain innards, pouring the soaking water into your stock pot
  • Put innards into a cheesecloth – a bouquet garni – and secure with a string, keeping the end available for easy removal.
  • Pour water and peel into your stock pot
  • Add 1/3 C orange juice into your stock pot
  • Bring up to boil, then reduce heat to simmer
  • Skim foam as necessary.  Stir with a WOODEN spoon.  Metal will react with the acids in the orange
  • Simmer for 90-120 minutes over low heat – this will release much of the pectin
    If the oranges have not been soaked for at least 8 hours, go ahead and simmer for 120 minutes.

The seeds contains the pectin, and will be discarded after about 90 minutes. The outer orange peel will become the meat of the marmalade. I prefer to dice half and mince half of the rind, so that you have a variety of sizes of orange rind in your marmalade.

Definition: bouquet garni – A bag (frequently in a cheesecloth) that is used for infusions, and removed later as the recipe progresses. CLICK HERE to read more.

NOTE: DO NOT ADD SUGAR YET.  If you add sugar too early, it will freeze the production of pectin, and your jam may not set properly, so don’t add it until after the 90 minute boil.

SECOND BOIL (HEAT TO 221º F – 105º C )

  • Remove pips and pith in the mesh bag at 208º. Use a tongs to squeeze the juices from the bag back into the pot. Discard the bag.
  • Increase heat and stir to dissolve. If sugar is added too soon, peel may become tough. Wait until temperature reads at least 210º
  • BRING HEAT UP TO 210º BEFORE ADDING SUGAR
  • 1 1/4 C  granulated sugar
  • 2 TBL  Karo Syrup
  • 1 TBL lemon juice
  • Add the Second Boil ingredients slowly, stirring continually
  • As soon as it starts boiling, stop stirring.  Stir very infrequently.
  • IMPORTANT NOTE:  Until most of the water boils away, the sugar may stay at 215º for about 10 minutes.  Once it hits 216º it will increase about one degree per three minutes.
  • Keep heating until the temperature reaches 221º This could take up to an hour. I’ve had success with 119º but only marginally.  Be patient and wait until it reaches full jell temperature.  A few minutes will make all the difference.  If possible, use a calibrated thermometer (or a scientific thermapen) to make sure your thermometer is not off by 2-3 degrees.
  • Meanwhile, sterilize canning jars. Details not included on this page.
  • When 221º is reached, remove the pot from the heat and let rest for 5-10 minutes.  Skim off any scum or foam.
  • Orange rind will rise to the top.  Stir the rind back into the mixture before canning.
  • Put into canning jars and cover with a lid put into hot water for at least 60 seconds.  When properly canned and cooled, this will last you for about a year.

NOTE:
Temperature will plateau at 215 for quite awhile – for as long as 15 minutes
After that, you will get 1º increase in temperature about every 3 minutes
Be patient.

MORE INFORMATION

Alternative Recipes

There are SWEET ORANGE marmalades which do not use as much sugar as this recipe. CLICK HERE for Alton Brown’s recipe for Sweet Orange Marmalade, or USE THIS LINK for Strawberry Marmalade.

A Word of Caution

A word about POT SIZE. The first time I made this I nearly boiled over. It was a constant battle between foam and the size of my pot. This will foam up about 400% of its size.  NO KIDDING.  Make sure you use a pot large enough, or you will end up with a huge dangerous mess.  This does not ALWAYS happen, but you can be prepared if it does.

I reuse my canning lids. If they fail to seal, I eat that jar first. Put an X on the failed lid so you don’t save it after the jar is empty. If they seal, they will generally not fail after cooling.  I prefer to use the small canning jars, because once exposed to light and air, the marmalade starts to lose its flavor.

The canned jars will last longer if you process them in a water bath for 10 minutes after putting into jars.

        1. Put marmalade into sterilized canning jars
        2. Soak lids about 60 seconds in boiling water
        3. Wipe rim clean and put lids on
        4. Tighten only finger tight
        5. Submerge in water (1″ over top) and process 10 minutes
        6. Cool (undisturbed) on the counter

What is shown in the photos are quantities to make two entire large batches of marmalade.

Optional Ingredients

Optional ingredients reserved for the very end:

Minced strawberries, blueberries, rhubarb, shredded carrot, or other contrast

Chemistry

If you do not use enough sugar, the liquid will be unable to reach 221º (as water only gets 212º) and it will NEVER set. Sugar can get up to 300º   If you try to decrease the calories, and use a marginal amount of sugar, you may heat it too long and you will get inverted sugar which has a longer shelf life, but is similar to high fructose corn syrup and is not as good for you as regular sugar.

Realistically, if you don’t have a thermometer, you can test the gel level but putting glass plates in the fridge, and then dripping jam onto the plate to see if it runs or just sits there.  CLICK HERE

  1. If desired, after the temperature has reached 221º you can mix in some contrast fruit such as minced strawberry – but something that is ready to eat just as it is. Don’t use anything that needs cooking or softening.
  2. Pour into canning jars. If you completely can the marmalade, it should last for up to a year. Otherwise, refrigerate it for up to six months. I personally just put them on my shelf for up to a year, but if you do this, proceed at your own risk.

If your marmalade does not set, it is still good for steamed marmalade pudding, marmalade tarts, marmalade ice cream and much more. CLICK HERE if your marmalade did not set properly.


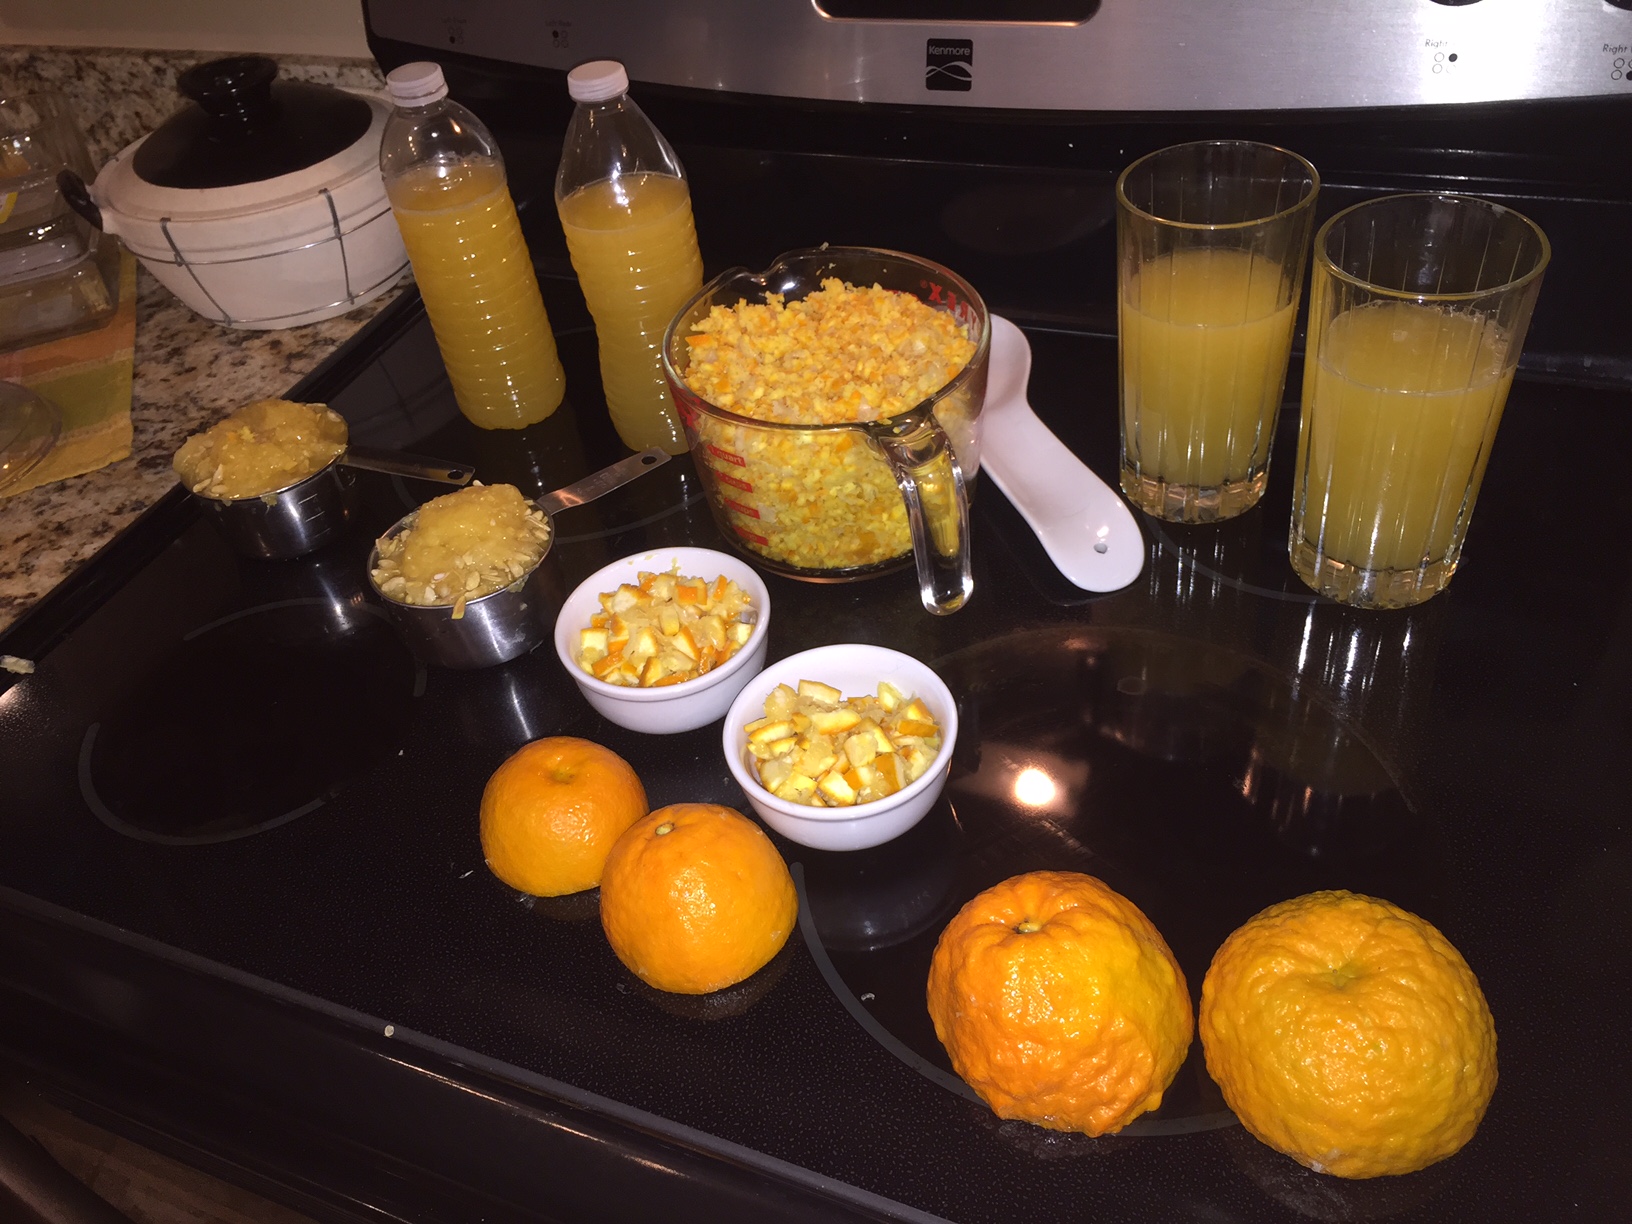
Bottom right: Some of your oranges may be older and nubbly. You will need juice from many oranges, but the peel that you want to use is from about eight oranges that have fairly smooth skin.

Top right: To get the amount of pips and pith that you need for the larger sized recipe, you will have to juice a lot more than eight, but just throw the extras into the trash.


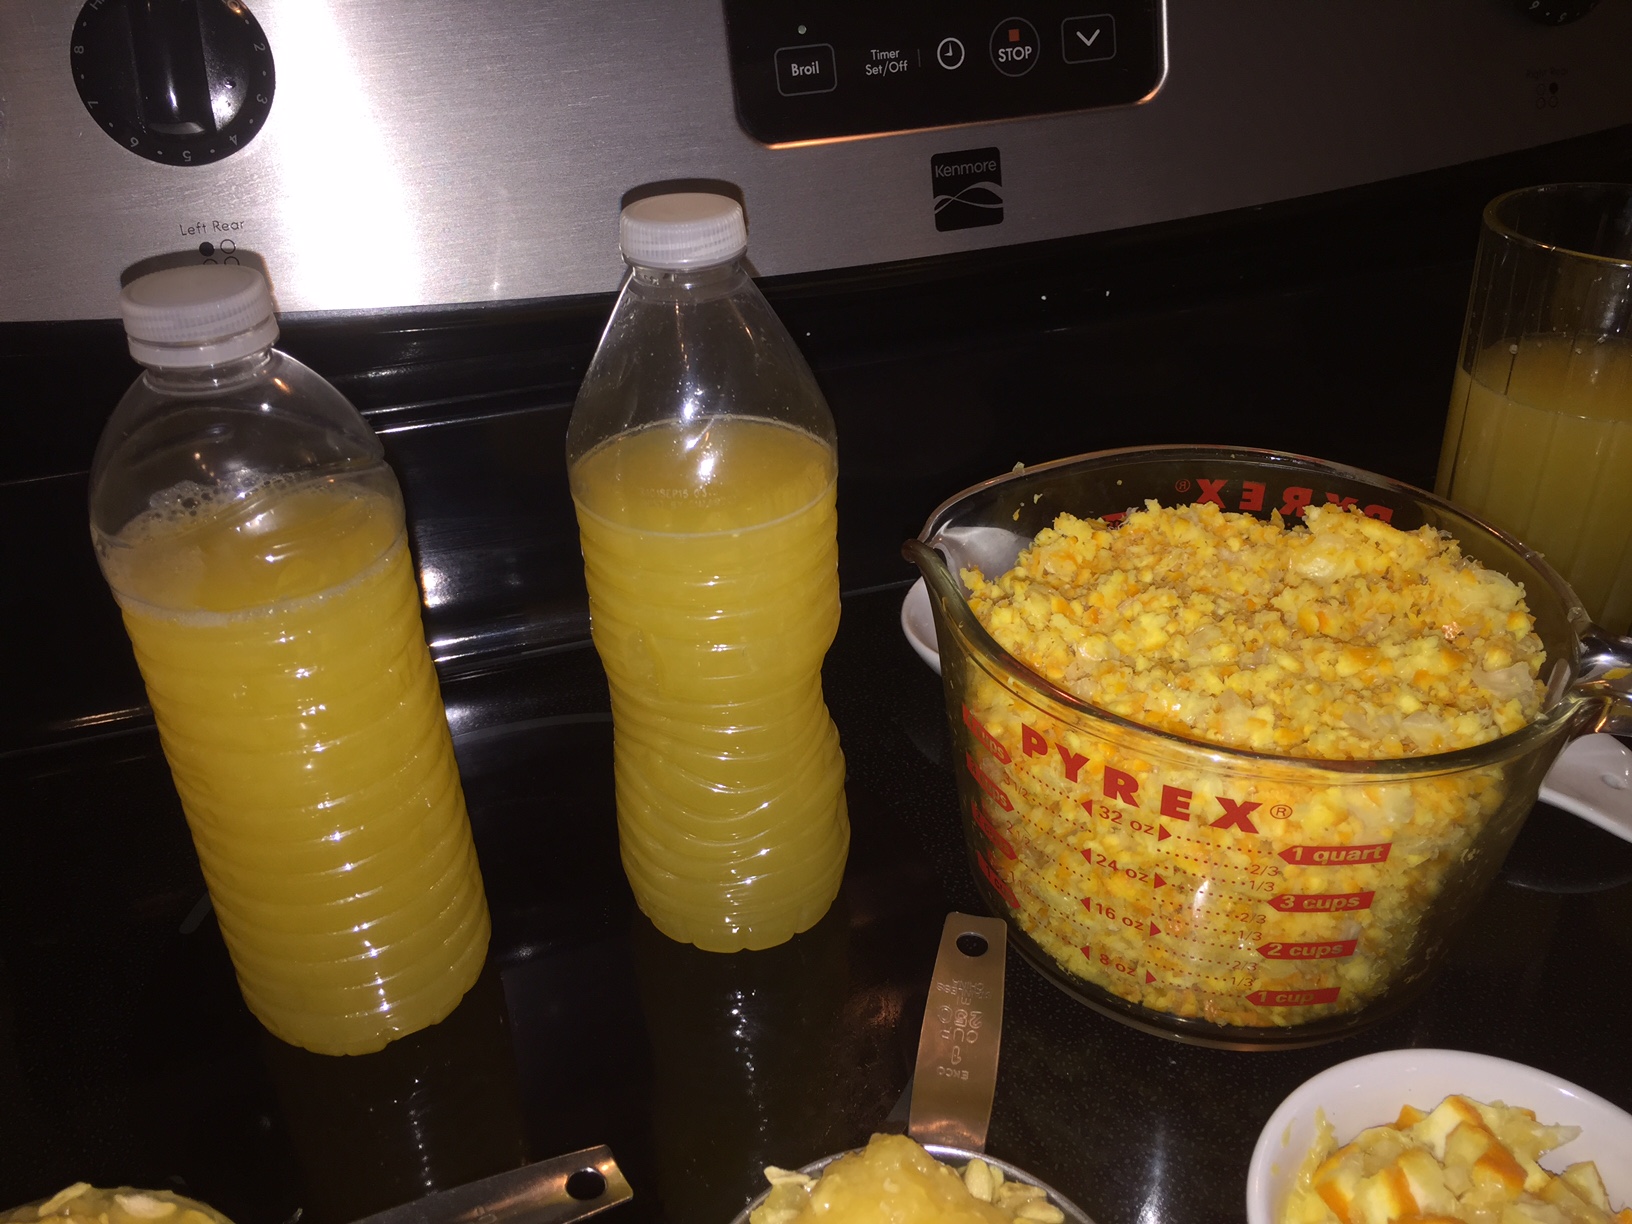
The ingredients freeze really well. Hot pack canning is another good option. If you freeze, be sure to leave an inch of headroom in your water bottles.

Another photo

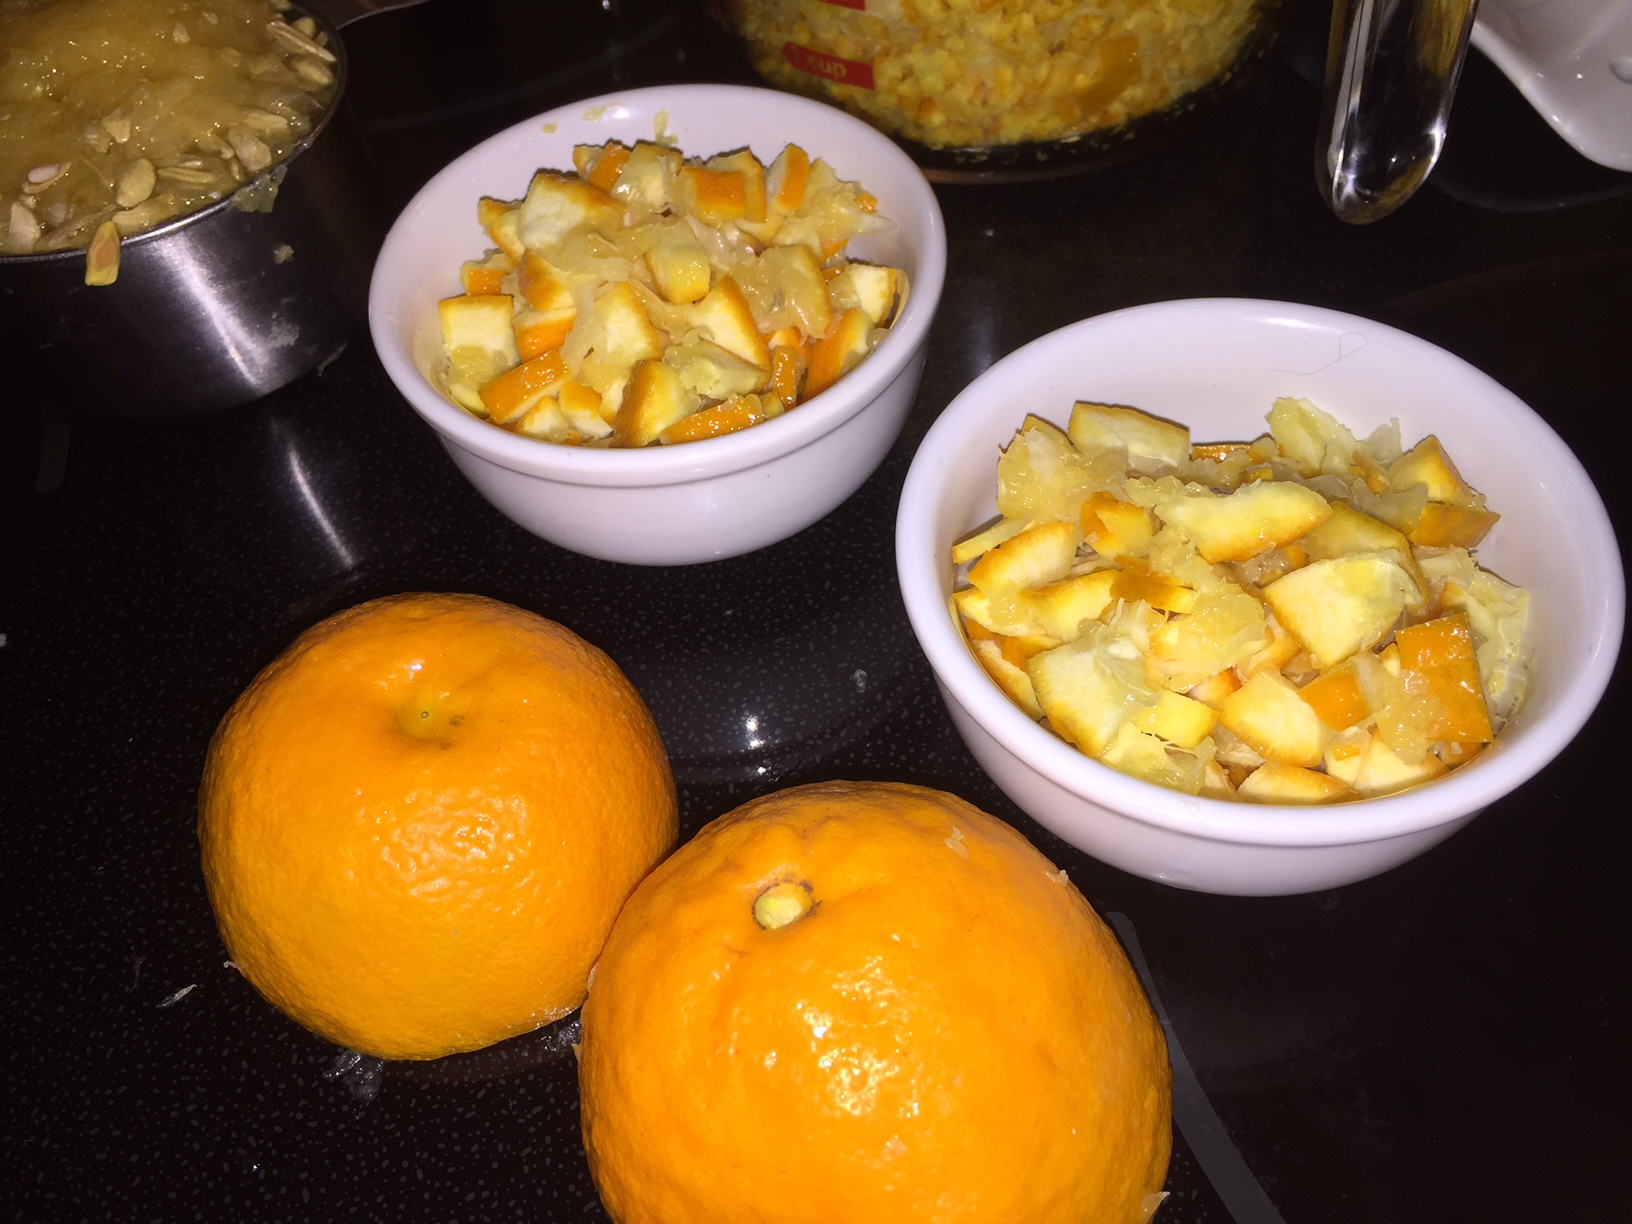
This photo gives you a good close up of the smoother skinned oranges and the older nubbly ones. The juice from the older oranges is perfectly usable, but the skin will be a bit more bitter than the younger oranges, so get rid of them.

I prefer just a few larger dices of orange, but most of the skin that I use is minced in a food processor.

Another good way to do it is with a zester. It takes more oranges, but you can leave the white pith behind, which actually gives you a better end product.

Lemon Curd and Tarts – COLLECTION

Basic Lemon Curdkey-lime

Basic Tart Crust

Advanced Tart Crust

Lemon Lime Tart

Key Lime Tart

Apple Tart

Peach Tart


THIRD PARTY RECIPES – RecipeBox.XYZ


The information below this section is from a third party. It is part of Grandpa's Personal Recipe box. Feel free to browse, but know that this information is from someone else.

– Grandpa’s Recipe Box: CLICK HERE


Dutch Baby with Lemon Curd

– Third Party Recipe: CLICK HERE


Portuguese Custard Tart

– Third Party Recipe: CLICK HERE


Spinach and Ricotta Lasagna

Ingredients

  • 1 onion – diced and sauteed in EVOO
  • Garlic – minced
  • 1 can crushed tomatoes
  • 1 can tomato sauce
  • 1.5 C water or chicken broth
  • Lasagna noodles – cooked
  • 1 LB Ricotta cheese
  • 3 eggs
  • handful of minced scallions
  • Grated Parmesan and Swiss cheese
  • salt, pepper, parsley (chopped)
  • dash of grated nutmeg
  • Spinach – cooked or sauteed

Step by Step

  1. Prepare Ricotta Mixture
    – ricotta, 3 eggs, salt, pepper, scallion, parsley, nutmeg – mix well
  2. Prepare Sauce
    – Mix onion, garlic tomatoes, water or broth – simmer 8 minutes
  3. In a baking dish put 1/2 C sauce in the bottom
  4. Add a layer of pasta sheets to cover the sauce
  5. 1/2 of ricotta mixture
  6. pasta sheets to cover
  7. 1/2 C sauce
  8. layer of spinach
  9. pasta sheets to cover
  10. remaining ricotta mixture
  11. pasta sheets to cover
  12. remaining red sauce
  13. grated Parmesan and Swiss cheese
  14. Cover baking dish with foil
  15. Bake 400º for 45 minutes
  16. Remove foil
  17. Bake an additional 15 minutes
  18. rest 5-10 minutes before cutting

Mac and Cheese – COLLECTION

2016-03-02 18.07.26Before we begin…

  • Many of the professional recipes have you starting out with a roux. This is one of the recipes that Grandma contributed to the website. See optional roux note if you want to experiment.

Mother Sauces

  • BECHEMEL
    Take ¼ C each flour and butter, and heat until it starts to brown
    Whisk in 2 C of whole (hot) milk gradually – ¼ C at a time
    Stir to completely incorporate before adding more milk
  • MOURNAISE
    Add shredded cheese to your Bechemel
    ½ C cheddar and ½ C Gruyere

For basic Mac and Cheese mix cooked pasta in with your Mournaise

When ready to serve, top with Panko and bake at 350º for about 20 minutes


Grandma’s Mac and Cheese

This is on a separate page. Use the above link (or click here) to view the recipe.

Grandpa’s Mac and Cheese

{CAPTION}Ingredients

  • 4 C dried macaroni pasta (large)
  • 2 eggs
  • 1/2 stick butter (4 TBL)
  • 1/4 C AP flour
  • 2 C whole milk
  • 1/4 C Dijon mustard
  • 1 LB fresh sharp cheddar
  • 1/2 tsp salt – 1/2 tsp pepper
  • 1/4 C black olives (rough chop)
  • 1/2 onion (diced)

Step by Step

  1. Preheat oven to 350º
  2. Cook the macaroni most of the way (al dente)
  3. Drain and set aside
  4. In a small bowl, beat the eggs and set aside
  5. Rough chop the olives and put into large mixing bowl
  6. Grate cheese and add to the olives
  7. Add salt and pepper into the mixing bowl
  8. Measure milk, mustard and onion and set aside
  9. Put butter and flour into the bottom of a heavy stock pot
  10. Cook over medium-low heat until flour barely starts to brown
  11. Add the onion into the stock pot
  12. Mix in the milk and the mustard
  13. Cook until it starts to thicken (5-7 minutes)
  14. Reduce heat to low
  15. Temper the hot sauce into the egg mixture – slowly – whisking constantly
  16. After 1/4 has been added to the eggs, whisk it back into the stock pot
  17. Add in the cheese and olives and stir until mixed
  18. Add the drained macaroni and mix well
  19. Serve immediately

Mushroom Mac and Cheese

INGREDIENTS

  • 1 can Cream of Mushroom soup
  • 1 tsp cumin
  • 1 C Shredded SHARP cheddar
  • 1 C Shredded Swiss cheese
  • 1/2 stalk de veined and chopped celery
  • 1/2 tsp allspice
  • Elbow macaroni
  • Sprinkle with fried onions and bake 375° about 30 minutes

STEP BY STEP

  1. Cook macaroni

Basic Mac and Cheese

macINGREDIENTS

  • 4 C uncooked large elbow macaroni
  • Optional: 1 C uncooked cauliflower pieces
  • 2 C Panko bread crumbs
  • 8 TBL butter
  • 6 TBL All-Purpose Flour
  • 2 tsp Dried Mustard
  • 2 tsp Spicy Paprika
  • 1 tsp salt
  • 1 or 2 dashes Tabasco
  • 5 CU 1/2 and 1/2 (or whole milk)
  • 1 C Philly Cream Cheese
  • 2 C Colby Cheese (grated)
  • 2 C Monterey Jack Cheese (grated)

STEP BY STEP

  1. Cook pasta al-dente (about 8 minutes for thin pasta, longer for thicker pasta)
    Put cauliflower in half way through – about 4 minutes
  2. Toss 2 TBL melted butter with bread crumbs. Mix well. Set aside
  3. Drain pasta and melt 5 TBL butter in emptied pot. Melt till foam subsides.
  4. Whisk in all-Purpose flour. Cook till a tawny color.
  5. Add Worcestershire, Paprika, dried mustard, salt and Tabasco
  6. Add milk and bring slowly to a boil stirring constantly.
  7. Add cream cheese
  8. Reduce heat and cook 3-5 minutes or until thickened.
  9. Stir 3/4 of the cheese into the pasta
  10. Mix with cream cheese mixture
  11. Transfer to baking dish and top with bread crumbs mixed with the remaining cheese.
  12. Bake for 15-20 minutes @ 350 degrees
  13. Broil 2 more minutes while still on the middle rack.
  14. Let set 5 minutes before cutting / serving

VARIATIONS

  • Ten Cheese Mac and Cheese
    • 2 C Italian Blend Shredded Cheese: Provalone, Mozzarella, Parmesan, Romano, Assayago
    • 2 C Mexican Blend Shredded Cheese: Colby, Monterey Jack, Chedder, Manchego
    • 1C Whipped Cream Cheese (used later)
  • Create roux with butter, flour, onion, Worcestershire, paprika
  • Put chopped scallions in the mix
  • Add 4 C Half and half
  • Cook pasta, toss with 3/4 of the shredded cheese
  • Put mixed pasta, scallions and cheese into baking dish
  • Pour cream cheese over top
  • Topping 2 C cheese blends, french fried onions
  • 25 minutes @ 350º

Macaroni and Cheese by Lydia’s Italy

Mix together one cup each grated cheddar cheese and grated fontina cheese
Pour enough milk in to see the visible milk line through the cheese . Kind of like you would do if you were making a quiche
And several leaves of sage and one Bay leaf
Set aside for one hour
Put in stove-top / oven-safe casserole dish at low heat
start cooking in salted water big elbow macaroni or rigatoni noodles . Cook only al dentė

Topping
Coarsely great part of a French loaf
Melt butter in the pan
And bread crumbs to toast
Set aside to cool

Using slotted spoon or spider strainer to bring pasta into cheese mixture. Don’t worry about completely straining because you want some of the pasta water mixed in.
Cook together for a few moments stirring occasionally

Toss grated Parmesan in with the breadcrumbs

In greased baking dish, sprinkle some breadcrumb mixture in the bottom.
Spoon noodle mixture onto breadcrumbs as the next layer removing leaves
Top pasta with more breadcrumbs
Bake at 425° uncovered about 25 minutes


Stovetop Mac and Cheese – ATK

  • 1.5 C water
  • 1 C milk
  • Bring water and milk to a low boil, then reduce heat
  • Add 8 oz (weighed) elbow macaroni
  • Simmer 6-8 minutes
  • Add 1 C Deluxe American Cheese – bulk grated, not prewrapped
  • Take off heat
  • Stir in 1 C shredded Extra Sharp Cheddar
  • Add 1/2 tsp Dijon mustard and cayenne pepper to taste
  • Cover and let meld – serve hot

Mac and Cheese – ATK

  • 1 lb pasta
  • 3 tbl butter
  • stale bread
  • 1/2 tbl dried mustard
  • 1 tsp salt
  • ¼ tsp cayenne
  • 5 cu milk
  • ½ lb sharp chedder
  • ½ lb Monterey Jack
  1. Cook pasta in plenty of water to al dente. Make bread crumbs with stale bread strips, put in blender w/3 tbl butter, pulse to 1/8” pieces (set aside). Drain pasta. In pot add 5 tbl butter and melt till foam subsides, whisk in 6 tbl flour, cook until tawny color, add ½ tbl dried mustard, 1 tsp salt, ¼ tsp cayenne and 5 cu milk. Bring to boil, reduce heat and cook 3-5 min till thickened. Stir into sauce, ½ lb sharp chedder, ½ lb Monterey jack, toss in pasta and cook for 6 min. Transfer to baking dish, top w/bread crumbs. Broil 2 minutes on middle rack.
  2. Let set 5 min, then serve.

Mac and Cheese – Composite

1 CU uncooked pasta (or 2 CU cooked)
1 CU Milk
1 CU diced French bread
Onion (diced)
¼ tsp cayenne
1/2 tsp Mustard
1 TBL SALTED Butter
2 TBL flour
Bread crumbs
1/4 CU each Cheeses (Sharp Cheddar, Mozzerella or Monterey Jack, Parmesean)

Instructions

1. Cook pasta in plenty of water to al dente.
2. Make bread crumbs with French bread,
put in blender w/ 3 tbl butter, pulse to 1/8” pieces (set aside).
3. Drain pasta. In pot add 2 TBL butter and melt till foam subsides,
add grated onion and cook until it starts to turn translucent
whisk in 2TBL flour, cook until tawny color, add ½ tsp dried mustard, scant salt, ¼ tsp cayenne and 1 cu milk.
4. Bring to boil, reduce heat and cook 3-5 min till thickened.
5. Stir into sauce – grated cheeses,
toss in pasta and cook for 6 min.
6. Transfer to baking dish, top w/ bread crumbs.
7. Bake 10 minutes at 425 degrees or until the cheese/bread starts to brown

Let set 5 min, then serve.

German Red Cabbage

Ingredients

  • 3 slices of chopped bacon
  • 1 diced apple
  • 1/4 C diced onion
  • 1-2 tsp sugar (depending on taste)
  • 1 inch thick steak of green cabbage
  • 1 inch thick steak of red cabbage
  • 1 TBL red wine vinegar
  • 1/4 C red wine
  • salt and pepper to taste
  • dash of ground clove
  • 1 bay leaf

Step by Step

  1. Cut cabbage steaks in layers creating strands
  2. Render bacon in a Dutch oven
  3. Add onion and stir until coated
  4. Add diced apple and sugar – mix well
  5. Add cabbage strips and toss until coated
  6. Add vinegar and wine plus final seasonings
  7. Simmer for 1 hour
  8. Add in 1 TBL AP flour and 1 TBL lingonberry jam
  9. Mix until thickened
  10. Serve on a plate with grilled bratwurst.

For another recipe CLICK HERE.

Togo’s Asian Chicken Salad Dressing

Thanks Sherry

Important Update: The Coco’s Asian Chicken Salad Dressing has been discontinued. The restaurant has a replacement (that is not very good.) A comment from Sherry Leger suggests a substitute and asks our feedback. This warranted its own page, so here you are. PLEASE CLICK HERE to read the original chain about Coco’s Asian Chicken Salad Dressing.

Sherry Comment

Here is Sherry’s post:

I love Coco’s Asian Chicken dressing and was sad that I could not buy the bottles anymore. But I have found a substitute, Togo’s Asian Chicken Salad Dressing is very close (its been so long, but its got that same kick). I would love from someone to try it and tell me their thoughts.

Please comment below with your comments about Togo’s.

Here is what I found on the web and by making a few phone calls:


Nutritionally…

According to the Fooducate website, the dressing got a D grade. It has too much salt. It has too much saturated fat. It is horrendous for dieters.

My opinion about that is “Yeah, so what’s the problem?” We all know it probably has lots of calories and is bad for us, but you only go around in life once. ENJOY IT.

Togos is a Franchise

I gave a call to a couple of the Togos Sandwich Shops.  Two of the shops offered to sell me a small Au jus container of it, but two said “Sorry.”  Since it is a franchise, it is pretty much up to the owner of the franchise.  The problem for you Easterners is that it is a chain located in the western half of the United States.  I’ve found enough information that you might try the recipe below.

Make it Yourself

Here is a recipe that I found posted on Yahoo. I modified it a little bit. The way it was written would not allow the oil to completely emulsify, plus I changed a few things up cause that’s just what I do.

  • 1/2 C Pineapple juice
  • 1/4 C Rice vinegar
  • 1 TBL Soy sauce
  • 1 TBL Brown sugar
  • 2 TBL Honey
  • 1/2 tsp Pepper
  • 1 tsp Dijon mustard or 1/2 tsp mustard seed
  • 2 tsp Sesame oil
  1. Combine all ingredients except the oil in a food processor or large mixing bowl.
  2. Whisking or blending continually, drizzle in the sesame oil VERY SLOWLY
  3. Store in a jar for up to a week
    – Warm to room temperature and shake well before using stored dressing

Applebees May be Close

ORIENTAL CHICKEN SALAD LIKE APPLEBEE’S

  • 4 breaded chicken breast fillets
  • 1 romaine heart
  • 1 1/2 c. coleslaw mix (or finely shredded cabbage)
  • 1/3 c. toasted almond slivers or slices (blanched almonds)
  • 1/2 c. chow mein noodles
  • Dressing:
    – 1/3 c. vinegar
    – 1/2 c. sugar
    – 3/4 tsp. salt
    – 1 tsp. dry mustard
    – 1 tsp. horseradish
    – 1/4 c. spanish onion, diced
    – 1 c. canola oil
  1. Cook chicken fillets as directed.
  2. To make dressing, combine everything but the oil in a blender of food processor and process until liquified.
  3. Continue to blend and slowly drizzle in the oil until blended.
  4. To be really authentic, make coleslaw with the cabbage and the dressing first and top it with the lettuce, almonds and noodles.
  5. Then cut up the chicken and add to salads.
  6. I’ve had good results by layering first the romaine then the cabbage, almonds, chicken and dressing. This should make 3 or 4 salads.

Steve’s Chicken Burrito

{CAPTION}Ingredients

  • 1/2 LB shredded precooked chicken
  • 1 onion
  • 2 Roma Tomatoes
  • 1 or 2 jalapeños (optional)
    – Seeds and veins removed
  • 1 TBL tomato paste
  • 1 taco seasoning packet

Step by Step

  1. Brown the chicken in 1 TBL butter
    (Ground chicken is OK, but not as good)
  2. Add the onion
  3. Continue to cook 5 minutes until softened
  4. Add the tomato paste and (optional) jalapeño
  5. After 5 minutes, add the seasoning packet
  6. Cover and simmer for 30-60 minutes
  7. Wrap in a tortilla.
    Can’t find them in the grocery store?
    CLICK HERE for Grandpa’s tortilla recipe:

Alternate Preparation

  1. Buy a whole chicken and remove the stuffing packet and rinse it under cold water
  2. Put the chicken in a crockpot with the onion and jalapenos and tomato paste
  3. Mix in 1 C of water or broth
  4. Simmer for 6-8 hours

Steve used the same skillet that his dad had been using for 40 years.

Egg Taco

You have PROBABLY had a taco some time in your life, or at least heard of one, so are familiar with the concept. With this breakfast recipe, you eliminate the taco shell and replace it with an egg.

INGREDIENTS{CAPTION}

  • 1 egg for each taco
  • 1 thin slice of toast
  • 1-2 tsp salsa
  • a few sprigs of cilantro

STEP BY STEP

  1. Heat your non-stick skillet to a low heat – about 300º
  2. Beat the egg and pour it into the pan, allowing it to spread itself thin into a pancake
  3. Let the pancake “dry out” until it looses it’s shine
  4. Carefully flip the pancake and put shredded cheese onto it
  5. Slide the pancake onto your plate and top with salsa, bread and cilantro
  6. Enjoy!

{CAPTION}{CAPTION}

Tip: Buying in Season

Season

  • Summer – watermelon, corn and tomatoes, cucumber, honeydew, cantaloupe,
    NOTE:  Smell the point where it was cut from the plant
  • Labor Day – Utah peaches
  • November – Persimmons
  • Hard squash (check out Butterkin) butternut and pumpkin cross

Peach Tips

  • Clingstone – Used for lots of canned peaches
  • Out of Hand – Freestone
  • Muir – Yellow flesh
  • Lovel – Yellow flesh
  • Alberta – Yellow flesh
  • White peaches – Lower acid content, less peachy but sweeter
    • Mountain Rose
    • Alexander
    • Old Mixon
    • Summer Snow
  • Pick peaches from the tree when possible – California grows a lot
  • Age in a paper bag – will soften, but will ripen no more
  • OK to store in fridge to keep, but room temp before eating

Orange Citrus Salad

Chef Notes

  1. Avocado creama – Avocado, fresh mint, salt, EVOO, pepper, Sour cream, lemon juice – Muddle stick in blender – Refrigerate up to 24 hours
  2. pickled onion rings (Hot vinegar, sugar, 2 minutes)
  3. Grapefruit, oranges, SLICES
  4. Add Kalamati olives and garlic olives
  5. Roasted beets
  6. Drizzle with avocado creama
  7. Top with feta cheese and pickled onions
  8. Finally top with sprigs of mint, salt and pepper
  9. EVOO on top

Mexican Jumble

Food is whatever tastes good together.  Here are many things that you can put on top of a corn tortilla.

  1. Heat the tortilla in a dry skillet
  2. Top with any combination of the below ingredients
  • Spinach
  • Fontina cheese
  • Cilantro
  • Tomato
  • Cucumber
  • Avocado
  • Shredded pork
  • Lettuce
  • Sour cream or Mexican crema
  • Marinated red onion
  • Black beans
  • Salsa
  • Carnitas

etc….

Mondongo a la Andaluza

  • Cows feet and tripe
  • Cover with water
  • Add oregano, salt, achiote paste in water (a staple)

Sofrito

  • Bacon, ham, sausage, bell pepper, onion, tomato
  • Add potatoes and more achiote chilies
  • Garbanzo beans

Panuchos, tortas

Empanadas de queso con chaya

  • Maize, chaya (green leaf) Mix and flatten
  • Wrap around shredded dutch edam cheese
  • Fry until golden brown
  • Serve with puree salsa or red sauce

Kibi

  • Lebanese
  • Pork, bulgar wheat, pepper, garlic, chopped mint, onions – FRY
  • Serve with some sort of dip

2 LB black beans – 6 L of water (no salt)
Cook 1 hour
Add salt AFTER cooking
Epazote leaves – whole
1 whole onion – halved
1 pork butt – chunks
Cover with a lid – cook 2 more hours

Serve with Chiltomate – Yucatan tomato

Cilantrol, lemon, tortillas

Mango pancake

  • 1 3/4 C fresh mango
  • 1/4 C buttermilk
  • 1 tsp almond extract
  • 1 tsp vanilla extract
  • PUREE UNTIL SMOOTH
  • 1 stick butter – softened
  • 1 1/3 C sugar
  • 2 eggs – 1 at a time
  • 2.5 C flour
  • 1 tsp baking powder
  • 1 tsp baking soda
  • 1/2 tsp salt
  • Mix in with mango puree
  • Mix into egg mixture
    BUTTERED baking dish
  • 350º for 30 minutes
  • Turn out and sprinkle with powdered sugar
  • Serve with fresh fruit

Fig Newtons

Ingredients

  • 1 C AP flour
  • 1/2 C wheat flour
  • 1/2 C masa or Maseca
  • 2/3 C sugar
  • 1/2 tsp salt
  • 2 egg yolks
  • 1 tsp vanilla
  • 12 TBL butter (1.5 sticks)
    FILLING INGREDIENTS
  • 1.5 C chopped figs (stems removed)
  • 1/4 C port, brandy or whisky
  • 3 TBL brown sugar
  • 1 tsp vanilla
  • 1/2 tsp salt

Step by Step

  1. Combine first seven ingredients in food processor
  2. Pulse until it comes completely together
  3. Create two separate logs, wrap in plastic wrap, and refrigerate for at least an hour
  4. Combine figs and alcohol into a sauce pan
  5. Bring to a simmer and let cook 3-5 minutes or until liquid has completely absorbed
  6. Put into food processor with sugar, vanilla and salt
  7. Bring dough out of fridge and roll flat (about 1/4 inch)
  8. Spread filling into center – edge to edge, but only the center third (like a burrito)
  9. Fold both sides up and over creating a flattened burrito
  10. Press firmly, cover with plastic wrap again, and chill for 1 hour
  11. Remove from plastic and place on baking sheet and brush with egg white wash
  12. Sprinkle with Turbinado sugar
  13. Cut into slices, but do not separate
  14. Bake 325º for 30 minutes
  15. Let cool 5 minutes, then cut again (sugars will have fused)
  16. Let cool completely, then wrap in plastic for longer term storage


Pilot Bread

Thanks to Cousin Sue for telling me about this Alaskan Staple.  Pilot Bread, also known as Survival Bread, Ship Biscuit or Sea Bread is something with a a shelf life of 2 years when stored in airtight containers.  Commercial containers of Pilot Bread could last for up to 30 years. Here is a recipe (modified slightly) from the Internet.

Ingredients

  • 4 C Flour
  • 1 TBL Salt
  • 1 tsp Sugar
  • 1 tsp baking powder
  • Water (approx 2 C)

Step by Step

  1. Preheat oven to 400º
  2. Stir together flour and salt
  3. Add water only until mixture starts to clump together
  4. Roll flat and shape into a rectangular sheet
  5. Use a butcher knife or pizza cutter to cut the sheet into 2×3 inch crackers
    ALT: Use a round biscuit cutter to make circles.  Roll the remainder flat and repeat until finished.
  6. Use a toothpick to poke a crosshatched series of holes to allow for easier breaking
    ::::::::::::::::::
    ::::::::::::::::::
    ::::::::::::::::::
  7. Put the squares on a dry cookies sheet and bake at 350º for 20 minutes
  8. Turn off oven, keep door closed, and let the bread completely dry out before removing it
  9. Store the survival bread in a baggie for a month or two, or a completely airtight container for many years.


Homemade Peanut Butter

Ingredients

  • 2 C shelled and skinned roasted Spanish peanuts (see note below)
  • 1 tsp kosher salt
  • 2 tsp honey
  • 2 TBL peanut oil

Step by Step

  1. You can save money by buying peanuts that still have the skin on.  It is easy to remove though.  Rub the peanuts together in your hands held over a large bowl.  OUTSIDE, pour the peanuts and skin in front of a fan, which will blow the skins into the grass.  Once you have skinned peanuts… continue.
  2. Place the peanuts, salt and honey into a food processor.
  3. Process for 30 seconds. If you want chunky peanut butter, remove 1/4 C of peanuts and set aside.
  4. Scrape down the sides of the bowl, put the lid back on and process while slowly drizzling in peanut oil – about 2 minutes.  Add back in the 1/4 C peanuts (for chunky peanut butter.
  5. Continue to process until the mixture is the desired consistency.  Test and scrape down every 30 seconds.
  6. Peanut butter will keep in an airtight container in the refrigerator for up to 2 months.

Peanuts taste better when roasted.  You can roast your own, if you have the inclination.  I am not going to cover that here, but you can watch this video if you want to tackle roasting your own peanuts.

Octo Pasta

Ingredients

  • 1 whole octopus
    MARINATE
  • 8 C water
  • 2 C red wine
  • 1/2 C white vinegar
    VINAIGRETTE
  • 3 TBL white wine
  • 2 TBL EVOO
  • 2 tsp garlic powder
  • oregano, salt and pepper
  • one lemon – zest and juice
    PASTA
  • 1/2 onion – slivered
  • 4 cloves shaved garlic
  • 1 C cherry tomatoes (halved)
  • 1/4 C Kalamata olives
  • 1/2 C tomato sauce
  • salt, pepper, micro greens and cooked orichetta pasta

Step by Step

  1. Put all (or part) of octopus into the marinate
  2. Wives tale?  Don’t know, but they all do it…
    Put two wine bottle corks in the liquid
  3. Turn heat onto medium low
  4. As soon as the marinate starts to simmer, reduce to low
  5. Allow to cook for another 90 minutes
  6. Rub off sucker cups with a spoon
  7. Remove the beak (cartilage)
  8. Cut arms at a bias into 3/4 inch pieces
  9. TASTE TEST:  Should be soft, not chewy
  10. Brush with oil and sprinkle with salt and pepper
  11. Sear on hot grill pan (350º) for 1 minute per side
  12. Whisk together Vinaigrette and toss with octopus pieces and set aside
  13. Now, finish your pasta
  14. Sear shallots or onion in EVOO
  15. Add in shaved garlic
  16. Sweat for 3 more minutes
  17. Add olives
  18. Add cherry tomatoes
  19. Add salt and pepper
  20. Add tomato sauce
  21. Toss above with orichetta pasta
  22. Plate pasta
  23. Top with octopus
  24. Garnish with microgreens and lemon


HTML Snippets Powered By : XYZScripts.com