Zoodles

INGREDIENTS

  • Corn from 1 ear of corn
  • 1 zucchini
  • 1 avocado – diced
  • Tomatoes
  • Red onion
    VINAIGRETTE
  • 1 tsp Dijon mustard
  • zest and juice from one lime
  • 5 mint leaves – chopped
  • 4 basil leaves – chiffonade strips
  • 3 TBL EVOO – Emulsified into the other ingredients
  • salt and pepper to taste

STEP BY STEP

  1. Use a Benriner spiral cutter and cut your zucchini into thin ribbons.
  2. Remove the kernels from your ear of corn
  3. Saute the corn in hot EVOO
  4. Add your zucchini ribbons
  5. Toss with 2 TBL basil and 2 tsp mint
  6. Add salt and pepper
  7. Add red onion slivers
  8. Add tomatoes
  9. Toss with vinaigrette (above)
  10. Toss gently with 1 diced avocado


Tips: Peppers

  • Before working with peppers, coat your hands with just a bit of olive oil.  This will protect your skin, and then you can just wash your glove off afterwards
  • The seeds and vein contain most of the heat in a pepper
  • Most of the seeds will be near the stem
  • Green jalapeños will turn red if left on the vine
  • Green bell peppers are just unripe red bell peppers
  • Hatch chilies have the best flavor out of many similar peppers
  • A pepper gets “hotter” if it is stressed during growth
  • A dried pepper should still be slightly pliable
  • When cutting a bell pepper, use the outsides and keep the core intact.  It will stay fresh for 3 days longer.


Rustic Freeform Fruit Tart

Use this link to make your Pastry Dough, or just use puff pastry.

    • After you have your crust, toss your selected fruit with
  • 2 C fruit,
  • juice and zest from one lemon,
  • 1/4 C sugar and
  • 1/4 C fruit jam.
    • Mix 1/4 C panko crumbs with
  • 1/4 C sugar and
  • 1 TBL cinnamon

This will be used to keep your tart from getting soggy

  1. Roll your crust out on a floured surface
  2. Transfer to a parchment sheet
  3. Dust with 1/2 of your Panko mixture, leaving approx 2-inch border
  4. Layer your fruit, maintaining the border
  5. Top with the last of your Panko mixture
  6. Fold up the sides to create a bowl containing the fruit
  7. Bake in preheated 375º oven for 45-60 minutes
  8. Let cook 5 minutes before cutting

Tips: Frozen or Canned Food

Most food is flash frozen at the peak of ripeness.

Berries – These have a very short season, so frozen is the best way to get ripe strawberries, blueberries, raspberries 10 months out of the year.  Thaw them overnight in the refrigerator.

Spinach – Greens freeze very well.  You can thaw these in the fridge overnight, or place them in a bowl of water for 30 minutes.  Leaf for leaf, frozen spinach costs quite a bit less than fresh as well.

Tomatoes – These don’t freeze well so should be canned, or bought canned or sun dried and placed in oil.

Vegetables – Frozen peas are much better frozen than canned.  They are frozen at the peak of ripeness.  The canning process can tend to make them mushy.  Thaw them overnight in the fridge in a bowl of water.

Lemon juice – Don’t buy that plastic lemon shaped container, or even the green bottles of juice.  Squeeze lemons yourself and then freeze in water bottles.  Thaw in the refrigerator.  There may be some separation of the juice and the pulp, so shake before using it.

Grapes – These don’t freeze or can well.  Raisins can be rehydrated overnight in water.

Broccoli – This does not freeze well.  It becomes mushy.  It is marginally OK to use in a stir fry, but fresh is so much better.

Salmon – Of course it is better fresh, but it is also very expensive.  Canned salmon is not THAT bad, and is about a fifth of the price of fresh.  If budget is no matter, go fresh.  For most of us canned salmon is good enough for most of what we do.

Cindy’s Eggs

INGREDIENTS

  • Tomato pieces
  • Frozen chopped spinach
  • Optional sliced ham
  • Cheese
  • Egg
  • More Cheese

STEP BY STEP

  1. Grease a muffin ring (or steel tuna can)
  2. Preheat your skillet to about 350º
  3. Put in about 1/4 C tomato pieces (heated)
  4. Put in 2 TBL chopped spinach (heated)
  5. Put sliced ham in, if you wish
  6. Push it down so it is all kind of flat
  7. Sprinkle in some cheese, and make a well in the center
  8. Break your egg yolk/white into the well
  9. Sprinkle on a bit more cheese
  10. Cover with a mixing bowl and pour about 1/2 C water into the hot pan
  11. Let cook 4 minutes
  12. Meanwhile toast two pieces of bread
  13. Carefully remove your ring (with the egg) to the top of your toast
  14. Remove the ring and serve


Canoli Creme

INGREDIENTS

  • 1 C Ricotta cheese
  • 1/4 C powdered sugar
  • zest from one orange
  • 1/2 tsp vanilla
  • Optional: 1/4 C semi-sweet chocolate chips

STEP BY STEP

  1. Mix ingredients
  2. Pipe into canaloni shells or squished flat white bread


Sweet Mini Peppers

INGREDIENTS

  • 1 bag small multi colored sweet peppers
  • 1/2 LB sausage
  • Mozzarella – shredded
  • Sharp cheddar – shredded

STEP BY STEP

  1. Brown the sausage
  2. Meanwhile, cut the peppers into half – keeping the stem intact
    Use the top half in a salad or something like that
  3. Let the sausage cool a bit
  4. Toss the sausage with the cheeses
  5. Stuff mixture into the peppers
  6. Bake at 325º for 5-8 minutes


Party Sub

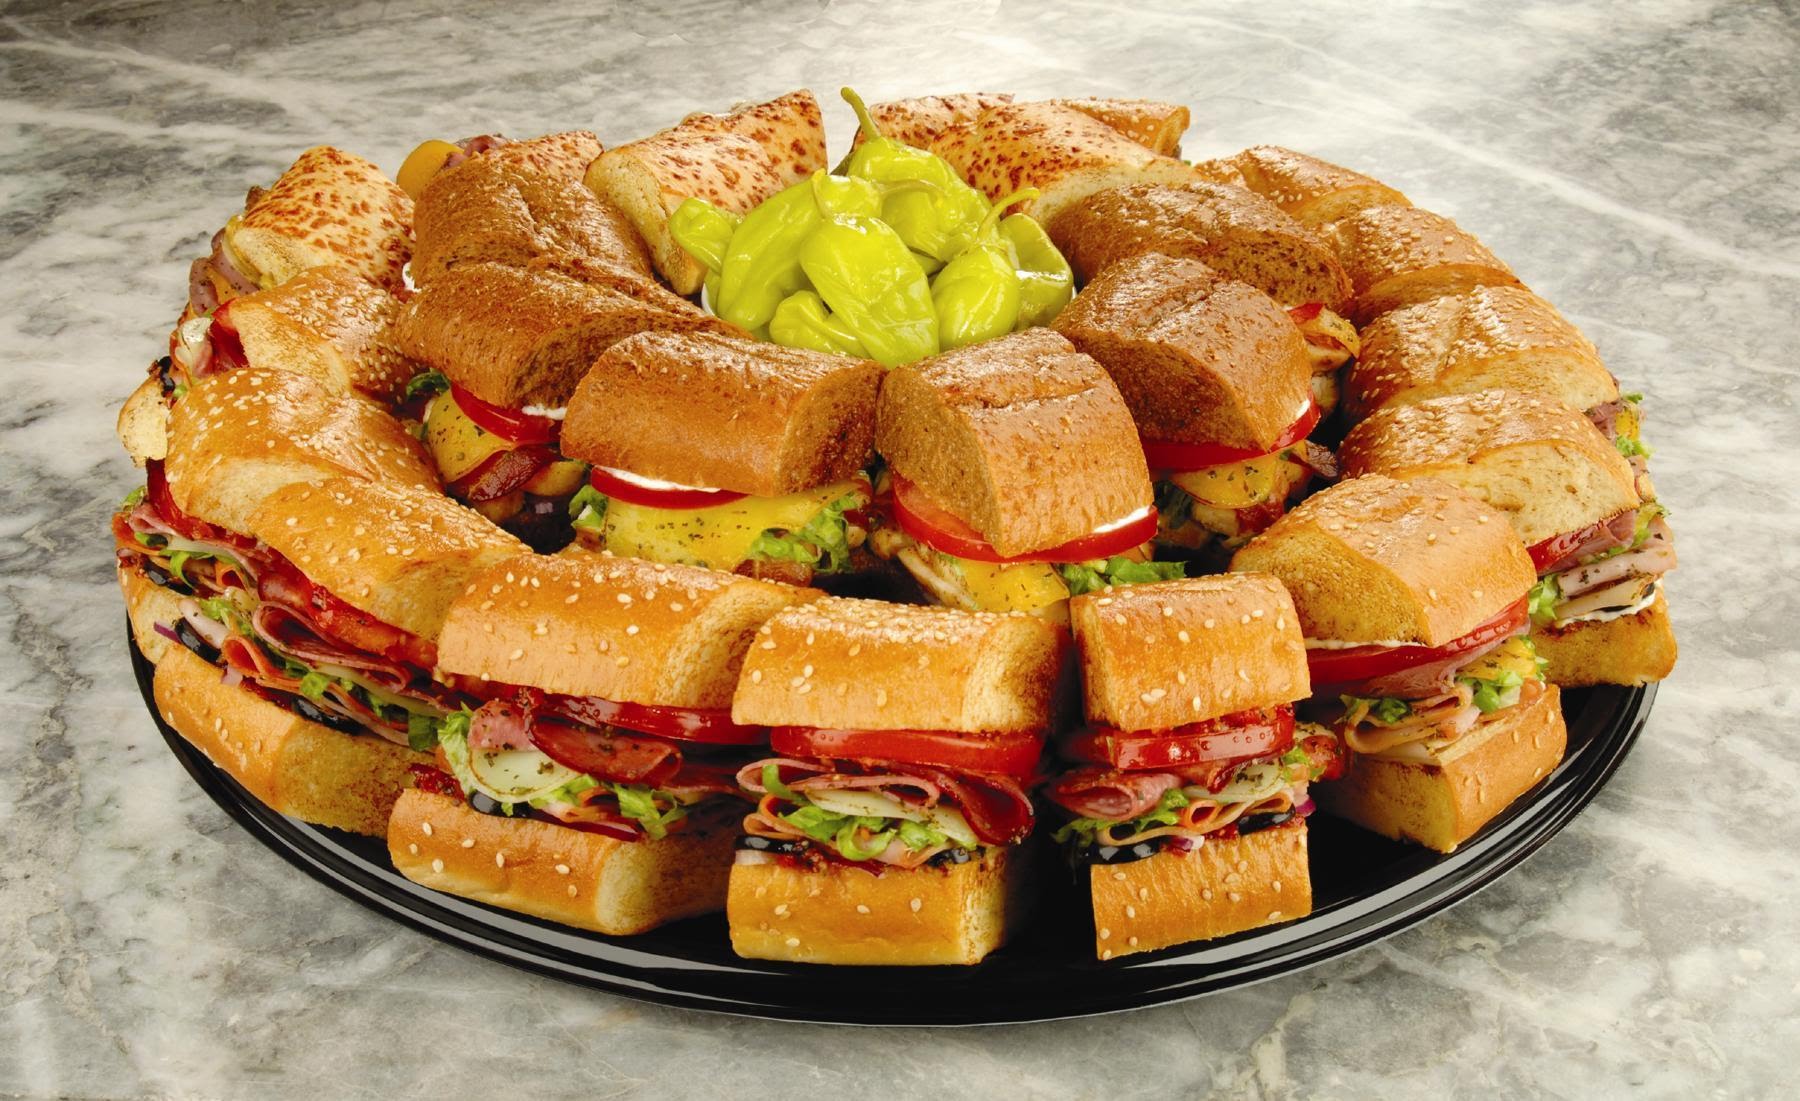
If you want to be a hit at your next party or potluck, consider making a six foot sub.  HINT:  It is not really six foot long, it just looks that way.

subrollINGREDIENTS

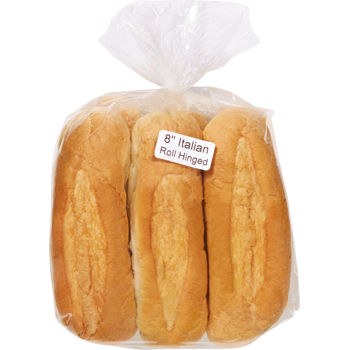
  • 6-8 sub sandwich rolls
  • about 24 slices of provalone cheese
  • 24 slices of ham
  • 30 slices of salami
  • 1 onion – sliced very thin
  • 2 bell peppers – cut into very thin strips
  • 1 head of iceberg lettuce – shredded
  • 4 tomatoes – sliced thin
  • EVOO
  • Optional – Dijon mustard or ketchup

STEP BY STEP

  1. Here is the key:  Cut the tips off all of your sub rolls.  They will eventually fit together (end to end) so that they look like one huge sub (see below).
  2. Cut them lengthwise into sandwich buns
  3. Put thin layer of onions on the subs
  4. Spread lettuce onto the subs
  5. Put tomato and bell peppers on the lettuce
  6. Add your meats, and end with your cheese
  7. Optional – Put on a baking tray and place under the broiler for about 30 seconds to melt the cheese
  8. Set them up on a large tray (as shown to the right) and cover with a towelsub


Israeli CousCous

Israeli couscous (about the size of a small pea) is a larger pearl than standard (North African) couscous, which is about the size of a grain of rice.

INGREDIENTS

  • 2 T EVOO – to fry
    PREPARE COUSCOUS
  • 1 C Israeli couscous
  • 3/4 C chicken stock (alt: vegetable stock)
  • 1 C water
    FOR THE DRESSING – WHISK TOGETHER
  • 2 T honey
  • 1 T fresh lemon juice
  • 1 T Dijon mustard
  • 1/4 C red wine vinegar
  • 2 T EVOO – for dressing
    TO BE COMBINED WITH DRESSING
  • 2 roma tomatoes (seeds removed – small chop)
  • 1 cucumber (seeds removed – small chop)
  • 1 bunch scallions (greens only – 1/4 inch pieces) reserve some for garnish
  • 2 C fresh chopped parsley
  • 1 C fresh chopped cilantro – reserve some for garnish
  • 1/4 C baby peas – strained
  • 1/4 C fresh chopped mint
  • salt and pepper to taste – or use [thnder-powder]
    FOR THE FINAL STEPS – ASSEMBLE SALAD
  • 8 leaves romaine lettuce – washed, but left whole
  • 1/4 C feta cheese (alt: tofu) for garnish
  • garnish with reserved cilantro and scallions
  • OPTIONAL:  Toasted sesame seeds or chopped pistachio

STEP BY STEP

  1. Toast couscous in EVOO using a large heavy deep pot
  2. Fry / toast over medium heat till slightly browned (5-8 minutes)
  3. Add water and broth, bring to a simmer and lower heat
  4. Cover and let simmer 15 minutes, stirring occasionally
  5. Transfer couscous to a colander and let rest while you prepare the rest of the ingredients
  6. Combine dressing ingredients – whisk together
  7. Toss with all other salad ingredients
  8. Toss gently with couscous and serve over lettuce leaves
  9. Top with cilantro leaves, scallions, and a bit of feta cheese

Salmon Rillettes

INGREDIENTS

  • Fatty part of the salmon – Belly – about 6-8 ounces
  • Smoked salmon – also about 6-8 ounces
  • 1 stick of salted butter
  • 1/2 onion – finely minced
  • 1 TBL prepared horseradish

STEP BY STEP

  1. Melt butter in a large skillet
  2. Let butter rest for 30 seconds, then pour off about half (clarified butter) into a separate container (to be used later)
  3. In remaining butter sautee minced onion
  4. Sprinkle in some salt and pepper
  5. Cook salmon for about 1 minutes – DO NOT overcook
  6. Add horseradish and stir until combined
  7. Crush all ingredients together with a fork until roughly combined
  8. Put loosely into a mold (a glass bowl to be turned upside down later)
  9. Top with clarified butter
  10. Put into refrigerator for 2-3 hours (or overnight)
  11. Turn out on chilled plate and serve with toast points, pita or crostini


Chicken Salad – COLLECTION

Basic Chicken Salad

Basic Chicken Salad

Sesame Chicken Salad

Sesame Chicken Salad

Oriental Chicken Salad

Oriental Chicken Salad

Asian Chicken Salad

Asian Salad

Seared Chicken Salad

Seared Chicken Salad

Pineapple Chicken Salad

Pineapple Chicken Salad

Chicken Fajita Salad

Chicken Fajita Salad

Mexican Chicken Salad

Mexican Dinner Salads – Two Recipes

Pickles – COLLECTION INDEX

A VERY BASIC OVERVIEW

A Very Basic Pickle Overview

CUCUMBER PICKLE RECIPES

Bread and Butter Pickles

https://www.grandpacooks.com/recipes/bread-and-butter-pickles

Simple Pickles

Simple Picked Cucumber Slices

Quick Pickles

https://www.grandpacooks.com/recipes/quick-pickle

Sunomono Thai Cucumber Salad

https://www.grandpacooks.com/recipes/sunomono-cucumber-salad

Growing and Making Pickles

Growing and Making Pickles


PICKLED VEGETABLES RECIPES

Pickled Beets

Pickled Beets

Pickled Chiles

Pickled Chiles

Pickled Eggplant

Pickled Eggplant

Pickled Veggie

Quick Pickled Vegetables

Partial Peck of Pickled Peppers

A Partial Peck of Pickled Peppers

Pickled Watermelon Rind

https://www.grandpacooks.com/recipes/watermelon-pickles


Pickled Onion

Pickled Onions

Pickled Red Onion

Red Onion Pickles


PICKLED OTHER STUFF

Pickled Breakfast Herring

Robert’s Favorite Scandinavian-Style Pickled Breakfast Herring

Style Pickled Breakfast Herring – Robert’s Favorite

Robert’s Favorite Scandinavian-Style Pickled Breakfast Herring


Candied Nuts

Use almonds, pecans, peanuts, or walnuts – or all of them

INGREDIENTS

  • 3 oz Karo syrup
  • 1/2 tsp almond or walnut extract
  • 1 C granulated sugar

STEP BY STEP

  1. Heat over medium high heat
    This will take about 30-40 minutes
  2. When it starts to brown and caramelize, add your nuts
  3. Dump 3 C nuts into the glaze
  4. Stir until everything is well coated
    You should have “spider web” strings between the pieces
    About 5-10 minutes
  5. OPTIONS:  Add some coarse salt for salted caramel, chili for a bit of a bit, or cinnamon for a holiday treat.
  6. Pour onto waxed paper or parchment paper and let them COMPLETELY cool before breaking apart
  7. They will keep for a very long time – – – months !

NOTE:  This will pretty much ruin your wooden spoon, so either use the same spoon every time, or use something that is near the end of its life anyway.

Grandpa’s Short Angel Cake

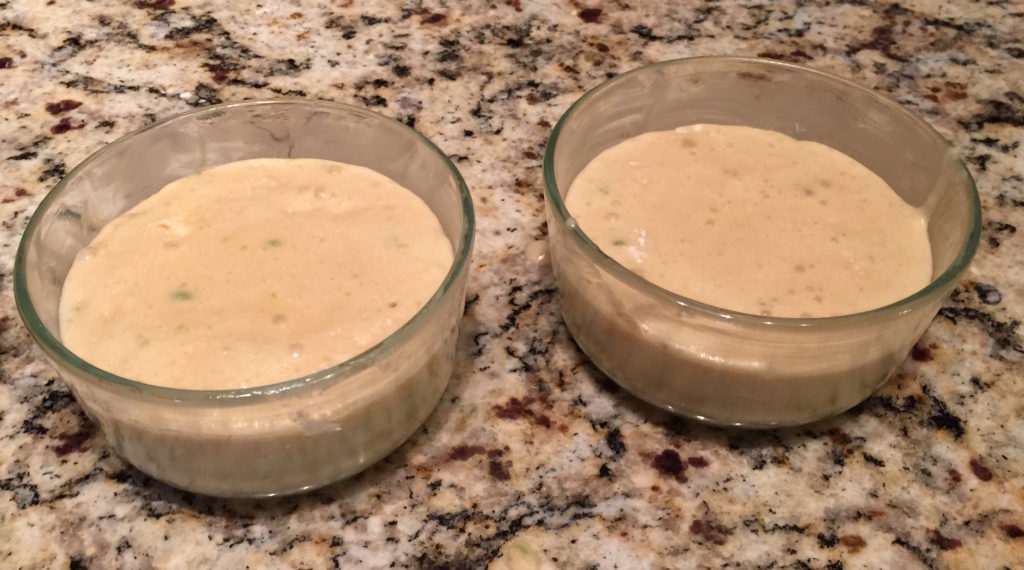
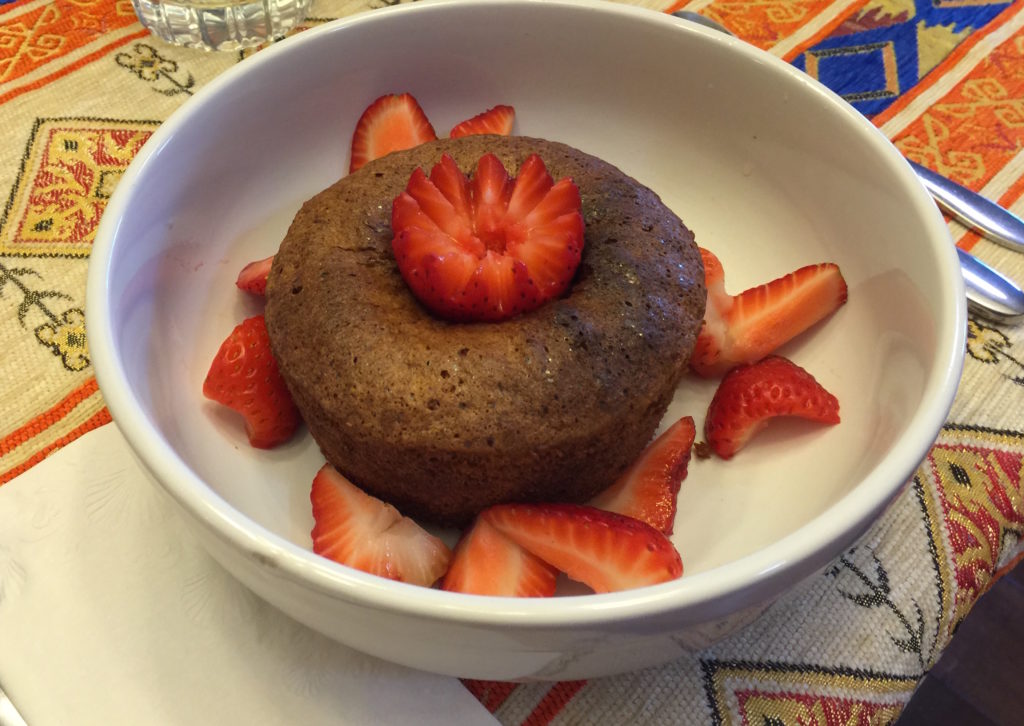
angel-beforeA quicker recipe for Angel Food Cake

INGREDIENTS and STEP BY STEP

For the amounts shown in the photo, sift together:
– 1 cup Bisquick
– 1 cup powdered sugar
– 1/2 tsp baking soda
Cut in 1 TBL cold butter
Set aside

  1. 4 egg whites – Beat to stiff peaks
  2. 1/2 tsp cream of tartar
  3. scant salt
  4. When whites begin to foam, add 1/4 cup granulated sugar
  5. 1/2 tsp vanilla
  6. Finely grated lemon or lime rind
  7. After peaks have formed,
    • Add back in one egg yolkangel-after
    • 1 tsp vanilla
    • 1 TBL melted butter – BUT NOT HOT
  8. Fold in dry ingredients –  Do not overmix
  9. Pour into lightly greased ramekins
  10. Bake at 350° for 45-50 minutes – toothpick test
  11. Cool
  12. Run knife around edge and center
  13. Remove from mold
  14. Top with strawberries, blueberries, blackberries

OPTIONAL WHIPPED TOPPING

  • 1/2 C heavy whipping cream – Whipped until stiff
  • 1/3 C confectioner sugar
  • 1 TBL corn syrup


Shelling a Lobster

PREPARATION
Get large pot of water to boiling
Look for cross line on back
Pierce quickly with a butcher knife
Down and through to front
Straight into heavily salted boiling water for 2 minutes
SHELLING
Snap off the claws
Break tail at proximal joint . Twist
Press tail shell to crack to release meat till tail pulls free
Claws: snap off knuckle then pull or roll
Keep claws intact
Open up knuckles
. 8 legs- Start at thin end and r.o.l.l out meat
Gently score tail to lay flat
Lay out body, claws, and knuckles
Lay out legs
Sculpt head to lay in place
Brush with EVOO

Veggie Burger

INGREDIENTS

  • 1 C moderately mashed black beans
  • 1/4 C green bell pepper – diced
  • 1/4 C minced onion
  • 3 cloves minced garlic
  • 8 crushed Ritz crackers
  • 1/4 C brown rice
  • 1 egg plus 1 egg yolk
  • 2 TBL teriyaki sauce
  • 1 jalapeño
  • cumin, salt and pepper to taste
  • Grandpa's Thunder Powder or Arghhh Powder to taste

STEP BY STEP

  1. Put crushed black beans, onion and bell pepper into colander for 30 minutes to drain
  2. Set aside liquids for later use
  3. Mix solids with 8 crushed Ritz crackers
  4. Combine with 1/4 C brown rice
  5. 1 tsp each cumin, Grandpa's Thunder Powder or Arghhh Powder or to taste
  6. 1/2 tsp sea salt
  7. 1 deseeded jalapeño
  8. 1 egg plus 1 egg yolk
  9. Create 2-3 patties
  10. Cook 2-3 minutes per side
  11. Add teriyaki glaze while cooking

OTHER NOTES:

  • 1 C mashed black beans
  • 1/4 C green bell pepper – diced
  • 1/4 C minced onion
  • 3 cloves minced garlic
    •  
  • Put into colander for 30 minutes
  • Set aside liquids for later use
  • Mix solids with 8 crushed Ritz crackers
    •  
  • Combine with 1/4 C brown rice
  • 1/2 C whole black beans
  • 1 tsp each cumin, GPTP
  • 1/2 tsp sea salt
  • 1 deseeded jalapeño
  • 1 egg
    •  
  • Create 2-3 patties
  • Cook 2-3 minutes per side
  • Add glaze while cooking

Petite Sirloin

Fries, mushrooms, onions and corn were wrapped in foil and cooked at 350º for 30 minutes.

Petit Sirloin should be cut, then seared as follows

  1. Bring steak up to room temperature
  2. 3 minutes on one side, rotate
  3. 2 minutes on 90º rotation, flip
  4. 3 minutes on other side, rotate
  5. 2 minutes on 90º rotation
  6. Cover with foil and let rest 10 minutes


Berndes 11 inch Skillet

A SAD STORY WITH A GREAT OUTCOME – – – – –

This was a GREAT skillet, but recently (7 years after purchase) it has become unusable.  We will find out if Berndes will stand behind their Lifetime Warranty. I will post their reply below.  I approached them as a consumer, so they did not know that this entire situation was echoed here at Grandpa Cooks.


The First Note from Grandpaberndes-skillet

I am the main cook in our family.  I got my Berndes 11″ skillet about 6-7 years ago.  I loved it.  I treated it well, never used abrasives, never exceeded 450º and oiled it before each use.  The non-stick finish has eroded and the skillet is no longer usable.  I was going to throw it away, but see that it had a lifetime warranty.  How do I take advantage of that warranty?


The First Surprise

I must say that I am truly impressed. Not only did I get a reply, but it came within about 48 hours of my original message. More to come as I have it.


The Reply from Berndes

Robert,

Hello! We are the US distributor for Berndes Cookware. We received your email from the headquarters in Germany. We see that you have a pan that is showing signs of wear. We are happy to inform you that we will go ahead and send you a replacement. If you are able please send a photo of the whole pan and measure the pan from outer rim to rim in inches. Is this a fry pan or a different pan? Please let us know this information so we can see if we have that same pan available. Also please provide your shipping address. We will await your reply.

Thanks and have a good day!

We Really Care!

Amanda Stemen
Receptionist / Client Support
Range Kleen Mfg. Inc
4240 East Rd.
Lima, Ohio USA 45807


My Reply – Berndes wanted More Information

Amanda,

What a pleasure to hear from another person from Ohio.  I moved to Arizona from M2016-09-13-17-06-01arion, Ohio nearly 30 years ago.  I was also pleased to get a reply so promptly.

Attached is a measured top photo.  It is an 11 inch skillet.   My mailing address is …  (Address removed for my privacy)

Sincerest thanks,
Robert Andrews


2016-09-23-12-41-37The Result:  Berndes Just Earned a Lifelong Customer

So Maggie (my dog) started going crazy. She does that whenever a delivery person comes to the door. I had ordered two cookbooks, but nothing that I was expecting in a large box, but this was a VERY large box. I opened the box and there it was… my brand new Berndes pan – exactly like the other one, except new!

For those of you who have gone to the expense of buying quality cookware (especially non-stick) please review the rules about how to treat your precious skillets.  If you are looking to invest in something with which you will be happy, give Berndes a try.  Here is a link to Amazon for a quick and easy review of everything they have to offer.   Thanks Berndes for a job VERY well done.

Robert Andrews
Grandpa Cooks


SEE MY POST Care of your Non-Stick Skillets

HTML Snippets Powered By : XYZScripts.com