PREPARATION
Get large pot of water to boiling
Look for cross line on back
Pierce quickly with a butcher knife
Down and through to front
Straight into heavily salted boiling water for 2 minutes
SHELLING
Snap off the claws
Break tail at proximal joint . Twist
Press tail shell to crack to release meat till tail pulls free
Claws: snap off knuckle then pull or roll
Keep claws intact
Open up knuckles
. 8 legs- Start at thin end and r.o.l.l out meat
Gently score tail to lay flat
Lay out body, claws, and knuckles
Lay out legs
Sculpt head to lay in place
Brush with EVOO
Author: Robert Andrews
Veggie Burger
INGREDIENTS
- 1 C moderately mashed black beans
- 1/4 C green bell pepper – diced
- 1/4 C minced onion
- 3 cloves minced garlic
- 8 crushed Ritz crackers
- 1/4 C brown rice
- 1 egg plus 1 egg yolk
- 2 TBL teriyaki sauce
- 1 jalapeño
- cumin, salt and pepper to taste
- Grandpa's Thunder Powder or Arghhh Powder to taste
STEP BY STEP
- Put crushed black beans, onion and bell pepper into colander for 30 minutes to drain
- Set aside liquids for later use
- Mix solids with 8 crushed Ritz crackers
- Combine with 1/4 C brown rice
- 1 tsp each cumin, Grandpa's Thunder Powder or Arghhh Powder or to taste
- 1/2 tsp sea salt
- 1 deseeded jalapeño
- 1 egg plus 1 egg yolk
- Create 2-3 patties
- Cook 2-3 minutes per side
- Add teriyaki glaze while cooking
OTHER NOTES:
- 1 C mashed black beans
- 1/4 C green bell pepper – diced
- 1/4 C minced onion
- 3 cloves minced garlic
- Put into colander for 30 minutes
- Set aside liquids for later use
- Mix solids with 8 crushed Ritz crackers
- Combine with 1/4 C brown rice
- 1/2 C whole black beans
- 1 tsp each cumin, GPTP
- 1/2 tsp sea salt
- 1 deseeded jalapeño
- 1 egg
- Create 2-3 patties
- Cook 2-3 minutes per side
- Add glaze while cooking
Salmon Burger
Ingredients
- 1 lb salmon – cut into 1/4 inch cubes
- 1 egg – beaten
- 2 tsp lemon juice
- 1/2 C crushed Ritz crackers
- 1 tsp Grandpa's Thunder Powder or Arghhh Powder
- Dash of Choloula
Step by Step
- Mix above ingredients
- Form patties from chopped salmon mixture
- Refrigerate 4 hours
- Sauté 2-3 minutes each side
Petite Sirloin
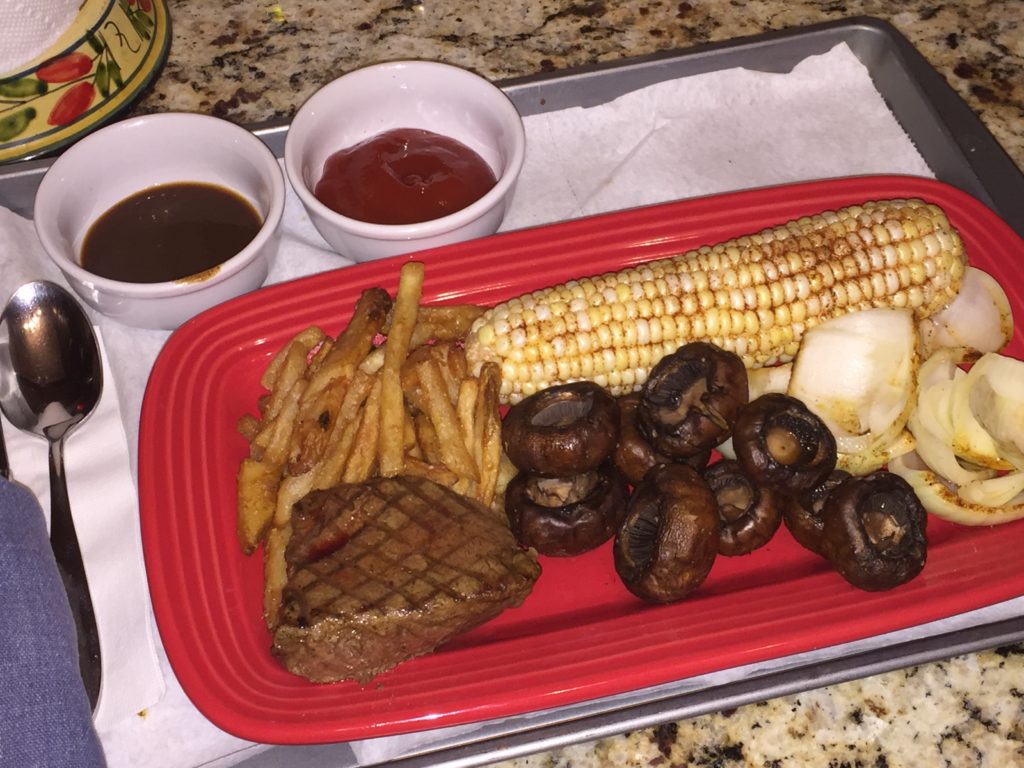 Fries, mushrooms, onions and corn were wrapped in foil and cooked at 350º for 30 minutes.
Petit Sirloin should be cut, then seared as follows
- Bring steak up to room temperature
- 3 minutes on one side, rotate
- 2 minutes on 90º rotation, flip
- 3 minutes on other side, rotate
- 2 minutes on 90º rotation
- Cover with foil and let rest 10 minutes
Berndes 11 inch Skillet
A SAD STORY WITH A GREAT OUTCOME – – – – –
This was a GREAT skillet, but recently (7 years after purchase) it has become unusable. We will find out if Berndes will stand behind their Lifetime Warranty. I will post their reply below. I approached them as a consumer, so they did not know that this entire situation was echoed here at Grandpa Cooks.
The First Note from Grandpa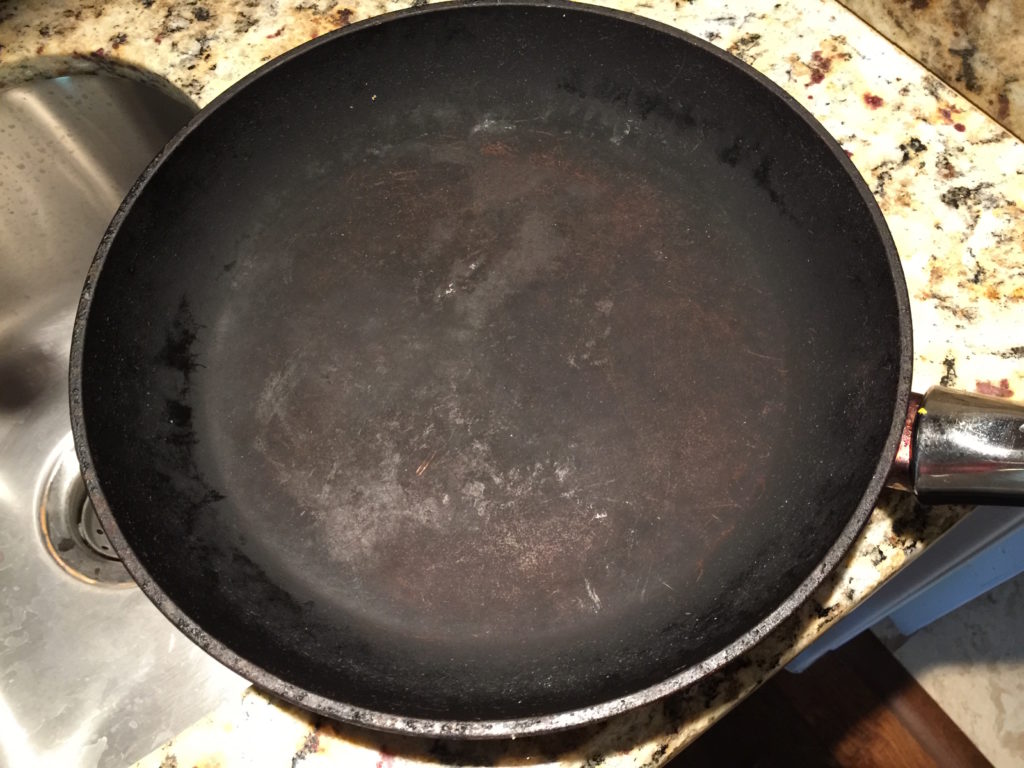
I am the main cook in our family. I got my Berndes 11″ skillet about 6-7 years ago. I loved it. I treated it well, never used abrasives, never exceeded 450º and oiled it before each use. The non-stick finish has eroded and the skillet is no longer usable. I was going to throw it away, but see that it had a lifetime warranty. How do I take advantage of that warranty?
The First Surprise
I must say that I am truly impressed. Not only did I get a reply, but it came within about 48 hours of my original message. More to come as I have it.
The Reply from Berndes
Robert,
Hello! We are the US distributor for Berndes Cookware. We received your email from the headquarters in Germany. We see that you have a pan that is showing signs of wear. We are happy to inform you that we will go ahead and send you a replacement. If you are able please send a photo of the whole pan and measure the pan from outer rim to rim in inches. Is this a fry pan or a different pan? Please let us know this information so we can see if we have that same pan available. Also please provide your shipping address. We will await your reply.
Thanks and have a good day!
We Really Care!
Amanda Stemen
Receptionist / Client Support
Range Kleen Mfg. Inc
4240 East Rd.
Lima, Ohio USA 45807
My Reply – Berndes wanted More Information
Amanda,
What a pleasure to hear from another person from Ohio. I moved to Arizona from M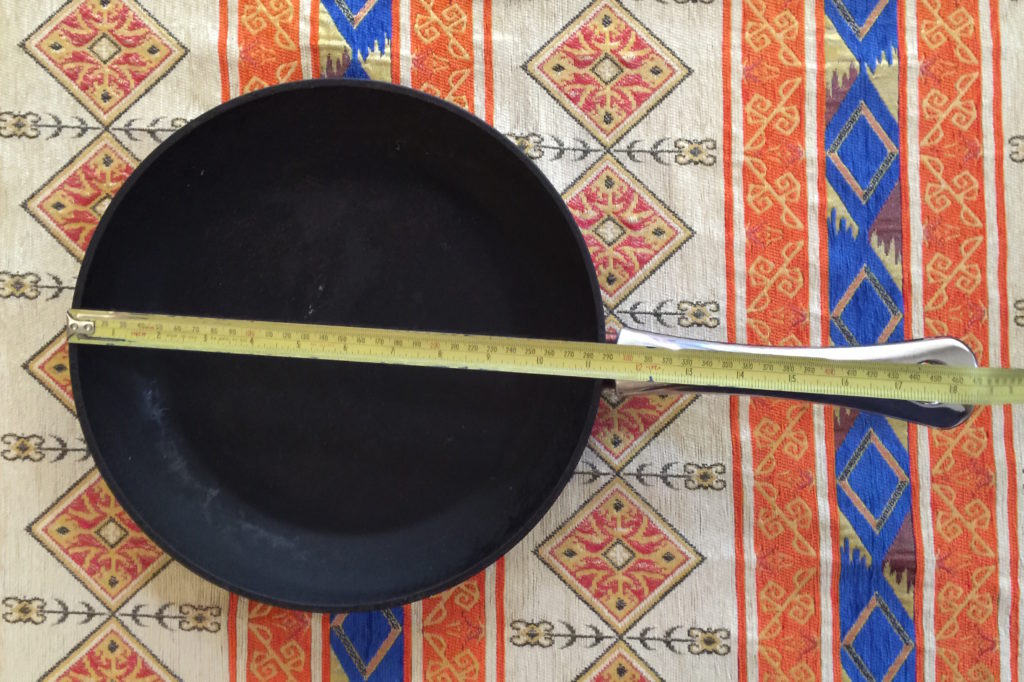 arion, Ohio nearly 30 years ago. I was also pleased to get a reply so promptly.
Attached is a measured top photo. It is an 11 inch skillet. My mailing address is … (Address removed for my privacy)
Sincerest thanks,
Robert Andrews
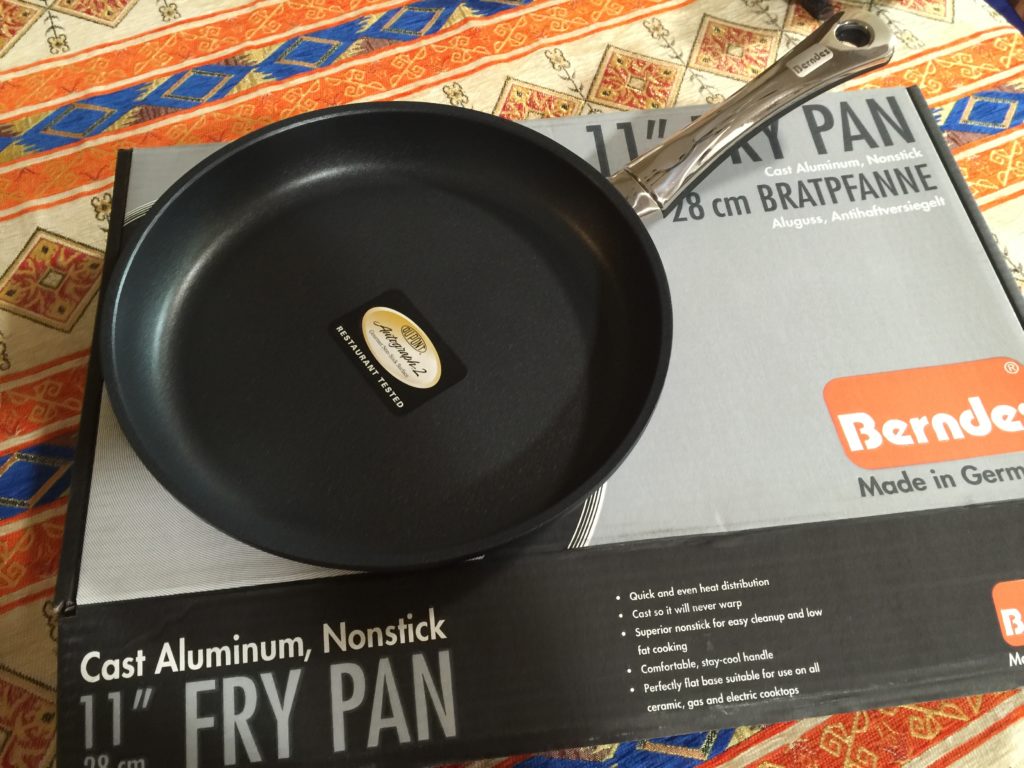 The Result: Berndes Just Earned a Lifelong Customer
So Maggie (my dog) started going crazy. She does that whenever a delivery person comes to the door. I had ordered two cookbooks, but nothing that I was expecting in a large box, but this was a VERY large box. I opened the box and there it was… my brand new Berndes pan – exactly like the other one, except new!
For those of you who have gone to the expense of buying quality cookware (especially non-stick) please review the rules about how to treat your precious skillets. If you are looking to invest in something with which you will be happy, give Berndes a try. Here is a link to Amazon for a quick and easy review of everything they have to offer. Thanks Berndes for a job VERY well done.
Robert Andrews
Grandpa Cooks
SEE MY POST Care of your Non-Stick Skillets
Muffalatta Burger
 As it turns out, nearly everyone knew about the Muffalatta Burger except me. A Google search brought up all kinds of different recipes. Anyway… This is a recipe deconstruction of this great hamburger presented by Southern Rail Restaurant here in Phoenix.
INGREDIENTS
- Pickled Dressing: Carrot, garlic, green olive, capers, sauteed onion, finely minced celery
- Provalone cheese
- Mortadella
- Salami
- Ham or bologna – fried
- Thin hamburger patty (NOT OVERCOOKED)
- Tomato
- Dijon mustard or mayo with mustard seed
- Rustic hamburger bun
STEP BY STEP
- Brush bun with melted butter
- Grill it so that it browns a little bit
- Spread mustard on buns
- Layer on tomato, meats and cheeses
- Top with pickled dressing
- Serve with crispy hot salted fries
Bread Roll

Ingredients
- Potatoes – 3 medium size
- Green Peas – ½ cup
- Sweet Corn – ¼ cup
- Cheese or any other ingredient you want to add
- Salt
- Red Chilly
- Green Chilly – 2 to 3
- Bread Slices – 8
- Green Chutney
- Tomato Sauce
Instructions
Bread Roll Filling
- Boil potatoes and mash finely – DO NOT use food processor
- Boil green peas and sweet corns and add to mashed potatoes.
- Add salt, red chilly and finely chopped green chilly to the mixture.
- You may also toast this mixture a bit in light olive oil to add to the flavors though I usually skip this part.
Bread Roll
- Take a big bowl and fill it with water. Take a slice of bread and dip in water for 2 seconds. Take the bread out and press in between your palms to remove the excess water.
- Take a spoon full of filling and put it in between the bread and roll it up from the sides to make a round ball.
- Deep fry in the oil of your liking.
- Serve with green chutney and red sauce. A strong ginger tea will double up the fun :).
This recipe first appeared on senseornosense.
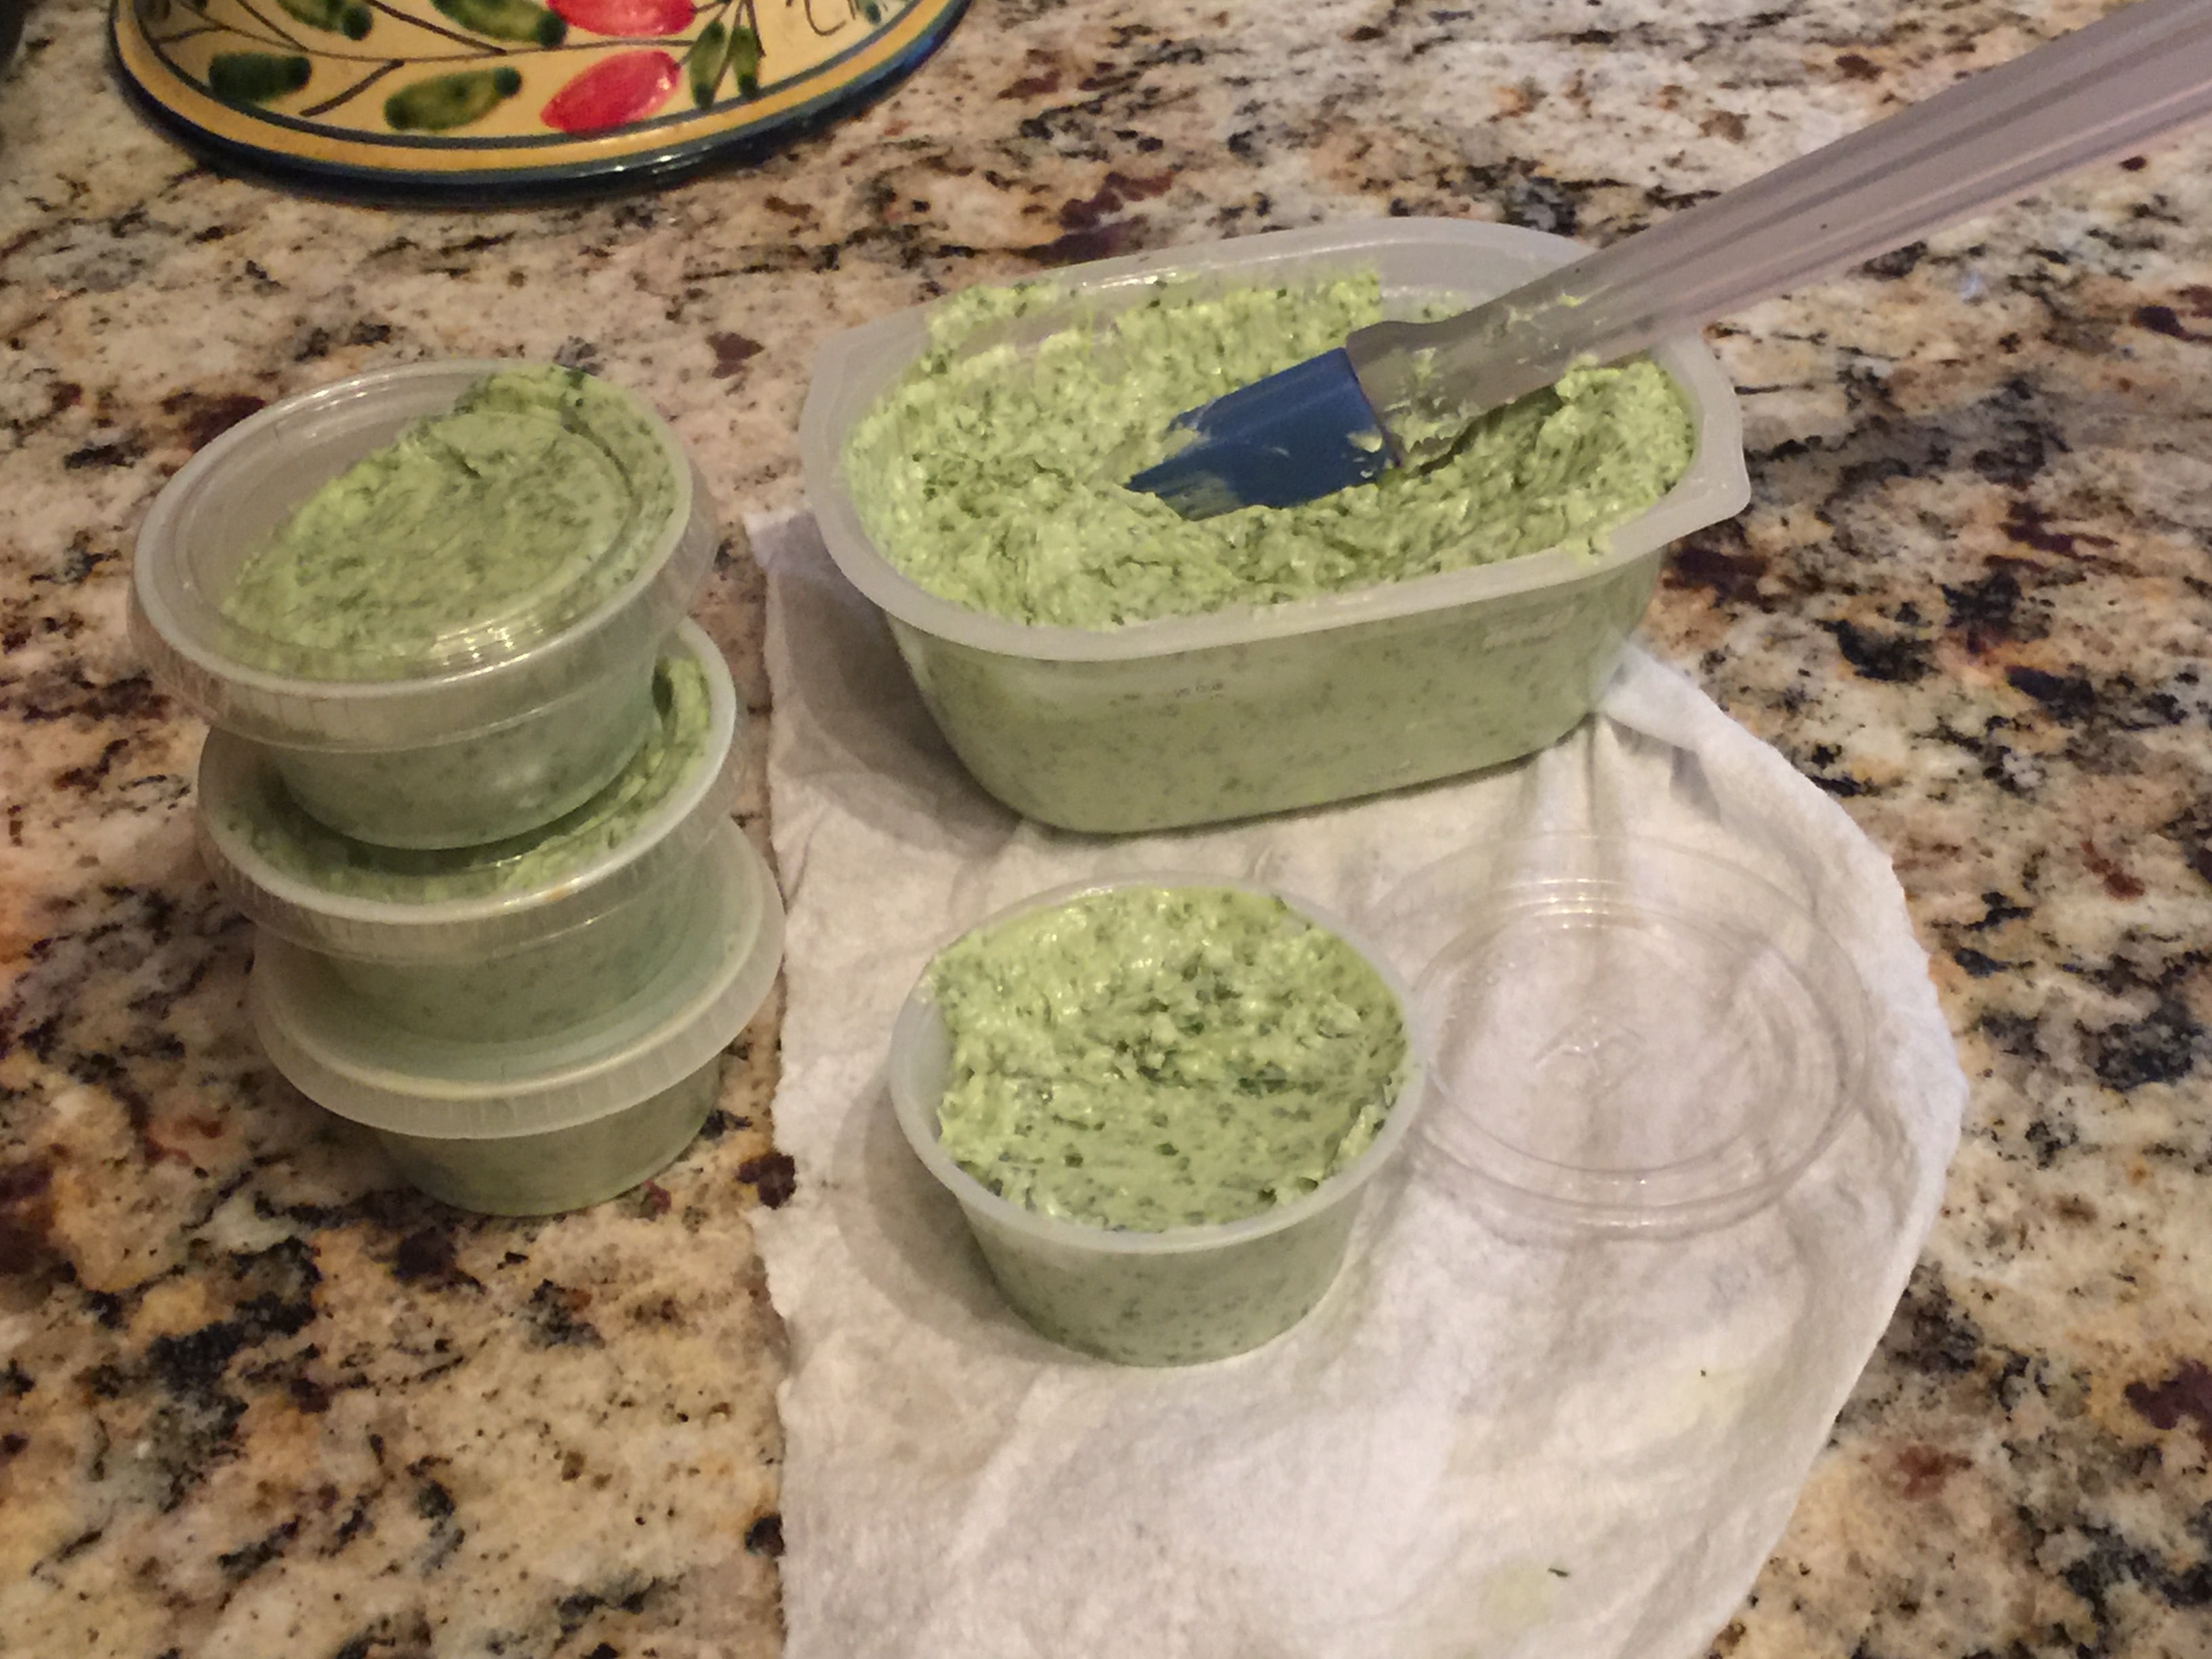
Lemon Basil Butter
 INGREDIENTS
- 1 large bunch of basil (about 6 Cups of leaves)
- 1 tsp citric acid
- 1 tsp salt
- 1/4 C grated Parmesan cheese
- 2 C butter
- 1/4 C Crisco
STEP BY STEP
- Clean the basil
- Select only unblemished leaves
Don’t use any with imperfections, as this could introduce bacteria - Add everything but the butter and Crisco
- Pulse in food processor to reduce in size
- Add butter and Crisco and process to blend and chop basil
- Use spatula as necessary to incorporate outliers
- Store in small take out containers or other tupperware
- Refrigerate for up to three months
Recipes from Mama’s Kitchen
Found an old cookbook that I started back about 1985. Here are some of the recipes:
- Lazy-agna (Lasagna)
- Crocker Doodle Doo (Crock Pot Chicken)
- Super Duper Egg Sandwich
- French Cakes
- French Toast
- Miner’s Lunch
- Hamburgers with veggies – onion, carrot – 350º for one hour
Basic Pudding & Swirl Pudding
 King’s Pudding
INGREDIENTS
- 2 C milk or Half and Half
- 1/4 C corn starch
- 1 egg + 3 egg yolks
- 1 tsp real vanilla
- 1/2 C condensed milk
OR: 1/2 C more milk plus 1/2 C sugar
(Use egg whites to make meringue topping)
STEP BY STEP
- Warm milk in microwave until it is warm to the touch, but not hot.
- Mix in all other ingredients
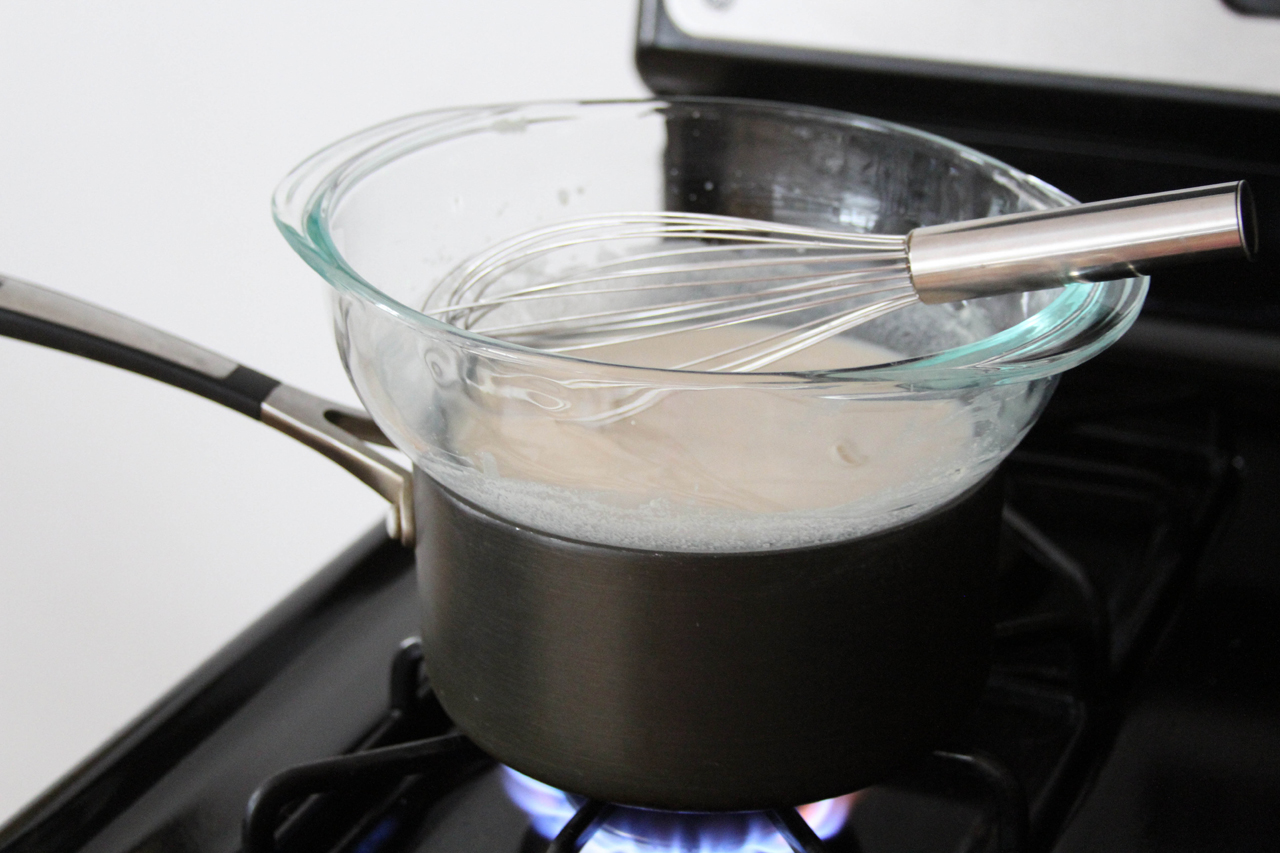
- Cook in double boiler (glass bowl) until thickened – Stir constantly
Garth’s Chocolate Swirl
- 3 C whole milk
– Start to bring up to a simmer
– meanwhile combine . . . - 1/4 C milk
- 1/4 C corn starch
- 1 1/2 tsp vanilla
- 4 egg yolks (save whites)
- 3/4 C sugar
- pinch of salt
- As mentioned before, start to bring milk up to the merest simmer over medium low heat
- Combine all other ingredients in a mixing bowl
- As soon as you see whisps of steam coming from the top of the milk, temper the simmering milk into the egg mixture.
Tempering means that you want to pour half of the hot liquid SLOWLY into the cold egg mixture while whisking continually. If you don’t whisk, or if you pour too quickly, you will end up with scrambled eggs in your pudding.
- Once combined, return to the heat and continue heating until the pudding starts to thicken.
- Meanwhile, put 2 TBL butter into a small bowl.
- Once it begins to thicken, pour half in with the butter.
- Add 1 TBL cocoa to the pan and stir both to combine.
- Let cool about three minutes, then pour into 2-4 ramekins – pouring half chocolate and half vanilla
- Let cool 20 minutes before serving
Optional Treatment
- Add 2-3 TBL cocoa at Step 2 above
- Prepare a crust before starting the entire recipe
• 4 graham crackers – crushed, 1/2 stick butter - Pour pudding over bananas and vanilla wafers – refrigerate
- Topping – Whip in very cold glass bowl
• 1/2 C cold heavy cream, 1/4 C powdered sugar - Break and roast vanilla wafers @ 325º for 20-25 minutes – toss with 2 T sugar, 2 T brown sugar, 2 T melted butter, 1 tsp salt
- Make a Trifle with layered ingredients :: Wafers, banana jam, cream, wafers, banana, cream, wafers, caramel topping
- Another trifle layer :: banana jam :: 2 bananas, sugar, lemon and pectin
Apple Butter
INGREDIENTS
- 6-8 medium to large apples
Fuji or Gala if you like sweet apple butter
Granny Smith or Red Delicious for a more tart apple butter
About TWO POUNDS by weight AFTER peeling and coring
(You can cheat and use applesauce, but it is MUCH better with real apples) - 1/2 C of apple cider (no preservatives if possible)
- 1 C granulated white sugar
- 1 C brown sugar
- 1 teaspoons cinnamon
- 1/2 tsp nutmeg
- scant teaspoon cloves
- scant salt
- 2 tsp lime juice
- 1 tsp lemon juice
- 1 tsp vanilla extract
This recipe makes about 2-4 jars, so if you plan on using it over the next few months, you don’t have to can it. If you are planning to can some, double the recipe and follow standard canning procedures (which will not be repeated here)
STEP BY STEP
- Wash your jars in the dishwasher so they are as sterile as possible
- Put a small pot of boiling water in the far corner of your stove top and let it simmer for now
- Peel and core your apples, and then chop, mince or grate
- Bring all other ingredients up to a boil on your stove top
- Add your apple pieces to the boiling mixture
- Let simmer about 20 minutes
- Increase heat to medium high and cook for 1 HOUR stirring almost constantly with a flat spatula, scraping the bottom of the pot to keep from scorching. (Bring a good book into the kitchen with you.)
IMPORTANT NOTE: During the cooking process, the liquid will expand to about TWICE the original size, so make sure you have a large pot. - If you don’t have an immersible thermometer, GET ONE. Here is the one that I use, and I LOVE IT. It is by Thermoworks, and is not all that expensive for the use you will get out of it. This is also good for cooking meat, potatoes, etc. I also got an infrared thermometer that I used for grill and pan temperatures.
THE CANNING PROCESS
- Heat until it reaches 220-222º
- Put a lid (one by one) into the small pan of boiling water to soften the seal.
- Pour into prepared canning jars, screw lid on finger tight, and set on the counter.
Even without hot water bath canning, the “counter canned” apple butter should last a few months in the refrigerator.
Steam Juicer
Thanks to Living HomeGrown for some tips and feedback on using my steam juicer.
I’ve used my steam juicer for my soft fruits such as grapes, raspberries, etc. We last a huge branch of our lime tree last night, so today will be trying this on citrus (yet untested) and I am not sure how well it will work. I know the zest juice will be viable, but am not sure about the lime juice itself.
If all of the water evaporates, you can damage your juicer, so a trick that I use is to put two pennies in the bottom of the pan. They will start to rattle when the water gets low and steam forms underneath the pennies.
Quick Green Salsa
INGREDIENTS
- 6 jalapeños
- 2 Hatch or Anaheim peppers
- 4 tomatillos
- 1 grilled Vidalia onion
- 1/2 grilled red onion
- 2 cloves grilled garlic
- 2 dried arbol chilies – seeds removed
- salt
- Water and apple cider vinegar
- 1 hand of fresh cilantro
STEP BY STEP
- Remove tomatillo skins
- Deseed your arbol chilies
- Cut your onions into thick wedges – leaving the skins intact
- Put all ingredients on a baking sheet
- Broil for about 3-6 minutes
- Remove arbol chilies when they start to blacken
- Remove grilled garlic when the skin starts to blacken
- Remove the onions when the edges start to blacken
- Peel the onions and garlic
- Leave the peppers in place until the skins are nearly all blackened
- Put the peppers into a glass bowl and cover with plastic wrap for 5 minutes
- Peel off the pepper skin using a paper towel – DO NOT RINSE
- Put everything into a blender or food processor
- Add fresh cilantro
- Add 2 TBL vinegar and pulse
- Add water just until the ingredients blend together
- Do not puree, but leave a bit rustic
Corn Cakes
INGREDIENTS
- 3/4 Cup Flour
- 1/4 Cup Maseca
- 1/2 tsp Baking Powder
- 1/2 tsp Baking Soda
- 1 tsp Salt
- 1 tsp Sugar
- 1 oz Melted Butter
- 1 can Corn
- 2 Eggs
- 1/2 Cup Buttermilk
STEP BY STEP
- Combine all Dry ingredients in a bowl except for corn.
- In another bowl, whip eggs and buttermilk
- Stir into dry ingredients
- Add melted butter then fold in Corn.
- Using a lightly greased skillet over medium heat, make 2-3 TBSP sized cakes and cook until browned on both sides and cooked through.
Sicilian Bread Soup
INGREDIENTS
- Abot 4 C Left-over pieces of rustic bread. Basic white sponge bread will be a disaster if you try to use it.
- 6 cloves whole garlic
- To taste: red pepper, salt, pepper
- 2 TBL EVOO
- 1/2 C carrot
- 1 C onion
- 1/2 C celery
- 1 can peeled tomatoes
- Basil leaves
- Chicken stock
- Scallions
- Romano Cheese or Parmesan Cheese
STEP BY STEP
- Saute onion in EVOO
- Add carrot and celery
- Add garlic
- Add red pepper, salt and pepper
- Add tomatoes – crushed or broken apart
- Cut bread into 1 inch pieces – about 4-6 C of it – and add to pot
- Add basil chiffonade
- Add 4-6 C of chicken stock
- Simmer 90 minutes
- Stir every 15 minutes
- Top with scallions or basil
- Top with cheese
- Drizzle with EVOO
This is also called Pappa al Pomodoro and was originally a peasant dish in Italy.
Candied Citrus
 INGREDIENTS
- Citrus with little to no blemishes on the skin
- 1 C Water
- 1 C crushed ice with water
- 1-1/2 C sugar
STEP BY STEP
- Heat 1 C water plus all of the sugar
- Stir until sugar is dissolved
- Remove from heat and stir in ice mixture
- Slice citrus as absolutely thin as possible – peels and all
- Slip citrus slices into the sugar water
- Cover with plastic wrap
- Let soak overnight in the refrigerator
- Finish with a fine layer of powdered sugar or Turbinado sugar
- Let air dry on a rack overnight before storing.
If you would like another recipe, CLICK HERE for Candied Citrus from www.TasteOfHome.com – the photo is also from Taste of Home.
Tips: Tuna
- A sashimi knife called a yanagi-bocho or yanagi knife is sharpened only on one side. This allows you to slice the sashimi with minimal bruising or mashing.
- Tosha Soy is generall used for sashimi dipping. You can make an acceptable substitute using soy + sake + mirin + bonito flakes. Boil the mixture, then cool, then strain.
- Create a carrot wave, but slicing a carrot very thin, then wrapping it around a chop stick. Immerse it in ice water for 5 seconds, and the form will stay in place.
- NOTE: White tuna – Kanpachi or Amberjack – is a heartier fish and will hold up better for many recipes, but it does not offer the presentation that RED tuna offers.
- A typical recipe for Amberjack is to carve very thin slices on the bias, and then skewer them with a thin lemon medallion.
- When cutting tuna, let the knife do the work and be patient. DO NOT push the knife through the meat, but rather let the moving knife gently slice through the meat.
- Put your finger on top of your carving knife to stabilize it and keep it from moving from side to side.
- Start your slicing movement before you even touch the surface of the fish.
Easy Pecan Pie
Nuts: Pecans, walnuts, cashews – whatever you like best – chop very coarsely
INGREDIENTS
- 1 stick melted butter
- 1 tsp vanilla
- 1/2 tsp salt
- 1/2 C molasses
- 1/2 C dark corn syrup or Karo
- 1/2 C brown sugar
- 2 TBL Kentucky Bourbon
- 2 eggs – beaten till frothy
Note: Try beating egg whites to a medium peak if you want a less dense pie
STEP BY STEP
- Use ready-made prepared pie crust
or mix flour with cold butter and ice water - Bake docked pie shell for 10 minutes at 350º
- Put crushed pecans in the bottom of the pie shell
- Pour mixture into pie shell
- Cut a donut out of foil or parchment paper to protect the shell from burning for the first 20 minutes.
- Bake at 350º for 35-45 minutes
- Remove protective donut after 20 minutes
- Bake an additional 15-20 minutes
- Cool before cutting
Jesco Lifetime Guarantee
We were preparing for a party, when I found a note that I had written to myself over a year ago. It stated that I had sent in a knife for replacement, but I realized that the knife had never arrived. I thought perhaps I had not mailed it in, or it got lost in the mail, but I looked back and found the check we had written, and on the back evidence that you had cashed it.
The knife in question is your “cut nails then cut a tomato” knife with the two points on the end.
The quality of the knife was outstanding. I actually used it for yard work, cutting small branches, then brought it in and used it to slice paper thin tomatoes. It really does what you claim. I absolutely loved it.
I had forgotten about the guarantee, and bought an entire set, with which I am very happy, but then I saw that the first knife was actually guaranteed. I sent it in with high hopes, but the replacement knife never arrived. I would still like the replacement knife promised to me.
I am enclosing bank images of the checks; Front and back. The check had actually been cashed. Please send a replacement knife to Robert Andrews, 903 W Glendale Ave, Unit 3, Phoenix, AZ 85021
So far I have not been able to contact Jesco. My eMails have come back as undeliverable. More info to come as I have it.
Our Garden – July 2016
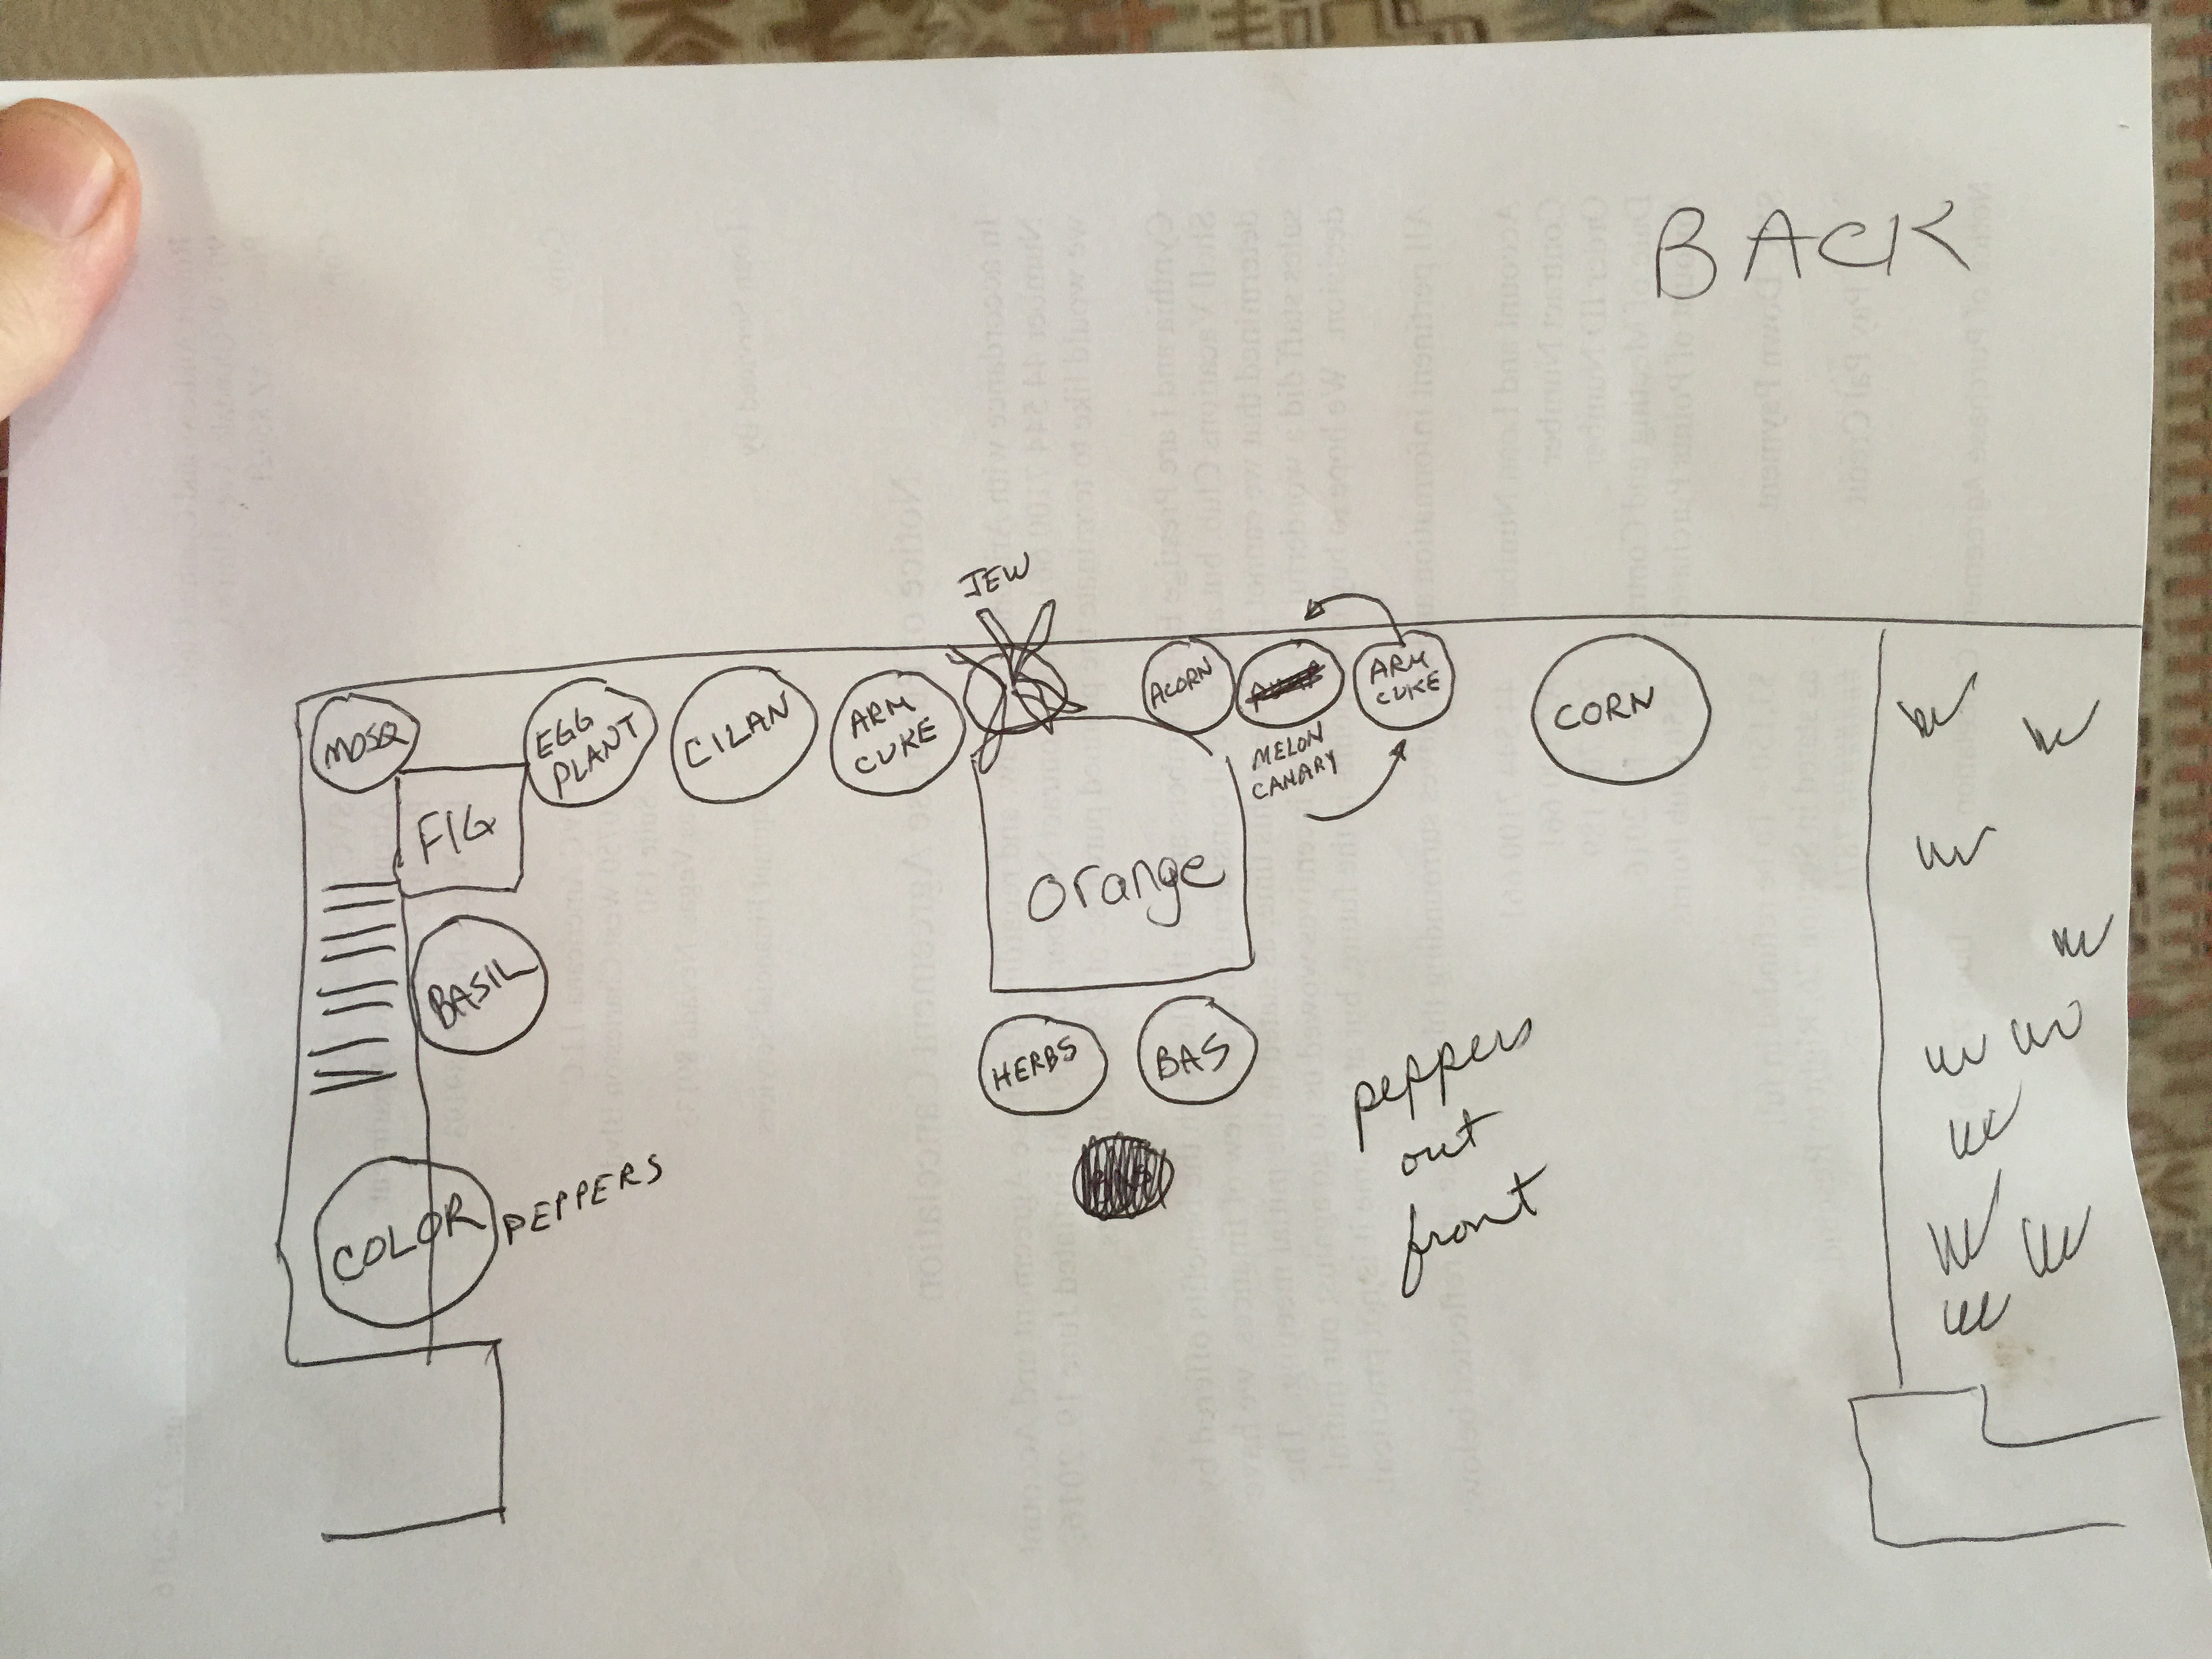
This has changed a bit, so I will make notes here. Starting from the COLOR pot to the left and working my way around.
- I didn’t put any peppers in the pot with the color spots in them.
- The Basil has been replaced with Hatch Chilies
- Nothing additional in the Fig Tree basin
- Mosquito bush (citronella) is also unchanged.
- We are waiting for August to plant Eggplant starts. Meanwhile there are sunflowers there.
- The cilantro will be replaced with an Acorn Squash start. Meanwhile there are sunflowers there.
- The Armenian Cuke will be replaced with a Canary Melon, if we can find one. Meanwhile there are sunflowers there.
- Wandering Jew is just as it remains
- The next three pots will be Scallion starts, Cilantro start and a Daikon radish start.
- The pot with the corn will now be some type of cucumber, but meanwhile has sunflowers there.
- Of the two pots out front, the basil has three plants in it, and the “herbs” has a Chiltipen ( Americans erroneously call this a Chili Tepin )