First Watch – Poppyseed Dressing

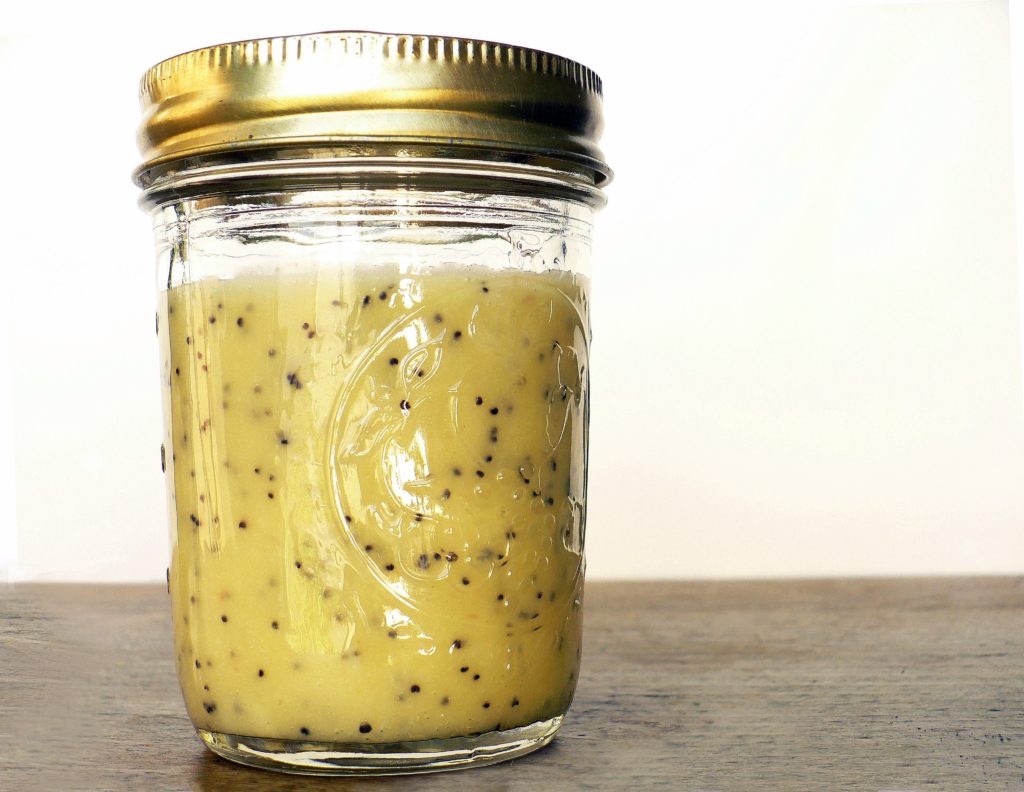
poppyseedFirst Watch (a local eggery and diner here in Phoenix) has undergone a DRASTIC change.  As it turns out, First Watch was started by four friends, who had an idea.  And a great idea it was.  First Watch has been my wife and my favorite breakfast place for about 25 years.  Recently two of the founders died, and the heirs decided that restaurant management was not quite their thing.  They sold it to a corporate conglomerate, and while it is still an OK place to eat, the menu has changed dramatically.

One of the things they have stopped providing is their Poppyseed Dressing.  They offer a Lemon dressing, Ranch dressing, and a Chipotle Ranch dressing.  Since it is not a restaurant secret any more, I asked for their recipe for their famous Poppyseed Dressing.  Their recipe (created for a large batch) is at the bottom of this page.  My modified recipe (with a few substitutions) is immediately below.

Special thanks to First Watch Restaurant for providing the recipe.

First Watch – Poppyseed Dressing – Two servings

  • 3 TBL canola oil
  • 3 TBL Karo syrup or honey (personal taste)
  • zest and juice from one lemon
  • 1 tsp white vinegar
  • 1/2 tsp dry mustard
  • 1/4 C minced onion
  • 1/2 tsp poppy seeds
  • Scant salt to taste

First Watch – Poppyseed Dressing – small bottle

  • 1 C canola oil
  • 1 C Karo syrup or honey (personal taste)
  • zest and juice from 3-6 lemons (3 TBL)
  • 3 TBL white vinegar
  • 4 tsp dry mustard
  • 1/4 C minced onion
  • 2 TBL poppy seeds
  • 1/2 tsp salt

Original Recipe – Directly from First Watch – about 3/4 Gallon

  • 9 C oil
  • 9 C sugar
  • 1 C lemon juice
  • 1 C white vinegar
  • 7 TBL dry mustard
  • 5 C diced onion
  • 1/2 C poppy seeds

Alternate:  Beatitudes Poppyseed Dressing

  • 1 egg yolk with 1/2 C canola oil drizzled and emulsified together
  • Mix in 1 TBL Dijon mustard,
  • 2 TBL hone
  • scant garlic powder, salt and pepper
  • 1 tsp apple cider vinegar
  • 1-2 TBL poppy seeds

Use in a salad or as a slaw dressing with apple, cabbage and craisins.

Pizza Scrap Frittata

INGREDIENTS

  • Left over pizza crusts – about 3 cups
  • 3 eggs
  • 1/4 C milk
  • 1 C shredded cheese (Mexican mix) yellow and white
  • 1 can Crushed tomatoes (drained)
  • Basil
  • 2 chopped cloves of garlic

STEP BY STEP

  1. Beat together your milk, eggs and cheese in a large mixing bowl
  2. Cut or tear your crusts into 1/2 inch pieces
  3. Combine pieces of pizza with tomato, garlic, basil and toss into the milk mixture
  4. Pour it all into a greased baking dish
  5. Bake at 350º for 40 minutes

Mozzarella Bordered Pizza

This is a pizza similar to the one served at Pequod’s Pizza in Chicago.

INGREDIENTS

  • Lots of slices of mozzarella cheese
  • 1/4 C EVOO
  • Lots of salt and pepper – about 1 TBL each
    PIZZA DOUGH
  • 3 C Flour
  • 2 TBL yeast
  • 1/4 C very warm (not hot) water
  • 1 TBL sugar
  • 1 TBL EVOO
    TOPPINGS
  • San Marzano whole tomatoes (crushed)
  • Pecorino / Romano cheese
  • Oregano
  • Toasted garlic

STEP BY STEP

  1. Mix together yeast, warm water and sugar
  2. Let proof while you prepare all the other ingredients
  3. Pulse together the flour and the yeast mixture and the EVOO
  4. Drizzle ice cold water into the (running) food processor until the dough starts to ball up
  5. Remove to finish on floured surface – knead until it is springy and responsive
  6. Preheat your oven to at least 500º but 600º if you have that capability
  7. Set aside in a slightly warm space to rise for 30-45 minutes
  8. Warm cast iron skillet to about 200º
  9. Pour in EVOO, salt and pepper – brush bottom and sides with oil
  10. Turn out dough onto skillet and flatten it (roughly) by hand, but not quite to the edge/side of the pan
  11. Lay mozzarella cheese between the sides and the dough – all the way around
  12. Keep laying until the whole thing is covered from edge to center to edge
  13. Crush your tomatoes all across the cheese
  14. Add your romano, and other toppings
  15. Put into your super-hot oven for 16-24 minutes
  16. Serve in nice thick crunchy slices.

Mexican Pizza

This is a Blue Corn Chicken Enchilada similar to the one served at the Rooftop Pizzeria in Santa Fe, NM.

INGREDIENTS

  • 1/2 C cornmeal
  • 1 C High Gluten Flour
  • 1 tsp salt
  • 2 TBL EVOO
  • ice cold water
    TOPPINGS to taste
  • Alfredo sauce
  • Shredded chicken
  • Asadero cheese
  • Green chilies
  • Cotija cheese
  • 1/2 onion – sliced thin

STEP BY STEP

  1. Pulse all dry ingredients in food processor
  2. With the food processor running, drizzle in EVOO
  3. While running, drizzle the the ice water until the dough starts to ball up
  4. Sprinkle cornmeal on the counter
  5. Take dough ball out of food processor and knead it by hand until it starts to become more elastic
  6. Wrap it in plastic wrap and let it rest on the counter for ten minutes
  7. Roll out on an upside down cast iron skillet
  8. Bake 10 minutes at 350º
  9. Meanwhile, prepare your toppings
  10. Remove the pizza base and set on counter
  11. Turn up oven to 500º
  12. Put an Alfredo base on the pizza, then the other toppings
  13. Put back into the hot oven for 5-8 minutes
  14. Cut with pizza cutter and slide onto plates to serve

Cheddar Burger Disk

INGREDIENTS

  • Baking ring
  • 3/4 LB cheddar cheese
  • 1/4 LB Parmesan cheese

STEP BY STEP

  1. Put baking rings onto a baking sheet
  2. Put 1/4 C cheese into each ring and spread out
  3. Bake at 400º for 8-10 minutes, or until browned
  4. Remove from oven
  5. Let cool 60 seconds, then remove ring
  6. Let cool another 5 minute before handling cheddar disks
  7. Use as a hamburger topping

French Onion Soup Burger

INGREDIENTS

  • A few French rolls
  • 1 LB 80/20 ground beef
  • 4 strips bacon
  • 1/4 LB gruyere
  • 2 TBL bleu cheese
  • 1/2 onion – sliced thin
    SECRET SAUCE
  • 1 strip bacon – crisp and crushed
  • 3 TBL butter – softened
  • 2 TBL mayo or salad dressing
  • 1 tsp chipotle powder
  • 1/2 tsp garlic powder
  • 1/2 tsp onion powder

STEP BY STEP

  1. Cook bacon crisp – set aside
  2. Caramelize your onions – set aside
  3. Mix 2 strips crumbled bacon, cheeses and ground beef together
  4. Spread sauce onto halved french rolls
  5. Toast cut face of French rolls
  6. Form into patties that will fit your French rolls
  7. Cook over high heat in cast iron skillet
  8. Put patty on your bun
  9. Top with caramelized onions
  10. Top with halved bacon slice
  11. Put under the broiler to reheat
  12. Top with baby arugula

Turkey Burger

INGREDIENTS

  • 1/2 LB ground turkey white meat
  • 1/2 LB ground turkey dark meat
  • 1/4 LB grated gruyere cheese
  • 1/2 onion – sliced thin
  • 1 TBL EVOO
  • 1 TBL cold butter
  • 1 TBL melted salted butter
  • Soft deli-sized hamburger bun
  • Dijon mustard
  • May or salad dressing

STEP BY STEP

  1. Heat cold butter and EVOO in a saute pan over medium heat
  2. Put in the onion and let cook while you do everything else
  3. Mix ground turkey and grated cheese
  4. Form into thin patties
    Thin allows for more caramelization
  5. While those are cooking, butter and brown your buns
  6. Continue to caramelize your onions
  7. Cook your patties until they start to brown or blacken on the edges
  8. Put DIjon on one bun, and mayo on the other
  9. Serve two patties with caramelized onions in between the patties

Easy Pasta Salad

Ingredients

  • Some sort of fancy pasta – twirls, ears, whatever…
  • One egg (separated)
    This means the yolk in one small bowl, and the yolk in another
  • 1 TBL red vinegar
  • 1 TBL honey
  • 1 TBL mayo
  • 1 TBL EVOO
  • 2 basil leaves
  • 1 clove of garlic – crushed
  • Salt and pepper to taste
  • Optional: Black olives, feta cheese, cucumber, shredded cheddar, chives, parsley, cilantro

Step by Step

  1. Cook the pasta till soft
  2. Mix red vinegar, one egg yolk, honey, mayo and EVOO
  3. Add in garlic, salt, basil and pepper
  4. Toss everything together in a big mixing bowl.
  5. Add optional chopped black olives, feta, cucumber and shredded cheddar
  6. Top with tarragon, chives, cilantro or parsley

Toasted Mango Oat Desert Bar

  1. Mix flour, butter, sugar and salt.
  2. Baked at 350º for ten minutes
  3. Mix eggs, sugar, lemon peel and juice
  4. Add canned mango puree
  5. Mix with flour until you have a loose batter
  6. Pour over top of your baked bottom crust and spread
  7. Bake 325º for 25 minutes
  8. Sprinkle 1/4 C oats (or granola) over the top and press down
  9. Refrigerate before cutting

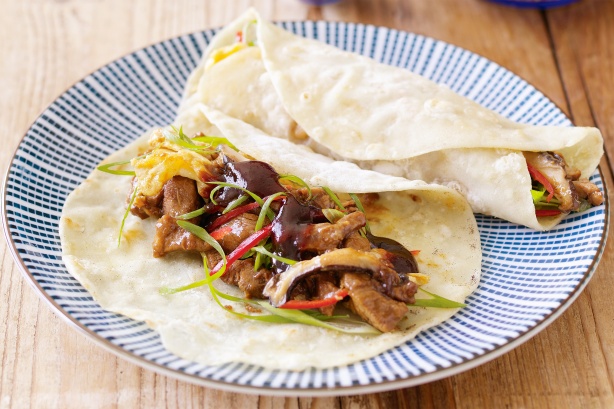
Mu Shu Pork

mushu

READ HERE HOW TO MAKE MU SHU PANCAKES

INGREDIENTS

  • Pork Tenderloin
  • Shitake mushrooms (fresh or dried)
    – If dried, soak in boiling water 5 minutes
  • 2 TBL soy
  • 1 TBL dry sherry
  • 2 tsp cornstarch
  • 2 eggs
  • 1 TBL oil
  • 6 scallions (whites and greens thinly sliced and separated)
  • Bamboo shoots
    PORK MARINATE
  • 2 TBL soy
  • 1 TBL dry sherry
  • 1 tsp honey
  • 1 tsp ginger
  • 1/2 tsp white pepper

STEP BY STEP

  1. Mix together Pork Marinate – set aside
  2. Cut Pork Tenderloin half
  3. Wrap and refrigerate one half
  4. Cut the other half into two or three long strips
  5. Cut into thin medallions
  6. Let pork marinate with mixture created in Step 1
  7. Slice your shitakes very thin
  8. MUSHROOM SAUCE:  Mix 2 TBL soy, 1 TBL dry sherry, 2 tsp cornstarch and 1/3 C shitake water or chicken broth
  9. In hot wok (or pan) cook two eggs – soft scrambled – set aside
  10. Add 1 TBL oil and then your scallion whites
  11. Add your pork marinate into the pan
  12. Add your pork and saute about 2-3 minutes – set aside
  13. Add 1 TBL oil then your bamboo shoots and mushrooms
  14. Add 2 C shredded cabbage and your scallion greens
  15. Add your mushroom sauce and toss until reduced and thickened
  16. Add back your pork and eggs and toss to combine
  17. Serve with mu shu pancales and Hoisin sauce.

Crispy Orange Chicken or Beef

INGREDIENTS

  • Two chicken breasts or 1 LB flap meat or 1 LB skirt steak
  • 1 TBL soy sauce
  • 6 TBL corn starch or potato starch
  • 3 C Vegetable oil – heated to 375º
    SAUCE
  • 1/4 OJ
  • 3 TBL molasses
  • 2 TBL honey
  • 2 TBL soy sauce
  • 2 TBL dry sherry
  • 1 TBL rice vinegar
  • 2 tsp sesame oil
  • Skin peeled from one orange
  • 1/2 red bell pepper
  • 2 TBL ginger – minced
  • 3 cloves garlic – minced
  • 1 tsp red chili flakes
  • 4 scallions – whites and greens minced, but kept apart
  • Rice – Cooked

STEP BY STEP

  1. Cut chicken or beef into 1/4 inch strips against the grain
  2. Toss meat in 1 TBL soy sauce
  3. Drain briefly, then toss in 6 TBL corn starch
  4. Put onto a baking sheet and into the freezer for one hour
  5. Start 3 C Vegetable oil heating up to 375º
  6. Cook meat in small batches and set on paper towel and bread rack to drain
    SAUCE
  7. Meanwhile, mix OJ, molasses, soy, sherry, vinegar and sesame oil.  Set aside
  8. Cut orange peel into VERY thin julienne strips
  9. Cut red bell into slightly thicker julienne strips
  10. Fry orange peel and scallion whites in 2 TBL of the deep fry oil – cook till it starts to brown
  11. Add ginger, garlic and chili flakes
  12. Cook about 30 seconds, then add your sauce, scallion greens and meat
  13. Stir to combine and reheat
  14. Serve over cooked rice

Tomato Sauce from Scratch

  1. Bring a pot of water to a boil. Have ready a large bowl of iced water. Plunge whole tomatoes in boiling water until skin starts to peel, 1 minute. …
  2. In a large pot or Dutch oven over medium heat, cook onion, bell pepper, carrot and garlic in oil and butter until onion starts to soften, 5 minutes. Pour in pureed tomatoes.

How To Make Basic Tomato Sauce with Fresh Tomatoes

Makes about 8 pints

What You Need

Ingredients
15 pounds ripe tomatoes
1/4 to 1/2 cup lemon juice or red wine vinegar
2 teaspoons salt (optional)

Optional ingredients:  grated carrot, chopped onion, minced garlic

Equipment
6 1/2-quart or larger Dutch oven or stockpot
Mixing bowls
Slotted spoon
Knife and cutting board
Food processor or blender
Jars for canning or containers for freezing

Instructions

  1. Boil a pot of water and prep the ice bath: Bring a large Dutch oven or stockpot of water to a boil over high heat. Fill a mixing bowl with ice and water and set this next to the stove.
  2. Prepare the tomatoes for blanching: Core out the stems from the tomatoes and slice a shallow “X” in the bottom of each fruit.
  3. Blanch the tomatoes to peel them: Working in batches, drop several tomatoes into the boiling water. Cook until you see the skin starting to wrinkle and split, 45 to 60 seconds, then lift the tomatoes out with the slotted spoon and plunge them into the ice water. Continue with the rest of the tomatoes, transferring the cooled tomatoes from the ice water to another mixing bowl as they cool.
  4. Strip the peels from the tomatoes: When finished blanching, use your hands or a paring knife to strip the skins from the tomatoes. Discard the water used to boil the tomatoes.
  5. Roughly chop the tomatoes: Working in batches, pulse the tomatoes in the food processor. Pulse a few times for chunkier sauce, or process until smooth for a pureed sauce. Transfer each batch into the Dutch oven or stockpot. Alternatively, chop the tomatoes by hand. Process through a food mill for a smoother sauce. For a very chunky sauce, skip this step entirely and let the tomatoes break down into large pieces as they cook.
  6. Simmer the tomatoes: Bring the tomato sauce to a simmer over medium heat. Continue simmering for 30 to 90 minutes, stirring occasionally, until the sauce reaches the taste and consistency you like.
  7. Stir in the lemon juice and salt: When finished cooking, stir in the lemon juice or vinegar and salt. A quarter-cup is necessary to ensure a safe level of acidity for canning. Add more lemon juice or vinegar to taste.
  8. Preserving option 1 — freeze your sauce: Let the sauce cool, then transfer it into freezer containers or freezer bags. Sauce can be kept frozen for at least 3 months before starting to develop freezer burn or off-flavors.
  9. Preserving option 2 — can your sauce: Transfer the hot sauce into sterilized canning jars. Top with new, sterilized lids, and screw on the rings until finger tight. Process in a pot of boiling water for 30 minutes. Let cool completely on the counter — if any lids do not seal completely (the lids will invert and form a vacuum seal), refrigerate that sauce and use it within a week or freeze it for up to 3 months. Canned tomato sauce can be stored in the pantry for at least a year.→ For a more detailed description of the canning process, read this tutorial: A Visual Tour of Hot Water Bath Canning

First, I want to admit something: Making sauce from fresh summer tomatoes has long been an insecurity of mine, despite years of cooking experience, including working as a sous chef in a Tuscan restaurant in New York and living and working on farms in Italy for extended periods, elbows deep in fresh-picked tomatoes and the sauce we made from them.

The reason why: there are two primary goals when making fresh tomato sauce, and they’re at odds with each other:

  • First, the sauce should taste like it was made from fresh tomatoes, which means it should have the bright, fruity aroma and flavor of uncooked (or barely cooked) fruit. If we don’t have this, we might as well throw in the towel and stick with canned tomatoes 365 days of the year.
  • Second, the sauce should have a good sauce-like consistency and have deep, sweet notes, which means cooking off much of the tomatoes’ natural water content and caramelizing the fruit’s natural sugars. Otherwise it’s going to be too thin and tart.

The trouble is that retaining the tomatoes’ fresh flavor means minimal cooking, while getting rid of the excess water content and caramelizing sugars means extended cooking. Everyone has a different solution to this dilemma. Some discard the watery seed-jelly and cook only the tomato pulp, which I refuse to do because the seed jelly has way too much flavor to waste. Others settle for a minimally cooked sauce that just heats for about 25-30 minutes, but I find this to be a compromise that fails to deliver the deep, sweet flavors we want. Another approach is to divide the sauce into two parts, one long-cooked, one quick-cooked, and then blend them back together.

Of those approaches, the divide-and-conquer concept has always made the most sense to me, but I’d never settled on exactly how to do it. To figure it out, I started with the first obvious question: What kind of tomato should we use?

You Say Tomato, I Say, Which One?

The first rule of making tomato sauce from fresh tomatoes is to do it in the peak of summer, when tomatoes are not only at their absolute best, but also their absolute cheapest. In the winter, when the only tomatoes available are ghostly versions of their in-season selves, it often makes more sense to use canned: canned tomatoes tend to be made with fruit that’s more ripe than anything we can hope to get out of season, and they’re generally cheaper, especially when you account for the amount of water weight that fresh ones have to shed before they become sauce.

But there’s still the question of which fresh tomatoes to use when they’re at their peak. The general wisdom is to use pulpy “paste” tomatoes (i.e. plums), which are less watery. Those guys yield more sauce per pound of fruit and require a shorter cooking time to get rid of the liquid, which helps retain some of that fresh tomato flavor.

But are plum tomatoes really the best way to go? And does it matter which kind of plum tomato you use? I bought four different types of tomato at the farmers market: three different varieties of plum tomato and then common beefsteaks, which are basically never recommended for sauce due to their juiciness. There are far more varieties of tomato than this, but it isn’t practical to test them all, and, frankly, most other varieties, such as most heirlooms, cost a premium—making them a prohibitively expensive option for sauce.


And these are the beefsteaks. Tanta acqua! Clearly, after all this water cooks off, there’s not going to be much sauce left, which is why it doesn’t make a lot of sense to make sauce from these kinds of tomatoes, unless you like paying hard-earned cash to humidify the air in your home with tomato vapor.

But, since I’d already started, I took the beefsteaks to their completion, straining out the skins and seeds and cooking the purée down. I did the same for all four types of the tomatoes, and was surprised at how drastic their flavor differences were.

  • The San Marzanos made a purée that was bright and tart and not too sweet.
  • The Amish Pastes produced a purée that was sweet, mild, slightly tart, and fruity.
  • The Romas were sweet and floral, but not very tart.
  • The beefsteaks had a great balance between sweetness and tartness.

Alone, each had its strengths, one more tart, one more sweet, one fruitier, another more fragrant. But as I tasted them all, what I realized was I didn’t want any one of these tomatoes in my sauce: I wanted all of them. Tasting then one by one, each was good, but combining them into a single spoonful made the whole thing pop.

To be clear, the flavors of my tomatoes are particular to the ones I bought: You may buy San Marzanos that are sweeter and less tart, and Romas that are tart but not sweet. It depends not only on the variety, but also where they were grown and other specific environmental conditions. It’s hard to predict with certainty the exact flavor profile and balance of sweetness and tartness any given tomato will deliver, so the best way to arrive at a balanced sauce is to combine multiple types.


The majority of the tomatoes should be pasty plums—ideally a variety of types if you can find them—because they’re more cost-effective. But I’m willing to add a little extra water from a small portion of beefsteaks or other juicy tomatoes if it means I can get a little bit of their flavor in the mix.


http://www.seriouseats.com/2014/08/how-to-make-the-best-fresh-tomato-sauce-summer-spaghetti-sauce-which-tomatoes-to-use.html


Prepping the Tomatoes

Once I’d settled on using a mix of tomatoes, the next step was deciding on how to prep them. Most folks agree that an abundance of skin or seeds in a tomato sauce is not a good thing, but there’s more than one way to remove that stuff from a sauce.

Some recipes call for discarding the seeds altogether, but as I’ve already mentioned, I like the flavor of the jelly the seeds are suspended in too much to do that—in fact, it has a tartness that I think is essential to creating what will ultimately be a sauce that has a good balance of sweet and tart flavors.

As for the skins, one option is to score the tomatoes, quickly blanch them and then peel off their skins. This is fine for small quantities of sauce, but I felt strongly that I wanted to select a method that would work for large batches—we are doing this in peak tomato season so we might as well make a lot, and peeling each tomato individually isn’t practical.

The method I know best is one I used when working on farms in Italy where we would make vats of sauce each week in the peak of summer: The tomatoes are cut into chunks, cores, skins, stems, seeds, and all (absolutely no need to exclude anything except the odd bad spots you may find), dumped into a pot, and set over high heat until they dump their juices and come to a boil.*

*Yet another method involves baking the tomatoes first at low heat to drive off some of their water, and only then to quickly cook them into a sauce; the reason for this has to do with how temperature affects enzyme activity and flavor, but for large quantities of sauce I also find this method impractical.

Then they’re boiled for about 10 minutes, just long enough to soften the pulp. It’s a quick enough cooking time that the fresh tomato flavor isn’t lost, but long enough that the pulp will pass* through a food mill or vegetable strainer.

In fact, in Italian this watery, fresh tomato purée is called a passata (“passed”).

According to Harold McGee in On Food and Cooking, this quick-boil method allows pectins to thicken the sauce much more effectively, requiring less overall sauce reduction (and therefore a fresher-tasting sauce!).

This does require having either a food mill or some other type of mechanical strainer, but for large quantities of sauce, it’s a minimal investment that will save a lot of time. Plus, it’s one of the easiest ways to remove seeds and skins while keeping all the good stuff in the sauce.

Once we have our tomato purée, the next question is what to do with it.

Cooking the Sauce: The Quick and the Red

One of the goals I outlined above for fresh-tomato sauce is that it should retain some of that fresh-tomato flavor. So I knew I wanted some of my tomato purée to be cooked minimally. But one of the things my initial test batches made me think about is how damned delicious long-cooked tomatoes are. You see, when I was cooking down my beefsteak tomato purée, I had to cook it a long, long time to get rid of all of its excess water, and by the time it was done, it was sooooo delicious: dark red, intensely sweet, and oh-so rich. I just kept going back to it with a spoon.

To get that flavor into my sauce, I consulted several cookbooks, and settled on the idea of turning a portion of the purée into a tomato-paste like extract in the oven, called estratto in Italian. It’s a technique described well by Paul Bertolli in his fantastic Cooking By Hand, and Rosetta Costantino in My Calabria, and while it’s traditionally done in the Southern Italian sun, a low oven is the easy alternative.

Because so much evaporation is required to reach the concentrated stage I was going for here, I used only paste tomatoes for this portion of the recipe—I’d rather let the small portion of beefsteaks in the batch contribute their water elsewhere than have to cook it all off here. Overall, a little less than half of my tomatoes went towards this component (10 pounds out of 25).

The method is simple: pour the purée into rimmed baking sheets or baking dishes (basically anything wide that will maximize surface area and therefore evaporation) and set them in a low oven, stirring from time to time, especially as it begins to thicken, until a rich, sweet extract is formed. Don’t even think of taking a shortcut with store-bought tomato paste here: This stuff is way more flavorful than any canned tomato paste I’ve ever tried.

The low-and-slow reduction allows the tomato sugars to caramelize, creating an intensely sweet, concentrated flavor base for the sauce.


Just one tip: Keep an eye on these and stir them frequently. I learned the hard way that the thin layer of tomato paste can burn quickly, even at low oven temperatures, if it’s left unattended for too long.

With most of my remaining tomato purée, about 15 pounds of mixed tomatoes, I used a more classic stovetop method, cooking it down for about 45 minutes to a sauce-like consistency. But before I did that, I set about a quart of the fresh tomato purée aside, thinking I would add it back in at the end for a blast of fresh-tomato flavor. I had gotten the idea while thinking about the common practice of adding a splash of high-quality uncooked olive oil at the end of cooking to get its great taste into the dish. I figured, if it works for olive oil, why shouldn’t it work for tomatoes?

What that meant was I ended up with three sauce components: my rich, delicious tomato paste; my basic cooked sauce; and then my very fresh-tasting tomato purée.


Here they are side-by-side, and the color alone speaks volumes about how each is different. In terms of absolute quantities, I had only about a quart’s worth of both the concentrated paste and the fresh purée; the regular sauce seen in the middle here produced about a gallon, and is the backbone of the sauce. The idea is to enrich the bulk of the sauce with the deep, sweet, caramelized notes of the paste, and then finish it with the bright, fresh flavor of the barely-cooked purée, to create layers and layers of flavor that hit every note.

Correcting the Bulk Sauce

So, now that I’ve explained my three-pronged approach to the sauce, we’re basically done, right? Nope!

Just because I have my amazing tomato paste and my fresh-and-fruity purée doesn’t mean I’m just going to accept that the bulk of the sauce is going to taste merely good, especially if there’s anything I can do about it.

The first trick is one we’ve all seen a million times: toss in some basil. It’s no accident that basil is usually included in canned tomatoes: Canning require intense heat and cooking, which kills any trace of fresh tomato flavor. A few sprigs of basil help add a little freshness back in. I added some basil to a portion of my bulk sauce while it was still warm and let it steep.

It worked, adding a fragrant, floral, anise-y scent to the sauce that is totally wonderful. At the very least, it’s worth steeping the basil in the sauce.

Some folks, though, also add some tomato leaves to their sauce. Writes McGee, “tomato leaves have a fresh-tomato aroma thanks to their leaf enzymes and prominent aromatic oil glands.”

I tried it out, and, aside from putting way too much in my sauce, found that it does indeed add a grassy green flavor that can help offset whatever fresh notes are lost from cooking the tomato. The only hard part for most of us is getting our hands on tomato-plant cuttings. If you can’t, rest assured the basil does more than enough on its own—honestly, if I had to choose between the two, I’d take the basil. But if you can do both, each will help in its own way.

The Question of Aromatics

One other major concern for the bulk sauce is whether to add aromatics like onion and garlic, and if so, how to do it. Some recipes call for cooking the aromatics first until soft and sweet (but not browned), while others have the aromatics dumped in raw and simmered in the sauce as it cooks.

I tried it three ways*: with raw aromatics, sautéed aromatics, and none at all. In my tests I just used onion and garlic, which are the most common, though you can opt to also include others like carrot and celery—each will alter the flavor of the sauce somewhat, and whether or not you include them is a matter of personal preference.

*Actually four ways, I also did a batch with crushed red pepper, and loved the subtle warm heat it adds to the sauce.

Raw onion and garlic produced a cleaner-tasting sauce with fresh vegetable notes, but the overall flavor and texture was less integrated. To avoid the texture issue, you can use Marcella Hazan’s method of submerging raw onion halves in the simmering sauce and then fishing them out whole.

When blind-tasting these two sauces on spaghetti, more of my colleagues preferred the sautéed aromatics to the raw ones, but opinion wasn’t unanimous.

My third batch, without any aromatics, was also delicious, and in some ways I preferred its pure tomato flavor, which goes to show that if the sauce is good enough, you really don’t need to enhance it much. On that note, I also preferred my sauce without cheese, which shocked me, because I always put cheese on my pasta with tomato sauce, but this sauce really is that good—too much other stuff just gets in the way.

There are many, many ways to make very good tomato sauce, but if you’re going to take the time to prepare it using fresh tomatoes, the key to creating a balanced, rich, and layered sauce that tastes both fresh yet also deep and complex is to think of it as a blender’s art: make tomato purée and divide it into parts, then slow-cook one portion of it into a thick, sweet, caramelized paste; cook another portion into the bulk of the sauce, flavored with basil, possibly tomato leaves, and aromatics; and save a small portion of the barely-cooked purée to add at the end for a bright, fresh note, similar to how we often finish dishes with a drizzle of uncooked olive oil.

Exactly how you use the sauce will determine final steps: On pasta, for instance, you can finish the pasta in a pan with the sauce and some of the pasta-cooking water, adding a little raw olive oil, pat of butter, or splash of cream at the end, depending on the final flavor you want.

It may be a little fussy, but it’s also the first tomato sauce I’ve made that I haven’t wanted to top with cheese. And really, I don’t even really need the pasta. Just give me a spoon.



Tomato Bisque

INGREDIENTS

  • 2 C tomato – pieced
  • 1/2 Vidalia onion – sliced thin
  • 1/4 C chopped carrot
  • 1/4 C chopped celery
  • 1 TBL tomato paste
  • 1 bay leaf – to be removed at step 10
  • 3 TBL Butter
  • 1 C Stock
  • 1/2 C Water
  • 1/2 C Milk
    – use for finishing it up – SEE BOTTOM OF PAGE
  • 1/2 C Heavy cream
  • 1 egg yolk
  • 2 Chives – minced
  • 1 TBL Sour cream
  • 1 tsp dried parsley
  • 1 lemon
  • Black pepper and Thyme to taste – just a dash

STEP BY STEP

  1. Toss tomato in about 1 tsp salt
  2. Put tomato pieces on a baking sheet in the oven at 350º for 30-45 minutes (See step 4)
  3. Slice onion in half, and then very thin.
  4. Sweat onion, carrot, celery and tomato paste in butter on low heat 1/2 hour.
  5. Add 1 TBL AP flour and cook an additional 3 minutes
  6. Add stock and bring to a boil.
  7. Reduce to a bare simmer and add milk and water.
  8. Put all tomato pieces into the pot.
  9. Bring back to a simmer, then remove pot from heat.
  10. Remove bay leaf
  11. Puree carefully
    – – Strain or run through a food mill. – You can buy one BY CLICKING HERE.
    AT THIS POINT, YOU CAN POUR IT INTO FOUR HALF-PINT CANNING JARS, or TWO ONE-PINT CANNING JARS
  12. Mix in heavy cream.
  13. Pour back into the pot, and return to a low heat JUST UNTIL IT STARTS TO THICKEN
  14. Add 1 tsp lemon (or zest and juice from one lemon)
  15. Remove pot from burner.
  16. Temper in your egg yolk.  CLICK HERE to see how to temper.
  17. Garnish w/ sour cream & Chives

IF YOU HAVE PUT IT INTO FOUR HALF-PINT CANNING JARS, HERE IS WHAT YOU NEED FOR EACH JAR


  • 2 TBL Heavy cream
  • 1/2 egg yolk
  • 1/2 Chives – minced
  • 1 tsp Sour cream
  • 1 pinch  dried parsley
  • zest and juice from 1/4 lemon
  • Black pepper and Thyme to taste – just a shake

IF YOU HAVE PUT IT INTO TWO ONE-PINT CANNING JARS, HERE IS WHAT YOU NEED FOR EACH JAR

  • 1/4 C Heavy cream
  • 1 egg yolk
  • 1 Chives – minced
  • 2 tsp Sour cream
  • 2 pinch  dried parsley
  • zest and juice from 1/2 lemon
  • Black pepper and Thyme to taste – just a shake


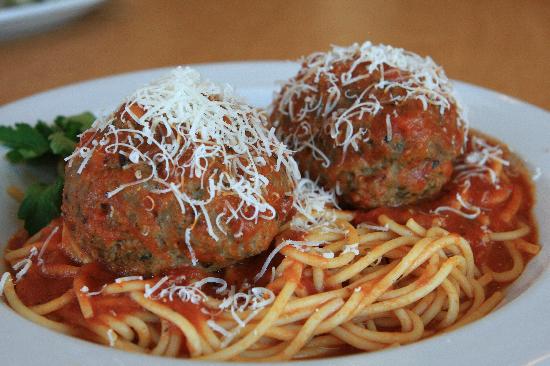
Four Big Ol’ Meatballs

meatballINGREDIENTS

  • 1/2 LB ground pork or Italian sausage
  • 3/4 LB 80/20 chuck hamburger
  • 1/4 LB ground lamb
  • 2 TBL chopped parsley
  • 1/4 C buttermilk
  • 1/2 C Parmesan cheese
  • 1/2 C bread crumbs
  • 2 tsp grated onion
  • 2 tsp granulated garlic (not garlic powder)
  • 1 tsp dried basil
  • 1 tsp crushed chili flakes or Grandpa's Thunder Powder or Arghhh Powder
  • 1 tsp sage
  • 1 tsp each salt and pepper
  • 1 jumbo ( or 2 medium) egg
  • 2 mozzarella cheese sticks

STEP BY STEP

  1. Combine everything except egg and meats
  2. Mix ground meats and eggs only to combine – do not overmix or they get tough
  3. Fold in all other ingredients
  4. Cut in half, then in half again making four big ol’ meatballs
    Double ingredients if you want eight meatballs, or cut in half again for eight regular meatballs
  5. Flatten the patties with your hands, and then cut the cheese sticks into eight pieces.  Put two inside four patties, or one inside eight patties – then roll them up into a ball.
  6. Bring a skillet up to screaming hot and sear your meatballs on all sides – not black, just browned
  7. Bake in the oven at 400 for 15-20 minutes
    Internal temperature should be about 165º
  8. Put them on top of your cooked spaghetti, top with sauce and sprinkle with cheese

SPECIAL STEPS

  1. Cook your spaghetti for about 10 minutes in boiling water.
  2. Heat your marinara sauce to about 185º

 
Sixteen Li’l ole Meatballs

Prepare Steps 1-3 above, except at Step 4, divide in half, four times making a total of 16 meatballs.  Then…

  1. Roll into balls, and space out onto a tray into the refrigerator for 30 minutes
  2. Meanwhile, combine 1 C panko bread crumbs with red pepper flakes, dried parsley, garlic powder, and Parmesan cheese.  Mix well.
  3. Beat one egg and 1 TBL of water
  4. Take each ball and dip it in the egg mixture and then roll in the bread crumbs, and return to the tray
  5. Put the meatballs into a 400º oven for 20 minutes
  6. Serve on top of pasta topped with maranara.


Tlayuda – Mexican Pizza

mex-pizzDOUGH

  • 2 C Masa Harina (corn flour)
  • Salt
  • water – approx 1-1/2 C – drizzle into running food processor until it starts to pull together
    (SHORTCUT: Use large soft yellow or white corn tortillas)
    (WORSE SHORTCUT: Use a large flour tortilla.  This is a quesadilla!)

STEP BY STEP

  1. Put the masa and salt into your food processor
  2. Have a measuring cup with 2 C water – YOU WILL NOT use it all.
  3. In a food processor, put the masa, salt and 1 C water
  4. Start the food processor and drizzle more water in a bit at a time, till it starts to pull together.
  5. Take it out and finish it on the counter
  6. Cut in half, and form two large balls, about the size of a softball, and press it kind of flat
  7. Cover with plastic, and let it rest 5 minutes
  8. Put onto a parchment paper, flatten a bit more
  9. Put a second parchment paper on top
  10. Roll it even flatter
  11. Put into a hot lightly oiled cast iron skillet
  12. 3-5 minutes, then flip
  13. Cook other side 3-5 minutes
  14. It should have blacked spots on both sides
  15. Set aside on baking sheet
  16. Repeat 8 through 15 for the other ball of masa

TOPPINGS

  • Refried Beans as a base
  • Cheeses
    • Many grocery stores offer a shredded Mexican blend of cheeses.  This is your safest best
    • Other good choices – Asiago, Havarti, Mozzarella, Provolone, Queso Oaxaca, Queso Asadero ( aka Queso Quesadilla), Panela, Manchego, Queso Chihuahua
    • In a pinch, use a blend of Cheddar, Monterrey Jack & Mozzarella – or just  Cheddar and Monterrey Jack
    • Bad choices: These cheeses do not melt well, and probably are not as good for this application – Queso Fresco, Queso Anejo (Aged Fresco), Cotijo, Parmesan
  • Meat:  Chorizo, chicken, fish, carne, bacon, or carnitas – Cooked
  • Avocado
  • Fresh tomato
  • Sun dried tomato
  • Bell pepper
  • Shredded lettuce
  • Mexican Crema
  • Corn
  • Mushrooms
  • Black beans
  • Black olives
  • Crumbled Queso Fresco

Senior Discounts

Like our recipes? Download one or more cookbooks BY CLICKING HERE. Multiple book discounts are available.

Since many senior discounts are not advertised to the public, our advice to men and women over 55 is to ALWAYS ask a sales associate if that store provides a senior discount. That way, you can be sure to get the most bang for you buck. Here is a list that is good to put into your car for quick reference.

113 Stores with Senior Discounts

Restaurants

    1. Applebee’s: 15% off with Golden Apple Card (60+)
    2. Arby’s: 10% off (55+)
    3. Ben & Jerry’s: 10% off (60+)
    4. Bennigan’s: discount varies by location
    5. Bob’s Big Boy: discount varies by location (60+)
    6. Boston Market: 10% off (65+)
    7. Burger King: 10% off (60+)
    8. Captain D’s Seafood: discount varies on location (62+)
    9. Chick-Fil-A: 10% off or free small drink or coffee (55+)
    10. Chili’s: 10% off (55+)
    11. CiCi’s Pizza: 10% off (60+)
    12. Culver’s: 10% off (60+)
    13. Denny’s: 10% off, 20% off for AARP members (55+)
    14. Dunkin’ Donuts: 10% off or free coffee (55+)
    15. Einstein’s Bagels: 10% off baker’s dozen of bagels (60+)
    16. Fuddrucker’s: 10% off any senior platter (55+)
    17. Gatti’s Pizza: 10% off (60+)
    18. Golden Corral: 10% off (60+)
    19. Hardee’s: $0.33 beverages everyday (65+)
    20. IHOP: 10% off (55+)
    21. Jack in the Box: up to 20% off (55+)
    22. KFC: free small drink with any meal (55+)
    23. Krispy Kreme: 10% off (50+)
    24. Long John Silver’s: various discounts at participating locations (55+)
    25. McDonald’s: discounts on coffee everyday (55+)
    26. Mrs. Fields: 10% off at participating locations (60+)
    27. Shoney’s: 10% off
    28. Sonic: 10% off or free beverage (60+)
    29. Steak ‘n Shake: 10% off every Monday & Tuesday (50+)
    30. Subway: 10% off (60+)
    31. Sweet Tomatoes 10% off (62+)
    32. Taco Bell: 5% off; free beverages for seniors (65+)
    33. TCBY: 10% off (55+)
    34. Tea Room Cafe: 10% off (50+)
    35. Village Inn: 10% off (60+)
    36. Waffle House: 10% off every Monday (60+)
    37. Wendy’s: 10% off (55+)
    38. White Castle: 10% off (62+)

Retail and Apparel

    1. Banana Republic: 10% off (50+)
    2. Bealls: 20% off first Tuesday of each month (50+)
    3. Belk’s: 15% off first Tuesday of every month (55+)
    4. Big Lots: 10% off
    5. Bon-Ton Department Stores: 15% off on senior discount days (55+)
    6. C.J. Banks: 10% off every Wednesday (60+)
    7. Clarks: 10% off (62+)
    8. Dress Barn: 10% off (55+)
    9. Goodwill: 10% off one day a week (date varies by location)
    10. Hallmark: 10% off one day a week (date varies by location)
    11. Kmart: 20% off (50+)
    12. Kohl’s: 15% off (60+)
    13. Modell’s Sporting Goods: 10% off
    14. Rite Aid: 10% off on Tuesdays & 10% off prescriptions
    15. Ross Stores: 10% off every Tuesday (55+)
    16. The Salvation Army Thrift Stores: up to 50% off (55+)
    17. Stein Mart: 20% off red dot/clearance items first Monday of every month (55+)

Grocery

    1. Albertson’s: 10% off first Wednesday of each month (55+)
    2. American Discount Stores: 10% off every Monday (50+)
    3. Compare Foods Supermarket: 10% off every Wednesday (60+)
    4. DeCicco Family Markets: 5% off every Wednesday (60+)
    5. Food Lion: 6% off every Monday (60+)
    6. Fry’s Supermarket: free Fry’s VIP Club Membership & 10% off every Monday (55+)
    7. Great Valu Food Store: 5% off every Tuesday (60+)
    8. Gristedes Supermarket: 10% off every Tuesday (60+)
    9. Harris Teeter: 5% off every Tuesday (60+)
    10. Hy-Vee: 5% off one day a week (date varies by location)
    11. Kroger: 10% off (date varies by location)
    12. Morton Williams Supermarket: 5% off every Tuesday (60+)
    13. The Plant Shed: 10% off every Tuesday (50+)
    14. Publix: 5% off every Wednesday (55+)
    15. Rogers Marketplace: 5% off every Thursday (60+)
    16. Uncle Guiseppe’s Marketplace: 5% off (62+)

Travel

    1. Alaska Airlines: 10% off (65+)
    2. Alamo: up to 25% off for AARP members
    3. American Airlines: various discounts for 65 and up (call before booking for discount)
    4. Amtrak: 15% off (62+)
    5. Avis: up to 25% off for AARP members
    6. Best Western: 10% off (55+)
    7. Budget Rental Cars: 10% off; up to 20% off for AARP members (50+)
    8. Cambria Suites: 20%-30% off (60+)
    9. Clarion: 20%-30% off (60+)
    10. Comfort Inn: 20%-30% off (60+)
    11. Comfort Suites: 20%-30% off (60+)
    12. Continental Airlines: no initiation fee for Continental Presidents Club & special fares for select destinations
    13. Dollar Rent-A-Car: 10% off (50+)
    14. Econo Lodge: 20%-30% off (60+)
    15. Enterprise Rent-A-Car: 5% off for AARP members
    16. Greyhound: 5% off (62+)
    17. Hampton Inns & Suites: 10% off when booked 72 hours in advance
    18. Hertz: up to 25% off for AARP members
    19. Holiday Inn: 10%-30% off depending on location (62+)
    20. Hyatt Hotels: 25%-50% off (62+)
    21. InterContinental Hotels Group: various discounts at all hotels (65+)
    22. Mainstay Suites: 10% off with Mature Traveler’s Discount (50+); 20%-30% off (60+)
    23. Marriott Hotels: 15% off (62+)
    24. Motel 6: 10% off (60+)
    25. Myrtle Beach Resort: 10% off (55+)
    26. National Rent-A-Car: up to 30% off for AARP members
    27. Quality Inn: 20%-30% off (60+)
    28. Rodeway Inn: 20%-30% off (60+)
    29. Sleep Inn: 20%-30% off (60+)
    30. Southwest Airlines: various discounts for ages 65 and up (call before booking for discount)
    31. Trailways Transportation System: various discounts for ages 50 and up
    32. United Airlines: various discounts for ages 65 and up (call before booking for discount)
    33. U.S. Airways: various discounts for ages 65 and up (call before booking for discount)

Activities & Entertainment

  1. AMC Theaters: up to 30% off (55+)
  2. Bally Total Fitness: up to $100 off memberships (62+)
  3. Busch Gardens Tampa: $3 off one-day tickets (50+)
  4. Carmike Cinemas: 35% off (65+)
  5. Cinemark/Century Theaters: up to 35% off
  6. U.S. National Parks: $10 lifetime pass; 50% off additional services including camping (62+)
  7. Regal Cinemas: 30% off
  8. Ripley’s Believe it or Not: @ off one-day ticket (55+)
  9. SeaWorld Orlando: $3 off one-day tickets (50+)

Pulled Pork Shoulder

INGREDIENTS

STEP BY STEP

  1. Season meat all over, wrap loosely in foil, and refrigerate overnight
  2. Soak wood chips in water also overnight
  3. Wrap wet wood chips in foil and put in baking tray on lower oven rack.
  4. Cook for about 12 hours at 220º  – – –
    For meat done at 5 pm – put into oven at 5 am
    For meat done at 6 pm – put into oven at 6 am
    etc
    For meat done at 9 am – put into oven at 9 pm
  5. NOTE: If internal temperature reaches about 185-200º it is done,
    but expect that to take at least 10 hours.
    Also, bone should pull out easily.
  6. Let meat rest at least 30 minutes before cutting or shredding

OPTIONAL SEASONING MIX

  • 1 TBL each – brown sugar, salt
  • 2 tsp each – garlic powder, onion powder
  • 1 tsp each – paprika, cumin
  • 1/2 tsp each – black pepper, cayenne pepper or chili powder

THE TWO CLASSES OF PULLED PORK

Southern Carolina Pulled Pork BBQ

  • Meat on a soft bun
  • Vinegar based BBQ sauce
  • Cole slaw

Traditional Pulled Pork BBQ

  • Meat on a soft bun
  • Tomato based BBQ sauce (sweet)

Note from Grandpa:   As far as commercial sauces, I like Jack Daniels #7 BBQ sauce

Hasselback Potatoes

This dish takes its name from Hasselbacken, Sweden where it was first served.
The potatoes turn out crisp on the outside and tender on the inside.

INGREDIENTS

  • Two regular baking potatoes – Russet
  • Cream cheese
  • Sliced Swiss cheese
  • Drizzle Sauce
    • 4 TBL butter
    • 1 TBL EVOO
    • 1/2 tsp garlic powder
    • 1/2 tsp onion powder
  • 2 Strips of bacon
  • 1 Stalk chives
  • Sour cream

You will also need two wooden mixing spoons with long handles (or chopsticks or skewers_

STEP BY STEP

  1. Melt Drizzle Sauce in a small sauce pan – set aside
  2. Wash potato then dry it
  3. Cook medium potato in microwave for about 90 seconds.
  4. Let cool, then rub potato with oil
  5. Put potato on a cutting board, and place a spoon handle on each side of the potato
  6. Cut 1/4 inch slices (or less) through the potato.  The spoon handles prevent you from cutting the potato all the way through.
  7. Put potato on a baking sheet in a little foil “boat”
  8. Stuff slices with a bit of the cream cheese
  9. Baste liberally with the Drizzle Sauce, getting some sauce into each of the accordion folds
  10. Salt outside liberally
  11. Bake at 400º for 20 minutes
  12. Baste
  13. Bake another 20 minutes
  14. Meanwhile, cook the bacon till crisp
  15. Steam broccoli if that is your side
  16. Chop the chives into small pieces. . . just keep busy
  17. At about 38 minutes, baste again and put a slice of Swiss cheese on top.
    The cheese will melt and become real messy – that’s why they are in a boat
  18. Serve as soon as the cheese starts to brown
  19. Top with sour cream, bacon and chives


Big Bay Sea Scallops

How to Buy Scallops

  • Scallops are sold either “wet” or “dry.”
  • Look for “Dry,” natural scallops that have not been treated with any chemicals.  They should smell fresh… like the ocean.
  • “Wet” scallops are treated with phosphates, which causes them to absorb water. This extra water makes them heavier and thus more expensive.  The water also dilutes their flavor and makes it nearly impossible to sear or brown properly.
  • How can you tell the difference between wet and dry scallops? You should just be able to ask the fishmonger, but there is a visual clue that usually gives the game away:
    • “wet” scallops tend to be snow-white in color
    • “dry” scallops are a natural pale vanilla color.
  • A good size to buy is 8-12 scallops per pound

Types of Scallops

  1. Sea Scallops aka Weathervane Scallops
    • Served seared or thinly sliced
  2. Bay Scallops
    • Smaller, but just as sweet
  3. Rock Scallops
    • Found only in the Pacific ocean
    • Do not move around
  4. FARMED:  Very good.  Especially those from British Columbia
  5. DIVER:  Excellent.  Hand picked by divers
  6. DREDGED:  Bad for the environment.  Do not buy

How to Cook Scallops

  • Remove small abductor muscle.  It is edible, but tough.
  • Do not overcook.  They become chewy.
  • Poach, saute, sear, or bake
  • Best to pat dry and sear for 60 seconds each side in very lightly oiled pan; or serve raw.

STEP BY STEP

  1. Preheat oven to 350º
  2. Remove the abductor muscle before cooking
  3. Sprinkle both sides with salt and pepper
  4. Preheat very hot cast iron skillet
  5. EVOO, wipe oil, sear scallops – 1 minute first side
  6. Put 1 TBL butter into the pan, and let it melt
  7. Flip and cook the other side for 1 minute
  8. Plate with garlic pesto schmear or in melted butter with lemon zest over top
  9. A tiny spritz of rum is also good

Your goal is to only sear these scallops, not cook them.  If you cook them, they will become rubbery and lose that silky texture.

HTML Snippets Powered By : XYZScripts.com