Scratch Marinara / Bolonaise

INGREDIENTS

  • 8 Roma Tomatoes
  • 1 Small sweet onion – diced
  • 1/2 C Red wine
  • 1/2 C chicken, vegetable or beef stock.
  • 3 cloves of garlic – minced
  • 2 TBL EVOO – whisked in to emulsify
  • 1 TBL Basil
  • 1 TBL Oregano
  • 1 tsp Thyme
  • 1 tsp Rosemary
  • 1 bay leaf
  • Salt and pepper

To make Bolonaise Sauce add these meats, cooked

  • 6 oz sirloin – coarse grind
  • 6 oz chuck (shoulder) – coarse grind
  • 6 oz pork butt – coarse grind
  • 4-6 oz thick cut bacon

STEP BY STEP

  1. Tomatoes are in season April through August – the hot summer months
    Use tomatoes during those months.  During the cooler times, see make BASIC MARINARA.
  2. Cut an X in the top of the tomato
  3. Plunge into boiling water – simmer for two minutes
  4. Plunge into ice water – let cool for two minutes
  5. Skin should peel off easily
  6. Squeeze the tomato and squeeze out the seeds
  7. Discard the seeds, which can be bitter, and put the flesh into a stock pot
  8. Add all other ingredients to the pot
  9. Bring to a high simmer, then reduced to a low simmer
  10. Let cook on the stovetop for at least an hour, preferably two.
  11. Halfway through, use a potato masher to break up to tomato pieces
  12. Can the sauce to carry you through the winter months, or
    Let cool, and store in zip lock bags.  Freeze flat (on a tray) so they stack efficiently in the freezer.

NOTES

  • Ask at the supermarket for bruised tomatoes at a discount
  • Keeps for a year or two if properly canned, or two weeks in the refrigerator
    Buy in bulk when the tomatoes are on sale and CAN YOUR OWN TOMATOES.
  • Use this as a base, then add your own variations:  more basil or mushrooms or cheese… Whatever
  • This is a great use to get rid of your tired veggies
  • If you have the hard rind from Parmesan cheese, throw it in for flavor.  Remove it before freezing or canning.
  • This is a great place to throw whole and intact chicken or rib bones.  Be VERY CAREFUL to not leave bone pieces behind.
    Better yet, create SCRATCH STOCK from the bones, and then use 1/2 C of your own homemade stock

Chef Notes

  1. EVOO in a hot pan, smashed garlic – skin and all
  2. 4 ripe Roma tomatoes – cross top – boil and remove skin
  3. Smash and chop the tomatoes
  4. Add a bit of water, black pepper, salt, parsley and basil
  5. Add optional chili pepper
  6. Spaghetti al dente in with sauce
  7. Add fresh basil – toss together
  8. Plate and top with Parmesan cheese

Heirloom Tomato Snack

INGREDIENTS

  • One heirloom tomato per person
  • EVOO
  • Salt and pepper
  • Brown sugar

STEP BY STEP

  1. Cut your tomato into nice thick slices
  2. Drizzle with EVOO
  3. Sprinkle with salt and pepper
  4. Sprinkle with brown sugar
  5. Bake at 400º for about 5 minutes

TAKE IT ONE STEP FURTHER

  1. Cook another 15 minutes
  2. Remove the skin
  3. Crush up tomato
  4. Mix with mayonnaise
  5. You now have Tomato Aioli which is great on toast.


Tips: Substitutions

See also EQUIVALENTS

Why Substitute?

  • Emergency:  If you don’t have a needed ingredient, there are usually options.
  • Health Related:  Eliminating peanuts, for example :: Most allergies are with milk, egg, peanuts,  shellfish, soy, wheat
  • Creative:  Tarragon rather than oregano, for example

Allspice

1 teaspoon = 1/2 teaspoon cinnamon + 1/2 teaspoon ground cloves

Apple Pie Spice

1 teaspoon = 1/2 teaspoon cinnamon + 1/4 teaspoon nutmeg + 1/8 teaspoon cardamom

Baking Powder

•  Single Acting:  1 teaspoon = 1/4 teaspoon baking soda + 5/8 teaspoon cream of tartar – 1/2 tsp of cornstarch if you are not using it right away
Confectioner sugar ?!?
•  Double Acting:  Releases gas twice – Hard to do in the home

Baking Soda

There is NO substitute for baking soda

Basil

Substitute peas

Bread Wheat Flour

Xanthan Gum – Helps do the task that gluten does

Other gluten-free wheat flour substitutes are garbanzo beans, teff, sorghum and quinoa flours

Butter

•  Replace half the amount of butter in your recipe with applesauce; if the recipe calls for one cup of butter, use half a cup of butter and half a cup of applesauce. If you don’t mind a denser, more moist bread, replace all the butter with applesauce to cut even more calories and fat.
•  Use Greek yogurt cup for cup to replace all or part of your butter
•  Canola oil can be used in place of melted butter.

Buttermilk

1 cup = 1 tablespoon lemon juice or vinegar plus enough regular milk to make 1 cup (allow to stand 5 minutes in the fridge)

Chili Sauce

1 cup = 1 cup tomato sauce, 1/4 cup brown sugar, 2 tablespoons vinegar, 1/4 teaspoon cinnamon, dash of ground cloves and dash of allspice

Chocolate, Unsweetened

1 ounce = 3 tablespoons cocoa plus 1 tablespoon butter or regular margarine or vegetable oil

Cornstarch (for thickening)

1 tablespoon = 2 tablespoons flour
You must cook longer than you would with cornstarch.

Cream

•  1 C = 1/3 cup melted unsalted butter + 3/4 cup milk.
•  1 C = 1/3 cup melted unsalted butter + 3/4 cup low-fat milk + 1 TBL flour or cornstarch.
•  1 C = 1 cup skim milk + 2 TBL cornstarch.
•  1 C = 1/6 cup melted butter + 7/8 cup half-and-half.

Egg:  1 whole egg

•  1 egg = 1/4 cup egg substitute
•  3 TBL powdered flax

Mayonnaise

1/2 C = One egg yolk to 1/2 cup of oil. Plus 1 tsp Dijon and salt

Miso

Soybean allergy: 

Parmesan – from Italy

Substitute American Parmesan if mixed

Peanut Butter

Substitute cashew butter,

Pine Nuts

Substitute walnuts

Sugar, Confectioners’ or Powdered

1 cup = 1 cup granulated sugar plus 1 tablespoon cornstarch; process in a food processor using the metal blade attachment until it’s well blended and powdery.

Tahini

Ground up sesame seeds

Tomato Juice

1 cup = 1/2 cup tomato sauce plus 1/2 cup water

Wine, Red

Any amount = The same amount of grape juice or cranberry juice

Wine, White

Any amount = The same amount of apple juice or white grape juice

Swiss Meringue Buttercreme

INGREDIENTS

  • 5 large egg whites
  • 1 C granulated sugar
  • 4 sticks salted butter – room temperature
  • 1-1/2 tsp vanilla

STEP BY STEP

  1. Combine egg whites, sugar, and salt in the heatproof bowl of a standing mixer set over a pan of simmering water.
  2. Whisk constantly by hand until mixture is warm to the touch and sugar has dissolved (the mixture should feel completely smooth when rubbed between your fingertips).
  3. Attach the bowl to the mixer fitted with the whisk attachment.
  4. Starting on low and gradually increasing to medium-high speed, whisk until stiff (but not dry) peaks form.
  5. Continue mixing until the mixture is fluffy and glossy, and completely cool (test by touching the bottom of the bowl), about 10 minutes.
  6. With mixer on medium-low speed, add the butter a few tablespoons at a time, mixing well after each addition.
  7. Once all butter has been added, whisk in vanilla. Switch to the paddle attachment, and continue beating on low speed until all air bubbles are eliminated, about 2 minutes.
  8. Scrape down sides of bowl with a flexible spatula, and continue beating until the frosting is completely smooth.
  9. Keep buttercream at room temperature if using the same day.
    (Optional)
  10. To tint buttercream (or royal icing), reserve some for toning down the color, if necessary.
  11. Add gel-paste food color, a drop at a time (or use the toothpick or skewer to add food color a dab at a time) to the remaining buttercream.
  12. You can use a single shade of food color or experiment by mixing two or more.
  13. Blend after each addition with the mixer (use a paddle attachment) or a flexible spatula, until desired shade is achieved.
  14. Avoid adding too much food color too soon, as the hue will intensify with continued stirring; if necessary, you can tone down the shade by mixing in some reserved untinted buttercream.


Swiss Meringue Buttercreme Filled Cupcakes

Makes about 24

INGREDIENTS for BATTER

  • 1-1/2 C AP flour
  • 1 tsp baking powder
  • 2 sticks of butter
  • 1-3/4 C granulated sugar
  • 1 egg
  • 2 tsp vanilla
  • 1-1/4 C whole milk

STEP BY STEP

  1. Preheat oven to 350º
  2. Sift together flour and baking powder and set aside
  3. Cream together butter and sugar using Kitchen Aid
  4. Add egg and vanilla and stir to incorporate
  5. Alternate 1/3 milk and 1/3 flour mixture until all combined
  6. Fill cupcake papers with 1/2 C scoop each of batter
  7. Bake for 20 minutes at 350º

INGREDIENTS and STEP BY STEP for FILLING

  • 8 egg yolks
  • 1 C granulated sugar
  • 10 TBL butter
  • 1/4 tsp salt
  • 2/3 C frozen puree of passion fruit
  1. Mix it all together
  2. Simmer to thicken
  3. Set aside to cool

NOTE: Buy wrinkly passion fruits, not plump ones ( which are not yet ripe )

  1. Use apple corer to remove center of cooked / cooled cupcakes
  2. Pipe passion fruit into the hole

Top with Swiss Meringue Buttercreme using a star piping bag


Easy Apple Strudel

INGREDIENTS

  • Commercial Puff Pastry, or Strudel Pastry
  • 3 Baking Apples – Granny or Honeycrisp – cored but with skin still on – sliced very very thin or grated
  • 1 TBL Cinnamon
  • 2 TBL Butter
  • 1/2 C Sugar – Turbinado sugar is pretty, but not required

STEP BY STEP

  1. Use strudel pastry (keep moist).
  2. Roll just a bit flatter
  3. Melt your butter in the microwave
  4. Lay down filling – Leave an edge bare for sealing
  5. Sprinkle cinnamon and 3 TBL sugar over apples
  6. Drizzle apple with butter
  7. Fold ends, roll tightly
  8. Press together seam
  9. Place on baking sheet with seam side down
  10. Brush outside w/ butter.
  11. Bake till golden brown. Cut ends off to sit flat
  12. Cut into 2-3 inch pieces – straight across
  13. Cut pieces at an angle (on the bias)
  14. Place on serving plate with the flat side down.
  15. Serve w/ ice cream or yogurt

FROM SCANNED NOTES

Apple Strudel
1 pound red apples, peeled and sliced
1/4 cup sugar
1 teaspoon cinnamon
3 tablespoons raisins
pate Brisee:
1 cup all-purpose flour
1/4 teaspoon salt
3 tablespoons sugar
1/4 cup cold butter, diced

4 to 6 tablespoons ice waterp
2 tablespoons melted butter pPp”

p p
p p p
1. Preheat oven to 375∞; Lightly coat a baking sheet with canola oil.
2. In a large bowl, toss apples with sugar, cinnamon and raisins.
3. To prepare pate brisee, place flour in a medium bowl. Add salt and sugar and mix
well. Add butter and cut into flour, using a pastry cutter, until butter is the size of
small peas. Add water, 1 tablespoon at a time, mixing gently after each addition.
Dough will begin to form a ball when enough water has been added. Gather dough
with dry hands and form into ball. Let rest for 5 minutes.
4. Roll into an 8″ by 12″ rectangle!~ffff~poon filli~g”along”the 19n9 edge of the dough, about
. “”i ii” “i”
1-mch from the edge. Roll dough and fillin,gi;9ver itself and seal ends to form a strudel-
“i
Score into 10 1-inch slices. Brush top of strudel with melted butter.
5. Bake for 35 to 40 minutes, or until top is lightly browned. Remove from oven and trim
any extra pastry off the ends. Cut into 10 servings.
Makes 8 servings, each containing approximately:
170 calories
28 mg. carbohydrate
6 gm. fat
15 mg. cholesterol
2 gm. protein
95 mg. sodium
2 gm. fiber
9/01

Brown Butter

Also called buerre noiset, brown butter has a subtle nuttiness and enhances some recipes.  If you go too far, you get buerre noir, which is black butter.

One of the important points is that the milk solids are used.  When making clarified butter the clear solution is poured off, and the solids are discarded.

STEP BY STEP

  1. Melt 1 stick of butter in a sauce pan over low heat until the milk solids turn brown
  2. Pour through a fine sieve.  Some solids are OK, but there are large chunks which you don’t want
  3. Add 1 tsp vanilla

This brown butter is used for a lemon tart  in my Desserts book.


Fruitcake – Two Recipes

Recipe One

Anyone can buy a fruit cake, but did you know that you can bake your own for twice the cost?   LOL.   This is true, but when making it from scratch you are assured of the ingredients, and that is worth a lot for something that can last for up to two years.  Here is Grandma’s Recipe for Fruitcake.  This recipe will fill a 9×12 and a 9×9 baking dish.  For just one 9×9 baking dish, divide all ingredients in half.

INGREDIENTS

  • STEP ONE – Soak fruit mixture one or two days in advance
    6 C misc dried diced fruit – golden raisins, Medjool dates, prunes, Craisins, blueberries, sour cherries, apricots, dried pineapple, dried apples, dried bananas, etc.
    2 C Rum
    Let mixture meld and soften for 8-48 hours
  • STEP TWO – Prepare nuts
    Zest and juice from one orange
    Zest and juice from one lime or lemon
    1 tsp salt
    1 C chopped walnuts
    1 C slivered almonds
    1 C chopped pecans
    2 sticks ( 1 C ) butter – Melt and toss with nuts to absorb butter – set aside
  • STEP THREE – Prepare sweetener
    Cream together 3/4 C granulated white sugar and 1/2 C brown sugar
    8 eggs (one at a time)
    2 TBL molasses
    1/4 C apple cider
  • STEP FOUR – Prepare binder
    1 TBL allspice – Alternately 2 TBL Grandpa’s CinnaSugar® and 1/2 tsp clove
    Sift together several times till all one color
    3 C AP flour
    2 TBL ground ginger
    – When completely sifted together, toss with 1 C crystallized (candied) ginger
  • STEP FIVE – Combine ingredients
    Mix the fruit mixture with the nuts (From Steps 1 and 2) and stir to combine.
    Mix the fruit mixture into the sugar mixture (Step 3) and stir to combine.
    Mix the binder (flour mixture – Step 4) together all other ingredients
  • STEP SIX – Prepare for baking
    Cut aluminum foil and spread over the bottom of your greased baking dish
    Also grease the aluminum foil after it is in the bottom of the pan
    Fill pan with the mixture (3/4 of the way up) and press flat
    Place a baking dish 1/2 filled with water in the bottom of your oven
    – This will keep your cake from drying out while baking
    Bake at 275º for 3 hours
    Test with a toothpick, and if it does not come out clean, bake another 30 minutes
  • STEP SEVEN – Let flavors combine
    Spritz with brandy every hour for six hours as it cools completely
    Wrap in clean cheese cloth soaked in brandy
    Refrigerate and generously spritz with brandy every 4-8 hours for the next 24 hours
  • STEP EIGHT
    Leave the cheese cloth in place, and carefully wrap for storage using Saran Wrap or Foil
    If using foil, wrap also in Saran Wrap – freshness is key.
    Ideally, seal it in a heat-seal vacuum bag for ultimate preservation.

NOTE:  I was kidding when I said this will last for two years.  While it just might last that long in the freezer, this will keep (unopened) for several months in your refrigerator.

Recipe Two

Not your typical Fruitcake.  No baking, no aging and no mystery fruit.

      • 1 lb graham crackers – crumbled
      • 1 tsp nutmeg
      • 1/2 lb raisins – Soaked in hot water for 30 minutes
      • 16 oz jar Maraschino Cherries – Drain and halve cherries
        • Alternate fruits:  golden raisins, Medjool dates, prunes, Craisins, blueberries, sour cherries, apricots, dried pineapple, dried apples, dried bananas, etc.
      • 1/2 C brandy or rum
      • 1/4 lb pecans – Chopped
      • 1/4 lb English Walnuts – chopped
      • 1/4 lb almonds – chopped
      • 20 big marshmallows – Melted in hot milk
      • 14 oz condensed or evaporated  milk
      • Mix all ingredients together
      • Pack into regular sized loaf pan lined with plastic wrap
      • Refrigerate overnight and cut slices with a hot knife
    1. Prepare all dry ingredients, put into bowl
    2. Chop nuts and raisins, and combine with dry ingredients
    3. Crush graham crackers, and combine with dry ingredients
    4. Chop (or halve) Marashino cherries – drain and reserve juice – set juice aside, and toss fruit into dry ingredients.
    5. Combine milk and marshmallows into a medium sized sauce pan.
    6. Cook over medium-low heat stirring constantly only until melted.
    7. Add brandy into the juice
    8. Pour the marshmallow mixture over the dry ingredients
    9. Top with reserved juices, and mix slightly
    10. Pour into a casserole dish, lined with plastic wrap and lightly sprayed with Pam
    11. Dump the mixture into the dish, spread evenly and press
    12. Store in refrigerator at least 12 hours.


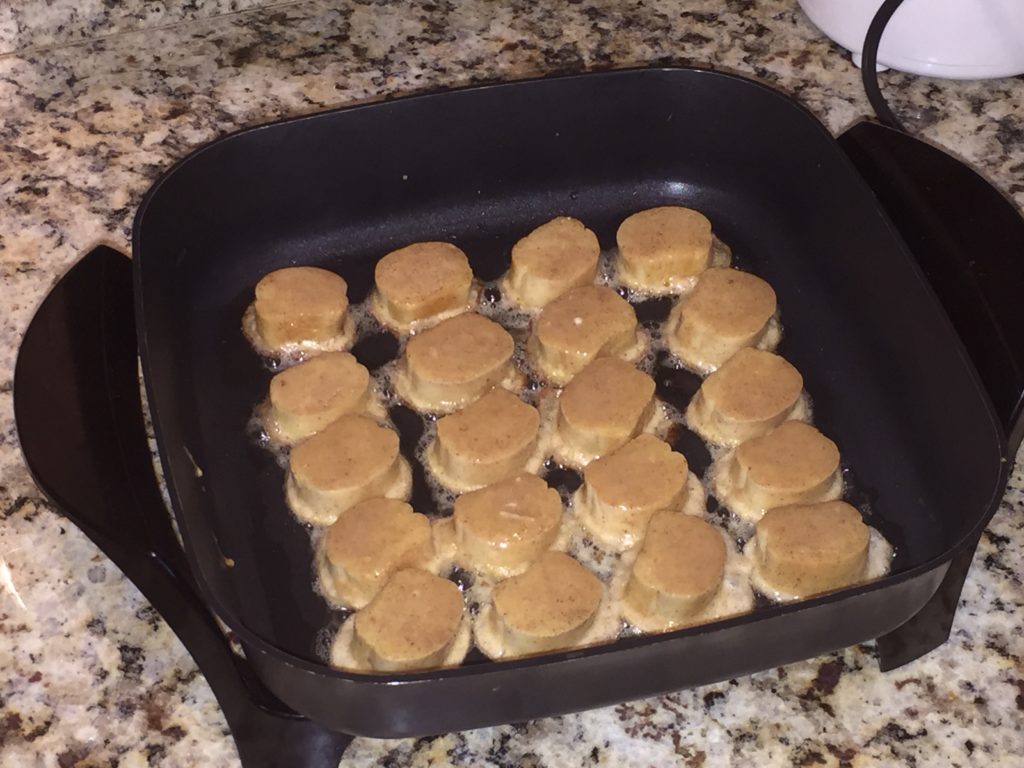
Mini French Toast Medallions

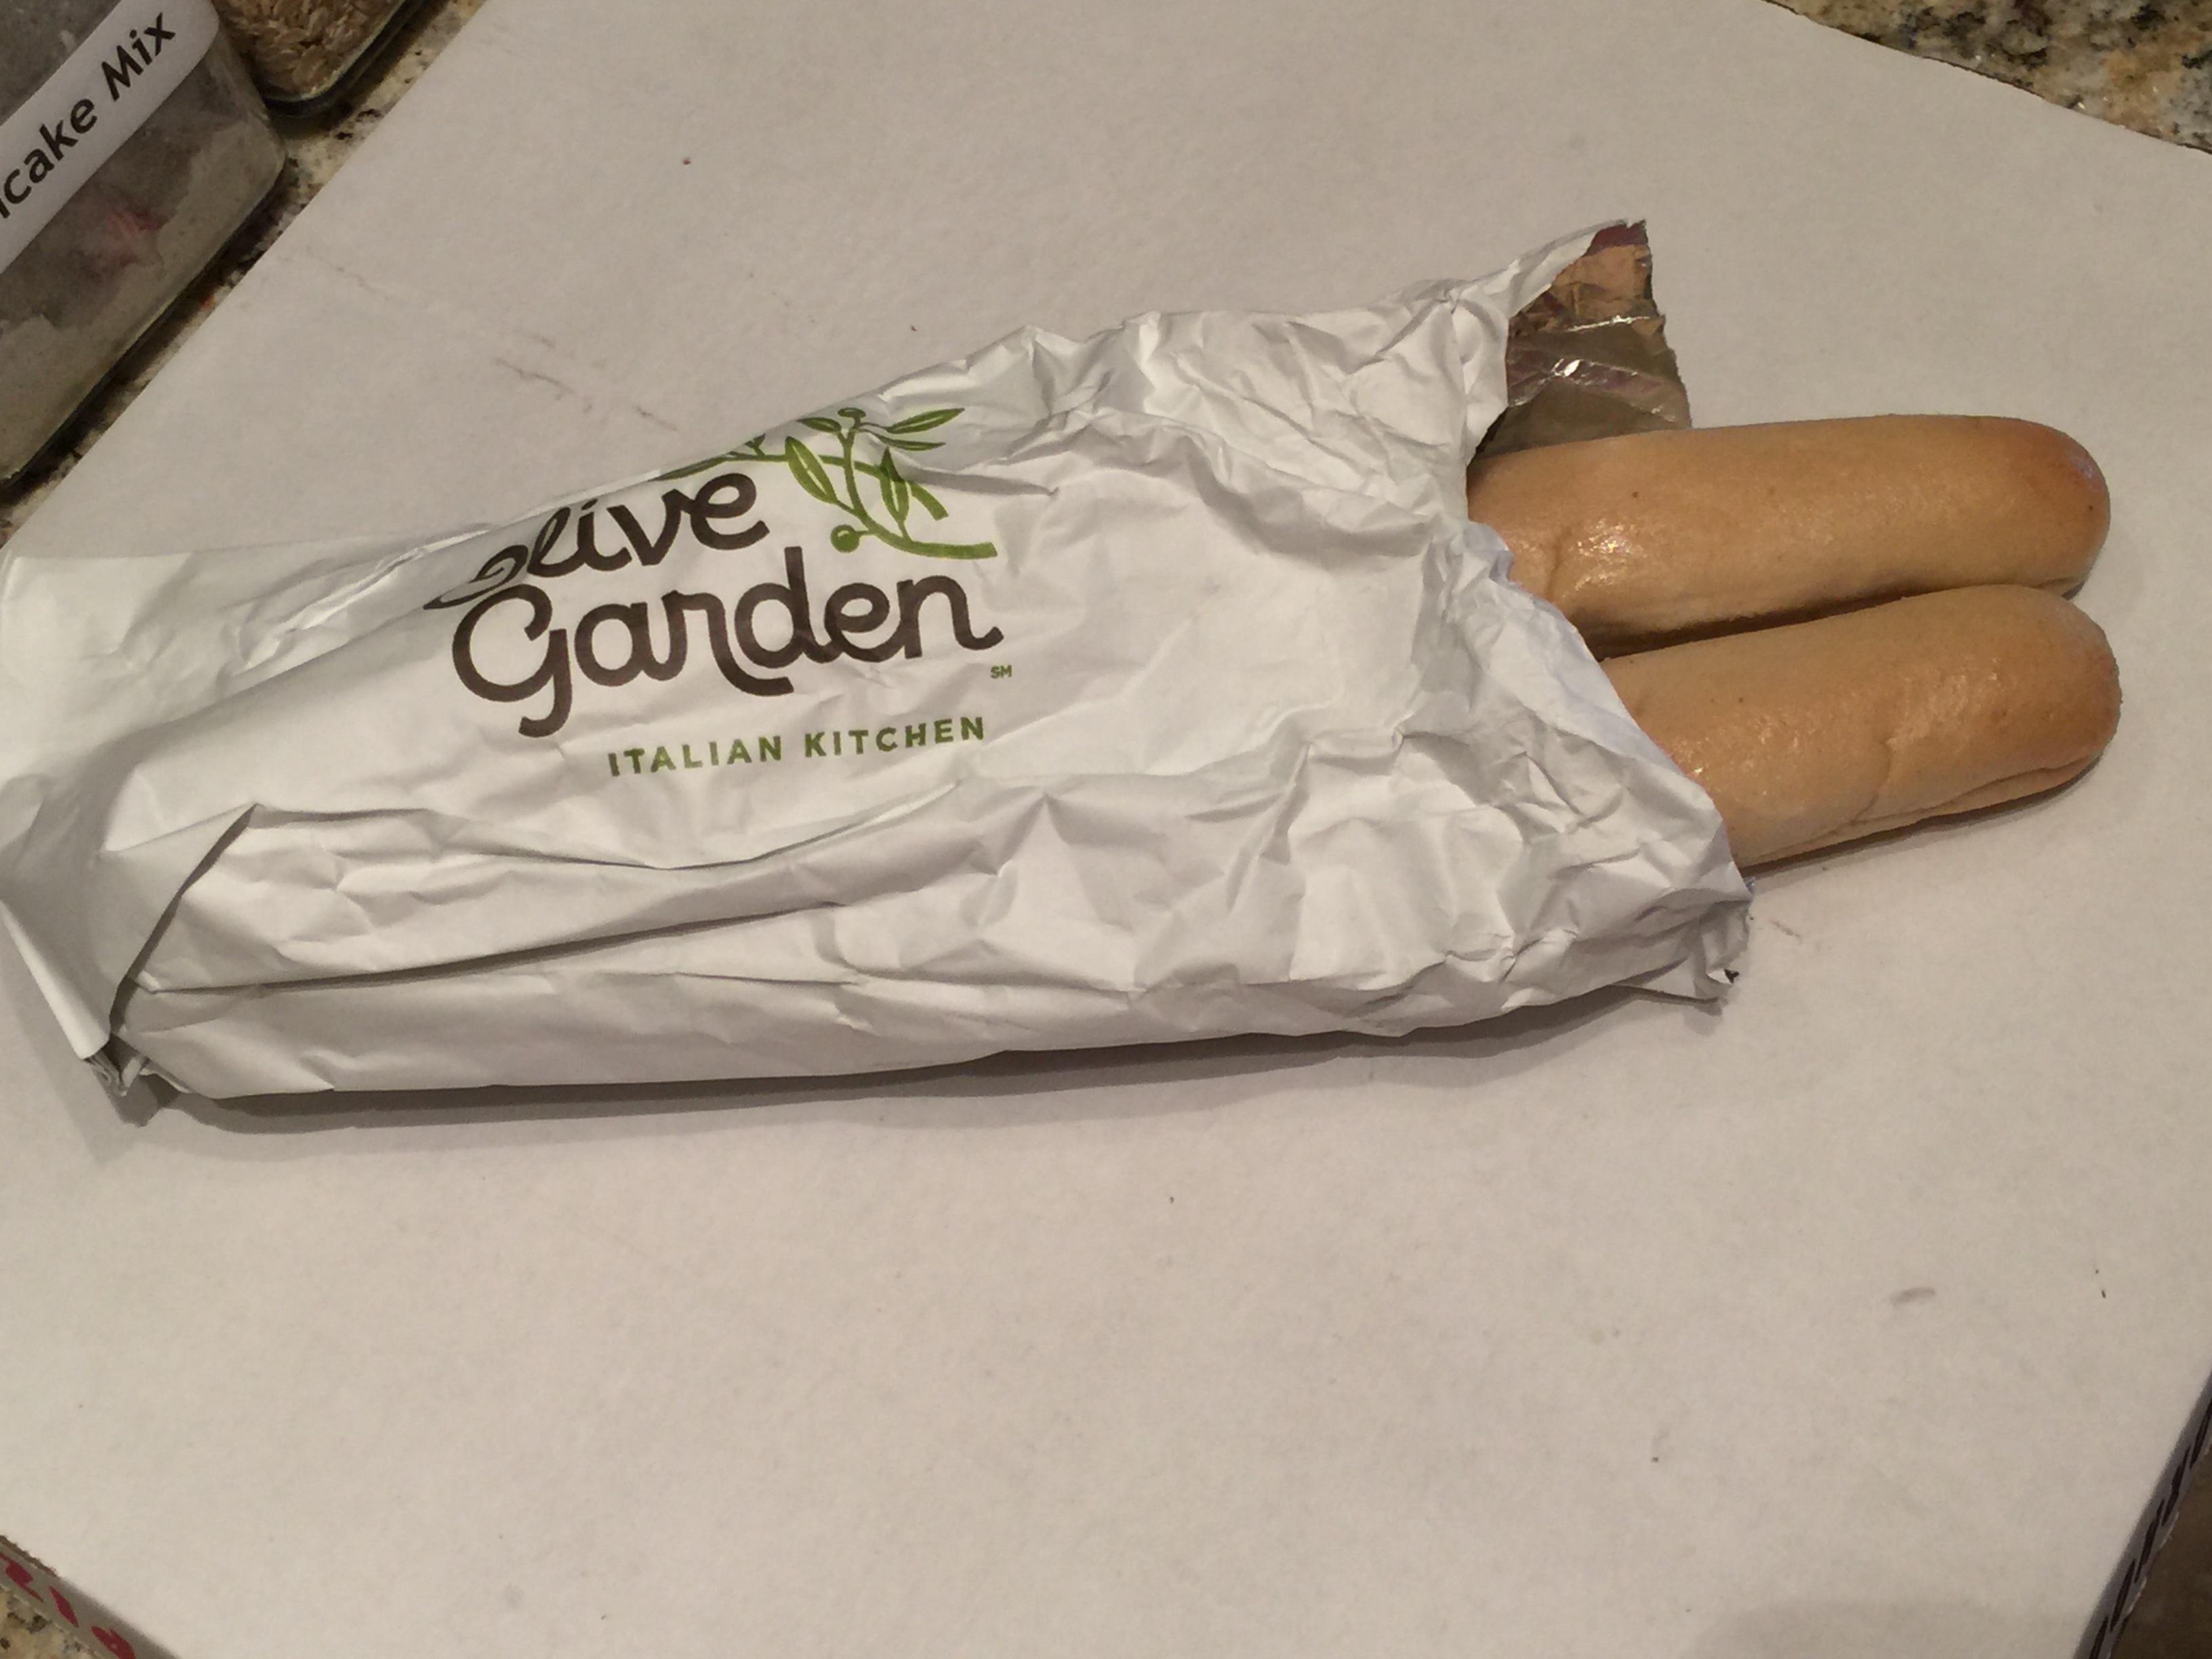
Olive Garden BreadsticksIf you eat at Olive Garden, you know that you receive an unlimited supply of breadsticks.

Take them home and you will have a great breakfast surprise.

INGREDIENTS for preparing two breadsticks

  • Take-home left over breadsticks
  • One egg
  • 2-3 TBL buttermilk (or whole milk)
  • 2-3 TBL of melted butter
  • 2-3 TBL of canola oil2016-04-24 08.59.18
  • 2-3 TBL granulated sugar
  • 1 TBL Grandpa’s CinnaSugar®


STEP BY STEP

  1. Using a dry paper towel, brush the outside of the breadsticks.  Most of the butter will remain, but most of the garlic will be brushed away.
  2. Cut medallions about 1/4 inch thick – discard the tips
  3. Mix all of the above ingredients (except the breadsticks) together in a large mixing bowl
    – when adding your milk, melted butter and canola oil, whisk continually to emulsify the fats
  4. Toss the bread medallions in the mixture
  5. Allow to soak for about five minutes
  6. Toss again and soak for five minutes2016-04-24 09.02.02
  7. Toss again and soak for five minutes
  8. Lightly grease your skillet
  9. Place each soaked medallion in the skillet
  10. Let cook about 5 minutes then flip each one
  11. Let cook about 4 minutes then flip back to the original side
  12. Let cook about 2 minutes, then place on plates
  13. There is no need for butter because we added it into the batter2016-04-24 09.05.37
  14. Simply serve with hot mashed fruit, syrup or honey – depending on your tastes.


Judy’s Counter Kraut

Note:  This is a lot of information.  If you print out this recipe, you can use the delete function to delete any “tabled” recipes that you don’t want.

1. Shave cabbage thin. Discard hard core.
2. Pack tightly into glass jar sprinkling 1 tsp with each handful (approx 2 TBL per quart jar)
3. Add distilled water to cover (or tap water that has aired out for 24 hours)
4. Place lid on loosely.
5. Stand jars in tray (or plate) and leave on counter for 9-12 days.  A longer fermentation makes a tangier sauerkraut.  Go for as long as six weeks.
6. Add water lost by fermentation process – top off daily – also, remove any floaters from the top of the water.After 9-12 days, kraut is ready to eat or may be canned in boiling water bath. May also be refrigerated for up to 2 months.Caraway seeds or garlic may be added if desired as you pack in the cabbage.

OTHER NOTES FOR SAUERKRAUT AND KIMCHI BELOW.

In the first stage, the cabbage is soaked in a salty brine that kills off harmful bacteria. In the second stage, the remaining Lactobacillus bacteria (the good guys!) convert sugars into lactic acid, which preserves the vegetables and gives them that wonderful, tangy flavor. (If you want to learn more about fermentation, I highly recommend The Art of Fermentation by Sandor Katz.)

How to Make Cabbage Kimchi

Makes 1 quart
What You NeedIngredients
1 (2-pound) head Napa cabbage
1/4 cup sea salt or kosher salt (see Recipe Notes)
Water (see Recipe Notes)
1 tablespoon grated garlic (about 5-6 cloves)
1 teaspoon grated ginger
1 teaspoon sugar
2-3 tablespoons seafood flavor or water (optional, see Recipe Notes)
1-5 tablespoons Korean red pepper flakes (gochugaru)
8 ounces Korean radish or daikon, peeled and cut into matchsticks
4 scallions, trimmed and cut into 1-inch pieces

Equipment
Cutting board and knife
Large bowl
Gloves (optional but highly recommended)
Plate and something to weigh the kimchi down, like a jar or can of beans
Colander
Small bowl
Clean 1-quart jar with canning lid or plastic lid
Bowl or plate to place under jar during fermentation
Instructions

Cut the cabbage. Cut the cabbage lengthwise into quarters and remove the cores. Cut each quarter crosswise into 2-inch-wide strips.

Salt the cabbage. Place the cabbage and salt in a large bowl. Using your hands (gloves optional), massage the salt into the cabbage until it starts to soften a bit, then add water to cover the cabbage. Put a plate on top and weigh it down with something heavy, like a jar or can of beans. Let stand for 1-2 hours.

Rinse and drain the cabbage. Rinse the cabbage under cold water 3 times and drain in a colander for 15-20 minutes. Rinse and dry the bowl you used for salting, and set it aside to use in step 5.

Make the paste. Meanwhile, combine the garlic, ginger, sugar, and seafood flavor (or 3 tablespoons water) in a small bowl and mix to form a smooth paste. Mix in the gochugaru, using 1 tablespoon for mild and up to 5 tablespoons for spicy (I like about 3 1/2 tablespoons).

Combine the vegetables and paste. Gently squeeze any remaining water from the cabbage and return it to the bowl along with the radish, scallions, and seasoning paste.

Mix thoroughly. Using your hands, gently work the paste into the vegetables until they are thoroughly coated. The gloves are optional here but highly recommended to protect your hands from stings, stains, and smells!

Pack the kimchi into the jar. Pack the kimchi into the jar, pressing down on it until the brine rises to cover the vegetables. Leave at least 1-inch of headspace. Seal the jar with te lid.

Let it ferment. Let the jar stand at room temperature for 1-5 days. You may see bubbles inside the jar and brine may seep out of the lid; place a bowl or plate under the jar to help catch any overflow.

Check it daily and refrigerate when ready. Check the kimchi once a day, pressing down on the vegetables with a clean finger or spoon to keep them submerged under the brine. (This also releases gases produced during fermentation.) Taste a little at this point, too! When the kimchi tastes ripe enough for your liking, transfer the jar to the refrigerator. You may eat it right away, but it’s best after another week or two.

Recipe Notes

Salt: Use salt that is free of iodine and/or anti-caking agents, which can inhibit fermentation.

Water: Chlorinated water can inhibit fermentation, so use spring, distilled, or filtered water if you can.  Last resort, you can use tap water than has aired out for 24 hours.

Seafood flavor and vegetarian alternatives: Seafood gives kimchi an umami flavor. Different regions and families may use fish sauce, salted shrimp paste, oysters, and other seafood. Use about 2 tablespoons of fish sauce, salted shrimp paste, or a combination of the two. For vegetarian kimchi, I like using 3/4 teaspoon kelp powder mixed with 3 tablespoons water, or simply 3 tablespoons of water.

Sauerkraut is made by a process called lacto-fermentation. To put it (fairly) simply: There is beneficial bacteria present on the surface of the cabbage and, in fact, all fruits and vegetables. Lactobacillus is one of those bacteria, which is the same bacteria found in yogurt and many other cultured products. When submerged in a brine, the bacteria begin to convert sugars in the cabbage into lactic acid; this is a natural preservative that inhibits the growth of harmful bacteria.

Lacto-fermentation has been used for centuries to preserve seasonal vegetables beyond their standard shelf-life. The fermentation process itself is very reliable and safe, and the fermented sauerkraut can be kept at cellar temperature (around 55°F) for months, although those of us without cellars can make do with storing the kraut in our fridges. Besides preserving the cabbage, this fermentation process also transforms it into something incredibly tasty and gives it additional health benefits — fermented sauerkraut contains a lot of the same healthy probiotics as a bowl of yogurt.

What Do I Need to Make Sauerkraut?

At the most basic, all you need is cabbage, salt, and some sort of container to store it while it’s fermenting. It’s important that the cabbage remain submerged in its liquid during fermentation. When making sauerkraut in a crock, you usually place a weighted plate over the cabbage to pack it down and keep it submerged. When fermenting in a mason jar, inserting a smaller jelly jar filled with rocks or marbles in the mouth of the larger jar serves the same purpose.

The cabbage near the surface tends to float, so when fermenting in a mason jar, you need to either tamp down the cabbage a few times a day or place a large outer leaf of cabbage over the surface of the shredded cabbage to hold it down. Also be sure to keep the jar covered at all times with a clean cloth or piece of cheese cloth. This will allow airflow, but prevent dust or insects from getting into the sauerkraut.

How Long Does It Take To Make Sauerkraut?

For a small quart-sized batch like we’re making today, the minimum time is about three days, though the kraut will continue to ferment and become tastier for many days after that. As simple as it sounds, the best rule of thumb is to keep tasting the kraut and refrigerate (or take it cellar temperature) when it tastes good to you. The sauerkraut is safe to eat at every stage of the process, so there is no real minimum or maximum fermentation time.  It can go for as long as six weeks.

What Can Go Wrong?

Not much! You may see bubbles, foam, or white scum on the surface of the sauerkraut, but these are all signs of normal, healthy fermentation. The white scum can be skimmed off as you see it or before refrigerating the sauerkraut. If you get a very active fermentation or if your mason jar is very full, the brine can sometimes bubble up over the top of the jar. This is part of the reason why I recommend using a larger mason jar than is really necessary to hold the cabbage. If you do get a bubble-up, it’s nothing to worry about. Just place a plate below the jar to catch the drips and make sure the cabbage continues to be covered by the brine.

It is possible that you might find mold growing on the surface of the sauerkraut, but don’t panic! Mold typically forms only when the cabbage isn’t fully submerged or if it’s too hot in your kitchen. The sauerkraut is still fine (it’s still preserved by the lactic acid) — you can scoop off the mold and proceed with fermentation. This said, it’s still important to use your best judgement when fermenting. If something smells or tastes moldy or unappetizing, trust your senses and toss the batch.

I have been making fermented beverages and foods for years, and I have always been amazed by how easy they are and how delicious the results can be. There are a few resources I turn to again and again:

The Art of Fermentation by Sandor Katz – This is a great all-around resource on fermentation in general, fermentation problem-solving, and fermentation health benefits.

Cultures for Health – This is an online resource for fermentation cultures and equipment, but I also turn to them for a lot of information on fermenting. They just released a free e-book on lacto-fermentation that is available if you sign up for their newsletter.

Here’s how to make a small batch of sauerkraut in a mason jar — it’s just enough kraut to get you hooked!

How to Make Homemade Sauerkraut in a Mason Jar

Makes 1 to 1 1/2 quarts
What You Need

Ingredients
1 medium head green cabbage (about 3 pounds)
1 1/2 tablespoons kosher salt
1 tablespoons caraway seeds (optional, for flavor)

Equipment
Cutting board
Chef’s knife
Mixing bowl
2-quart widemouth canning jar (or two quart mason jars)
Canning funnel (optional)
Smaller jelly jar that fits inside the larger mason jar
Clean stones, marbles, or other weights for weighing the jelly jar
Cloth for covering the jar
Rubber band or twine for securing the cloth
Instructions

Clean everything: When fermenting anything, it’s best to give the good, beneficial bacteria every chance of succeeding by starting off with as clean an environment as possible. Make sure your mason jar and jelly jar are washed and rinsed of all soap residue. You’ll be using your hands to massage the salt into the cabbage, so give those a good wash, too.

Slice the cabbage: Discard the wilted, limp outer leaves of the cabbage. Cut the cabbage into quarters and trim out the core. Slice each quarter down its length, making 8 wedges. Slice each wedge crosswise into very thin ribbons.

Combine the cabbage and salt: Transfer the cabbage to a big mixing bowl and sprinkle the salt over top. Begin working the salt into the cabbage by massaging and squeezing the cabbage with your hands. At first, it may not seem like enough salt, but gradually, the cabbage will become watery and limp — more like coleslaw than raw cabbage. This will take 5 to 10 minutes. If you’d like to flavor your sauerkraut with caraway seeds, mix them in now.

Pack the cabbage into the jar: Grab handfuls of the cabbage and pack them into the canning jar. If you have a canning funnel, this will make the job easier. Every so often, tamp down the cabbage in the jar with your fist. Pour any liquid released by the cabbage while you were massaging it into the jar.

→ Optional: Place one of the larger outer leaves of the cabbage over the surface of the sliced cabbage. This will help keep the cabbage submerged in its liquid.

Weigh the cabbage down: Once all the cabbage is packed into the mason jar, slip the smaller jelly jar into the mouth of the jar and weigh it down with clean stones or marbles. This will help keep the cabbage weighed down, and eventually, submerged beneath its liquid.

Cover the jar: Cover the mouth of the mason jar with a cloth and secure it with a rubber band or twine. This allows air to flow in and out of the jar, but prevent dust or insects from getting in the jar.

Press the cabbage every few hours: Over the next 24 hours, press down on the cabbage every so often with the jelly jar. As the cabbage releases its liquid, it will become more limp and compact and the liquid will rise over the top of the cabbage.

Add extra liquid, if needed: If after 24 hours, the liquid has not risen above the cabbage, dissolve 1 teaspoon of salt in 1 cup of water and add enough to submerge the cabbage.

Ferment the cabbage for 3 to 10 days: As it’s fermenting, keep the sauerkraut away from direct sunlight and at a cool room temperature — ideally 65°F to 75°F. Check it daily and press it down if the cabbage is floating above the liquid.

Because this is a small batch of sauerkraut, it will ferment more quickly than larger batches. Start tasting it after 3 days — when the sauerkraut tastes good to you, remove the weight, screw on the cap, and refrigerate. You can also allow the sauerkraut to continue fermenting for 10 days or even longer. There’s no hard and fast rule for when the sauerkraut is “done” — go by how it tastes.

While it’s fermenting, you may see bubbles coming through the cabbage, foam on the top, or white scum. These are all signs of a healthy, happy fermentation process. The scum can be skimmed off the top either during fermentation or before refrigerating. If you see any mold, skim it off immediately and make sure your cabbage is fully submerged; don’t eat moldy parts close to the surface, but the rest of the sauerkraut is fine.

Store sauerkraut for several months: This sauerkraut is a fermented product so it will keep for at least two months and often longer if kept refrigerated. As long as it still tastes and smells good to eat, it will be. If you like, you can transfer the sauerkraut to a smaller container for longer storage.

Recipe Notes

Sauerkraut with Other Cabbages: Red cabbage, napa cabbage, and other cabbages all make great sauerkraut. Make individual batches or mix them up for a multi-colored sauerkraut!

Canning Sauerkraut: You can process sauerkraut for longer storage outside of refrigeration, but the canning process will kill the good bacterias produced by the fermentation process. See this tutorial from the National Center for Home Food Preservation for canning instructions.

Larger or Smaller Batches: To make larger or smaller batches of sauerkraut, keep same ratio of cabbage to salt and adjust the size of the container. Smaller batches will ferment more quickly and larger batches will take longer.

Hot and Cold Temperatures: Do everything you can to store sauerkraut at a cool room temperature. At high temperatures, the sauerkraut can sometimes become unappetizingly mushy or go bad. Low temperatures (above freezing) are fine, but fermentation will proceed more slowly.

INTRO: Spices Demystified

It is quality more than quantity that matters in a spice cupboard. You should be able to consolidate your needed spices to no more than twenty. At least once a year, take the money that you might spend on a nice meal and replenish your spices. Pass on your old spices to a friend who really doesn’t know any better.

Keep in mind, whole keeps fresh longer. Grind it when you need it.

CRITICAL SPICES

Alspice
Basil

Bay Leaves
Black Pepper (Whole)
Cayenne Pepper
Celery Seed
Chili Powder
Cinnamon (whole)
Cloves (whole)
Coriander (Whole Cilantro seed)
Dill seed
Garlic powder (not salt)
Mustard (Ground)
Nutmeg
Oregano
Paprika
Parsley
Red pepper flakes
Rosemary
Salt (Kosher Sea Salt)
Tarragon
White Pepper


NICE TO HAVES

Chives
Cumin
Lemon pepper

Mace
Marjoram
Mustard seed
Onion flakes (Dried)
Oregano (Dried)
Poppy seeds
Saffron
Sage
Sesame seed
Thyme (Dried)
Turmeric


IN THE FRIDGE

Capers
Carrots
Celery
Cilantro

Dijon mustard
Eggs
Flat-leaf parsley
Ginger root (Whole)
Ketchup
Mayonnaise
Milk
Parmegiano-Reggiano
Soy sauce
Tomato (whole)

COMPLEX PRE-MIXED SPICES

Buy if you need them

Chinese 5 Spice Powder
Garam Marsala
Curry Powder
Chili Powder


IN THE FREEZER

Frozen Carrots
Frozen Peas
Frozen Spinach


PANTRY STAPLES

Baking potatoes
Beef stock
Bisquick
Chicken stock
Cream of mushroom soup
Deli brown mustard
Diced tomatoes (canned)
EVOO (Extra-Virgin olive oil)
Garlic cloves – lots!
Lemons
Limes
Louisiana hot sauce/Tabasco
Nuts (almonds, peanuts, pecans, walnuts)
Olive oil
Pasta
Peanut butter
Pure maple syrup
Roasted red peppers (12-16 oz. jar)
Sesame seeds (Toasted)

Soy sauce
Spanish or yellow onions
Teriyaki sauce
Tomato paste
Tomato sauce
Vanilla extract (Pure)
Worchestershire sauce


DON’T BOTHER WITH THESE

Barbecue sauce and
Bullion cubes
Anise
Cardamom
Carraway seed
Chicken, Beef or Vegetable stock
Cajun seasoning
Chipotle powder
Curry Powder
Fennel Seed
Greek seasoning
Herbs de Provence
Italian seasoning
Poultry seasoning
Taco seasoning.

OK, in a perfect world, we would use spices that are no more than 6 months old. Here in the real world, use this as your “get by” rule of thumb:

  • Keep the Critical Spices up to date, that is; refresh every 6 months – especially if they are ground spices. It will cost you about what one good meal might cost you.
  • Replace the Nice to Haves every 12 months. Replace all other spices at least every 24 months. They may taste closer to cardboard than the spice for which they were named, but there will at least be a slight resemblance after two years.
  • Whole spices, such as nutmeg, will be good for two years.
  • If you have spices older than two years, you should not be cooking.

spice shelf life – spice information – spices info – spice supply list


Tips on Using Spices

Good advice on spices

1. Use fewer ingredients. If you want more acidity use vinegar or lemon juice but not both. To create a briny taste use anchovies or capers but not both.
2. As ingredients cook, they become “tamed.” If you want (for example) a strong garlic taste, add the garlic at the end.
3. Chopping herbs roughly will keep more of their taste than if you mince them.
4. Don’t be afraid for foods to start toward room temperature. It’s better than too cold or too hot.
5. Don’t buy large quantities of oil or spices to save money. They will go bad or lose their potency before you can use them up.

Serve with sweet chutney along side to work with the spiciness.

Use these spices instead of salt

  • For Fish or Chicken
    • Basil
    • Cumin
    • Dry Mustard
    • Paprika
    • Thyme
    • Paprika
    • Fresh Lemon
    • Poultry Seasoning
  • For Beef or Pork
    • Basil
    • Horseradish
    • Onion
    • Sage
    • Rosemary
    • Garlic
    • Applesauce
    • Pepper
  • Starchy and Non-Starchy Vegetables
    • Curry
    • Dill
    • Marjoram
    • Garlic
    • Basil
    • Oregano

Baking Soda vs Baking Powder

  • Baking soda is Calcium Bicarbonate, and is alkaline.  It requires an acid such as buttermilk, lemon or vinegar to produce Carbon Dioxide.  This is a stable chemical compound, so there is no need to replace it except every couple of years, and that is only because baking soda tends to absorb odors and flavors from its surroundings.
  • Baking powder is made up of baking soda, plus corn starch plus cream of tartar.  Once the baking powder is dissolved, it acts as baking soda does.  Water speeds up the release of Carbon Dioxide.  The problem with this is that on the shelf, the reaction occurs more slowly, but it still occurs.  Replace your baking powder every six months.

Accompaniments can be as simple as bread and butter, or as complex as Cacik (a Turkish cucumber/yogurt side served cold)

An accompaniment should be selected so that it either enhances the flavor of the main course (like applesauce with pork chops) or provides a welcome relief (like crisp chips with a hot salsa). Textural compliments are also important (like scramble eggs with an English muffin.) The good thing is that there are only a few rules, and within that, you should experiment.

Salt and Pepper

Salt and Pepper

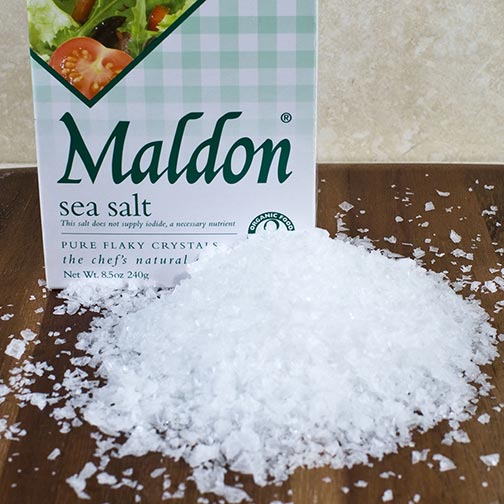
1. SALT – Always use Sea Salt, not “the stuff in the round blue box.”  Whether you use fine or coarse sea salt is determined by the results you are looking for.

Another option is Maldon Salt, which is actually shaved flakes of salt.

2. PEPPER – Avoid ground or crushed black pepper because it gets stale. Buy peppercorns and (Peugeot) pepper mill. Replace peppercorns about every 6 months.

Sauces like ketchup and A-1 Sauce are great for the rest of the people but if you want a sauce that they will remember, take a base such as ketchup, and add some garlic powder to it, for example. Other fun spices to add are chili powder, onion powder, cumin, and similar things.

Salad dressings are equally fun to explore. The base is 1/2 vinegar and 1/2 oil. Mix the vinegar with a whisk as you drizzle VERY SLOWLY the olive oil into the vinegar. Some people say this is not necessary, but what you are doing is breaking the oil into tiny droplets that will NOT separate completely from the vinegar. Once that is done, add something fun like powdered ginger.

Even things like pickles can be improved upon. Sure; Vlasic makes a hell-uv-a pickle, but once you’ve made my bread and butter pickles, you’ll never go back to the dark side.

Rhubarb Pie

INGREDIENTS

  • 1 C chopped rhubarb
  • 1 C chopped strawberries or peeled apples
  • 1 TBL lemon juice
    • TOSS FRUIT
  • 1 egg
  • 1/4 C white sugar
  • 1/2 tsp salt
  • 1 tsp apple pie spice
  • 1 TBL cornstarch
  • 3 TBL all-purpose flour
    • MIX DRY INGREDIENTS
  • 2 TBL butter – very cold
    • CUT BUTTER INTO DRY
  • Mix all together and drizzle in 1/4 C buttermilk
  • Puff pastry for the crusts

STEP BY STEP

  1. Preheat oven to 450 degrees F.
  2. Combine dry ingredients
  3. Sprinkle 1/4 C of it over pastry in pie plate
  4. Cut fruit into 1/2 inch pieces
  5. Heap fruit over this mixture.
  6. Sprinkle with remaining sugar and flour.
  7. Cover with top crust.
  8. Place pie on lowest rack in oven.
  9. Bake for 15 minutes on high heat.
  10. Reduce oven temperature to 325 degrees F (170 degrees C), and continue baking for 40 more minutes.
  11. Serve warm or cold.

Cinnamon Bun – ATK


  • Rapid Rise Yeast – 4 tsp
  • 1/4 C milk – Heat to 110º plus 1 tsp sugar
  • 5 minutes to rise
    MIX
  • 2 3/4 C AP flour
  • 2.5 tsp baking powder
  • 3/4 tsp salt
  • 5 tsp sugar
    ADD YEAST
  • 2 tbl melted butter
  • 1 C milk – room temp
  • Mix briefly
    dump on countertop
  • Create gluten, but don’t overwork
  • Roll out to about 9×12
  • Brush with 2 TBL butter – NOT 1 inch on edge though
  • Sprinkle on filling – not past edge
  • Press on
  • Bench scraper to losten, and then roll
  • Pinch seam together
  • Use cake pan – spray and parchment and spray
  • Cut in half, half, half
  • Put in pan
  • Brush tops with butter
  • Cover with plastic for 30 minutes
  • Bake 350º for about 23 minutes
  • Losen edge, let rest 5 minutes
  • Turn out, and invert onto cooling rack

GLAZE

  • 3 oz Cream cheese
  • 2 TBL butter
  • 2 TBL milk
  • salt
  • vanilla extract
  • Whisk till smooth
  • Add 1 C confectioner sugar
  • Pour and spread glaze over top

Filling

  • 3/4 C Brown sugar
  • 1/4 C gran sgar
  • 1 tbl cinnamon
  • 1/8 tsp salt
  • 2 TBL melted butter
  • 1 tsp vanilla

Make your own Baking Powder

The difference between Baking Soda and Baking Powder is that baking soda requires an acid such as lemon to activate.  Baking powder uses a dried acid, than when mixed with water will activate.

Here is an easy way to make your own.

Baking Soda is alkaline – Potassium Bicarbonate.  It requires an acid to activate and create bubbles
vinegar, lemon, butter milk or sour milk
CO2 gasses are produced

Yeast: A live product of beer fermentation.  Cinnamon rolls, etc to rise breads

Cake yeast: dried yeast with corn meal

Compressed yeast cakes – only last a few days

1820 baking soda – pearl ash

1850 – Calcium Bicarbonate is better and replaced potassium bicarb

1865 – Baking soda plus corn starch plus a dried acid such as cream of tartar

Generic kuken dough recipe from germany

Baking powder will combine slowly on the shelf, leaving you with inactive baking powder in about 6 months.

To make your own baking powder

  • Use 1 TBL baking soda and 2 TBL cream of tartar
  • Measures spoon for spoon just as baking powder
  • Use within 1 month of making it


Pizza Balls

INGREDIENTS

  • Pillsbury Biscuit Dough – flattened
  • Firm mozzarella cheese
  • Basil leaves
  • Sun dried tomato pieces
  • Parmesan
  • Garlic powder
  1. Wrap it up and make a ball
  2. Roll up tightly
  3. Paint with a little bit of egg wash
  4. Sprinkle with onion powder

OPTIONAL FLAVORS and FILLINGS

  • Cheddar, bacon and onion
  • Pepperoni, black olive and mozzarella
  • Ground beef or taco meat, jalapeño, and Monterey jack – Sprinkle with chipotle

You can bake these or put them in a tray with a bed of marinara.

HTML Snippets Powered By : XYZScripts.com