Chicken Kuwayaki

This recipe was presented by Chef Tatsuo Saito from NHK World Dining with the Chef.  Some modifications have been made.

  1. Pound 1 LB of chicken thighs gently with the blade of your knife to tenderize.
  2. Cut chicken thighs in pieces, on a bias to expose more surface area.
  3. Spread on a tray and sprinkle with salt.
  4. Let rest 5 minutes, then pat dry with a paper towel.
  5. Marinate in 2 TBL sake, 3 TBL mirin and 2 TBL soy for 15 minutes.
    I like to use a zip lock bag, so that I can easily agitate every 5 minutes.
  6. Pour the liquid into a cup.  We will use it later, so don’t discard.
  7. Toss the chicken pieces in potato starch or corn starch.
  8. Heat 2 TBL vegetable oil and 1 tsp sesame oil in a skillet.
  9. Cook on medium heat, but only to about 80% of completion.
  10. Tip the skillet and push the chicken to the high side.
  11. Add the marinate into the low side and heat until it boils and reduces slightly.
  12. Push the sauce and the chicken together.
  13. Plate with spinach and top with Sansho Pepper Powder.

Sansho Pepper  ( 山椒 ) is a Japanese seasoning powder made from the ground berries of the prickly ash tree. The powder has a peppery-lemon flavor with a long residual heat. Sansho powder is used to season sushi and make various Japanese noodle dishes mildly hot and fragrant.

Sichuan Eggplant

Steamed Eggplant

  1. Trim Japanese eggplant into 3 inch segments, then halve.
  2. Steam for 5 minutes or deep fry

Sauce 1 – Very north American

  1. Grill Anaheim pepper
  2. Chop until small
  3. Mix with fresh minced garlic
  4. Ginger
  5. White vinegar or white wine
  6. Olive oil

Cook briefly all to infuse

Sauce 2 – Very Sichuan

  1. 2 TBL Gochuchang
  2. Add garlic, ginger, Sesame seed oil (quite a bit)
  3. Sugar and soy (or mirin)
  4. White vinegar

Cook briefly

Eggplant 2

  1. Sesame oil, garlic, ginger
  2. Add eggplant
  3. Add protein – meat or tofu
  4. Add a bit of Sichuan sauce

Serve rice and sprinkle with chives


Pumpkin Roll

From Milk Street Television

Make a sponge

  • 1/2 C Rye Flour
  • 2 tsp Yeast
  • 1 TBL honey
  • 1/2 C warm water

Let proof 45-60 minutes

  1. 1 C pepitas – Pumpkin seeds or sunflower seeds
  2. 1/2 C sesame seeds
    Heat in dry skillet until the sesame seeds barely start to color
  3. Measure 1/2 C of seed mixture and set aside
  4. Remainder in food processor while still warm
  5. Puree for one minute until seeds are pulverized
  6. Add 4 TBL cold butter
  7. Puree 20 seconds
    Combine seeds into sponge
  8. 2 1/2 C bread flour
  9. Mix with Kitchen Aid
  10. Add 1 C water
  11. Mix about a minute
  12. Let rest 5 minutes
  13. Add 2 1/2 tsp kosher salt
  14. Mix 5 minutes
  15. Cover and let rise 1 hour
  16. Turn out onto floured surface
  17. Gently flatten and cut into half
  18. Pull together bottom and form balls
  19. Put onto baking sheet iwth parchment paper
  20. Brush top generously with egg wash
  21. Sprinkle with seed mixture
  22. Top with a Maldon sea salt
  23. Cover with plastic and let rise another 30 minutes
  24. 450º about 25 minutes
  25. Cool 30 minutes before eating

Parnassienne au Chocolate

Christopher Gross’ Parnassienne au Chocolate Chocolate Tower

From Phoenix New Times:  October 21, 2010

Chocolate Tower

What’s better than chocolate? Three kinds of chocolate, of course.

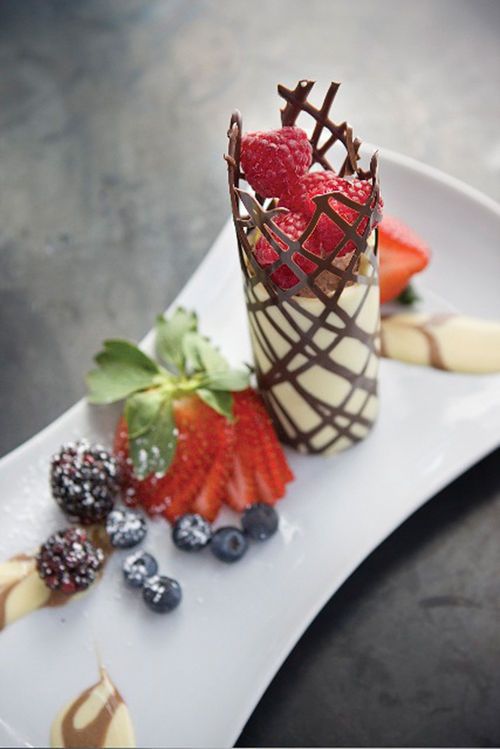
Chef Christopher Gross of Christopher’s Restaurant and Crush Lounge created his often-imitated  Parnassienne au Chocolate Chocolate Tower: Nearly half a foot of a dark chocolate lattice over a white chocolate tube that envelops a chocolate mousse center.

Today he shares the recipe for his signature tower — the same one he shared with Julia Child on her PBS master chef series — so you can try your hand at chocolatiering at home.

Click through for the three-part recipe: Mousse, lattice, and espresso sauce.

Chocolate Mousse

(Serves 8)
What you’ll need:
5-½ oz. semi-sweet chocolate, broken into pieces
3 Tbsp unsalted butter, sliced
¼ cup heavy cream
1-¼ cups egg whites (10 large)
4 Tbsp superfine sugar

What you’ll do:
1. Pour two inches of water into a saucepan and bring to a slow simmer. Set a stainless steel bowl on top of the pan, and add the chocolate and the butter. Stir occasionally as the chocolate melts; when smooth and lump-free, in about five minutes, remove and let the chocolate cool to room temperature.
2. Pour the cream into the stainless steel bowl set over ice and water. Beat by hand or with a portable beater, whipping in as much air as possible, until stiff peaks form.
3. Beat the egg whites to the soft peak stage; whip in two tablespoons of sugar; continue beating to stiff peaks form gradually adding the reminder of the sugar.
4. Whisk a quarter of the egg whites into the cool, melted chocolate, and then gradually add the rest. Fold in the cream quickly, deflating as little as possible.
5. Cut a piece of parchment paper into a rectangle 3-½ inches wide by 5 inches long. Form into a cylinder approximately 5 inches tall and 1-½ inches in diameter. Close the side with a piece of sticky tape and make sure that it stands up straight. Repeat to form 8 cylinders.
6. Fill a pastry bag with the mousse and pipe into the tubes, leaving a -½-inch space at the top. Drape the tops of the cylinders with a sheet of plastic and place in the freezer until frozen solid (approximately 1 hour).

Lattice

What you’ll need:
3 oz. semi-sweet chocolate, cut into pieces
6 oz. white chocolate, cut into pieces

What you’ll do:
1. For decorating the towers, cut eight 5-inch squares out of parchment paper.
2. Melt the semi-sweet chocolate over low heat.
3. Fill a decorating cone with some of the dark chocolate, and drizzle free form diagonal lines no more than 1/4 inch apart in a lattice pattern across each of the parchment squares. As each square is done, lay flat on one of the baking sheets.
4. When all squares are finished put the sheets in the freezer until the chocolate is set, or about 5 minutes. Reserve the remaining melted chocolate.
5. Melt the white chocolate over low heat.
6. Remove one dark chocolate lattice square from the freezer. And with the offset spatula, spread 2 to 3 tablespoons of the white chocolate in a very thin layer on top of the lattice, leaving a 1-inch strip uncoated at one side. Scrape off any excess chocolate.
7. Unwrap one frozen mousse tower and lay it on top of the white chocolate, parallel to and opposite the uncoated strip. Quickly wrap the parchment around the mousse, handling as little as possible and being careful to leave the uncoated flap overlapping.
8. Return each finished tower to the freezer, immediately after wrapping in parchment. Repeating steps 6 to 8 until you’ve latticed all the mousse towers.
9. The papers may be peeled off after five minutes in the freezer, and the chocolate lattice will remain in place around the mousse.
10. Then let the mousse defrost in the refrigerator for about an hour.

Espresso Sauce

What you’ll need:
1-½ cups half and half (light cream)
½ fragrant vanilla bean (or 1 tsp vanilla extract)
6 egg yolks
⅔ cup sugar
1 cup ILLY espresso coffee beans (2 oz.)

What you’ll do:
1. Heat the half and half with the vanilla bean, when almost at a simmer remove from the heat and cover the pan.
2. Meanwhile, start beating the egg yolks with the hand held mixer in the pan until thick and lemon-colored.
3. Gradually beat in the sugar, and then slowly blend in the ¼ cup of hot cream to warm the yolks. Blend slowly to minimize air bubbles.
4. Remove the vanilla bean from the remaining cream and blend the cream into the yolk mixture.
5. Pour in the espresso beans and set over low heat, stirring slowly and constantly until the mixture is thick enough to coat the back of the spoon.
6. Strain through the fine meshed sieve into a bowl and let cool. Serve warm, tepid or chilled.

Plate the chocolate tower plain or with fruit of your choosing. Then drizzle the espresso sauce over the components as desired.

This is one to bust out for dinner with the in-laws, your boss, a significant other, or anyone else you might be trying to impress. Can’t quite nail the presentation? Head over to Christopher’s instead.

(This is part three of our Chef Chat with Gross. Check out parts one and two for more about how he made the transition from picky eater to worldly chef and his foie gras battles.)

Trifle

SEE A SIMPLE RECIPE AT THE BOTTOM OF THIS PAGE

From AmandasCookin.com

This is a very simple and elegant dessert.  You can make a large trifle that will serve everyone, or individual dessert cup trifles.

From BBCGoodFood.com

A TRIFLE is a general category of recipe, kind of like “a casserole” – “a burrito” – or “a beverage.”

From RealFood.Tesco.com

It simply describes a layered desert, usually with a cake layer, a pudding layer, a fruit layer and a few other layers thrown in for good measure.

From taste.co.au

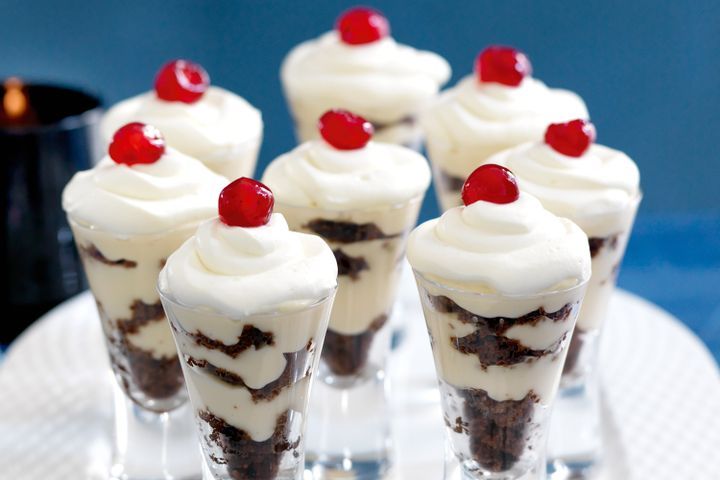
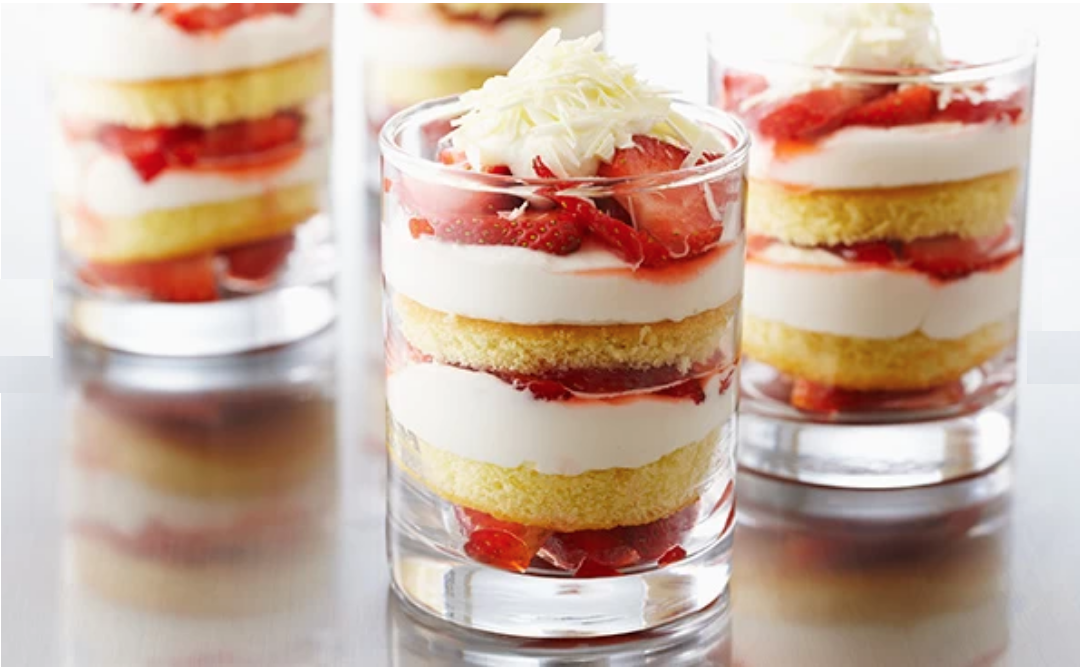
I’ve included photos from other websites so that you can get an idea of what a trifle is, and create your own.  You will see that the key is to maintain distinct layers.  If you browse all of these GOOGLE IMAGES you will see that some trifles are not clearly labeled at all, which makes it not really a trifle.

CLICK ON AN IMAGE FOR AN ENLARGEMENT

Food Network Canada

A simple recipe that you can follow, if you want a no-fail first attempt.

SIMPLE TRIFLE

  1. First, decide if you want one large dramatic trifle to share, or individual trifles.  You definitely want it to be clear glass though.  Be very careful to not fill any layer too deeply, or you will run out of space.
  2. SPONGE LAYER:  Traditionally you use Lady Fingers in a trifle, but you can buy angel food cake or use the recipe below and it will be just as tasty.  You can also simply use Vanilla Wafers.  Use a knife and cut prepared angel food cake into 1/2 to 1 inch slices.
  3. If you want to try to make your own sponge layer, here is a recipe for LADY FINGERS.
  4. If you don’t have a biscuit cutter, a single biscuit cutter is a good addition to your arsenal.  Cut circles from the angel food cake.  If they are too big for your container, cut them into geometric shapes and put them against the wall of your glass.
  5. PUDDING LAYER:  Spoon pudding into the bottom of your glass to hold your sponge in place.  Pudding can be from scratch or even a box instant pudding.  Both will work well.
  6. COOKIE LAYER:  You can use crushed Oreo’s or Graham Crackers.  You can even use granola.  The thing is that you want something with crumbly pieces to create a completely different texture.
  7. FRUIT LAYER:  For this, you want a soft fruit like peaches, strawberries, kiwi, and so forth.  The fruit should be in bite-sized pieces.
  8. WHIPPED CREAM LAYER:  You really don’t want to use spray canned whipped cream, as it breaks down too quickly.  Cool Whip is not a bad choice, but making your own whipped cream is actually pretty easy.  CLICK HERE for a simple three-ingredient whipped cream.
  9. OPTIONAL:  CREAM CHEESE LAYER:  Alternately, you can use Cream Cheese, Yogurt, cooked (cooled) Vanilla Pudding, and powdered sugar.
  10. FRESH FRUIT:  Top the whipped cream with something like blueberries, strawberries, cherries, etc.  Something small and colorful.
  11. GARNISH:  You can garnish with more crushed cookies, or even chopped nuts if you want.  You can also place a single mint leaf on the very top for an elegant presentation.

STEP BY STEP – OVERVIEW

  1. For a large trifle, put a layer of angel food cake in the bottom
  2. Add a layer of your white mixture cream cheese or whipped cream.
  3. Stack strawberries against the side so they can be seen
  4. Add strawberry pieces and blueberries
  5. Repeat with layers of cake, cream mixture, more fruit
  6. Finish with a layer of cake, cream mixture, and decoratively place fruits

Chef’s Notes

DO NOT USE ANYTHING BELOW THIS LINE IN MY COOKBOOK.


These notes are gleaned from PBS The Great British Baking Show

  • A Trifle should have well-defined layers
  • Trifles are a West Wales staple – placed on tables several times each week
  • Trifles traditionally use lady fingers for the cake layers
  • Another option is Vanilla Wafers
  • Use a shallow disk to serve many and to all all flavors in a single serving
  • Biscuits need to absorb the liquid without disintegrating
  • Many of the chefs used lemon meringue or lemon curd – The custard should be thick
  • Recipe 1: layers of biscuit/cake, strawberry, whipped cream and blueberry
  • Recipe 2: Recipe featured a praline circle on the top
  • Recipe 3: bananas, strawberries, mangos with Lemon Macaroons on top
  • Recipe 4: Ginger cake with fruit and creme anglaise
  • Recipe 5: Spray the layers with cointreau
  • Recipe 6: Peach, almond and ginger – with browned butter
  • Recipe 7: Cake layer was a lemon Swiss roll
  • Recipe 8: Amaretti Bisquits on top
  • Recipe 9: Chef used a jelly layer

If you are interested, you can MAKE YOUR OWN LADY FINGERS rather than using pound cake


Recipe from Wall Street Journal

Dec 20, 2016 – CLICK ON IMAGES TO ENLARGE
Trifle 1 Trifle 2 Trifle 3
What they are calling their Christmas Pudding was defined in a previous publication. You can use slices of Angel Food Cake, Vanilla Wafers, or more traditionally Lady Fingers. This goes over GREAT at parties. Make sure you assemble it into a clear glass bowl or the WOW factor is lost.


Turkish Cheeses

When we spent three months in Istanbul, we ate a MARVELOUS cheese that was some type of string cheese.  Here is what I found at TurkishCulture.org

Anatolian String Cheese

Bahçıvan Ceçil Peyniri ~ 250g
String and Jeddal cheeses which are among traditional exclusive products come into prominence with their perfect fibrous structure. Halloumi Cheese specific to Cyprus is also found in our product line. Halloumi Cheese is a very different kind of cheese with its form eligible for toasting. Its taste, smell and flavour are unique. Fresh Mozzarella in Water, specific to Italy is consumed as fresh, has the colour of porcelain white and an excellent taste. It may generally be served sliced in circles with tomatoes sliced in circles, olive oil and basil. Grated Cheese is a practical product which eases the life and may be used in your pizzas, pastas and soups.

CHEESE IN TURKISH CULTURE

For all the new technology and interest in cheese culture, Turkish cheeses are practically unknown. Foreigners are surprised when they learn the extent of cheese production in Turkey and local Turks are sometimes unaware of the many varieties produced outside their immediate area. Many cookbooks regard Ottoman cuisine as one of the world’s classics, but cheese gets but a passing mention.

The reason for this is because the majority of local cheeses are still made on farms or by nomadic peoples. They are often so fresh that they don’t travel well and few rural cheese makers and market traders are familiar with the weighty volumes of Euro-food rules. Small enterprises cannot compete with global food-producing conglomerates. Certainly Turkey has cheese factories and excellent commercially made cheeses in vacuum packs. These are usually more expensive than the traditional farm-produced cheeses. It is easy to believe that Turks eat only the white cheese, or beyaz peynir, similar to Greek Feta cheese. But this is a misnomer, now that Feta is officially recognised as a Hellenic domain cheese.

CHEESE FOR BREAKFAST

Few cultures feature cheese as a breakfast food so spectacularly as Turkey. Indeed, it is the nucleus of a typical breakfast. When a Turk wakes up, he wants breakfast – even if it is well after noon. Visitors find cheese, olives, cucumbers and eggs laid out on the breakfast table. With butter, honey, crusty bread and freshly-brewed Turkish tea, this is the way a Turk begins his day. If he rises early enough, then a second breakfast may well fill the place of a mid-morning snack or “elevenses.”

DİL PEYNİR

Cheese that pulls away in strips and strings, this means literally ‘tongue’ cheese.

Cheese in Turkey
by Dilek Özenen Zorbey

Cheese is one of nature’s most tasty foods. It is eaten by everyone with great pleasure. Cheese is not only a substantial food because of its taste but it also has high nutritional value. Milk, which is itself a great source of nutrition, is processed and made into cheese. The main substance in cheese is “casein”, a protein which has no equal in nature. In addition to being rich in calcium, phosphorus and vitamin A, cheese is an important nutritional source for life.

Another reason for its vast consumption is that it can easily be digested and it aids in the digestion of other foods. This property of cheese is due to rennet which is used to curd milk. Cheese was made in ancient times and was found to be a very substantial food for man. We know that even in the Babylonian Civilization in 2000 B.C. cheese production was quite advanced.Today in Turkey, 60% of the annual 10 million tons of milk is processed as cheese. Although the most tasty cheese is made from sheep’s milk, only 10% of cheese production is produced from sheep’s and goat’s milk, with the remainder from cow’s milk. Cheese consumption differs considerably from other countries in Turkey. The most wide-spread consumption of cheese other than at breakfast, is when it is eaten with fruit or as a sort of dessert after lunch or dinner. However in our country, cheese and olives are a must on the breakfast table. The variety of cheese depends on certain factors: cultural habits and tastes, natural conditions, the species and variety of the animals providing the milk, and the production methods employed. We have more than 100 types of cheese in our country, but when they are grouped according to their similarities,we have around 30 different kinds of cheese. The following is a list of the different kinds of cheese which are the most popular in our country:

White Cheese

It is produced from sheep’s or cow’s milk. Rennet curdles the milk, then it is strained. The curd is salted in brine and packed into tins. It is eaten mostly at breakfast. In addition it is the main ingredient in appetizers, especially when served with our traditional drink “Rakı”. White cheese is also one of the ingredients in an omelette or is put on macaroni. “Börek” is a national food consumed at each meal everywhere in Turkey. Dough prepared with flour, water, salt and eggs, is rolled out wafer-thin, and placed on top of each other with oil in between. Various fillings are put between the layers which is then baked. Cheese is mostly used as a filling for börek.

Kaşar Cheese

It is also produced from sheep’s or cow’s milk. But in the Thracian region, kaşar especially that made from sheep’s milk is traditional and one of the most important dairy products of the region. Rennet curdles the milk, then it is strained and the curd is boiled in salt water. After boiling cheese, the curd becomes like dough due to the heat. It is placed in round moulds and cooled. After being shaped, it is removed from the mould. Kaşar cheese made from sheep’s milk is produced as large wheels and during the ageing process the outer part is allowed to dry which then forms a crust. Some of the cheeses which are produced from cow’s milk have a crust but most are vacuum-packed. Both types are eaten at breakfast, however the fresh cheese is also consumed in toasted sandwiches or on baked foods in the same way as mozzarella cheese.

Tulum Cheese

By removing the water of the curd, a crumbly texture is obtained. The crumbled curd is salted and packed firmly in goat’s skins or in cloth sacks and aged for 3 to 6 months. During this period it becomes tasty. It can be used in börek or similar foods and is also a great appetizer when mixed with walnuts.

Mihalic (Kelle) Cheese

Its production is similar to that of white cheese. The only difference is that it has big holes. The processes applied to it give it a pretty salty flavor and it is usually consumed at breakfast with tea.

Dil Cheese

It is similar to Kaşar cheese as far as production goes but it looks like mozzarella. During the boiling of the curd instead of putting it in a mould it is stretched and becomes fibrous in appearance. It is often consumed at breakfast.

Cerkez Cheese, Orgu Cheese

Dil cheese is packed in moulds of about 100-150 gr which is known as Çerkez cheese. If it is braided it is called örgü cheese. Örgü means braid in Turkish.
Although both cheeses are vacuum-packed, örgü cheese can be preserved in brine and is usually eaten after it is cooked.

Civil (Tel) Cheese

It is produced particularly in Eastern Anatolia and the Black Sea Region. It is a type of Dil cheese made from non-fat cow’s or goat’s milk. It is kept in brine and consumed after cooking it in butter.

Van Otlu Cheese

It is one of the unique cheeses of Turkey. It is produced in Van and its surrounding areas. It is made by mixing the cheese with local herbs. Except for the added herbs, texture, ingredients and the way it is consumed, it resembles white cheese.

Lor Cheese

After boiling the whey, which is strained from the curd, the remaining protein is curdled. It is used in börek, served for breakfast or as an appetizer after mixing it with various herbs and spices.

The cheese culture is so widespread in our country that even in making many of our desserts cheese is used.The following three descriptions are given as examples.

Kuymak

It is a regional food from the Black Sea Region.

Ingredients: 100g cornflour, 1/1.5 glasses of water, 250g tel cheese, 70g butter

Melt the butter in a saucepan. Add the cornflour and stir, then add water and cheese in small pieces. Boil until the cheese is melted, the liquid becomes a paste and the butter comes to the top. Serve hot.

Künefe

It is a popular dessert from Southern and Southeastern Anatolia.

Ingredients: 200g teleme or fresh salt-free cheese, 200g sugar, 1 glass of water, 100g butter, 250g tel kadayıf

Boil the water and sugar to obtain a syrup. In another dish mix the melted butter and kadayıf. Arrange half of the kadayıf in a tray. Spread grated cheese on it. Then arrange the remaining kadayıf. Bake in a 160 degree oven for 20-30 minutes. Remove it from the oven and pour the syrup over it; serve hot.

Kemalpaşa Cheese Dessert

It is a dessert mostly cooked in the Bursa and Balıkesir districts.

Ingredients: 400g sugar, 2 glasses of water, 100g semolina, 1 teaspoon baking powder, 2 eggs, 50g butter, 150g cheese curd

Boil water and sugar to obtain a syrup and leave it. Grate the cheese and knead with the other ingredients to obtain a dough. Take small pieces of the dough, flatten them slightly and place on an oiled tray. Bake in a 180 degree oven for 20-30 minutes until they turn slightly golden. Boil the cookies in the syrup for 15 minutes. Then serve cold and top with cream, if desired.
Some selected examples (please click on pictures to enlarge):

Simple Pastry Dough

This is a good and forgiving recipe for dough for a quiche, pot pie, fruit pie, and much more.  Simpler Pastry Dough is under this recipe.

Ingredients

  • 2 C flour – sifted
  • 1/3 C sugar (half this for a savory quiche)
  • 2 TBL cornmeal
  • 1/2 tsp salt
  • 1/2 tsp baking powder
  • 1 tsp lemon zest
  • 1 stick butter – cold pieces
  • 1 tsp vanilla
  • 1 egg plus an extra yolk
  • 1 oz cold apple cider
  • Add ice water if necessary for consistency
  1. Using a food processor, pulse together flour, sugar, salt, baking powder and lemon zest.
  2. Pulse in butter, vanilla and egg until it starts to come together.
  3. Finish on the counter on a floured surface.
  4. Wrap in plastic wrap and chill overnight.
  5. Next day, take out and rest (still wrapped) on the counter for an hour.
  6. Knead until it is once again pliable.
  7. Return to your recipe to continue prep. . .
  • 1.5 C AP flour
  • 1 tsp sugar
  • 1/2 tsp salt
  • 1 stick butter (cold)
  • 1/2 C milk
  1. Combine salt, sugar and flour
  2. Cut in butter
  3. Blend in milk
  4. Finish on the counter
  5. Let rest 10 minutes
  6. Roll into shape for your pie pan


Freezing Herbs and other Stuff

Not just freezing, but drying and preserving.  This is intended only to give brief instructions.  For details about why some of it is being done this way, check the internet.


Cilantro

Parsley

Sage

Rosemary

Bay Leaves

Don’t Freeze

  • Eggs:  You can freeze 12 egg whites and 2 egg yolks with reasonable results, but it will be just a bit rubbery.

Freezing Fruits

This is intended only to give brief instructions.  For details about why some of it is being done this way, check the internet.

Note that you are preserving flavor, but not texture.  That is strawberries will be good in smoothies, jam or ice cream topping, but not as a munchable treat.

You should freeze fruits when they’re at their peak of freshness. Blanch fruits for 30 seconds first, then submerge in ice water to cool quickly. Dry thoroughly. Freeze for the first 12 hours on a rimmed baking tray, then move to  heavy-weight, air-tight containers or freezer bags.

Rather than reinventing the wheel, the following text is from MyBluePrint.com.

From MyBluePrint.com

How to freeze 40 types of fruit

Here’s your comprehensive guide to freezing all kinds of fruit.

Apples

  1. Peel, core and slice your apples.
  2. Rub the exposed fruit with lemon juice.
  3. Pre-freeze.
  4. Transfer to an airtight container.
  5. Freeze for up to 6 months.

Apricots

  1. Blanch apricots for about 20 seconds, then plunge in ice water and strain. This prevents the skins from becoming firm and tough during the freezing.
  2. Pat dry and, if desired, remove the skins.
  3. Slice in half and remove the pits.
  4. Rub the exposed fruit with lemon juice.
  5. Pat dry and pre-freeze.
  6. Transfer to an airtight container
  7. Freeze for up to 3 months.

Avocado

Storing in halves:

  1. Cut the avocado in half; remove the peel and the seed.
  2. Rub the exposed fruit with lemon juice.
  3. Putt into an airtight container or freezer bag. (No need to pre-freeze.)

Storing as purée:

  1. Purée the avocado.
  2. Mix in a few drops of lemon or lime juice to prevent browning.
  3. Transfer to an airtight container.
  4. Freeze for up to 3 months.

Bananas

Bananas are actually easy to freeze in a variety of ways. Choose extremely ripe bananas, as their flavor will preserve best.

  1. Remove the peel, and decide if you want to save the bananas whole, cut into chunks or puréed.
  2. If freezing them whole or in chunks, pre-freeze. No need to pre-freeze purée.
  3. Transfer to an airtight container.
  4. Freeze for up to 6 months.

Blackberries

  1. Wash and pat dry.
  2. Pre-freeze.
  3. Transfer to an airtight container.
  4. Freeze for up to 6 months.

Note: Berries can really benefit, texture-wise, from adding a little sugar before freezing. If desired, toss the berries with sugar (about 1/3 cup per pint) before pre-freezing.

Blueberries

  1. Wash and pat dry.
  2. Pre-freeze.
  3. Transfer to an airtight container.
  4. Freeze  for up to 6 months.

Cherries

  1. Wash your cherries.
  2. Remove the stems and pits.
  3. Pre-freeze.
  4. Transfer to an airtight container.
  5. Freeze for up to 6 months.

Coconut

  1. Remove the husk.
  2. Drain (and save) the milk. The liquid can also be frozen for up to 6 months, in a separate container.
  3. Cut the white coconut “meat” into hunks or shred it.
  4. Pre-freeze.
  5. Transfer to an airtight container.
  6. Freeze for up to 6 months.

Dried coconut can also be frozen: Simply place it in an airtight container and store for up to 6 months. No need to pre-freeze.

Cranberries

  1. Wash and dry the cranberries.
  2. Pre-freeze.
  3. Transfer to an airtight container.
  4. Freeze for up to 6 months.

Dates

  1. Cut and pit the dates.
  2. Pre-freeze.
  3. Transfer slices to an airtight container.
  4. Freeze for up to 6 months.

Dragonfruit

  1. Peel the dragonfruit and cut into pieces.
  2. Pre-freeze.
  3. Transfer slices to an airtight container.
  4. Freeze for up to 3 months.

Learn more about dragonfruit in this post!

Eggplant

There are actually a few different methods of freezing eggplant. Here are two:

Method 1:

  1. Blanch the eggplant for 3-4 minutes, then plunge it in ice water to cool.
  2. Pre-freeze.
  3. Transfer to an airtight container.
  4. Freeze for up to 3 months.

Method 2:

  1. Slice into coins, and bake at 350 F until tender, 10-15 minutes (not totally browned).
  2. Remove from oven, and let cool.
  3. Pre-freeze.
  4. Transfer to an airtight container.
  5. Freeze for up to 3 months.

Figs

  1. Wash and dry the figs; if desired, cut in half or pieces.
  2. Pre-freeze.
  3. Transfer to an airtight container.
  4. Freeze for up to 3 months.

Grapes

Two options here! The first is easier, in my opinion, but it’s totally up to you.

Method 1:

  1. Break the grapes up into small clusters (still on their stems).
  2. Place in an airtight container.
  3. Freeze for up to 6 months.

Method 2:

  1. Remove the grapes from their stems.
  2. Pre-freeze.
  3. Transfer to an airtight container.
  4. Freeze for up to 6 months.

Note: Once defrosted grapes will have a different texture; however, I find their texture eaten straight from the freezer pleasant, as well.

Grapefruit

  1. Cut the grapefruit into pieces, or unpeel and separate the sections.
  2. Pre-freeze.
  3. Transfer to an airtight container.
  4. Freeze for up to 6 months.

Guava

  1. Wash, peel and cut your guava in half.
  2. Rub the exposed fruit with lemon juice.
  3. Pre-freeze.
  4. Transfer to an airtight container.
  5. Freeze for up to 3 months.

Jackfruit

  1. Remove the individual bulbs from the fruit.
  2. Pre-freeze.
  3. Transfer to an airtight container.
  4. Freeze for up to 3 months.

Kiwi

  1. Start with a ripe kiwi. Peel and cut into slices or chunks.
  2. Pre-freeze.
  3. Transfer to an airtight container.
  4. Freeze for up to 6 months.

Kumquats

  1. Start by halving and removing the seeds from your kumquats.
  2. Pre-freeze.
  3. Transfer to an airtight container.
  4. Freeze for up to 6 months.

Lemons and limes

  1. Cut into slices (you can keep or discard the rind).
  2. Pre-freeze.
  3. Transfer to an airtight container.
  4. Freeze for up to 6 months.

Lychee

  1. Peel the fruit.
  2. Pre-freeze.
  3. Transfer to an airtight container.
  4. Freeze for up to 6 months.

Mango

  1. Cut and peel your mango.
  2. Pre-freeze.
  3. Transfer to an airtight container or freezer bag.
  4. Freeze for up to 6 months.

Note: Check out our handy illustrated guide to how to cut a mango!

Melon (watermelon, cantaloupe, etc.)

  1. Cut the melon and remove the tart-tasting area between the rind and the fruit flesh.
  2. Cut into strips or cubes.
  3. Pre-freeze.
  4. Transfer to an airtight container.
  5. Freeze for up to 6 months.

Nectarines

  1. Cut into chunks, removing the pits.
  2. Pre-freeze.
  3. Transfer to an airtight container.
  4. Freeze for up to 6 months.

Oranges

  1. Either cut the oranges into pieces, or unpeel and separate the sections.
  2. Pre-freeze.
  3. Transfer to an airtight container.
  4. Freeze for up to 6 months.

Papaya

  1. Remove the skin and the seeds from the papaya.
  2. Cut into strips or pieces.
  3. Pre-freeze.
  4. Transfer to an airtight container.
  5. Freeze for up to 6 months.

Passionfruit

  1. Cut the passionfruit, and spoon the flesh out into small portions.
  2. Pre-freeze.
  3. Transfer to an airtight container.
  4. Freeze for up to 6 months.

Tip: For an easy way to keep the passionfruit in small portions, spoon the fruit into an empty ice cube tray, and pre-freeze the portions in it. Transfer the frozen cubes of fruit to an airtight container before freezing.

Peaches

  1. Cut into chunks, removing the pits.
  2. Pre-freeze.
  3. Transfer to an airtight container.
  4. Freeze for up to 6 months.

Grandpa’s Note:  Freestone offers the best results.  Cut into quarters or eights, then slice the flesh from the skin.  Freeze the skin and flesh separately, and use the skin for jellies or stocks, and the flesh for jams, marmalades and pies.

Pears

  1. Peel, core and slice.
  2. Rub the exposed fruit with lemon juice.
  3. Pre-freeze.
  4. Transfer to an airtight container.
  5. Freeze for up to 6 months.

Plantains

  1. Start by choosing extremely ripe plantains, as their flavor will preserve best.
  2. Remove the peel, and decide if you want them whole, cut into chunks, or puréed.
  3. If freezing whole or in chunks, pre-freeze. No need to pre-freeze purée.
  4. Transfer to an airtight container.
  5. Freeze for up to 3 months.

Plums

  1. Cut into chunks, removing the pits.
  2. Pre-freeze.
  3. Transfer to an airtight container.
  4. Freeze for up to 6 months.

Pineapple

  1. Cut the pineapple, being sure to remove the tough skin.
  2. Remove the core.
  3. Cut into chunks.
  4. Pre-freeze, then transfer to an airtight container.
  5. Freeze for up to 6 months.

Pomegranate

  1. Cut and de-seed the pomegranate.
  2. Scatter the arils in a single layer on a baking sheet.
  3. Pre-freeze.
  4. Transfer to an airtight container.
  5. Freeze for up to 6 months.

Learn how to de-seed a pomegranate here.

Prunes

  1. Cut and pit.
  2. Pre-freeze.
  3. Transfer slices to an airtight container.
  4. Freeze for up to 6 months.

Quince

  1. Use a towel to scrub off any “fuzzy” bits from the outside.
  2. Peel, core and slice.
  3. Rub the exposed fruit with lemon juice.
  4. Pre-freeze.
  5. Transfer to an airtight container.
  6. Freeze for up to 6 months.

Raisins / dried currants

  1. Place raisins or currants in an airtight container.
  2. Freeze for up to 6 months.

Note: Raisins and dried currants freeze beautifully, with minimal effect to their texture. To make your life easier later, divide into individual portions (or common amounts used in recipes).

Raspberries

  1. Cut into pieces, or leave whole.
  2. Pre-freeze.
  3. Transfer to an airtight container.
  4. Freeze for up to 6 months.

Strawberries

  1. Remove the stems. Cut or leave the berries whole.
  2. Pre-freeze.
  3. Transfer to an airtight container.
  4. Freeze  for up to 6 months.

Tomatoes

  1. Blanch the tomatoes for 1-2 minutes, then plunge in an ice water bath.
  2. Let dry, and cut into chunks or pieces if desired.
  3. Pre-freeze.
  4. Transfer to an airtight container.
  5. Freeze for up to 6 months.

Freezing Vegetables

This is intended only to give brief instructions.  For details about why some of it is being done this way, check the internet.

Blanche

Blanche all vegetables before freezing.  Boil 60-90 seconds, plunge into water bath to stop the cooking process.


Asparagus

Chop into 3 inch pieces.  Blanch 3-5 minutes depending on thickness.  Will keep for up to 18 months.  Good for soups, etc., but will not be crisp for a side.

Avocado

Will keep for up to 18 months.

Broccoli

Cut into bite sized florets.  Blance 3 minutes, then put into a large towel and toss to get as much water out as you can.   Freeze the pieces whole in single-use zip lock bags.  Good steamed or boiled (2 minutes) or in stir fries, quiches and soups.  Broccoli will not have the crunch, but will taste OK.  Use within a year.

Cabbage and Brussels Sprouts

Soak in heavily salted water for 30 minutes to encourage pests to vacate.    Pick off any old leaves, and trim base off.

For cabbage:  Quarter (leaving the stem intact) and freeze.  Keeps only about six months.
For Brussels Sprouts:  Blanche 3-5 minutes depending on the size.  Move to freezer immediately on a rimmed cookie sheet.  Freezing will actually improve the flavor, and they will keep about 18 months.

Cherry Tomatoes

Don’t require blanching.  Rinse well, dry and freeze.  Will keep for up to 18 months.  No longer good for salads, but good for soups, stews, braises, roasting, etc.

Corn

Freeze within 10 hours of being picked, not corn from the supermarket.  Remove kernels from the cob.  Blanche for 4 minutes.  Freeze on a pre-cooled tray so kernels stay separate.  Good for stir fry or on your plate.  Will keep for up to 18 months.

Cucumbers

These are best preserved by pickling.  Read my collection here.

Garlic

This can be dangerous.  READ CAREFULLY.  You can freeze peeled garlic in ice cube trays in olive oil, but DO NOT keep at room temperature for more than a few minutes.  EVER.  Botulism develops quickly.  Go straight into the freezer, and then straight from the freezer to the pot or skillet and cook immediately.  The bacterium Clostridium botulinum can cause death in a few days without medical treatment.  It is safe only if you do it perfectly right.

Green Beans

Blanche, then freeze individual beans laid flat on a pre-cooled tray.  Good for stir fry and soups.  Will keep up to 18 months.

Green onions

Freeze greens and whites separately.  The greens freeze well without any processing.  Blanch the whites for three minutes, and then freeze.  Double bag to avoid onion smell in your freezer.  Will keep for up to 6 months.

Mushrooms

Do not blanche!  Wipe them clean with a dry towel and cut off the end of the stem.  Freeze individually on a tray overnight, then seal in a vacuum bag.  Use within a year as you would fresh mushrooms.

Pumpkin, winter squash, acorn squash, etc

Bake at 350°F for 45 minute, scrape out flesh and let cool and then puree.  Freeze flat in zip lock bags.

Spinach

Will keep for up to 18 months.

Tomatoes

Blanche whole, then remove skin, cut into pieces, then freeze in zip lock bags that lay flat.  Not good for salads, but good for sauces, soups, etc.  Will keep for up to 18 months.

Zucchini

Good for bread, saute, grilling, muffins, pancakes, lasagna, frittata,  pizza,  quiche, and more … Cut into pieces and blanche 3 minutes.  Pat dry and freeze in single-use zip lock bags.

Will keep for up to 18 months.

Don’t freeze:

  • Eggplant: You can, but it will be for babaganoush, etc.  Otherwise use only fresh eggplant and freeze before seeds mature; even then freeze Black, but not Chinese or Thai.
  • Celery: This is mostly water and doesn’t freeze well, and it is readily available in the grocery.  Otherwise, blanche 3 minutes and freeze in sticks.
  • Onions: Cut into large pieces and blanche 5 minutes.  Freeze in a layer and break off what you need for stews and soups.  They will be mushy, but retain flavor.
  • Lettuce:  Not good for anything other than flavoring stocks and soups.
  • Spinach:  Not good for anything other than flavoring stocks and soups.


Rather than reinventing the wheel, the following text is from MyBluePrint.com.

From MyBluePrint.com

How to freeze vegetables

Here’s your comprehensive guide to freezing all kinds of vegetables.

Avocado

Storing in halves:

  1. Cut the avocado in half; remove the peel and the seed.
  2. Rub the exposed fruit with lemon juice.
  3. Putt into an airtight container or freezer bag. (No need to pre-freeze.)

Storing as purée:

  1. Purée the avocado.
  2. Mix in a few drops of lemon or lime juice to prevent browning.
  3. Transfer to an airtight container.
  4. Freeze for up to 3 months.

Blackberries

  1. Wash and pat dry.
  2. Pre-freeze.
  3. Transfer to an airtight container.
  4. Freeze for up to 6 months.

Note: Berries can really benefit, texture-wise, from adding a little sugar before freezing. If desired, toss the berries with sugar (about 1/3 cup per pint) before pre-freezing.

Blueberries

  1. Wash and pat dry.
  2. Pre-freeze.
  3. Transfer to an airtight container.
  4. Freeze for up to 6 months.

Cherries

  1. Wash your cherries.
  2. Remove the stems and pits.
  3. Pre-freeze.
  4. Transfer to an airtight container.
  5. Freeze for up to 6 months.

Cucumbers

  1. Slice the cucumbers and remove the skin if desired.
  2. Pre-freeze.
  3. Transfer slices to an airtight container.
  4. Freeze for up to 3 months.

Note: A cucumber will absolutely lose its texture when frozen — it won’t have any crunch. Instead, consider making freezer pickles, which are said to retain crunch (here’s a recipe).

Eggplant

There are actually a few different methods of freezing eggplant. Here are two:

Method 1:

  1. Blanch the eggplant for 3-4 minutes, then plunge it in ice water to cool.
  2. Pre-freeze.
  3. Transfer to an airtight container.
  4. Freeze for up to 3 months.

Method 2:

  1. Slice into coins, and bake at 350 F until tender, 10-15 minutes (not totally browned).
  2. Remove from oven, and let cool.
  3. Pre-freeze.
  4. Transfer to an airtight container.
  5. Freeze for up to 3 months.

Tomatoes

  1. Blanch the tomatoes for 1-2 minutes, then plunge in an ice water bath.
  2. Let dry, and cut into chunks or pieces if desired.
  3. Pre-freeze.
  4. Transfer to an airtight container.
  5. Freeze for up to 6 months.

The Science of Ketchup

… and other liquids.

Shear Thinning Liquids

  • When you try to pour ketchup, sometimes it just won’t start until you tap the bottle on the side of the bottom.
  • This is because when force is applied, the liquid becomes thinner, and flows more easily.
  • Other similar liquids are mayonnaise, oyster sauce, mustard, hoisin.
  • GEEK INFORMATION:
    Summary:  Warm ketchup flows more easily than cold ketchup.

    Non-Newtonian viscous shear thinning in ionic liquids We have studied the shear thinning of several protic and aprotic ionic liquids (ILs) by stress-controlled rheometry, which indicated that some ILs exist as liquid phase aggregates that can be disrupted or broken at high shear rates. Increasing the temperature shifted the onset of shear thinning to higher frequency and indicated that a smaller or less cohesive aggregate was formed. However, upon application of a sufficiently high temperature, the sample resumed the characteristics of a Newtonian fluid. (HOEt)2NH.AcOH was selected as an example of a protic ionic liquid (PIL) to probe concentration effects on liquid ordering. At water concentrations lower than one equivalent per PIL component pair, the viscosity rapidly decreased, although the onset frequency of shear thinning remained constant. The shear thinning and low viscosity regime remained until approximately 3–4 equivalents of water were added and the PIL behaved as a Newtonian fluid. The effect of water on the shear thinning of (HOEt)2NH.AcOH indicated that small dilution volumes did not alter the aggregate structure, but instead reduced the number of aggregates. Both the temperature and additive water strongly suggested that the IL aggregates were due to intermolecular hydrogen bond networks.

Shear Thickening Liquids

  • When you mix water and corn starch (as a thickener in gravy for example) it flows easily.
  • If you had a large amount and smacked it with your hand, it would feel quite solid.
  • This is because when force is applied, the liquid becomes thicker, and flows less easily.
  • Other similar liquids are
  • GEEK INFORMATION:

    Shear induced self-thickening in chitosan-grafted polyacrylamide aqueous solution A remarkable shear induced self-thickening of chitosan-graft-polyacrylamide aqueous solution was observed. After the polyelectrolyte solution presenting shear thinning was subjected to a high-rate shear for several minutes, their viscosities recovered and then a much higher zero shear viscosity than the original one appeared. Obviously, the self-thickening differs from conventional shear thickening or viscous recovery, as reported previously. The mechanism of self-thickening was investigated by rheological methods together with TEM, 1H NMR and DLS, etc. It was found that some aggregates exist in original chitosan-graft-polyacrylamide aqueous solution and the scale of such aggregations would become larger within several minutes after a strong shear. The thickening was proven to be the result of an enhanced scale of GPAM aggregation in aqueous solution, and the mechanism of aggregation was proven to be intermolecular hydrogen bonding effects. Besides, the shear-induced self-thickening appears to be facile, maintainable and easily controllable by changing the shear conditions.

    Rheology of Liquid Foods

    Liquid foods are classified and their properties discussed under various types of rheological behavior: Newtonian, pseudoplastic, shear thickening, thixotropic, and viscoelastic. Rheological data on selected liquid foods are summarized in either tabular form or in the form of equations. Wherever possible the influence of temperature, constituents, and structure on the rheological behavior is detailed. Because many foods are suspensions, the measurement of flow properties of suspensions and factors influencing their rheological behavior are also covered. Finally, the relationship between the flow behavior and the sensory evaluation of mouth feel and viscosity is discussed.

Planting Plants from Food

You don’t always have to plant from seed.

Lettuce

  1. Carefully cut about 2 inches above the roots, removing the outside leaves, but leaving the core.
  2. Put into a container of water, and refresh the water every two days.
  3. It will be ready for harvest in 14 days.

Green Onion

  1. Cut 2″ above the roots.
  2. Put the roots into a glass of water, and refresh the water every two days.
  3. Harvest in about 7 days.
  4. Don’t use more than 1/3 of the plant at any time.

Basil

  1.  Cut the longest/highest leaves
  2. Trim off excess leaves and put into water.
  3. Refresh the water every two days.
  4. Roots will appear in about two weeks, and you can put them into soil.

Onion

  1. Cut off the roots and put them pieces root-down into soil.
  2. Cover with 1/2 to 1 inch of soil.
  3. You won’t be able to see them grow, so mark your calendar:  90 days to harvest.

Celery

  1. Cut off about 4 inches of the stem.
  2. Put into water and move to soil in 8-10 days.

Garlic Chives

  1. Cut off roots and put into water.
  2. You can start using the greens in about a week.
  3. Don’t use more than 1/3 of the plant at any time.

Mushrooms

  1. Remove mushroom cap for use.
  2. Plant stalk with the cap side barely above ground.

Potatoes

  1. Plant the eyes under one inch of dirt, a foot apart.
  2. Allow the vines to trail.
  3. Harvest in 90 days.


Moringa Tree Information

SEE THIS PAGE ALSO

Wiki Information

How to Grow Your Own Moringa Tree

INFORMATIVE LINK

Moringa, the famous “miracle tree,” has many nutritional and medicinal properties and is one of the most efficient and influential plants out there. Even though it grows best in tropical and sub-tropical regions, people in many other climates can also enjoy the benefits of growing moringa in their own home with a few simple tricks.

Moringa trees can be grown from either moringa seeds or branch cuttings from a moringa tree. So unless you have a nearby friend with a healthy, well-established moringa tree who wouldn’t be opposed to lending you a branch, then seeds are the way to go. Moringa oleifera is a common variety of moringa and is a great choice for growing and consuming.

In the U.S., the only places moringa can grow outside year-round are southern areas of Florida, Arizona, California, and Texas. Depending on where you live, you may decide to grow moringa trees outside in the ground, in a pot to be kept indoors during the winter months and then to be moved outside during the summer, or in a pot permanently. Growing moringa trees in greenhouses is also an option, and is especially recommended for climates that regularly get below freezing temperatures. The optimal temperature range for moringa trees is 77-95 ˚F, but it can also survive in extreme temperatures up to 118 ˚F in the shade and down to a light frost. Altitudes lower than 1,970 ft above sea level are best, but moringa trees have been able to grow in the tropics up to 3940 ft above sea level. No matter where you decide to grow your tree, try to place it in a sunny location and give it plenty of water.

To plant moringa seeds in the ground, follow these instructions:

There is no dormancy period for moringa seeds, so you can plant mature seeds at any time.

– Find a spot with soil that is light and sandy, not waterlogged or clay-like.

– Dig a few 1 ft. x 1 ft. holes 1 ft. deep, and “back-fill” each hole a bit with soil.

– If you must plant in heavy soil, dig a hole up to three times as big as described in Step 2 and use a 1/3-sand, 2/3-soil mixture to back fill.

– Plant 3-5 seeds in each 1 ft. hole, spaced 2 inches apart.

– Be careful not to plant seeds more than ½ an inch deep.

To plant moringa seeds in a pot, follow these instructions:

Moringa trees can grow up to 50 feet tall, which is less than ideal for an indoor environment. These instructions will teach you how to grow a “dwarf” moringa tree, which is still the same plant that has just been pruned to grow less.

– Fill a pot that is 12-18 inches in diameter with loose soil.

– One pot can usually hold about five dwarf moringa trees, but it is a good idea to initially plant 7 or 8 in case a few seeds don’t sprout.

– Space out ¾- to 1-inch deep holes in the soil.

– Put a seed in each hole and lightly cover them with some soil.

– Once the plants have at least two layers of branches, it is time to start pruning. Cut back the tops of the seedlings and cut the branches back to half their length. When the tree is young, check the tree for new leaves at least once a week – new leaves usually appear on the tops and in a sort of “junction” or fork in branches – and cut these back as well.

– Pruning the tree will keep it small, and will also produce a LOT of leaves, which is all the better for you to use in your food!

If you do have the option to start your own tree from a branch cutting, follow these instructions:

– Use hard wood instead of green wood for cuttings, which should be at least one inch in diameter and at least six feet long. The best branches for cuttings are the ones that need to be cut off anyway after the tree has finished producing fruit for the year and needs to be pruned to promote new growth.

– Dig a 3 ft x 3 ft hole that is 3 ft deep and plant the cutting inside.

– Fill the hole with a sand and soil mixture. Pack soil firmly around the base of the plant.

Here are some general tips for cultivating moringa:

– Even though moringa can grow in a variety of conditions and in poor soil, using compost or manure mixed into your soil will help the tree grow.

– Be generous with watering, but don’t water too much. The soil should not be dry and cracked, but the seeds should not be drowning either. Seedlings also are a bit fragile when they have recently sprouted, so water lightly during this period. When watering a new plant that was started from a branch cutting, try to avoid watering the stem of the plant. Moringa can survive in very dry climates with little water, but regular watering during the first two months of planting seeds helps them develop properly. After the first two months, you can cut water back significantly and only water the tree when it looks like it needs water.

– All moringa trees need regular pruning to promote leaf growth, curb branching, and prevent the tree from being taller than you want it to be. If a moringa tree is left alone to grow, it will become tall with many branches and few leaves, and will only flower near the top, which is very unhelpful. A good height to aim for is 8-12 feet, and if you continue to prune the tree will keep growing lots of leaves and growing branches from the trunk instead of out the top of the tree. To prune, simply cut branches back to half their length and trim the top of the tree.

– The branch parts that you’ve removed can be chopped up into 4- to 10-inch bits and scattered underneath the moringa tree to serve as a natural mulch.

– Most moringa seeds sprout within two weeks of being planted.

– Moringa trees do not usually need fertilizer of any kind, but if yours needs a little bit of extra help, phosphorus will aid root development and nitrogen will help with leaf growth. Ammonium sulfate can also help your tree grow.

– Moringa resists a lot of pests, but termites still might give you trouble. If this is the case, use mulch with castor oil plant leaves, mahogany chips, tephrosia leaves, or Persian lilac leaves.

– If you live in a very wet climate and are growing your tree outside, Diplodia root rot can occur. To avoid this, try planting your tree on top of a small mound so that excess water can run off away from the plant.

– To harvest the pods for eating, pick them when they are about ½ an inch in diameter and come off easily.

– Older leaves are better for making moringa powder.


Resources:


Moringa – Uses of the Plant

SEE THIS PAGE ALSO

These seeds are ORGANIC which means that they are not chemically treated in any way.

Planting from Seeds

  • First, don’t store Moringa seeds in a freezer or fridge. They are heat-loving trees, and this will destroy the ability of the seeds to germinate.  Moringa seeds sprout in five to ten days.
  • Store Moringa seeds in a dry, warm area in a sealed container. The perfect temperature is between 60 and 80 °F. Based on the quality of the seeds, they should last for 2-3 years.
  • Moringa seeds should be dark colored and hard. If they are soft, they are old. If they’re a cream shade, they are old.
  • If you planted your Moringa trees a year back, and they appear dead, they most likely are just dormant, unless they decayed with too much water or froze.  Use your fingers to press on the taproot.  If it’s mushy, it froze or decayed. If it’s hard, it most likely will come back up.
  • Plant seeds in a sunny place.  For seeds, place approximately 1/4 inch into the soil and tamp own gently.
  • From our experience, Moringa’s do not like peat moss; they prefer a sand and soil mix.
  • Plant seed with the most pointed end down.  Plant ten seeds 2-3 inches apart.  Allow to germinate and grow for a month, then select the single best plant to remain and remove the rest.  The others can be carefully transplanted to a pot, where they may (or may not) continue to grow.
  • Use loose soil or mixsoil with sand so that the area where the roots are growing has plenty of good drainage for the water to flow to and the away from the roots.
  • Moringa Tree roots do not like to sit in water – it causes root rot.
  • Watering the Moringa Tree
    • daily until the root germinates
    • every other day for the first two months
    • after that time period, rain water is usually sufficient
    • In dry climates adjust waterings to three, four and eventually every five days, adjusting every two weeks.  During times that temperature exceeds 100º water every second or third day
    • If the leaves (usually near bottom or middle) start to curl, then water manually.
    • If the leaves start to turn yellow, the plant is getting too much water.
  • Frequent fertilization isn’t necessary for this type of tree.  It is well suited to hot or trropical climates and do very well in a natural, somewhat unattended growing method.  Fertilize initially, and then every few weeks during the first year, then every few months after that.

Consuming Moringa Seeds

  • Only consume a maximum of two seeds per time.  Actually, if you are taking for the first time, begin with one per day for the first week.
  • Don’t eat them on an empty stomach.
  • Don’t eat if you are pregnant, or trying to get pregnant.
  • Planting Moringa Seeds and edible Moringa Seeds may both be eaten BUT…
  • Like organic produce you get from the grocery store or your local farmer’s market, there could be occasional pests in the seeds, so we recommend opening the seed before eating.
  • Start with no more than 3 seeds.
  • Slowly work your way up to no more than 10 seeds per day.
  • The Planting Seeds are USDA approved and are edible, but are not FDA approved.
  • It should be noted that we cannot see inside the seeds to guarantee that there is seed meat, although we have carefully selected the seeds in hopes that the meat is in each seed.
  • You can make tea out of the pods, but eat only the meat of the seed.
  • Eating the seed with the pod may increase your weight loss.  Still, don’t eat more than two or there will be explosive consequences.  HOWEVER, if you do this, make sure you wash (without any cleansing agent) and rinse the pot well in salt water prior to consuming.

Preparing Moringa to Eat

  • There are four safe to eat parts of the Moringa tree, its roots, leaves, pods, and seeds.  Some sites say not to eat the roots, however the pods remaining from eating the seeds, can also be used to brew tea.
  • While the most common way to eat moringa is to use the plant’s leaves in salads or to powder the leaves for use in supplements or shakes, there are other parts of the plant you can eat as well. People also regularly eat the buds, flowers and pods that grow from moringa plants. Another common practice is to eat moringa seeds, both by themselves and mixed in with other food.
  • Moringa seeds do not have the kind of taste you would expect from most types of seeds or nuts. However, they are most certainly edible! It is generally recommended that you eat them in small doses, as they have a “cleansing” effect on your digestive system. But when eaten in appropriate doses, they are extremely healthy and beneficial to your body.
  • One of the ways you can eat moringa seeds is to pop them like popcorn. Simply fry them with some cooking oil and watch them blow up. You can eat a few and be fine, but you will likely need to slowly adjust your body to eating the seeds in this way. Again, you’ll want to be careful about the “cleansing” effects the seeds can produce.
  • Moringa seeds can also be added to other foods, like stews, casseroles, soups and sauces, to give those foods an extra crunchy texture. Drying the seeds is another option, and allows you to add them into bread or muffin mixes (in the same way that people often do with poppy seeds) or to corn bread mixes.
  • Just as your digestive system may need an adjustment period to get used to eating moringa seeds, so may your taste buds. Moringa seeds taste sweet when you first put them into your mouth, but soon create a bitter taste that you don’t often find in seeds or nuts. Once you have adjusted to the unique flavor, they offer you an extremely concentrated dose of minerals and vitamins.
  • The best way to eat Moringa seeds and to enjoy all their health benefits is to eat them like you would eat other nuts.  It is possible to consume the seeds together with dried fruits and nuts or include them in your breakfast.   A proven way you can consume Moringa seeds is to pop them just like popcorn.  Just fry them in a small quantity of cooking oil and watch them pop.
  • You can also cook fresh Moringa as you would with peas and use the seeds as a healthy and delicious accompaniment to any food.
  • Moringa seeds don’t have the sort of taste you would expect from many kinds of nuts or seeds.  But they are definitely fit for human consumption.
  • Moringa seeds can be boiled, baked, either shelled or in the pod, similar to green beans or peas.

What are Moringa seeds?

The Moringa plant contains thin green pods, which hang down from its branches. It’s from the pods that the seeds are removed.

Raw and fresh Moringa seeds are very tender; however, once they get dried, they get hard and begin to look like small beans.  The seeds have unique wing-like structures and are grayish-white in color.

During the months of reproduction, the Moringa tree offers a multitude of seed pods, leading to plenty annually.  In spite of the Moringa seeds only growing annually, it is worth the wait thanks to their significantly nutritional benefits.  The seeds are viable for between one and two years, lending themselves well to an annual harvest.

Dried Moringa Oleifera Leaves

  • To harvest leaves, prune tree and hang trimmed branches from a string and allow to dry naturally.  Once dried, remove the leaves and crust to powder and bits.
  • The end product will be natually dried Moringa Leaves and a few small stems.
  • Recommended Dosage is 5-10 grams per day, in a dried form
    • Start with 5 and increase slowly if desired.
  • They will keep for over a year, allowing you to harves every major pruning.
  • No known harmful side effects have been noted from Moringa ingestion
  • Dried Moringa Leaves can be used for
    • Loose leaf tea – hot or cold
    • Spices for cooking – great on chicken, omelets and soups
  • The benefits of Moringa are many.  See graphic at the bottom of this page.
  • Vitamins per gram
    • 3 x the potassium in bananas
    • 7x the Vitamin C as in oranges
    • 25x the iron contained in spinach
    • 4x the calcium contained in milk
    • 4x the Vitamin A contained in carrots
    • 4x more protein than eggs
    • Primary distribution
      • Paisley Farm and Crafts
      • Lawrenceburg, TN
      • Phone:  386-469-7917
      • www.PaisleyFC.com
    • Secondary Distribution
      • NatureVibe Botanicals
      • 710 Brunswick Ave
      • Unit B
      • Rahway, NJ 07065
      • www.NatureVibe.com

Harvesting Mature Seeds

  • Harvested seeds will have a 75-85% germination rate.
  • Seeds are viable for up to two years after harvest.
  • After two years, germination rate drops to about 20%
  • After four years, seeds will probably not germinate.

Transplanting


Chateaubriand

  1. Start with a top quality filet mignon
  2. Season with Grandpa's Thunder Powder or Arghhh Powder
  3. Preheat oven to 375º F
  4. Heat a large cast iron skillet to 450º on the stove top.
  5. Add 2 TBL butter and 2 TBL oil to the pan.  The oil will help prevent the butter from burning.
  6. When the butter stops foaming, turn the heat down to medium.
  7. Sear the meat on all sides.  If the meat sticks to the pan, leave it for another few seconds until it releases on its own.
  8. Put the pan into the oven until the meat has reached an internal temperature of 125º F. Use an external probe thermometer so you don’t have to keep opening the oven.  This will take 10-12 minutes.
  9. Remove from the oven.
  10. Put the meat on a warmed platter to rest for 15 minutes.
  11. While the meat is resting, prepare the sauce.
  12. Using the residual juices in the pan, place the pan over medium heat.
  13. Add the minced shallot and saute until translucent, but not browned.
  14. Add the red wine.
  15. Turn the heat up to medium high and reduce by half.
  16. Taste for seasonings.  Add salt and pepper if necessary.
  17. Stir in the minced tarragon and remove from the heat.
  18. Stir in the softened butter right before serving. This will help to further thicken the sauce and give it a lovely sheen.
  19. For a classic presentation, slice your Chateaubriand in half diagonally and serve on warmed plates with the sauce spooned over.
  20. Garnish with some fresh tarragon leaves.

Technically, Chateaubriand is a dish and not a cut of meat; however, sometimes cuts from beef tenderloin are sold as Chateaubriand steaks. These cuts and filet mignon are two very similar pieces of steak. They both originate from the same place on the cow and are very tender when cooked with the correct methods.

From TheDailyMeal.com

It’s not as common a dish as it used to be, but one of the fanciest — and most expensive — dishes you might ever encounter on a menu is a chateaubriand, usually served “for two.” The fact that it’s generally listed alongside steaks gives away the fact that it’s also a steak, but what is it, exactly, and why is it called “chateaubriand”?

Like Delmonico steak, the chateaubriand is one of those cuts of steak that isn’t named for a specific cut of meat, and its definition has also changed over the years. As legend has it, the chateaubriand was named after a French aristocrat named François-René de Chateaubriand, whose chef invented a method of cooking a large, boneless cut of beef by wrapping it in poor-quality steaks (sometimes recounted as the smaller end pieces from the filet), tying it up, grilling it until charred, and tossing the outer steaks. The perfectly-cooked inner roast was deemed the chateaubriand. (Perhaps appropriately for someone whose name has been attached to such an opulent dish, Chateaubriand was exiled during the French Revolution.”.)

Today, a chateaubriand is generally agreed-upon to be a large center cut filet mignon, roasted and served alongside potatoes and a sauce (appropriately named chateaubriand sauce) usually made with shallots, beef or veal stock, white wine, tarragon, and butter. The legendary French chef Pierre Franey, in his recipe for The New York Times, suggests wrapping a 7-inch filet in cheesecloth, standing it on its end, and pounding it down until it’s 1 1/2 inches thick, 6 inches in diameter, and round, then cooking it like a steak, but you don’t see too many people doing that any more.

While the techniques may vary, any menu that includes a chateaubriand will take pains to prepare the dish well, and the results are typically delicious. So if you see chateaubriand on a menu and you can spring for it, we suggest you order it, because you’ll receive a beautifully roasted filet mignon alongside a tasty French sauce and potatoes. Some places will even carve it tableside for you.

Shabu Shabu

Ponzu or Dashi – a Japanese dipping sauce made from soy sauce, lime juice, vinegar, and bonito fish flakes.  Sometimes chicken broth is substituted.

Traditionally pork sliced into paper-thin nearly transparent slices.  Cooked in boiling hot ponzu, then dipped in dashi

Paired with thin vegetables or rocket lettuce also dipped into the hot ponzu

Just a thought:  I wounder if marinated meat could be cooked on hot rocks – perhaps on a hot plate.

Cilantro Salad with Avocado

Ingredients

  • 2 cups cilantro leaves (1 large bunch)
  • 1 large avocado, diced
  • 4-6 Roma tomatoes, chopped
  • ½ medium red onion, sliced very thin
  • 1 cup canned black beans, drained and rinsed
  • 1 cup canned whole kernel corn, drained
  • 1 small can baby peas
  • Juice and zest of two large limes
  • 2 TBL olive oil
  • salt and black pepper (or red pepper flakes), to taste
  • 1 cup crumbled cotija or queso fresco cheese

Step by Step

  1. Rinse cilantro in a large bowl of standing water a few times to clean thoroughly
  2. Place on towel to dry.  Stems are edible, and full of flavor, but cut them into small pieces
  3. Slice your red onion as thinly as you possibly can and place the slices in a small bowl of ice water while you prepare other ingredients.
  4. Rinse and dry your large mixing bowl.  Add juice and zest of two limes, salt, pepper and EVOO and whisk together.
  5. Add diced avocado and toss in the lime juice.
  6. Add chopped tomatoes, black beans and corn.
  7. Toss gently to combine well.
  8. Add cilatro and drained red onions (both patted dry) and toss again.
  9. Sprinkle with crumbled cheese
  10. Serve as a side dish or a main salad.  Serve red pepper or Thunder Powder on the side.
  11. Store in the refrigerator.

Créme Fraiche

You can make your own créme fraiche on the kitchen counter overnight. 

• Pour 1 C heavy cream into a large canning jar
• Mix in 2 TBL buttermilk or 1/4 C active yogurt.
• Stir and cover with cheesecloth (NOT the lid)
• Let rest a total of 24 hours at room temperature. 
• Let chill in the fridge for another 24 hours before using.
• This will keep for up to two weeks

  • Use the best, freshest cream you can find. Look for pasteurized, not ultra-pasteurized heavy whipping cream.
  • Make sure to use cultured buttermilk, otherwise you will wait a full day and nothing will happen.

Great on a Brioche Tart.  Roll brioche flat before the final rise, mark a circle with a plate, roll up the sides using two finger folds, then let rise.  Tap down the center and spread with this créme fraiche and bake, then serve with a sabayone, and top with fresh fruit and sprinkle of Turbinado Sugar.


You can create a creme fraiche custard for many desserts.

HTML Snippets Powered By : XYZScripts.com