BREAD – INFO PAGE

Grandpa’s Notes

  • Internal temp of finished bread should be 195-205º
    • Below 190º and the gluten structure will break down, and your bread will fall
    • Above 210º and the water will quickly evaporate and bread will become dry
  • Bread flour has higher protein content
  • Tap water should be let to air out at least 2 hours in order for chlorine to evaporate

How to Make White Bread Soft, Spongy & Moist


10 Best Bread Recipes​

Choosing the Right Kind of Flour

It’s the most crucial element and can make or break your loaf. In India, the two most common types of flour are atta that is used to make chappatis and the all-purpose flour or maida which is mostly used in baking or seen in store-brought breads, cakes etc. I tried the recipes which asked me to use whole wheat flour but it didn’t work for a number of reasons which I’ll come back to later.


And so, I decided to go in for a basic white bread.


When it comes to picking the right flour, Chef Vinesh Johny, baker and owner of Lavonne, Bangalore says, “You need to find the kind that’s got gluten content of about 14%. Anything less than that and your bread won’t bake well or hold structure.” I checked most of the maida packets but couldn’t find the quantity of gluten, but from initial research I figure it’s somewhere around 10% and so I also brought a packet of gluten from Modern Bazaar.

Don’t get confused with trying to find bread flour because all-purpose flour will do the trick and I say this because I cruised through both Modern Bazaar and Le Marche trying to find it myself. I didn’t want to try a recipe and buy ingredients that I wouldn’t want to buy again and so I decided to stick with all-purpose flour.

(The Best Breads from Across the Country)

Other Ingredients You’ll Need

Yeast: This is an investment you’ll have to make. Modern Bazaar has a few options, they’re all imported but some of them are reasonable priced. I bought a Tesco box which has around 20 sachets of dry yeast and costs around Rs.300.

Things you want to set aside: Warm water, honey, salt, baking soda, sugar, eggs, olive oil and butter, salter and unsalted.

Methodology

I picked three recipes based on ease, expertise and popularity. The first recipe was the one which is most popular on YouTube and shows up every time you type in ‘how to make bread’. The second, was a classic French bread recipe for which I didn’t need special ingredients and the last one was Vinesh’s recipe who’s an exceptional baker.

Recipe #1 BakeLikeAPro

‘Bake Like a Pro’ is a YouTube channel with over a lakh subscribers and it’s all for good reasons. From cakes to biscuits to pasta dough, the channel has catalogued over 150 recipe videos and each one explains how to make a recipe, step-by-step. Bake Like a Pro has an excellent recipe for white bread for which you need a few basic ingredients like flour, butter, salt, sugar, milk and water.

You can watch the video here:


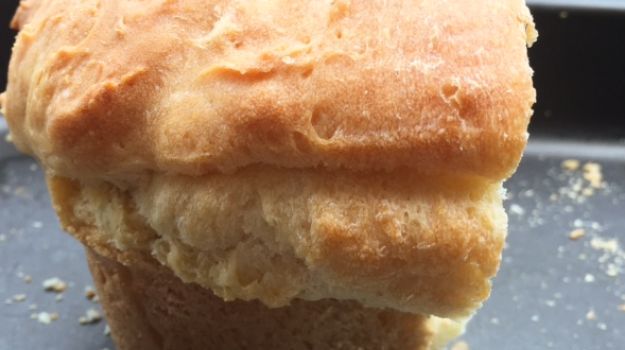
What works, what doesn’t:I had to try this recipe thrice to get it right but that was more my fault than the recipe’s. I couldn’t grasp how far the dough would rise and so I stuffed the baking tray with too much dough. But the one thing which was consistent every time I baked the bread was its taste. I’m not sure if it was the combination of milk and butter, but the loaf of bread had an extremely smooth and creamy taste.

After this recipe, I tried a number of other recipes and each and every one of them turned out to be a disaster which meant I needed to bring in an expert. I called up Chef Vinesh Johny (genius alert!) and here’s what he had to say: “Flour, yeast and water are the three basic ingredients you need to make bread. The rest of them are only for texture or flavour. Eggs and milk make it soft and creamy and sugar gives it a slightly sweet taste.”

Recipe #2 Classic French Bread

Classic French bread recipes call for honey and are a tad sweet which is what makes this white bread different from the others. The ingredients you need for this recipe are water, honey, dry yeast, butter, maida and milk powder though I used milk instead.

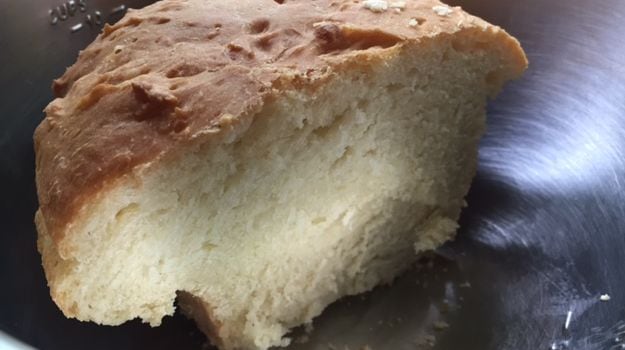
What works, what doesn’t: I used two teaspoons of milk instead of milk powder but I should have used the same quantity. The bread tasted delicious but it was crumbly which I think had more to do with the quality of flour I used. So for the next attempt, I plan on adding a pinch of gluten to this recipe. The bread also took much longer to rise, because of the humidity maybe, so I had to leave it for almost 2 hours.

It did taste different than all the other batch of breads I tried and I’d bake it again but it’s not something I’d use for a ham sandwich. It’s the kind you eat with jam or plain butter.

Recipe #3 White Bread Rolls

You need a few basic ingredients for this recipe but the technique is what really stands out. So before you start, be careful to read it thoroughly. You need the basics: flour, yeast, salt, sugar, eggs and water.

What works, what doesn’t: The one thing I seriously struggled with here was converting grams to tablespoons. I’m an amateur cook, at best, and so 9 grams sugar is not something I’ve come face to face with before. But this gorgeous convertor I found online came to my rescue (click here). And I’m guessing it’s fairly accurate, because my recipe turned out beautifully.

The other thing I altered in the recipe was the shape. I just separated the dough into three separate rounds to get smaller buns. Since I’ve never baked bread before, the one thing I was confused most about was how much time should the dough rest but Vinesh advised me to let it rest till it doubles in size and not worry too much about the number of hours mentioned in the recipe.

The Verdict

I loved all the three recipes I picked but if I had to pick one, and this is purely based on ease of execution, then it would be the first one by BakeLikeAPro. It’s ridiculously easy and needs no more than a few hours. Plus, the bread lasts for good three days so you don’t need to run to the store before breakfast. It also tastes really good with a bit of butter and jam, it’s got this undertone of sweet and salt which is great too. And just so you can try it at home, I’ve penned down the recipe:

(Bread and Beyond: 10 Best Sandwich Recipes)

Ingredients

5-6 cups flour
1/2 cup milk
3 Tbsp sugar
2 tsp salt
3Tbsp butter
2 packets of yeast (dry)
1 1/2 cups water

The only thing I added here is a pinch of gluten which you can if you like your bread a bit sturdy.

Method:

1. Heat the milk and add sugar, salt and butter. You can also you margarine if you want. Make sure the butter melts. If it hasn’t then microwave it a bit or over hot boiling water. You don’t want it boiling but it should be completely melt. Allow this mix to cool.

2. Heat up the water to about luke warm and add the yeast. Add a cup of flour and start stirring/mixing.

3. Add a second cup of flour and the butter mix you made in step 1. Stir again for a 9-10 minutes.

4. Add another cup of flour (3rd cup) and stir.

5. Add the next cup of flour and stir/knead for around 5-6 minutes. Add the 5th cup of flour and knead again. Keep kneading till it’s soft and doesn’t break but behaves more like clay. Add a bit more flour if required.

6. Pour some flour on your kitchen slab and start to knead the dough.

7. Oil a big pot. pan for the dough to go into. Cover with a towel and let it rise for around 35-40 minutes. Longer if it hasn’t risen.

8. Punch it down in the pot, take it out and knead it a little bit. Split it into two equal loaves.

9. Take two baking trays, oil them and put the dough in. The recipe asks for oil to be sprayed on top of the dough but i brushed some butter over them.

10. Cover them and let the dough rise for around an hour.

11. Preheat the oven to 220 degrees and bake till golden brown.

(Nigel Slater’s Bread Recipes)


Stroopwafel

A stroopwafel (or StroopWaffle) is a waffle made from two thin layers of baked dough with a caramel syrup filling in the middle. Stroopwafels are popular in the Netherlands, and were first made in the city of Gouda.

The stiff dough for the waffles is made from flour, butter, brown sugar, yeast, milk, and eggs. Medium-sized dough balls are put into a heated waffle iron and pressed into the required uniformly thin, round shape. After the waffle has been baked, and while it is still warm, it is split into thin layered halves. The warm filling, made from syrup, brown sugar, butter, and cinnamon, is spread between the waffle halves, gluing them together.

WAFFLE

  • 4 cups all-purpose flour
  • 1  1/8 cups butter, melted
  • 3/4 cup white sugar
  • 2 (.25 ounce) envelopes active dry yeast
  • 1/4 cup warm milk
  • 1 egg

CARAMEL FILLING

  • 1 1/2 cups molasses
    1 1/3 cups packed brown sugar
    1/3 cup butter
    1 teaspoon ground cinnamon
  1. In a large bowl, mix together the flour, melted butter, sugar, yeast, milk and egg.
  2. When the dough becomes to stiff to stir, turn out onto a floured surface and knead by hand for a few minutes.
  3. Set aside to rise for 45 minutes.
  4. To make the filling, heat the molasses, brown sugar, remaining butter and cinnamon in a saucepan over medium heat.
  5. Stir to blend, and set aside.
  6. Preheat a pizzelle iron (waffle iron)
  7. Knead the dough briefly, and divide the dough into 2 inch balls, or a size compatible with your pizzelle iron pattern.
  8. Press the balls in the preheated iron, and cook until the iron stops releasing steam, or until the waffles are golden brown.
  9. Carefully remove with a knife or spatula, and split in half horizontally (like pocket bread) while they are still warm.
  10. Don’t wait too long, otherwise they will break.
  11. Spread filling on the insides, and put the halves back together, pressing gently.

CinnaSugar ®

This is a powder that I mix up and keep on hand.  It is good for many things, but mainly French Toast.  It used to be called French Toast Powder, so you may see it call that in other recipes.

  • 1/4 C sugar
  • 1/4 C ground cinnamon
  • 1 TBL nutmeg
  • 1 tsp salt

For French Toast, add

  • 1 TBL seasoning
  • 1/2 tsp corn starch
  • 1 TBL granulated sugar
  • 2 eggs
  • 2 TBL milk (not skim)
  • 1 TBL emulsified butter or canola oil

Instant Pot – Grandpa’s Notes

This is a collection of information for use with my InstantPot Duo.

See ALL INSTANT POT Recipes

  • Needs at least 2 C water
  • RIBS – Dry rub – bottom rack – Add carrots, onions, potatoes – 25 minutes on Meat/Stew – High Pressure – Slow release 15 minutes then vent – Finish in oven 5-10 minutes at 400º then broil 1-2 minutes
  • RICE – 4 parts rice, 5 parts water – At least 2 C water – Pressure cook 4 minutes – Slow release 10 minutes
  • BEANS – Soak beans overnight – Alt to soaking beans overnight: 4 C water, 1 C rinsed beans – Pressure cook 4 minutes – Slow release 10 minutes – Discard water, rinse, and proceed as if soaked overnight
  • BEANS – 2 C water, 2 C kidney beans, 1 onion, 1 TBL butter, 1 tsp cumin, 1 bunch cilantro – Pressure cook 10 minutes – Slow release for 20 minutes
  • POTATOES – Mashed – 2 C water and 5-8 whole potatoes (washed) – Pressure cook 20 minutes – Quick release – Remove potato skins, season and mash
  • CHICKEN – Brown pieced chicken on Saute – Deglaze with ½ C white wine – Pressure cook 12 minutes – Quick release
  • BEEF ROAST – Saute with EVOO – Deglaze with chicken stock – Pressure cook 50 minutes – Quick release
  • PORK SHOULDER – Sear large pieces of the pork (approx 4-6 inches) – Deglaze with chicken stock – Add liquid smoke – Pressure cook 70-90 minutes – Natural release

Quick Release – Press cancel and turn lever to release pressure

Natural Release – Press cancel and wait 10 minutes, then flip to release pressure.

Slow release – Press cancel and wait 20 minutes for pressure to reduce, then flip to release pressure.

IP Pulled Pork

  1. Cut max 4 LBS pork shoulder into 3-4 inch pieces
  2. Sprinkle all pieces with Grandpa's Thunder Powder or Arghhh Powder
  3. Use Sauteé to brown the pieces in EVOO.  Remove the pieces to a plate when browned on all sides
  4. Use 1/2 C white wine to deglaze bottom of pan
  5. Add an additional 1/2 C water
  6. Place pieces of meat back into the pot on the steaming rack, and pressure cook for 90 minutes.
  7. Use natural release for 20 minutes, then switch to quick release
  8. Put pork on a plate and let it cool
  9. Pour the liquid into a glass or bowl
  10. Remove any separated grease that rises to the top of the liquid
  11. Shred the pork.  Use liquid (with grease removed) to moisten the meat
  12. Really good when served with COLE SLAW.

IP BBQ Ribs

  1. Marinate ribs overnight with 1/2 C EVOO, 2 TBL Grandpa's Thunder Powder or Arghhh Powder, 6 cloves of garlic, 1/4 C ketchup, 1 tsp hot mustard, 1/4 C apple cider vinegar, 2 TBL sugar and 1 TBL soy sauce – optional 1/4 tsp liquid smoke
  2. Add marinate liquid and 1 C water
  3. If rib rack fits around perimeter of pot, stand upright – bones in, meat side out – otherwise, cut to fit and lay flat.  Use Steam Rack to keep them out of the water
  4. I like to wrap two potatoes (with skin on) in foil – more on that later…
  5. Pressure cook (medium) for 25 minutes
  6. 10 minute natural release, then release steam
    – They will be very tender, but not browned
  7. Spread with sauce and place on broiler or grill until seared and caramelized – about 4 minutes
  8. While ribs finish, use a paper towel to remove skin from potato
  9. Add 4 TBL butter, 1/2 tsp salt and crush to mix
  10. Add JUST ENOUGH milk to make creamy mashed potatoes.  Mix well.
    Too much milk, and they will be runny.


IP Pot Roast

  1. Get a Beef roast that will fit comfortably into your IP pot.
  2. Season your roast using Grandpa's Thunder Powder or Arghhh Powder
  3. Using Sauteé setting, sear your roast on all sides
  4. Set the roast aside
  5. Deglaze the inner pot with 1.5 C chicken stock
  6. Return roast to pan
  7. Pressure cook for 45 minutes
  8. Prepare your potato, carrot and onion
  9. Quick release
  10. Quickly add potato, carrot and onion into the pot
  11. Pressure cook for an additional 10 minutes
  12. Remove veggies to bowl and roast to a pan
  13. Tent roast with aluminum foil to rest
  14. Strain remaining liquid and return to IP
  15. Add 1/2 glass white wine
  16. Sauteé liquid until reduced to more than half
  17. Turn off heat, then add 1-2 TBL cold butter
  18. Plate sliced meat – drizzle with sauce


IP Rice

  1. Rinse 2 C rice well
  2. Soak in water 15 minutes
  3. Add rice to IP
  4. Add 2 C water to IP
  5. Lock lid
  6. Pressure cook for 4 minutes
  7. Use natural release for 10 minutes
  8. After 10 minutes, switch to quick release

IP Mashed Potatoes

  • Cut 4-8 washed potatoes into 1-2 inch pieces
  • Add 2 C water
  • Pressure cook for 15 minutes
  • Quick release
  • Mix with 1 TBL butter per potato and mash
  • Add just a splash of milk or cream for consistency

Tip from Grandpa:  If you make them too runny, just add a little bit of instant potatoes.

IP Potluck Sweet and Tangy Meatballs

  • 45 oz (1/2 bag) of  frozen meatballs
  • 18 oz grape jelly
  • 12 oz Heinz chili sauce
  • 1/2 C water
  • .
  1. Add 45 oz frozen meatballs to your IP
  2. Mix jelly, chili sauce and water
  3. Dump over your meatballs
  4. Put lid on and turn lever to seal for pressure cooking
  5. Pressure cook for 10 minutes.  Quick release when done.
  6. Cool for 1 minute, then toss and serve.


Crispy Hot Wings

  1. Preheat oven to 250º
  2. Prepare a mixture of 1/2 tsp salt, 1/2 tsp pepper, 1/2 tsp garlic powder, 1/2 tsp onion powder, and 2 TBL baking powder
  3. Pat 24 wings dry – if frozen, thaw before patting dry
  4. Toss wings in seasoning mix
  5. Season wings prior to putting into the oven
  6. Bake wings for 30 minutes.  This will render much of the grease out of the wings, so they will smoke less.  The baking powder will also remove much of the liquid.
  7. Remove wings to a large mixing bowl, and turn the temperature of the oven up to 450º
  8. Add 2 TBL coconut oil or canola oil and toss to coat
  9. Meanwhile, mix 1 tsp GTP or desired seasonings, along with 1 TBL AP flour and 1 tsp cornstarch – and toss to coat all wings evenly
  10. Put onto greased wire rack on top of rimmed cookie pan.
  11. Bake at 450º for 30 minutes
  12. Flip, then bake another 15 minutes.
  13. Toss in Frank’s Red Hot Sauce or BBQ Sauce mixed with half as much melted butter.

Here is an Instant Pot Wing Recipe

IP Popcorn

This page is for Instant Pot only.

  • 1/2 C – 3/4 C Popcorn
  • 2 TBL Canola Oil
  • 2 TBL Country Crock Butter Spread – melted in microwave
  1. Push Sauteé button and wait for HOT to appear
    Press Adjust button to change temperature to More
  2. Add oil immediately after it says HOT
  3. As soon as oil starts to simmer, add melted butter
  4. The word HOT may disappear.
    Add popcorn when HOT reappears.  Spread to coat.
  5. Cover with standard lid – not pressure cooker lid.
  6. When it starts to slow, hit the cancel button.

IP Chicken Thighs

This recipe is a brief for Instant Pot only.

  1. Oil and season thighs, wings or drumsticks – 3 minutes
  2. Press Sauteé button and wait for HOT to appear – 4 min
  3. Put chicken in IP – skin side down – no lid – let brown 7 min
  4. .Remove chicken to plate and set aside
  5. Deglaze IP with 3/4 C white wine – 5 min
  6. Make sure you have silicone ring on lid or pressure will not work.
  7. Put chicken back in IP – skin side up – put lid on and lock it
  8. Press Pressure Cook button – press [-] and set time to 12 minutes
  9. Pressure cooking will start automatically
  10. After time has completed, press Cancel
  11. Carefully move Pressure Release toggle to allow steam to escape
    NOTE:  I do this in short bursts until steam flow has diminished
  12. Once “button” has dropped, remove chicken to plate
    IF YOU WANT SAUCE, CONTINUE
  13. Press Sauteé button again and wait for HOT to appear
  14. Allow liquid to boil and reduce until it begins to thicken
    NOTE: Allow 60 seconds AFTER pressing Cancel for temperature to drop, otherwise you may scorch the bottom of your IP
  15. Plate chicken and sauce over top
  16. Garnish with chopped rosemary and/or parsley

Cloud Bread

  1. 4 egg whites – Beat to stiff peaks with 1 tsp cream of tartar
  2. Add salt
  3. Combine (temper together) with 4 TBL cream cheese – softened
  4. Spread into pattys on baking tray
  5. Bake at 350º for 30 minutes
  6. Use for sandwiches

Pots and Co – Little Pot of…

We just finished our trip back to the US from Spain on British Airways and were served the most marvelous dessert. A Chocolate and Orange “Little Pot.”

It is labeled as “an indulgent blend of milk and dark chocolate infused with fresh orange zest.”

Here is a link for researching items to serve with at our pizza restaurants.

http://usa.potsandco.com/

http://www.grandepizza.com

http://www.uncletonysnypizza.com

http://www.tonysoncentral.com

http://www.cheesenstuffdeli.com


Twice Baked Mini-Potatoes

Based on a recipe by Barb Fenzel of Les Petites Gourmets

  1. Miniature potatoes
  2. Poke holes with a fork in miniature potatoes
  3. Halve a russet potato
  4. Combine 1 TBL Thunder Powder, 1 TBL sugar, 1 tsp CinnaSugar in a mixing bowl
  5. Coat mini potatoes with EVOO
  6. Coat mini potatoes with seasoning
  7. Bake all potatoes at 400º for 40 minutes
  8. Let all potatoes cool
  9. Cut the tips off the mini potatoes, so they sit flat, and then halve them.
  10. Scoop out the “meat” of the potatoes, being careful to not break the skin.
  11. Scoop out the russet meat as well.
  12. Combine the russet meat, half of the mini potato meat, and 1 TBL butter per 3 potatoes plus sour cream, chives and perhaps horseradish
  13. Crush the potatoes up and mix in just a bit of shredded cheese
  14. Put the filling back in the emptied shell of the mini potatoes
  15. Put on a sheet pan and bake at 350º for 8-10 minutes
  16. Garnish with chives or Thunder Powder

Edible Worms

  • Mix jello with HALF the liquid called for in the recipe
  • Alternate colors if you want, or if you want brown worms, use
    • blueberry and orange
    • raspberry and lime
    • lemon and grape
  • Close one end of straw (by folding) and tape in place
  • Put straws vertically into a tall glass
  • Pour slightly cooled jello into straws
  • Let cool for ½ hour in refrigerator
  • Using a pencil or pen, extrude the worm out onto a plate
HTML Snippets Powered By : XYZScripts.com