Cantaloupe Soup

cant-soupINGREDIENTS

  • 1 Cantaloupe – Peeled, deseeded and cubed
  • 1 C Philly Cream Cheese
  • 1/2 ± passion fruit puree
  • Small piece of peeled ginger
  • 1 dash Tabasco
  • A few mint leaves
  • OPTIONAL:  Thinly sliced Prosciutto
  • OPTIONAL:  A dollop of sour cream

STEP BY STEP

  1. Blend first five ingredients
  2. OPTIONAL:  Run through a sieve or food mill if you want a very smooth soup
  3. Chill at least 2 hours – overnight is better
  4. Put into bowl and top with sour cream, prosciutto and/or mint

Guacamole Deviled Eggs

Recipe mostly by TipHero, with a twist or two from Grandpa.

INGREDIENTS

  • Six eggs – About a week old
  • 1 VERY ripe avocado
  • Juice and zest from one lime
  • One deseeded jalapeño – minced
    TipHero prefers to use a serrano pepper
  • 1/2 tp salt
  • 1/4 tsp black pepper
  • 2 TBL chopped Cilantro
  • Dried chives ( not mixed in, rather sprinkled over top )

STEP BY STEP

  1. Rather than boiling your eggs to hard boil them, TipHero bakes them at 350º for 25 minutes.
    It is absolutely critical to start with a preheated oven.
  2. In a large bowl, take 4 C ice cubes and put into 8 C water
  3. Take your eggs directly from the oven and put into the ice water USING A SPOON.
    Touching the eggs will raise a blister.
  4. Let set in water until the ice melts
  5. Peel the eggs, using the water to wash away pieces, and lubricate the egg as you peel.
    You can also peel under running water, but this wastes water.
  6. Cut egg in half using a piece of dental floss – yes… dental floss.
  7. Remove yolks and place in a mixing bowl.
    Place the whites on your serving plate.
  8. Halve your avocado, and scoop the meat out using a spoon.
    TipHero uses the entire avocado.  I prefer using only half.
  9. Add lime, jalapeño, salt, black pepper and cilantro.
  10. Put into a zip lock bag, and cut the tip off a corner
  11. Place your avocado mixture into the bag
  12. Pipe ( squeeze ) the mixture into your egg white
  13. Sprinkle your chives over top of the eggs, letting some spill onto the serving platter.


Simple Crostini

CLICK IMAGE TO ENLARGE

INGREDIENTS

  • Baguette, bagel, or French bread
  • Cloves of garlic
  • EVOO
  • Very ripe tomato

See optional ingredients below.

STEP BY STEP

  1. Cut your bread into 1/4 – 1/2 inch slices on the bias (at an angle)
  2. Toast for 4 minutes in a toaster oven
  3. Rub with Garlic
  4. Rub with Tomato
  5. Drizzle with EVOO

OTHER TOPPINGS

The toppings are virtually unlimited.  Don’t be afraid to use your imagination.  Here is some guidance.

  • Put a thin slice of aged ham on top
  • Sun-dried tomato with a piece of cheese and a basil leaf
  • Oiled and cooked red pepper
  • Cream cheese and salmon
  • Salmon roe
  • Black olives
  • Radishes
  • Pickled onion
  • Avocado puree
  • Hard-boiled egg medallion with a dollop of mustard
  • Blueberries and raspberries
  • Olive Tapenade:  black, green, Kalamata, anchovy, salt, lime, capers, basil, garlic, and sundried tomato

First Watch – Poppyseed Dressing

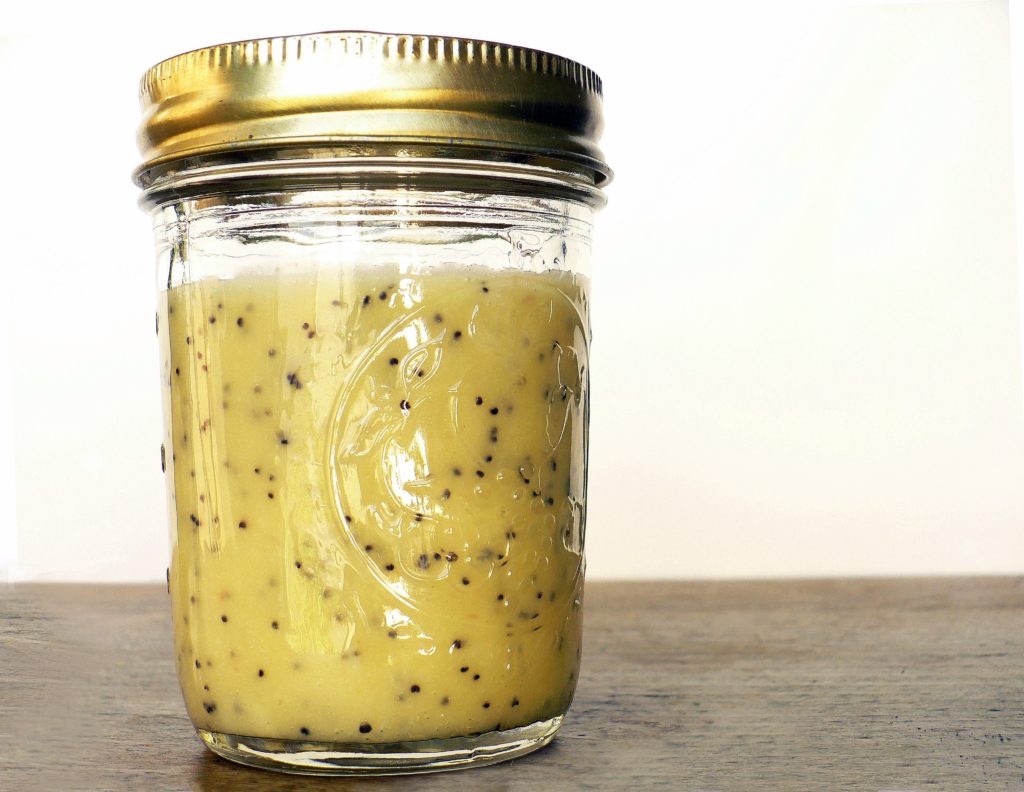
poppyseedFirst Watch (a local eggery and diner here in Phoenix) has undergone a DRASTIC change.  As it turns out, First Watch was started by four friends, who had an idea.  And a great idea it was.  First Watch has been my wife and my favorite breakfast place for about 25 years.  Recently two of the founders died, and the heirs decided that restaurant management was not quite their thing.  They sold it to a corporate conglomerate, and while it is still an OK place to eat, the menu has changed dramatically.

One of the things they have stopped providing is their Poppyseed Dressing.  They offer a Lemon dressing, Ranch dressing, and a Chipotle Ranch dressing.  Since it is not a restaurant secret any more, I asked for their recipe for their famous Poppyseed Dressing.  Their recipe (created for a large batch) is at the bottom of this page.  My modified recipe (with a few substitutions) is immediately below.

Special thanks to First Watch Restaurant for providing the recipe.

First Watch – Poppyseed Dressing – Two servings

  • 3 TBL canola oil
  • 3 TBL Karo syrup or honey (personal taste)
  • zest and juice from one lemon
  • 1 tsp white vinegar
  • 1/2 tsp dry mustard
  • 1/4 C minced onion
  • 1/2 tsp poppy seeds
  • Scant salt to taste

First Watch – Poppyseed Dressing – small bottle

  • 1 C canola oil
  • 1 C Karo syrup or honey (personal taste)
  • zest and juice from 3-6 lemons (3 TBL)
  • 3 TBL white vinegar
  • 4 tsp dry mustard
  • 1/4 C minced onion
  • 2 TBL poppy seeds
  • 1/2 tsp salt

Original Recipe – Directly from First Watch – about 3/4 Gallon

  • 9 C oil
  • 9 C sugar
  • 1 C lemon juice
  • 1 C white vinegar
  • 7 TBL dry mustard
  • 5 C diced onion
  • 1/2 C poppy seeds

Alternate:  Beatitudes Poppyseed Dressing

  • 1 egg yolk with 1/2 C canola oil drizzled and emulsified together
  • Mix in 1 TBL Dijon mustard,
  • 2 TBL hone
  • scant garlic powder, salt and pepper
  • 1 tsp apple cider vinegar
  • 1-2 TBL poppy seeds

Use in a salad or as a slaw dressing with apple, cabbage and craisins.

Tomato Bisque

INGREDIENTS

  • 2 C tomato – pieced
  • 1/2 Vidalia onion – sliced thin
  • 1/4 C chopped carrot
  • 1/4 C chopped celery
  • 1 TBL tomato paste
  • 1 bay leaf – to be removed at step 10
  • 3 TBL Butter
  • 1 C Stock
  • 1/2 C Water
  • 1/2 C Milk
    – use for finishing it up – SEE BOTTOM OF PAGE
  • 1/2 C Heavy cream
  • 1 egg yolk
  • 2 Chives – minced
  • 1 TBL Sour cream
  • 1 tsp dried parsley
  • 1 lemon
  • Black pepper and Thyme to taste – just a dash

STEP BY STEP

  1. Toss tomato in about 1 tsp salt
  2. Put tomato pieces on a baking sheet in the oven at 350º for 30-45 minutes (See step 4)
  3. Slice onion in half, and then very thin.
  4. Sweat onion, carrot, celery and tomato paste in butter on low heat 1/2 hour.
  5. Add 1 TBL AP flour and cook an additional 3 minutes
  6. Add stock and bring to a boil.
  7. Reduce to a bare simmer and add milk and water.
  8. Put all tomato pieces into the pot.
  9. Bring back to a simmer, then remove pot from heat.
  10. Remove bay leaf
  11. Puree carefully
    – – Strain or run through a food mill. – You can buy one BY CLICKING HERE.
    AT THIS POINT, YOU CAN POUR IT INTO FOUR HALF-PINT CANNING JARS, or TWO ONE-PINT CANNING JARS
  12. Mix in heavy cream.
  13. Pour back into the pot, and return to a low heat JUST UNTIL IT STARTS TO THICKEN
  14. Add 1 tsp lemon (or zest and juice from one lemon)
  15. Remove pot from burner.
  16. Temper in your egg yolk.  CLICK HERE to see how to temper.
  17. Garnish w/ sour cream & Chives

IF YOU HAVE PUT IT INTO FOUR HALF-PINT CANNING JARS, HERE IS WHAT YOU NEED FOR EACH JAR


  • 2 TBL Heavy cream
  • 1/2 egg yolk
  • 1/2 Chives – minced
  • 1 tsp Sour cream
  • 1 pinch  dried parsley
  • zest and juice from 1/4 lemon
  • Black pepper and Thyme to taste – just a shake

IF YOU HAVE PUT IT INTO TWO ONE-PINT CANNING JARS, HERE IS WHAT YOU NEED FOR EACH JAR

  • 1/4 C Heavy cream
  • 1 egg yolk
  • 1 Chives – minced
  • 2 tsp Sour cream
  • 2 pinch  dried parsley
  • zest and juice from 1/2 lemon
  • Black pepper and Thyme to taste – just a shake


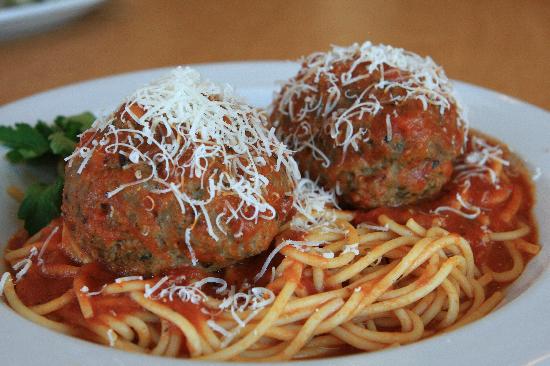
Four Big Ol’ Meatballs

meatballINGREDIENTS

  • 1/2 LB ground pork or Italian sausage
  • 3/4 LB 80/20 chuck hamburger
  • 1/4 LB ground lamb
  • 2 TBL chopped parsley
  • 1/4 C buttermilk
  • 1/2 C Parmesan cheese
  • 1/2 C bread crumbs
  • 2 tsp grated onion
  • 2 tsp granulated garlic (not garlic powder)
  • 1 tsp dried basil
  • 1 tsp crushed chili flakes or Grandpa's Thunder Powder or Arghhh Powder
  • 1 tsp sage
  • 1 tsp each salt and pepper
  • 1 jumbo ( or 2 medium) egg
  • 2 mozzarella cheese sticks

STEP BY STEP

  1. Combine everything except egg and meats
  2. Mix ground meats and eggs only to combine – do not overmix or they get tough
  3. Fold in all other ingredients
  4. Cut in half, then in half again making four big ol’ meatballs
    Double ingredients if you want eight meatballs, or cut in half again for eight regular meatballs
  5. Flatten the patties with your hands, and then cut the cheese sticks into eight pieces.  Put two inside four patties, or one inside eight patties – then roll them up into a ball.
  6. Bring a skillet up to screaming hot and sear your meatballs on all sides – not black, just browned
  7. Bake in the oven at 400 for 15-20 minutes
    Internal temperature should be about 165º
  8. Put them on top of your cooked spaghetti, top with sauce and sprinkle with cheese

SPECIAL STEPS

  1. Cook your spaghetti for about 10 minutes in boiling water.
  2. Heat your marinara sauce to about 185º

 
Sixteen Li’l ole Meatballs

Prepare Steps 1-3 above, except at Step 4, divide in half, four times making a total of 16 meatballs.  Then…

  1. Roll into balls, and space out onto a tray into the refrigerator for 30 minutes
  2. Meanwhile, combine 1 C panko bread crumbs with red pepper flakes, dried parsley, garlic powder, and Parmesan cheese.  Mix well.
  3. Beat one egg and 1 TBL of water
  4. Take each ball and dip it in the egg mixture and then roll in the bread crumbs, and return to the tray
  5. Put the meatballs into a 400º oven for 20 minutes
  6. Serve on top of pasta topped with maranara.


Senior Discounts

Like our recipes? Download one or more cookbooks BY CLICKING HERE. Multiple book discounts are available.

Since many senior discounts are not advertised to the public, our advice to men and women over 55 is to ALWAYS ask a sales associate if that store provides a senior discount. That way, you can be sure to get the most bang for you buck. Here is a list that is good to put into your car for quick reference.

113 Stores with Senior Discounts

Restaurants

    1. Applebee’s: 15% off with Golden Apple Card (60+)
    2. Arby’s: 10% off (55+)
    3. Ben & Jerry’s: 10% off (60+)
    4. Bennigan’s: discount varies by location
    5. Bob’s Big Boy: discount varies by location (60+)
    6. Boston Market: 10% off (65+)
    7. Burger King: 10% off (60+)
    8. Captain D’s Seafood: discount varies on location (62+)
    9. Chick-Fil-A: 10% off or free small drink or coffee (55+)
    10. Chili’s: 10% off (55+)
    11. CiCi’s Pizza: 10% off (60+)
    12. Culver’s: 10% off (60+)
    13. Denny’s: 10% off, 20% off for AARP members (55+)
    14. Dunkin’ Donuts: 10% off or free coffee (55+)
    15. Einstein’s Bagels: 10% off baker’s dozen of bagels (60+)
    16. Fuddrucker’s: 10% off any senior platter (55+)
    17. Gatti’s Pizza: 10% off (60+)
    18. Golden Corral: 10% off (60+)
    19. Hardee’s: $0.33 beverages everyday (65+)
    20. IHOP: 10% off (55+)
    21. Jack in the Box: up to 20% off (55+)
    22. KFC: free small drink with any meal (55+)
    23. Krispy Kreme: 10% off (50+)
    24. Long John Silver’s: various discounts at participating locations (55+)
    25. McDonald’s: discounts on coffee everyday (55+)
    26. Mrs. Fields: 10% off at participating locations (60+)
    27. Shoney’s: 10% off
    28. Sonic: 10% off or free beverage (60+)
    29. Steak ‘n Shake: 10% off every Monday & Tuesday (50+)
    30. Subway: 10% off (60+)
    31. Sweet Tomatoes 10% off (62+)
    32. Taco Bell: 5% off; free beverages for seniors (65+)
    33. TCBY: 10% off (55+)
    34. Tea Room Cafe: 10% off (50+)
    35. Village Inn: 10% off (60+)
    36. Waffle House: 10% off every Monday (60+)
    37. Wendy’s: 10% off (55+)
    38. White Castle: 10% off (62+)

Retail and Apparel

    1. Banana Republic: 10% off (50+)
    2. Bealls: 20% off first Tuesday of each month (50+)
    3. Belk’s: 15% off first Tuesday of every month (55+)
    4. Big Lots: 10% off
    5. Bon-Ton Department Stores: 15% off on senior discount days (55+)
    6. C.J. Banks: 10% off every Wednesday (60+)
    7. Clarks: 10% off (62+)
    8. Dress Barn: 10% off (55+)
    9. Goodwill: 10% off one day a week (date varies by location)
    10. Hallmark: 10% off one day a week (date varies by location)
    11. Kmart: 20% off (50+)
    12. Kohl’s: 15% off (60+)
    13. Modell’s Sporting Goods: 10% off
    14. Rite Aid: 10% off on Tuesdays & 10% off prescriptions
    15. Ross Stores: 10% off every Tuesday (55+)
    16. The Salvation Army Thrift Stores: up to 50% off (55+)
    17. Stein Mart: 20% off red dot/clearance items first Monday of every month (55+)

Grocery

    1. Albertson’s: 10% off first Wednesday of each month (55+)
    2. American Discount Stores: 10% off every Monday (50+)
    3. Compare Foods Supermarket: 10% off every Wednesday (60+)
    4. DeCicco Family Markets: 5% off every Wednesday (60+)
    5. Food Lion: 6% off every Monday (60+)
    6. Fry’s Supermarket: free Fry’s VIP Club Membership & 10% off every Monday (55+)
    7. Great Valu Food Store: 5% off every Tuesday (60+)
    8. Gristedes Supermarket: 10% off every Tuesday (60+)
    9. Harris Teeter: 5% off every Tuesday (60+)
    10. Hy-Vee: 5% off one day a week (date varies by location)
    11. Kroger: 10% off (date varies by location)
    12. Morton Williams Supermarket: 5% off every Tuesday (60+)
    13. The Plant Shed: 10% off every Tuesday (50+)
    14. Publix: 5% off every Wednesday (55+)
    15. Rogers Marketplace: 5% off every Thursday (60+)
    16. Uncle Guiseppe’s Marketplace: 5% off (62+)

Travel

    1. Alaska Airlines: 10% off (65+)
    2. Alamo: up to 25% off for AARP members
    3. American Airlines: various discounts for 65 and up (call before booking for discount)
    4. Amtrak: 15% off (62+)
    5. Avis: up to 25% off for AARP members
    6. Best Western: 10% off (55+)
    7. Budget Rental Cars: 10% off; up to 20% off for AARP members (50+)
    8. Cambria Suites: 20%-30% off (60+)
    9. Clarion: 20%-30% off (60+)
    10. Comfort Inn: 20%-30% off (60+)
    11. Comfort Suites: 20%-30% off (60+)
    12. Continental Airlines: no initiation fee for Continental Presidents Club & special fares for select destinations
    13. Dollar Rent-A-Car: 10% off (50+)
    14. Econo Lodge: 20%-30% off (60+)
    15. Enterprise Rent-A-Car: 5% off for AARP members
    16. Greyhound: 5% off (62+)
    17. Hampton Inns & Suites: 10% off when booked 72 hours in advance
    18. Hertz: up to 25% off for AARP members
    19. Holiday Inn: 10%-30% off depending on location (62+)
    20. Hyatt Hotels: 25%-50% off (62+)
    21. InterContinental Hotels Group: various discounts at all hotels (65+)
    22. Mainstay Suites: 10% off with Mature Traveler’s Discount (50+); 20%-30% off (60+)
    23. Marriott Hotels: 15% off (62+)
    24. Motel 6: 10% off (60+)
    25. Myrtle Beach Resort: 10% off (55+)
    26. National Rent-A-Car: up to 30% off for AARP members
    27. Quality Inn: 20%-30% off (60+)
    28. Rodeway Inn: 20%-30% off (60+)
    29. Sleep Inn: 20%-30% off (60+)
    30. Southwest Airlines: various discounts for ages 65 and up (call before booking for discount)
    31. Trailways Transportation System: various discounts for ages 50 and up
    32. United Airlines: various discounts for ages 65 and up (call before booking for discount)
    33. U.S. Airways: various discounts for ages 65 and up (call before booking for discount)

Activities & Entertainment

  1. AMC Theaters: up to 30% off (55+)
  2. Bally Total Fitness: up to $100 off memberships (62+)
  3. Busch Gardens Tampa: $3 off one-day tickets (50+)
  4. Carmike Cinemas: 35% off (65+)
  5. Cinemark/Century Theaters: up to 35% off
  6. U.S. National Parks: $10 lifetime pass; 50% off additional services including camping (62+)
  7. Regal Cinemas: 30% off
  8. Ripley’s Believe it or Not: @ off one-day ticket (55+)
  9. SeaWorld Orlando: $3 off one-day tickets (50+)

Sloppy Tony

INGREDIENTS

  • 1 LB hamburger
  • 1 LB ground sausage
  • 3 C marinara sauce
  • 1/2 C chicken broth

STEP BY STEP

  1. Brown meat and break it up
  2. Add about 3  C of sauce stir until all sauce is absorbed
  3. Add your chicken broth
  4. Cover and simmer 30 minutes
  5. Cut slices of Italian bread
  6. (optional) Butter your bread pieces and grill them for a few minutes
  7. Spoon your meat sauce
  8. Top with a thin slice of mozzarella or pepper Jack cheese
  9. Broil until cheese starts to brown
  10. Serve open-faced or as a sandich


Know 99 – EPISODE GUIDE

PROMOTIONAL

These are the recipes that I am hoping to demonstrate on Phoenix Channel 11 Know 99 local TV channel or YourLife A to Z

SEE ALSO AZ FAMILY – Your Life A to Z

Know 99 – Phoenix Local Cable TV
Know99@phoenix.gov
Chuck Emmret @ 602-534-5100

CoVid Cameras:  Pan Cam, Plate Cam, Chef Cam

Cooking when you don’t know how

  • Five Minute Meals
    • Scrambled Eggs and Toast
    • New Life for Left-over Burritos
    • Cheese Crisp
    • Egg Noodles with Butter
  • Crock Pot Cooking
    • Pot Roast and Vegetables
  • Instant Pot – Magic Cooking
    • Chicken breast w/ mashed potato
    • BBQ Ribs w/ baked potato
  • Kid Cooking
    • Hot Dogs
    • Muffin Pizza
    • Beanie Weenies
    • Spam and Pineapple
    • Meatloaf
    • Baked Apple with Raisins
    • Pigs in a Blanket (Puff Pastry)
  • Breakfasts
    • Breakfast Skillet
    • Scrambled Egg
    • Omelet
    • Pancakes
    • Bacon
    • Sausage
    • Grapefruit
    • Poached Egg on an English Muffin
    • Hollandaise Sauce – Eggs Benedict
  • Cinnamon and Nutmeg
    • Grandpa’s CinnaSugar®
    • Bread Pudding
    • Cinnamon Rolls
    • French Toast
  • From the Dairy Section
    • Make your own Yogurt
    • All about cheese
    • Hard Boiled Eggs
  • Breads
    • Bagel
    • Basic Bread
    • English Muffins
    • Corn Bread (2)
    • Dinner Rolls
    • Garlic Bread
    • Drop Biscuits
  • Desert Breads
    • Banana Bread
  • Side Salads
    • Tossed Salad
    • Three Bean Salad
    • Potato Salad
    • Cranberry Salad
    • Salad Plate
  • Side Dishes
    • Applesauce
    • Baked Beans
    • Cole Slaw
    • Sauteed Mushrooms
    • Carmelized Onions
  • Squashes
    • Acorn Squash
    • Spaghetti Squash
    • Butternut Squash
    • Pumpkin
  • A Pinch and a Dash
    • What is a pinch
    • … sprinkle
    • … dash
    • … little bit
    • … tad
  • Sweet as Can Be
    • Simple Syrup
    • Caramel Sauce
  • Desserts
    • Berry Trifle
    • Pumpkin Pie
    • Cheese Cake
    • Easy Cobbler
    • Strawberry Flowers
    • Mincemeat Pies
  • Foreign Cooking
    • Kim Chee
    • Won Ton Wrappers
    • Caçik
    • Kebaps (or Kebabs)
  • Beverages and Drinks
    • Iced Tea Ice
    • Arizona Sun Tea
    • Coffee
    • Smoothie
    • Egg Nog
    • Horchata
  • Potatos (Potatoes ?)
    • Potato Peels
    • Mashed Potatoes
    • Baked Potato
    • Twice Baked Potato
    • Fingerling Potatoes
    • Potato Medallions
  • Cooking in Boiling Water
    • Spaghetti
    • Hard Boiled Eggs
    • Deviled Eggs
    • Mashed Potatoes
    • Rice
  • Eating Your Veggies
    • Broccoli Parmesan
    • Cauliflower Parmesan
    • Baked Asparagus
    • Roasted Veggies
  • Sandwiches
    • Bologna Sandwiches
    • Baked Beans
    • PBJ
    • Grilled Cheese
    • Chicken Salad Sandwiches
    • BLT Sandwiches
  • South of the Border
    • Five Layer Bean Dip
    • Burrito
      • Sausage, sausage and cheese, SC & jalapeño, plain
    • Tacos
    • Guacamole
    • Bean Burrito
    • Cheese Crisps
    • Shopping Cart Salsa
    • Refried Beans
  • Pickled Again
    • Pickled Cucumber and Onion
    • Pickled Jalapeños
    • Refrigerator Pickles
  • Custards and Puddings
    • Basic Custard
    • Instant Pudding
    • Lemon Custard
  • Make Ahead Meals
    • Pulled Pork Sandwiches
    • Macaroni and Cheese
    • Pot Roast
  • Parts of Other Meals
    • Basic Stock
    • Gravy
    • Spaghetti Sauce
  • Sauces and Salsas
    • Jalapeño Sauce
    • Shopping Cart Salsa
    • BBQ Sauce
  • Appetizers and Snacks
    • Chip Dip
    • Celery and Peanut Butter
    • Cinnamon Toast
    • Buckeyes
    • Toffee
    • Rice Krispie Treats
  • Full Steam Ahead
    • Steamed Artichokes
    • Steamed Cauliflower
    • Steamed Broccoli
    • Corn on the Cob
  • Cold Weather Meals
    • Easy Chili
    • Corn Bread
    • Tomato Soup and Dumplings
  • Something is Fishy
    • Cooking Fish
    • Salmon and Crab Cakes
    • Fish Sticks
  • Mooooo and Oink
    • BBQ Ribs
    • Hamburgers
    • Meatballs
    • Meatloaf

Flank Steak

Other terms for Flank Steak are skirt steaks, beef bottom round roast, bottom sirloin-flat muscle/flat meat.

NOTE:  Inside skirt is wider (about 5 inches) and is best for shredding.  Outside skirt is narrower (about 3 inches) and is best for grilling.

INGREDIENTS

  • 2-3 lbs – Cut with the train into two inch strips, then against the grain into 1/4 inch pieces
  • Toss with 1/8 tsp baking soda and 1 TBL water – let rest 5 minutes

STEP BY STEP

Marinate the night before in the fridge using a plastic bag with mix outlined below.

LET WARM FOR 30 MINUTES on the plate before grilling or juices will let loose

1. Grill on very hot, preheated grill.
– Keep left side HOT and right side cooler. Scrape hot grill grate.
2. Sear on hot side 4 min, flip and cook other side 4 minutes.
3. Done when internal temp is 125º for medium rare.
– Move to cooler side.
110º is rare
135º is medium
140º is well done. Don’t do it, just don’t do it.

Cover in foil, let juices redistribute themselves. Lemon juice over top.

Slice on the diagonal with a bias AGAINST the grain AFTER it has rested at least 5 minutes (preferably ten)

OVERNIGHT MARINATE

  • 1/3 cu olive oil
  • 1/3 cu soy
  • 1 tbl rosemary
  • 1 tbl thyme
  • 1 tbl tomato paste
  • 1 tbl brown sugar
  • 3 cloves garlic
  • 1 tsp black pepper
    Pineapple juice
    Garlic
    Dijon Mustard
    Paprika
    Shallot
    Overnight Marinate – Use ingredients to taste

ALT MARINATE

Yakisoba Sauce -Copy Cat Recipe

Grandma’s Cooked Cranberry Relish

INGREDIENTS

  • One bag (about 4 cups) cranberries
  • One large orange, peel and all, deseeded
  • 1/2 cup sugar
  • 1/2 C Ruby Port
  • 1 C orange juice

STEP BY STEP

  1. Pulse all in food processor until chopped large
  2. Place all in a medium pot
  3. Cook on medium high until it comes to a boil
  4. Reduce heat and simmer 30 minutes – stirring occasionally
  5. Remove from heat
  6. While still hot, place in a clean canning jar leaving 1/2 inch head space
  7. May or may not seal.
  8. If it “pops” it will keep for a month or two.  If it doesn’t use this first.  It will keep for a couple of weeks.

OPTIONAL INGREDIENTS

  • One apple, deseeded
  • Walnuts

Hawaiian Roll Sliders

INGREDIENTS

  • 1 PKG King’s Hawaiian Rolls
  • 1 LB thinly shredded roast beef or corned beef
  • Sliced Provolone cheese
  • Sweet onion – thinly sliced
  • Pickles – thinly sliced
  • Tomatoes – thinly sliced

STEP BY STEP

  1. Saute onion slices and set aside
  2. Slice pickles very thinly and set aside
  3. DO NOT SEPARATE Hawaiian Rolls
  4. Cut down the middle creating twelve tops and twelve bottoms – all still connected
  5. Put bottom sheet in a baking dish
  6. Top with lightly chopped meat
  7. Top with sauteed onion
  8. Top with cheese slices
  9. Top with sliced pickles and tomato
  10. Put the top layer of buns onto the sandwiches
  11. Bake at 350º for about 10 minutes
  12. Slice apart and let people take their own

Scratch Marinara / Bolonaise

INGREDIENTS

  • 8 Roma Tomatoes
  • 1 Small sweet onion – diced
  • 1/2 C Red wine
  • 1/2 C chicken, vegetable or beef stock.
  • 3 cloves of garlic – minced
  • 2 TBL EVOO – whisked in to emulsify
  • 1 TBL Basil
  • 1 TBL Oregano
  • 1 tsp Thyme
  • 1 tsp Rosemary
  • 1 bay leaf
  • Salt and pepper

To make Bolonaise Sauce add these meats, cooked

  • 6 oz sirloin – coarse grind
  • 6 oz chuck (shoulder) – coarse grind
  • 6 oz pork butt – coarse grind
  • 4-6 oz thick cut bacon

STEP BY STEP

  1. Tomatoes are in season April through August – the hot summer months
    Use tomatoes during those months.  During the cooler times, see make BASIC MARINARA.
  2. Cut an X in the top of the tomato
  3. Plunge into boiling water – simmer for two minutes
  4. Plunge into ice water – let cool for two minutes
  5. Skin should peel off easily
  6. Squeeze the tomato and squeeze out the seeds
  7. Discard the seeds, which can be bitter, and put the flesh into a stock pot
  8. Add all other ingredients to the pot
  9. Bring to a high simmer, then reduced to a low simmer
  10. Let cook on the stovetop for at least an hour, preferably two.
  11. Halfway through, use a potato masher to break up to tomato pieces
  12. Can the sauce to carry you through the winter months, or
    Let cool, and store in zip lock bags.  Freeze flat (on a tray) so they stack efficiently in the freezer.

NOTES

  • Ask at the supermarket for bruised tomatoes at a discount
  • Keeps for a year or two if properly canned, or two weeks in the refrigerator
    Buy in bulk when the tomatoes are on sale and CAN YOUR OWN TOMATOES.
  • Use this as a base, then add your own variations:  more basil or mushrooms or cheese… Whatever
  • This is a great use to get rid of your tired veggies
  • If you have the hard rind from Parmesan cheese, throw it in for flavor.  Remove it before freezing or canning.
  • This is a great place to throw whole and intact chicken or rib bones.  Be VERY CAREFUL to not leave bone pieces behind.
    Better yet, create SCRATCH STOCK from the bones, and then use 1/2 C of your own homemade stock

Chef Notes

  1. EVOO in a hot pan, smashed garlic – skin and all
  2. 4 ripe Roma tomatoes – cross top – boil and remove skin
  3. Smash and chop the tomatoes
  4. Add a bit of water, black pepper, salt, parsley and basil
  5. Add optional chili pepper
  6. Spaghetti al dente in with sauce
  7. Add fresh basil – toss together
  8. Plate and top with Parmesan cheese

Easy Apple Strudel

INGREDIENTS

  • Commercial Puff Pastry, or Strudel Pastry
  • 3 Baking Apples – Granny or Honeycrisp – cored but with skin still on – sliced very very thin or grated
  • 1 TBL Cinnamon
  • 2 TBL Butter
  • 1/2 C Sugar – Turbinado sugar is pretty, but not required

STEP BY STEP

  1. Use strudel pastry (keep moist).
  2. Roll just a bit flatter
  3. Melt your butter in the microwave
  4. Lay down filling – Leave an edge bare for sealing
  5. Sprinkle cinnamon and 3 TBL sugar over apples
  6. Drizzle apple with butter
  7. Fold ends, roll tightly
  8. Press together seam
  9. Place on baking sheet with seam side down
  10. Brush outside w/ butter.
  11. Bake till golden brown. Cut ends off to sit flat
  12. Cut into 2-3 inch pieces – straight across
  13. Cut pieces at an angle (on the bias)
  14. Place on serving plate with the flat side down.
  15. Serve w/ ice cream or yogurt

FROM SCANNED NOTES

Apple Strudel
1 pound red apples, peeled and sliced
1/4 cup sugar
1 teaspoon cinnamon
3 tablespoons raisins
pate Brisee:
1 cup all-purpose flour
1/4 teaspoon salt
3 tablespoons sugar
1/4 cup cold butter, diced

4 to 6 tablespoons ice waterp
2 tablespoons melted butter pPp”

p p
p p p
1. Preheat oven to 375∞; Lightly coat a baking sheet with canola oil.
2. In a large bowl, toss apples with sugar, cinnamon and raisins.
3. To prepare pate brisee, place flour in a medium bowl. Add salt and sugar and mix
well. Add butter and cut into flour, using a pastry cutter, until butter is the size of
small peas. Add water, 1 tablespoon at a time, mixing gently after each addition.
Dough will begin to form a ball when enough water has been added. Gather dough
with dry hands and form into ball. Let rest for 5 minutes.
4. Roll into an 8″ by 12″ rectangle!~ffff~poon filli~g”along”the 19n9 edge of the dough, about
. “”i ii” “i”
1-mch from the edge. Roll dough and fillin,gi;9ver itself and seal ends to form a strudel-
“i
Score into 10 1-inch slices. Brush top of strudel with melted butter.
5. Bake for 35 to 40 minutes, or until top is lightly browned. Remove from oven and trim
any extra pastry off the ends. Cut into 10 servings.
Makes 8 servings, each containing approximately:
170 calories
28 mg. carbohydrate
6 gm. fat
15 mg. cholesterol
2 gm. protein
95 mg. sodium
2 gm. fiber
9/01

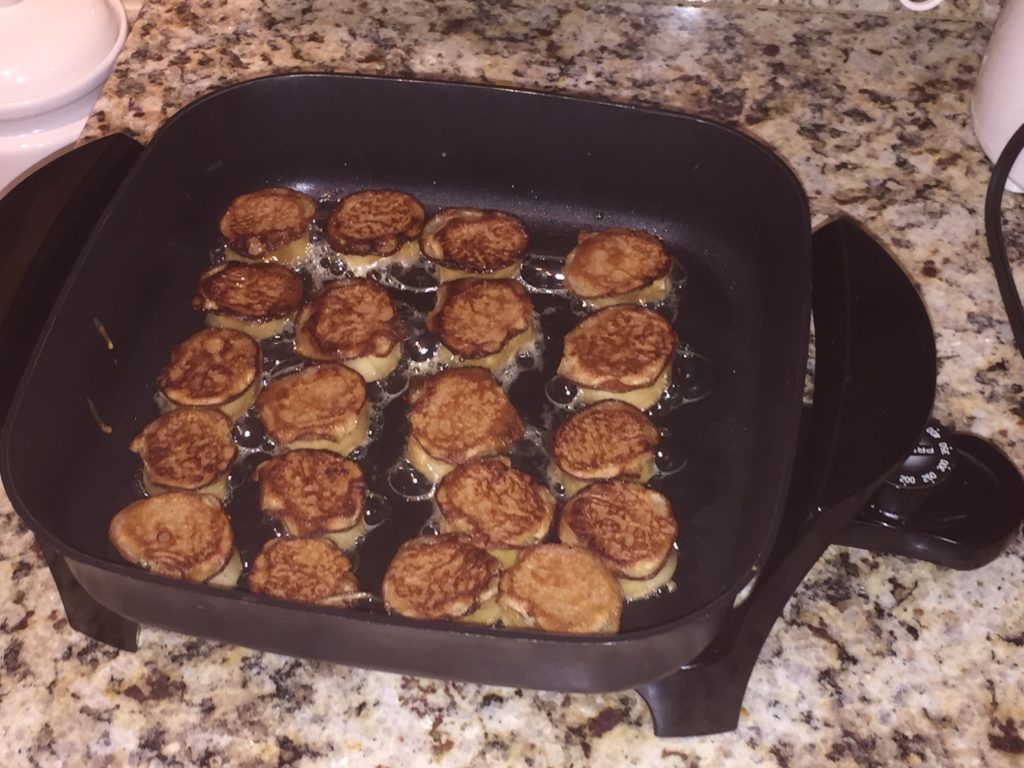
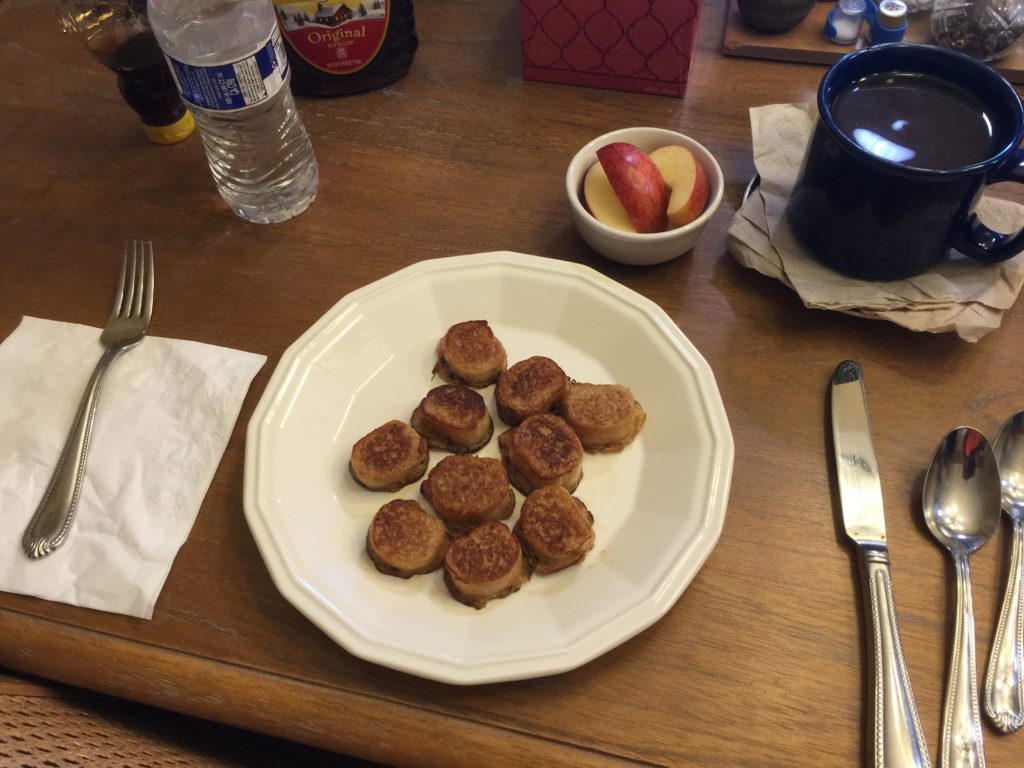
Mini French Toast Medallions

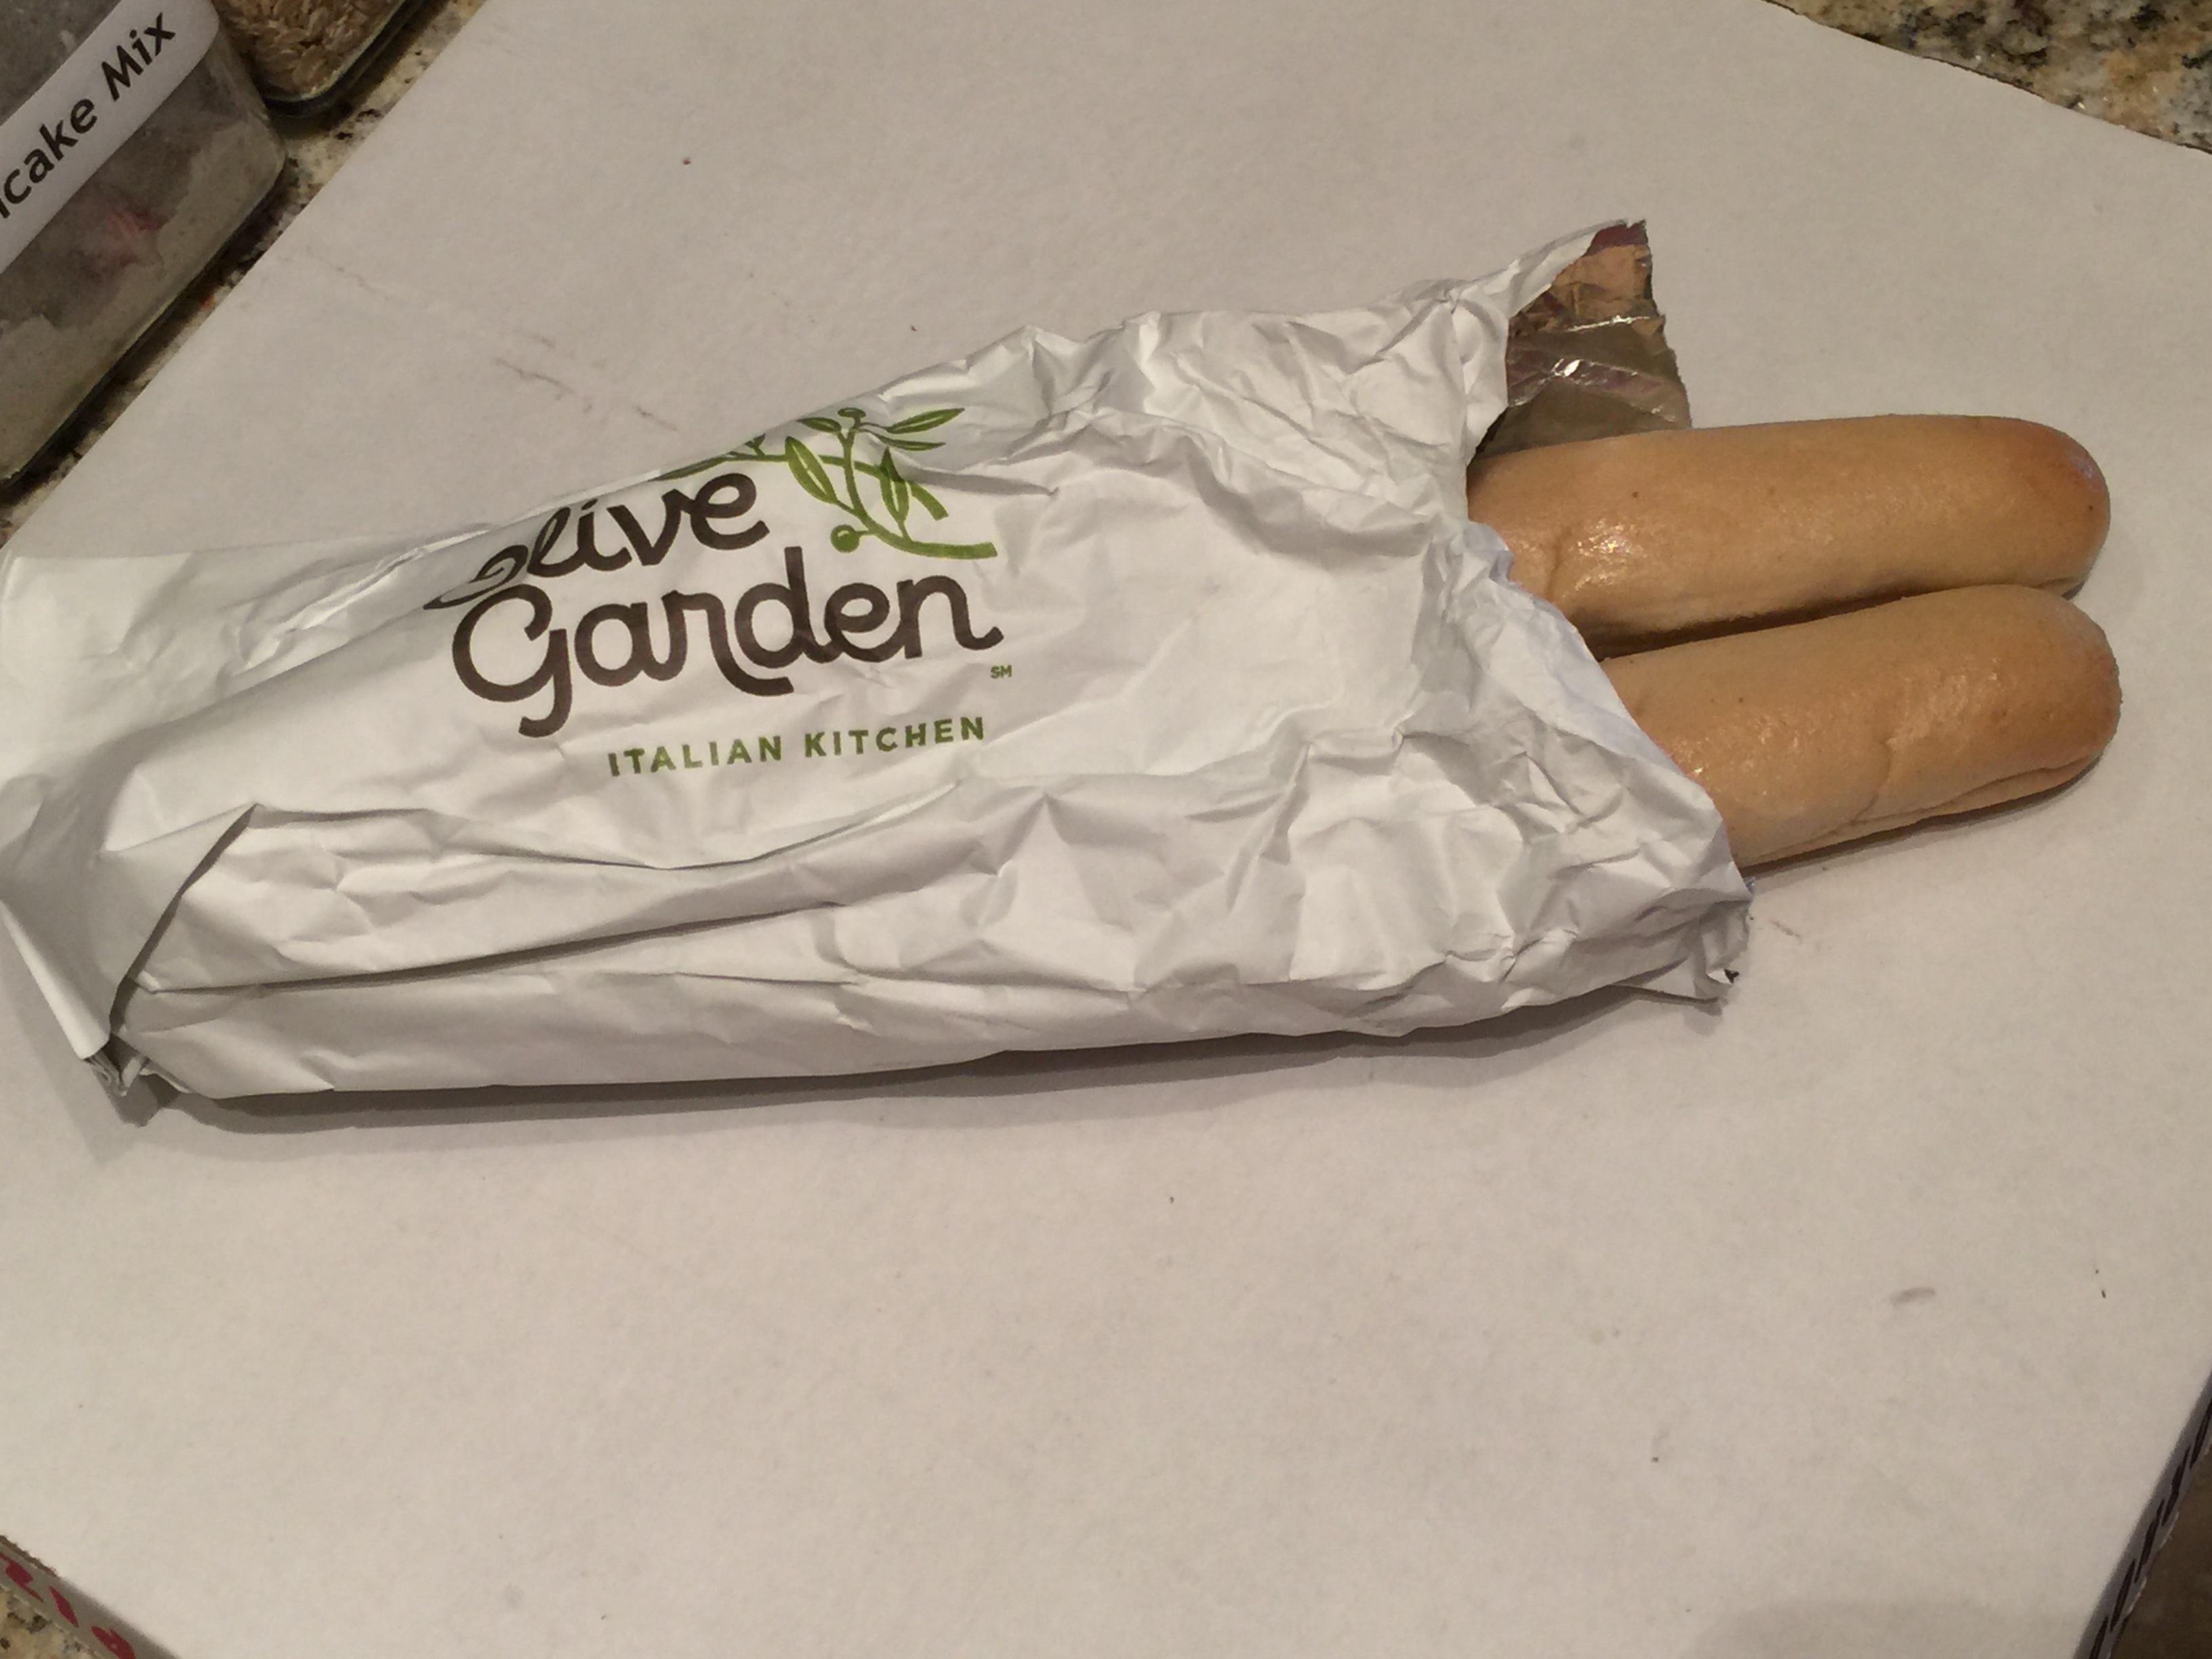
Olive Garden BreadsticksIf you eat at Olive Garden, you know that you receive an unlimited supply of breadsticks.

Take them home and you will have a great breakfast surprise.

INGREDIENTS for preparing two breadsticks

  • Take-home left over breadsticks
  • One egg
  • 2-3 TBL buttermilk (or whole milk)
  • 2-3 TBL of melted butter
  • 2-3 TBL of canola oil2016-04-24 08.59.18
  • 2-3 TBL granulated sugar
  • 1 TBL Grandpa’s CinnaSugar®


STEP BY STEP

  1. Using a dry paper towel, brush the outside of the breadsticks.  Most of the butter will remain, but most of the garlic will be brushed away.
  2. Cut medallions about 1/4 inch thick – discard the tips
  3. Mix all of the above ingredients (except the breadsticks) together in a large mixing bowl
    – when adding your milk, melted butter and canola oil, whisk continually to emulsify the fats
  4. Toss the bread medallions in the mixture
  5. Allow to soak for about five minutes
  6. Toss again and soak for five minutes2016-04-24 09.02.02
  7. Toss again and soak for five minutes
  8. Lightly grease your skillet
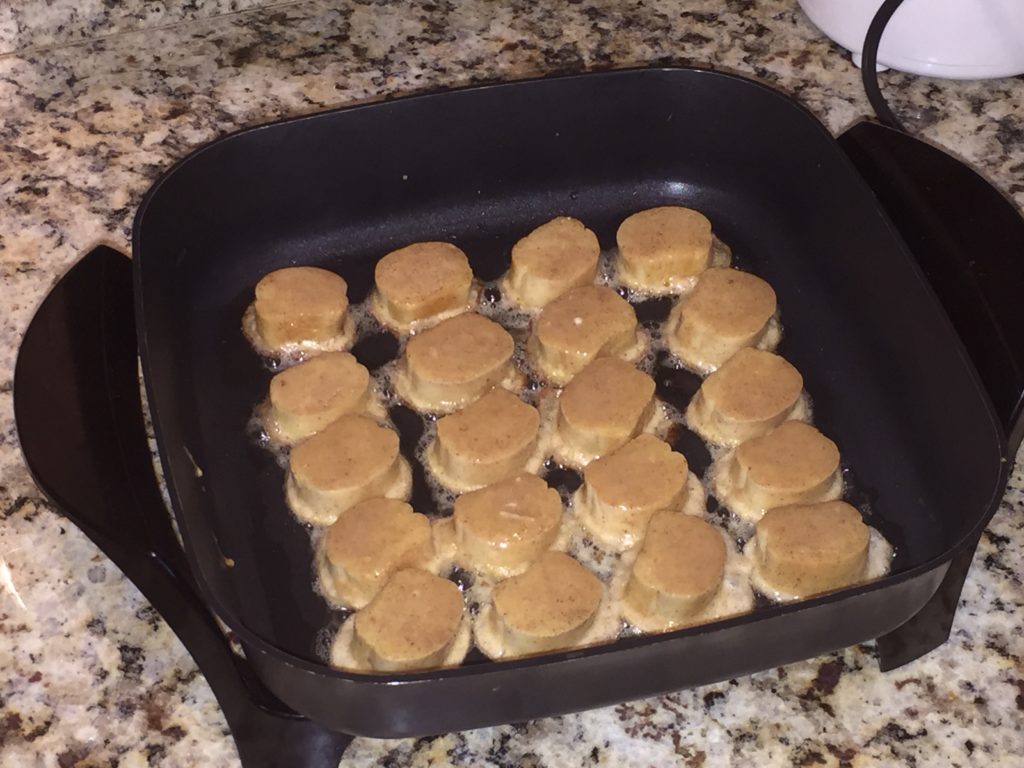
  9. Place each soaked medallion in the skillet
  10. Let cook about 5 minutes then flip each one
  11. Let cook about 4 minutes then flip back to the original side
  12. Let cook about 2 minutes, then place on plates
  13. There is no need for butter because we added it into the batter2016-04-24 09.05.37
  14. Simply serve with hot mashed fruit, syrup or honey – depending on your tastes.


Judy’s Counter Kraut

Note:  This is a lot of information.  If you print out this recipe, you can use the delete function to delete any “tabled” recipes that you don’t want.

1. Shave cabbage thin. Discard hard core.
2. Pack tightly into glass jar sprinkling 1 tsp with each handful (approx 2 TBL per quart jar)
3. Add distilled water to cover (or tap water that has aired out for 24 hours)
4. Place lid on loosely.
5. Stand jars in tray (or plate) and leave on counter for 9-12 days.  A longer fermentation makes a tangier sauerkraut.  Go for as long as six weeks.
6. Add water lost by fermentation process – top off daily – also, remove any floaters from the top of the water.After 9-12 days, kraut is ready to eat or may be canned in boiling water bath. May also be refrigerated for up to 2 months.Caraway seeds or garlic may be added if desired as you pack in the cabbage.

OTHER NOTES FOR SAUERKRAUT AND KIMCHI BELOW.

In the first stage, the cabbage is soaked in a salty brine that kills off harmful bacteria. In the second stage, the remaining Lactobacillus bacteria (the good guys!) convert sugars into lactic acid, which preserves the vegetables and gives them that wonderful, tangy flavor. (If you want to learn more about fermentation, I highly recommend The Art of Fermentation by Sandor Katz.)

How to Make Cabbage Kimchi

Makes 1 quart
What You NeedIngredients
1 (2-pound) head Napa cabbage
1/4 cup sea salt or kosher salt (see Recipe Notes)
Water (see Recipe Notes)
1 tablespoon grated garlic (about 5-6 cloves)
1 teaspoon grated ginger
1 teaspoon sugar
2-3 tablespoons seafood flavor or water (optional, see Recipe Notes)
1-5 tablespoons Korean red pepper flakes (gochugaru)
8 ounces Korean radish or daikon, peeled and cut into matchsticks
4 scallions, trimmed and cut into 1-inch pieces

Equipment
Cutting board and knife
Large bowl
Gloves (optional but highly recommended)
Plate and something to weigh the kimchi down, like a jar or can of beans
Colander
Small bowl
Clean 1-quart jar with canning lid or plastic lid
Bowl or plate to place under jar during fermentation
Instructions

Cut the cabbage. Cut the cabbage lengthwise into quarters and remove the cores. Cut each quarter crosswise into 2-inch-wide strips.

Salt the cabbage. Place the cabbage and salt in a large bowl. Using your hands (gloves optional), massage the salt into the cabbage until it starts to soften a bit, then add water to cover the cabbage. Put a plate on top and weigh it down with something heavy, like a jar or can of beans. Let stand for 1-2 hours.

Rinse and drain the cabbage. Rinse the cabbage under cold water 3 times and drain in a colander for 15-20 minutes. Rinse and dry the bowl you used for salting, and set it aside to use in step 5.

Make the paste. Meanwhile, combine the garlic, ginger, sugar, and seafood flavor (or 3 tablespoons water) in a small bowl and mix to form a smooth paste. Mix in the gochugaru, using 1 tablespoon for mild and up to 5 tablespoons for spicy (I like about 3 1/2 tablespoons).

Combine the vegetables and paste. Gently squeeze any remaining water from the cabbage and return it to the bowl along with the radish, scallions, and seasoning paste.

Mix thoroughly. Using your hands, gently work the paste into the vegetables until they are thoroughly coated. The gloves are optional here but highly recommended to protect your hands from stings, stains, and smells!

Pack the kimchi into the jar. Pack the kimchi into the jar, pressing down on it until the brine rises to cover the vegetables. Leave at least 1-inch of headspace. Seal the jar with te lid.

Let it ferment. Let the jar stand at room temperature for 1-5 days. You may see bubbles inside the jar and brine may seep out of the lid; place a bowl or plate under the jar to help catch any overflow.

Check it daily and refrigerate when ready. Check the kimchi once a day, pressing down on the vegetables with a clean finger or spoon to keep them submerged under the brine. (This also releases gases produced during fermentation.) Taste a little at this point, too! When the kimchi tastes ripe enough for your liking, transfer the jar to the refrigerator. You may eat it right away, but it’s best after another week or two.

Recipe Notes

Salt: Use salt that is free of iodine and/or anti-caking agents, which can inhibit fermentation.

Water: Chlorinated water can inhibit fermentation, so use spring, distilled, or filtered water if you can.  Last resort, you can use tap water than has aired out for 24 hours.

Seafood flavor and vegetarian alternatives: Seafood gives kimchi an umami flavor. Different regions and families may use fish sauce, salted shrimp paste, oysters, and other seafood. Use about 2 tablespoons of fish sauce, salted shrimp paste, or a combination of the two. For vegetarian kimchi, I like using 3/4 teaspoon kelp powder mixed with 3 tablespoons water, or simply 3 tablespoons of water.

Sauerkraut is made by a process called lacto-fermentation. To put it (fairly) simply: There is beneficial bacteria present on the surface of the cabbage and, in fact, all fruits and vegetables. Lactobacillus is one of those bacteria, which is the same bacteria found in yogurt and many other cultured products. When submerged in a brine, the bacteria begin to convert sugars in the cabbage into lactic acid; this is a natural preservative that inhibits the growth of harmful bacteria.

Lacto-fermentation has been used for centuries to preserve seasonal vegetables beyond their standard shelf-life. The fermentation process itself is very reliable and safe, and the fermented sauerkraut can be kept at cellar temperature (around 55°F) for months, although those of us without cellars can make do with storing the kraut in our fridges. Besides preserving the cabbage, this fermentation process also transforms it into something incredibly tasty and gives it additional health benefits — fermented sauerkraut contains a lot of the same healthy probiotics as a bowl of yogurt.

What Do I Need to Make Sauerkraut?

At the most basic, all you need is cabbage, salt, and some sort of container to store it while it’s fermenting. It’s important that the cabbage remain submerged in its liquid during fermentation. When making sauerkraut in a crock, you usually place a weighted plate over the cabbage to pack it down and keep it submerged. When fermenting in a mason jar, inserting a smaller jelly jar filled with rocks or marbles in the mouth of the larger jar serves the same purpose.

The cabbage near the surface tends to float, so when fermenting in a mason jar, you need to either tamp down the cabbage a few times a day or place a large outer leaf of cabbage over the surface of the shredded cabbage to hold it down. Also be sure to keep the jar covered at all times with a clean cloth or piece of cheese cloth. This will allow airflow, but prevent dust or insects from getting into the sauerkraut.

How Long Does It Take To Make Sauerkraut?

For a small quart-sized batch like we’re making today, the minimum time is about three days, though the kraut will continue to ferment and become tastier for many days after that. As simple as it sounds, the best rule of thumb is to keep tasting the kraut and refrigerate (or take it cellar temperature) when it tastes good to you. The sauerkraut is safe to eat at every stage of the process, so there is no real minimum or maximum fermentation time.  It can go for as long as six weeks.

What Can Go Wrong?

Not much! You may see bubbles, foam, or white scum on the surface of the sauerkraut, but these are all signs of normal, healthy fermentation. The white scum can be skimmed off as you see it or before refrigerating the sauerkraut. If you get a very active fermentation or if your mason jar is very full, the brine can sometimes bubble up over the top of the jar. This is part of the reason why I recommend using a larger mason jar than is really necessary to hold the cabbage. If you do get a bubble-up, it’s nothing to worry about. Just place a plate below the jar to catch the drips and make sure the cabbage continues to be covered by the brine.

It is possible that you might find mold growing on the surface of the sauerkraut, but don’t panic! Mold typically forms only when the cabbage isn’t fully submerged or if it’s too hot in your kitchen. The sauerkraut is still fine (it’s still preserved by the lactic acid) — you can scoop off the mold and proceed with fermentation. This said, it’s still important to use your best judgement when fermenting. If something smells or tastes moldy or unappetizing, trust your senses and toss the batch.

I have been making fermented beverages and foods for years, and I have always been amazed by how easy they are and how delicious the results can be. There are a few resources I turn to again and again:

The Art of Fermentation by Sandor Katz – This is a great all-around resource on fermentation in general, fermentation problem-solving, and fermentation health benefits.

Cultures for Health – This is an online resource for fermentation cultures and equipment, but I also turn to them for a lot of information on fermenting. They just released a free e-book on lacto-fermentation that is available if you sign up for their newsletter.

Here’s how to make a small batch of sauerkraut in a mason jar — it’s just enough kraut to get you hooked!

How to Make Homemade Sauerkraut in a Mason Jar

Makes 1 to 1 1/2 quarts
What You Need

Ingredients
1 medium head green cabbage (about 3 pounds)
1 1/2 tablespoons kosher salt
1 tablespoons caraway seeds (optional, for flavor)

Equipment
Cutting board
Chef’s knife
Mixing bowl
2-quart widemouth canning jar (or two quart mason jars)
Canning funnel (optional)
Smaller jelly jar that fits inside the larger mason jar
Clean stones, marbles, or other weights for weighing the jelly jar
Cloth for covering the jar
Rubber band or twine for securing the cloth
Instructions

Clean everything: When fermenting anything, it’s best to give the good, beneficial bacteria every chance of succeeding by starting off with as clean an environment as possible. Make sure your mason jar and jelly jar are washed and rinsed of all soap residue. You’ll be using your hands to massage the salt into the cabbage, so give those a good wash, too.

Slice the cabbage: Discard the wilted, limp outer leaves of the cabbage. Cut the cabbage into quarters and trim out the core. Slice each quarter down its length, making 8 wedges. Slice each wedge crosswise into very thin ribbons.

Combine the cabbage and salt: Transfer the cabbage to a big mixing bowl and sprinkle the salt over top. Begin working the salt into the cabbage by massaging and squeezing the cabbage with your hands. At first, it may not seem like enough salt, but gradually, the cabbage will become watery and limp — more like coleslaw than raw cabbage. This will take 5 to 10 minutes. If you’d like to flavor your sauerkraut with caraway seeds, mix them in now.

Pack the cabbage into the jar: Grab handfuls of the cabbage and pack them into the canning jar. If you have a canning funnel, this will make the job easier. Every so often, tamp down the cabbage in the jar with your fist. Pour any liquid released by the cabbage while you were massaging it into the jar.

→ Optional: Place one of the larger outer leaves of the cabbage over the surface of the sliced cabbage. This will help keep the cabbage submerged in its liquid.

Weigh the cabbage down: Once all the cabbage is packed into the mason jar, slip the smaller jelly jar into the mouth of the jar and weigh it down with clean stones or marbles. This will help keep the cabbage weighed down, and eventually, submerged beneath its liquid.

Cover the jar: Cover the mouth of the mason jar with a cloth and secure it with a rubber band or twine. This allows air to flow in and out of the jar, but prevent dust or insects from getting in the jar.

Press the cabbage every few hours: Over the next 24 hours, press down on the cabbage every so often with the jelly jar. As the cabbage releases its liquid, it will become more limp and compact and the liquid will rise over the top of the cabbage.

Add extra liquid, if needed: If after 24 hours, the liquid has not risen above the cabbage, dissolve 1 teaspoon of salt in 1 cup of water and add enough to submerge the cabbage.

Ferment the cabbage for 3 to 10 days: As it’s fermenting, keep the sauerkraut away from direct sunlight and at a cool room temperature — ideally 65°F to 75°F. Check it daily and press it down if the cabbage is floating above the liquid.

Because this is a small batch of sauerkraut, it will ferment more quickly than larger batches. Start tasting it after 3 days — when the sauerkraut tastes good to you, remove the weight, screw on the cap, and refrigerate. You can also allow the sauerkraut to continue fermenting for 10 days or even longer. There’s no hard and fast rule for when the sauerkraut is “done” — go by how it tastes.

While it’s fermenting, you may see bubbles coming through the cabbage, foam on the top, or white scum. These are all signs of a healthy, happy fermentation process. The scum can be skimmed off the top either during fermentation or before refrigerating. If you see any mold, skim it off immediately and make sure your cabbage is fully submerged; don’t eat moldy parts close to the surface, but the rest of the sauerkraut is fine.

Store sauerkraut for several months: This sauerkraut is a fermented product so it will keep for at least two months and often longer if kept refrigerated. As long as it still tastes and smells good to eat, it will be. If you like, you can transfer the sauerkraut to a smaller container for longer storage.

Recipe Notes

Sauerkraut with Other Cabbages: Red cabbage, napa cabbage, and other cabbages all make great sauerkraut. Make individual batches or mix them up for a multi-colored sauerkraut!

Canning Sauerkraut: You can process sauerkraut for longer storage outside of refrigeration, but the canning process will kill the good bacterias produced by the fermentation process. See this tutorial from the National Center for Home Food Preservation for canning instructions.

Larger or Smaller Batches: To make larger or smaller batches of sauerkraut, keep same ratio of cabbage to salt and adjust the size of the container. Smaller batches will ferment more quickly and larger batches will take longer.

Hot and Cold Temperatures: Do everything you can to store sauerkraut at a cool room temperature. At high temperatures, the sauerkraut can sometimes become unappetizingly mushy or go bad. Low temperatures (above freezing) are fine, but fermentation will proceed more slowly.

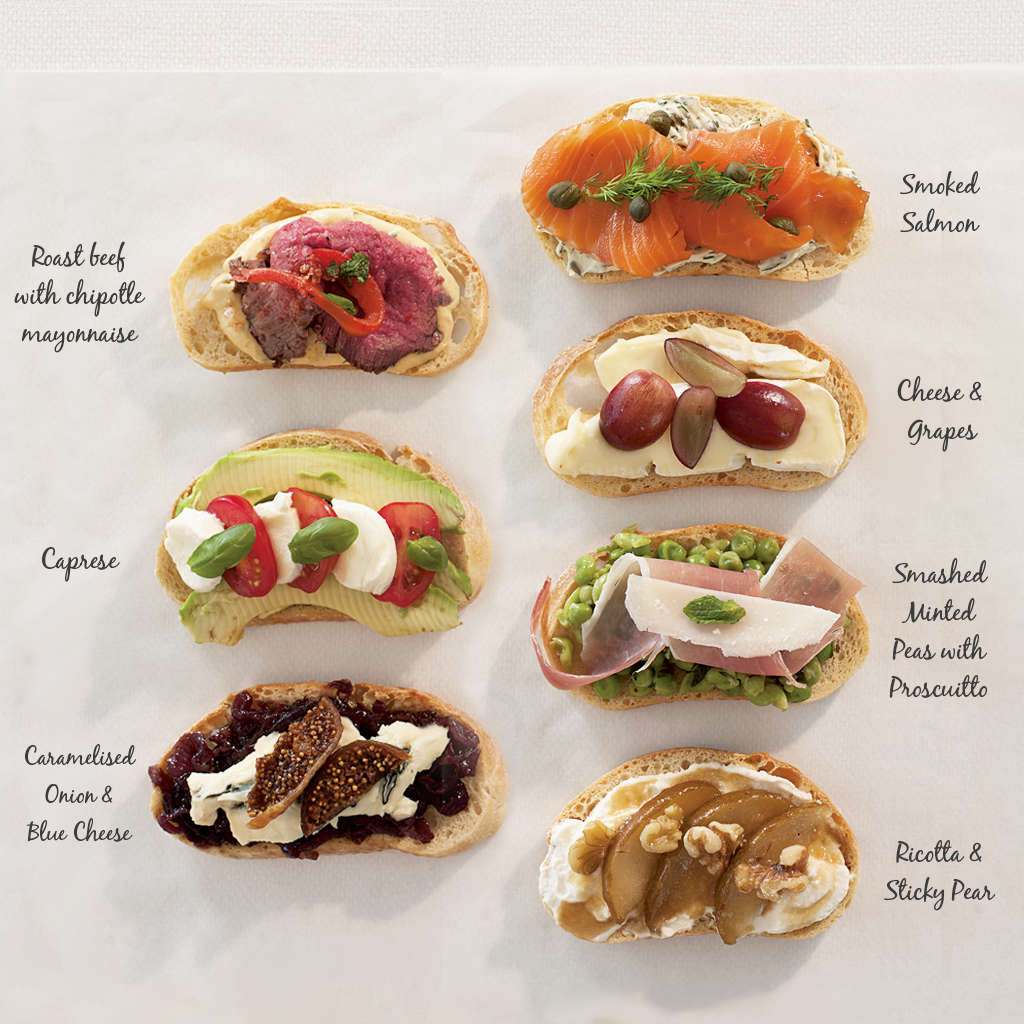
Party Trays – Quick & Easy

Cheese and Sausage Tray

  • 1 block cheddar cheese
  • 1 strip of aged summer sausage (casing removed)

Cheese Ball

  • Melt 1/2 C cheddar cheese
  • Mix with 1 pkg Cream Cheese
  • Roll around in chives or nuts

Italian Bites – Use long toothpicks

  • Pepperoni
  • Tomato slice
  • Banana peppers
  • Provalone
  • Black olive
  • on a chunk of bread

Quince Paste with Manchego

  • Slice quince into disks
  • Place on top of Cheese slices

Grape Tray

  • Buy nice plump grapes
  • Cut them into little bundles of about 4-8 grapes each

Brie and Crackers

  • Bring brie up to room temperature
  • Cut into pieces and put toothpicks in each little piece
  • Serve on a plate with a nice rustic cracker
    Note: I like Ritz crackers, but not with this pairing.  It’s like putting ketchup on filet mignon

Gruyere Dip

  • Melted gruyere
  • Cubes of bread on toothpicks

Tips

  • Use a crinkle cutter to give the appearance of something really fancy
  • Use toothpicks to stage individual gnoshes

Grated cheese has anti-caking agents in it, so it is good for melting things

Sriracha has Xantham gum – acts as an emulsifier

Sodium Citrate – emulsifier – Good nacho cheese

Nacho cheese


Tex Mex Cheese Enchiladas

INGREDIENTS

  • Tex Mex Chili Sauce (see recipe below)
  • 1/4 C Shredded cheddar Cheese
  • 1/4 C Monterrey Jack cheese
  • Corn tortillas
  • 1/2 Vadalia or other sweet onion

Text Mex Chili Sauce

  • 2 TBL AP flour
  • 2 TBL butter
  • 1 TBL ground cumin
  • 1 TBL ground Ancho chili
  • Salt, pepper and garlic powder to taste (just a tiny bit)
  • 2 C chicken stock
  1. Heat flour and butter together until it starts to brown
  2. Add cumin, chili, salt, pepper and garlic
  3. Stir for two minutes
  4. Whisk in 2 C chicken stock a little bit at a time
  5. Stir until smooth, then add more stock – REPEAT
  6. Cook until thickened

STEP BY STEP for Cheese Enchiladas

  1. Mix together your cheeses
  2. Put chili sauce on the bottom of a glass baking dish
  3. Heat your corn tortilla 10 seconds in the microwave
  4. Wrap 2 TBL cheese and 1 TBL chopped sweet onions in a corn tortilla
  5. Place it seam side down
  6. Repeat Steps 3-5 until your pan is full
  7. Put more sauce on top
  8. Top with cheese
  9. Bake for about 14 minutes at 350º
  10. Top with more chopped onion
  11. Bake for another 5 minutes
  12. Serve bubbling and hot


HTML Snippets Powered By : XYZScripts.com