Ready-to-eat Meusli

INGREDIENTS

  • 1 C raw oats (not instant)
  • 2 TBL chopped almonds
  • 1 TBL chopped pecans
  • 1 TBL chopped walnuts
  • 1 TBL chopped pistachios
  • 1 TBL pumpkin seeds
  • 1 TBL chia seeds
  • 1 TBL sunflower seeds
  • 1 TBL flax
  • 2 tsp cinnamon
  • 1/2 tsp salt
  • 3 TBL melted butter
  • 2 C yogurt
  • 1 C whole milk
  • 2 TBL apple cider
  • 2 TBL honey
    To taste – mix in:
  • raisins, cranberries, blueberries, craisins, strawberries, chopped banana, raspberries, diced apples, etc

STEP BY STEP

  1. Mix all ingredients ABOVE yogurt, spread out on pan and toast for 10 minutes at 400º
  2. Let cool, then mix with the rest of ingredients
  3. Refrigerate for up to a week.  Spoon directly into your breakfast bowl

Alternate storage

  1. Store the toasted dry ingredients in a jar in the refrigerator for up to three weeks
  2. Mix 1/2 C of the mix with 1/2 C yogurt, 1/4 C whole milk and 2 tsp honey
  3. Mix with 1/4 C of whatever fruit you desire at the time

SM – Sour Orange Marmalade

4 Jar – Overview

This recipe makes enough marmalade to last you for a couple of months.   If you want enough marmalade to last you through to next season, CLICK HERE for the amounts used to make a larger batch.

Marmalade is traditionally made with Seville oranges (also called sour oranges) which are FAR too sour to eat. They do, however, have a high amount of pectin in them. With the proper amount of sugar, this makes a great marmalade base to which other fruits can be added.  Prep your oranges the day before, so they can soak overnight.  Total hand-on time for this recipe is 3 – 4 hours, so make sure that you allow yourself enough time to cook safely.

PREPARATION

  • Wash one lemon and 3 Seville oranges thoroughly.
  • Peel the orange skin using a peeler.  Don’t peel too deeply, you do not want the white (pith) which tends to be bitter.  The orange peel will remain in the marmalade after cooking.
  • Cut apart, discarding any bad spots
  • Separate the innards and pith from the outermost orange peel.  Keep the innards and tie them into a cheesecloth bag.  This is where most of your pectin lives.

OVERNIGHT SOAK

  • Pulse pith, pips and guts in food processor
  • Place 2/3 C  pips, guts, seeds, membrane innards into 1+1/3 C  of water
  • Pulse peel in food processor – only briefly
  • Place 2/3 C peel into a second bowl containing 1+1/3 C of water

You should put the cut up and pulsed skin and innards into bowls covered with water overnight in the refrigerator.  This will soften them so that the pectin is more easily released.

FIRST BOIL (90 MINUTES)

  • Strain innards, pouring the soaking water into your stock pot
  • Put innards into a cheesecloth – a bouquet garni – and secure with a string, keeping the end available for easy removal.
  • Pour water and peel into your stock pot
  • Add 1/3 C orange juice into your stock pot
  • Bring up to boil, then reduce heat to simmer
  • Skim foam as necessary.  Stir with a WOODEN spoon.  Metal will react with the acids in the orange
  • Simmer for 90-120 minutes over low heat – this will release much of the pectin
    If the oranges have not been soaked for at least 8 hours, go ahead and simmer for 120 minutes.

The seeds contains the pectin, and will be discarded after about 90 minutes. The outer orange peel will become the meat of the marmalade. I prefer to dice half and mince half of the rind, so that you have a variety of sizes of orange rind in your marmalade.

Definition: bouquet garni – A bag (frequently in a cheesecloth) that is used for infusions, and removed later as the recipe progresses. CLICK HERE to read more.

NOTE: DO NOT ADD SUGAR YET.  If you add sugar too early, it will freeze the production of pectin, and your jam may not set properly, so don’t add it until after the 90 minute boil.

SECOND BOIL (HEAT TO 221º F – 105º C )

  • Remove pips and pith in the mesh bag at 208º. Use a tongs to squeeze the juices from the bag back into the pot. Discard the bag.
  • Increase heat and stir to dissolve. If sugar is added too soon, peel may become tough. Wait until temperature reads at least 210º
  • BRING HEAT UP TO 210º BEFORE ADDING SUGAR
  • 1 1/4 C  granulated sugar
  • 2 TBL  Karo Syrup
  • 1 TBL lemon juice
  • Add the Second Boil ingredients slowly, stirring continually
  • As soon as it starts boiling, stop stirring.  Stir very infrequently.
  • IMPORTANT NOTE:  Until most of the water boils away, the sugar may stay at 215º for about 10 minutes.  Once it hits 216º it will increase about one degree per three minutes.
  • Keep heating until the temperature reaches 221º This could take up to an hour. I’ve had success with 119º but only marginally.  Be patient and wait until it reaches full jell temperature.  A few minutes will make all the difference.  If possible, use a calibrated thermometer (or a scientific thermapen) to make sure your thermometer is not off by 2-3 degrees.
  • Meanwhile, sterilize canning jars. Details not included on this page.
  • When 221º is reached, remove the pot from the heat and let rest for 5-10 minutes.  Skim off any scum or foam.
  • Orange rind will rise to the top.  Stir the rind back into the mixture before canning.
  • Put into canning jars and cover with a lid put into hot water for at least 60 seconds.  When properly canned and cooled, this will last you for about a year.

NOTE:
Temperature will plateau at 215 for quite awhile – for as long as 15 minutes
After that, you will get 1º increase in temperature about every 3 minutes
Be patient.

MORE INFORMATION

Alternative Recipes

There are SWEET ORANGE marmalades which do not use as much sugar as this recipe. CLICK HERE for Alton Brown’s recipe for Sweet Orange Marmalade, or USE THIS LINK for Strawberry Marmalade.

A Word of Caution

A word about POT SIZE. The first time I made this I nearly boiled over. It was a constant battle between foam and the size of my pot. This will foam up about 400% of its size.  NO KIDDING.  Make sure you use a pot large enough, or you will end up with a huge dangerous mess.  This does not ALWAYS happen, but you can be prepared if it does.

I reuse my canning lids. If they fail to seal, I eat that jar first. Put an X on the failed lid so you don’t save it after the jar is empty. If they seal, they will generally not fail after cooling.  I prefer to use the small canning jars, because once exposed to light and air, the marmalade starts to lose its flavor.

The canned jars will last longer if you process them in a water bath for 10 minutes after putting into jars.

        1. Put marmalade into sterilized canning jars
        2. Soak lids about 60 seconds in boiling water
        3. Wipe rim clean and put lids on
        4. Tighten only finger tight
        5. Submerge in water (1″ over top) and process 10 minutes
        6. Cool (undisturbed) on the counter

What is shown in the photos are quantities to make two entire large batches of marmalade.

Optional Ingredients

Optional ingredients reserved for the very end:

Minced strawberries, blueberries, rhubarb, shredded carrot, or other contrast

Chemistry

If you do not use enough sugar, the liquid will be unable to reach 221º (as water only gets 212º) and it will NEVER set. Sugar can get up to 300º   If you try to decrease the calories, and use a marginal amount of sugar, you may heat it too long and you will get inverted sugar which has a longer shelf life, but is similar to high fructose corn syrup and is not as good for you as regular sugar.

Realistically, if you don’t have a thermometer, you can test the gel level but putting glass plates in the fridge, and then dripping jam onto the plate to see if it runs or just sits there.  CLICK HERE

  1. If desired, after the temperature has reached 221º you can mix in some contrast fruit such as minced strawberry – but something that is ready to eat just as it is. Don’t use anything that needs cooking or softening.
  2. Pour into canning jars. If you completely can the marmalade, it should last for up to a year. Otherwise, refrigerate it for up to six months. I personally just put them on my shelf for up to a year, but if you do this, proceed at your own risk.

If your marmalade does not set, it is still good for steamed marmalade pudding, marmalade tarts, marmalade ice cream and much more. CLICK HERE if your marmalade did not set properly.
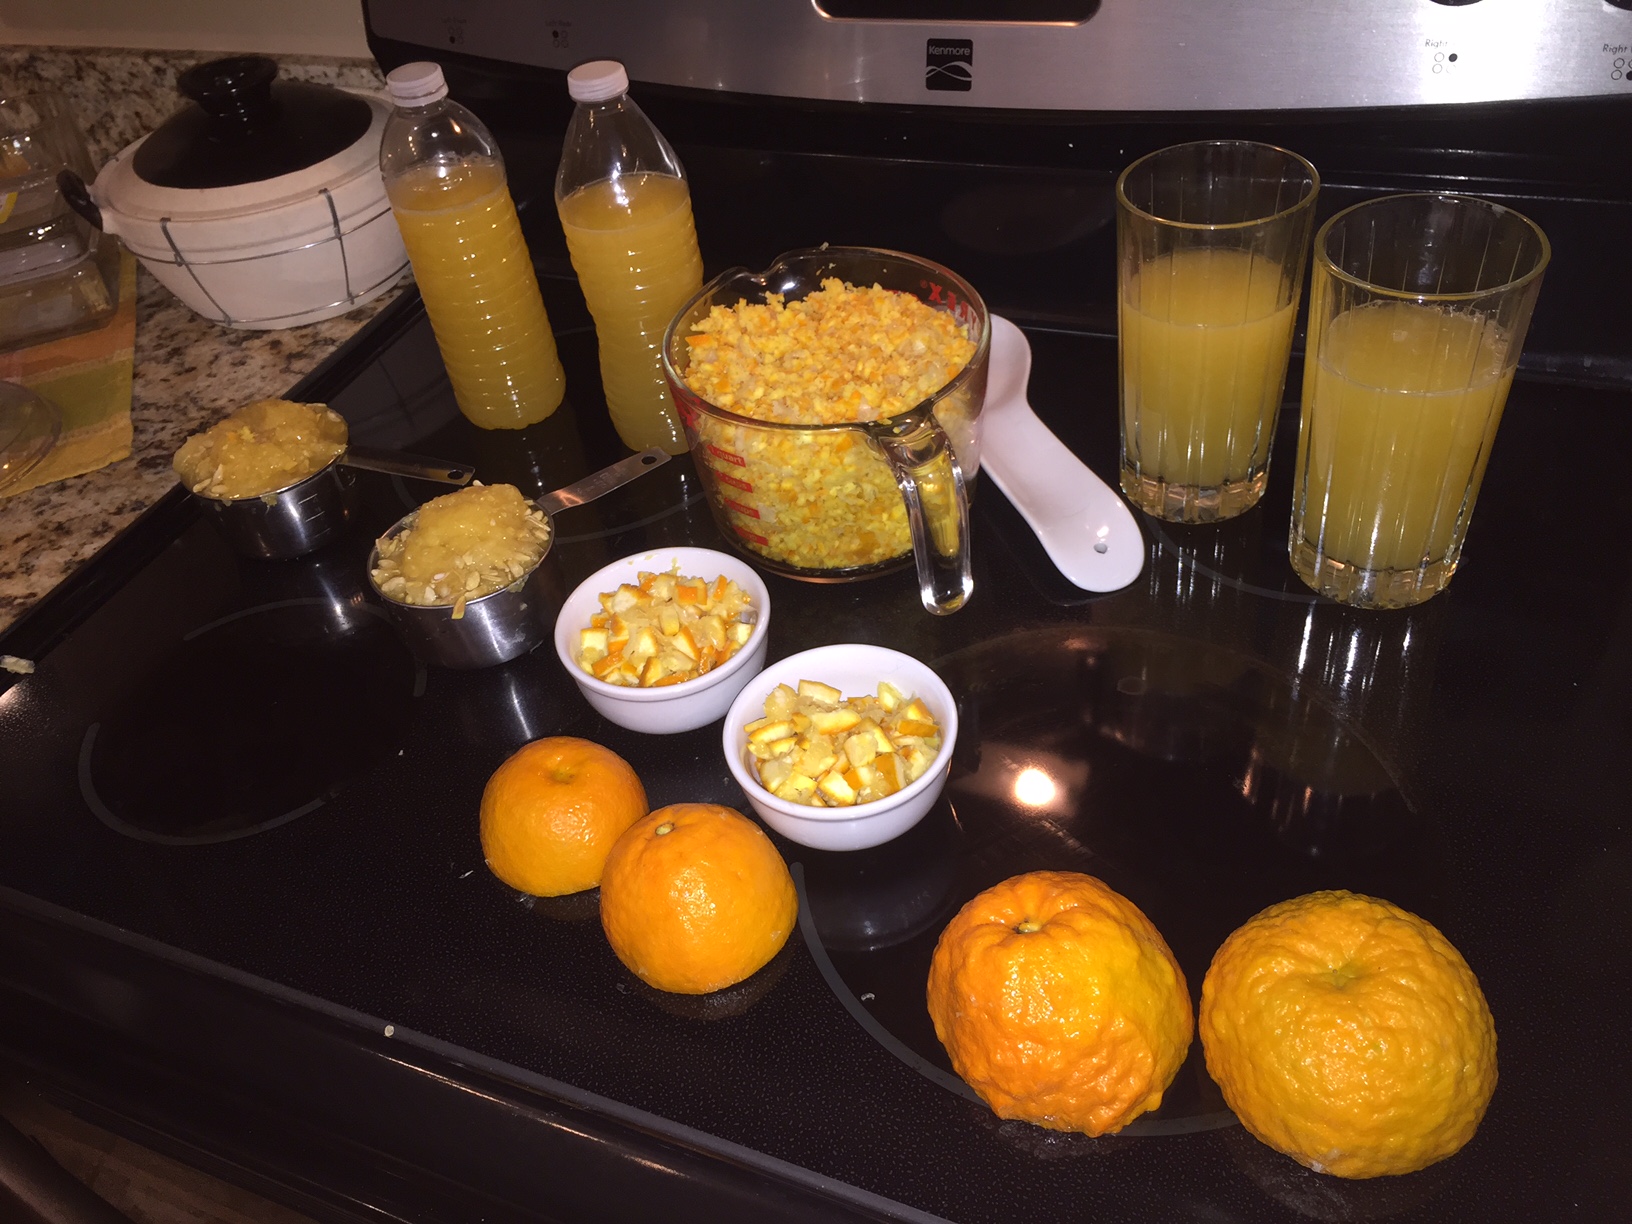
Bottom right: Some of your oranges may be older and nubbly. You will need juice from many oranges, but the peel that you want to use is from about eight oranges that have fairly smooth skin.

Top right: To get the amount of pips and pith that you need for the larger sized recipe, you will have to juice a lot more than eight, but just throw the extras into the trash.
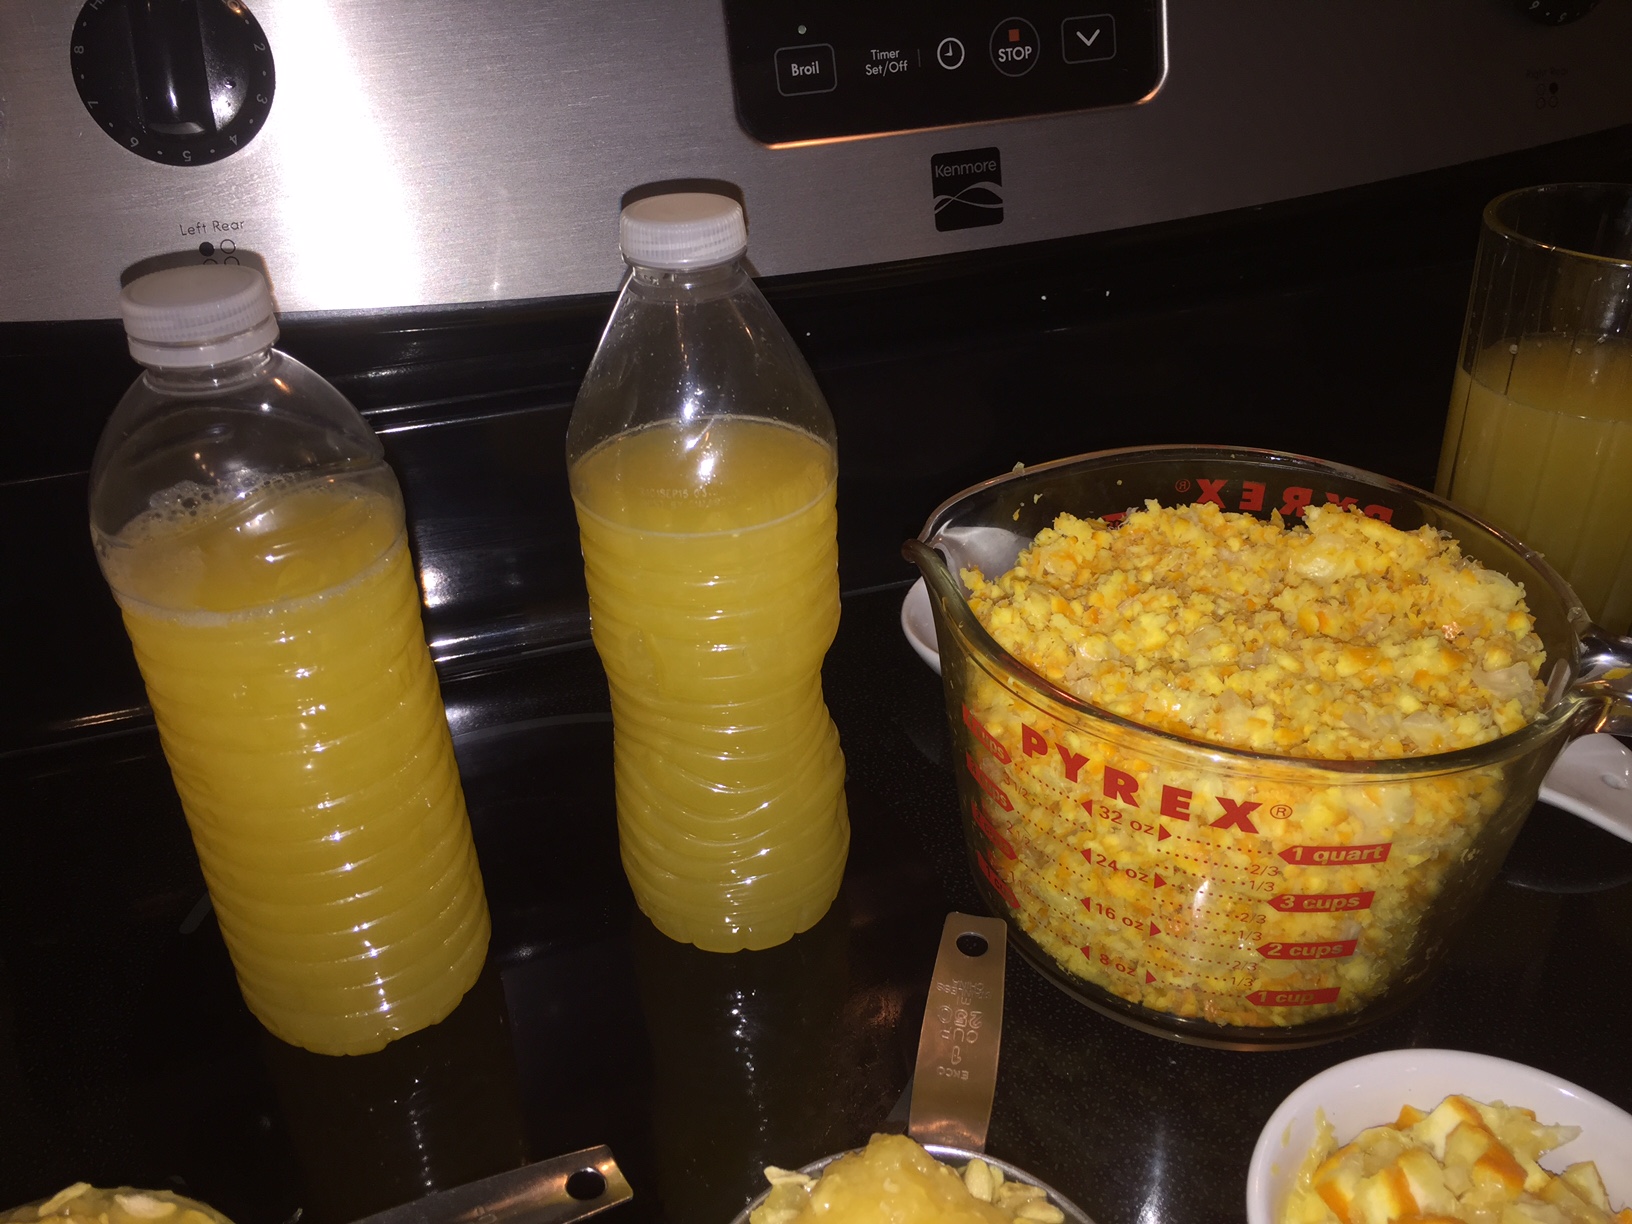

The ingredients freeze really well. Hot pack canning is another good option. If you freeze, be sure to leave an inch of headroom in your water bottles.

Another photo

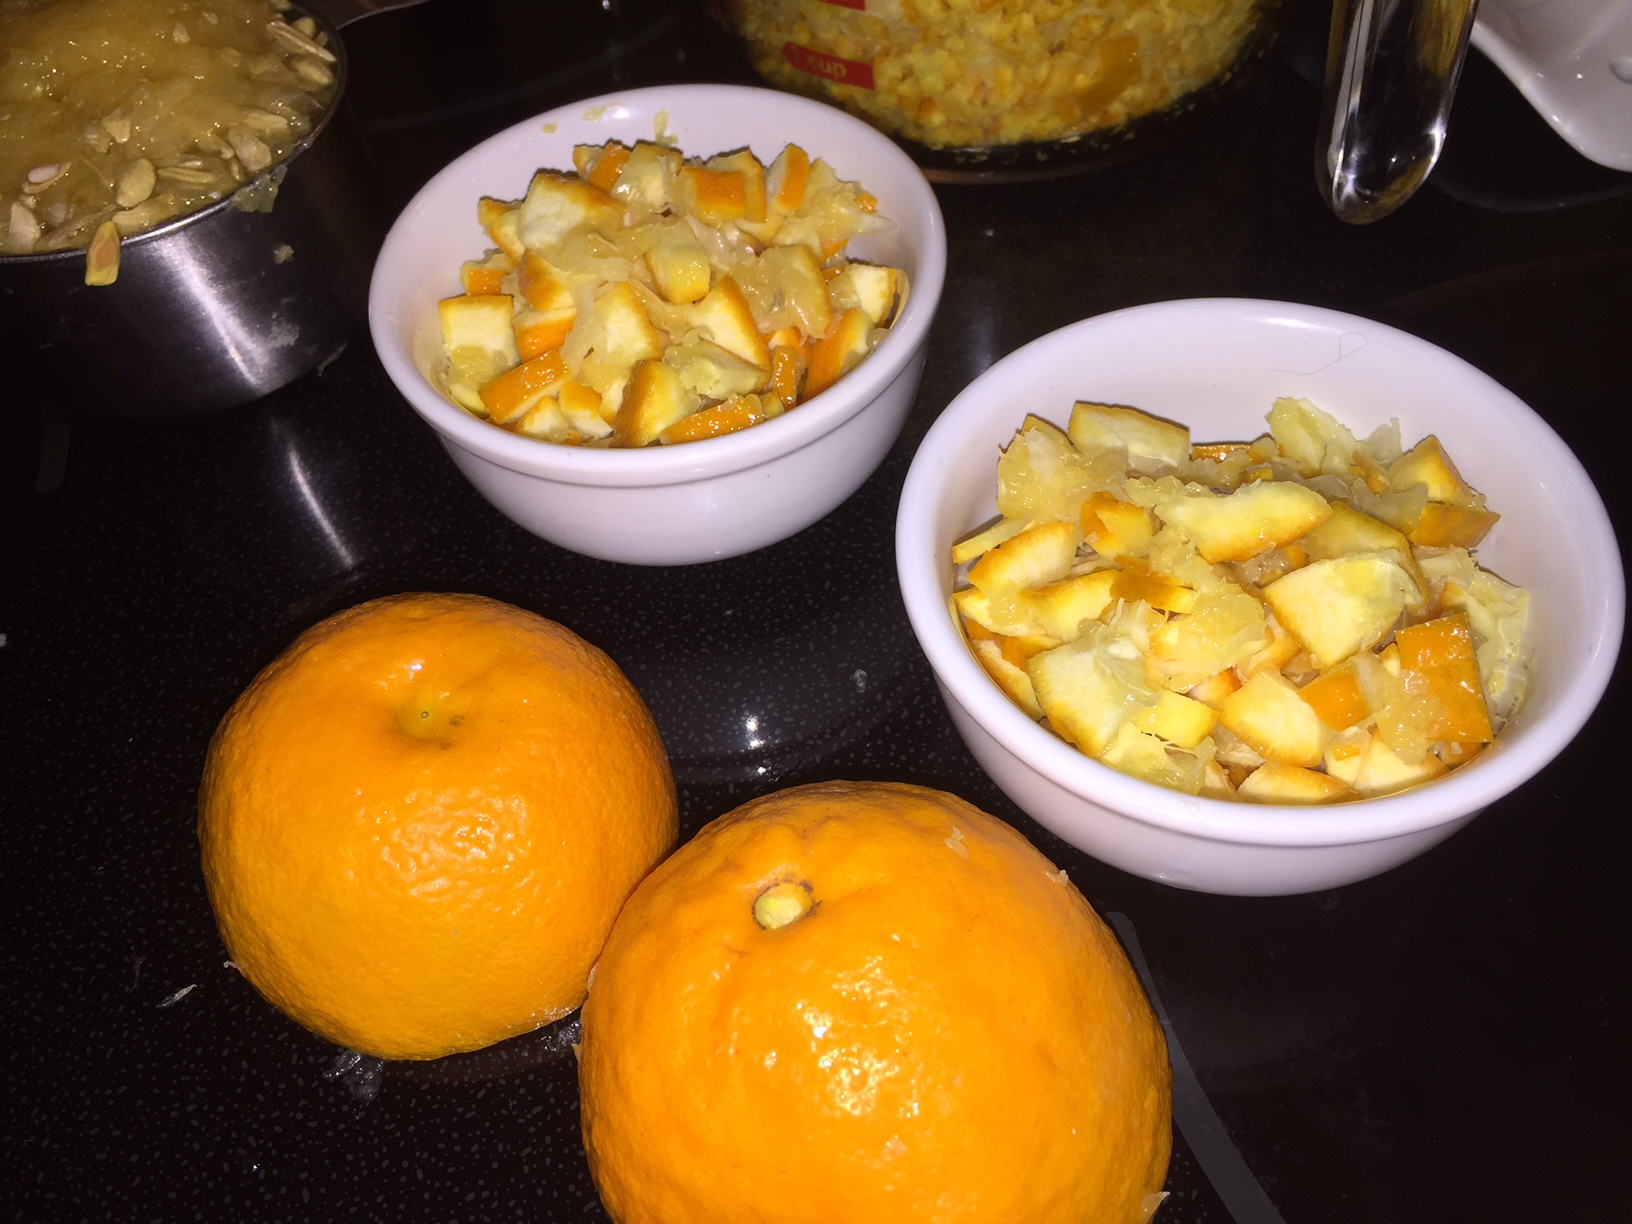
This photo gives you a good close up of the smoother skinned oranges and the older nubbly ones. The juice from the older oranges is perfectly usable, but the skin will be a bit more bitter than the younger oranges, so get rid of them.

I prefer just a few larger dices of orange, but most of the skin that I use is minced in a food processor.

Another good way to do it is with a zester. It takes more oranges, but you can leave the white pith behind, which actually gives you a better end product.

Lemon Curd and Tarts – COLLECTION

Basic Lemon Curdkey-lime

Basic Tart Crust

Advanced Tart Crust

Lemon Lime Tart

Key Lime Tart

Apple Tart

Peach Tart


THIRD PARTY RECIPES – RecipeBox.XYZ


The information below this section is from a third party. It is part of Grandpa's Personal Recipe box. Feel free to browse, but know that this information is from someone else.

– Grandpa’s Recipe Box: CLICK HERE


Dutch Baby with Lemon Curd

– Third Party Recipe: CLICK HERE


Portuguese Custard Tart

– Third Party Recipe: CLICK HERE


Mac and Cheese – COLLECTION

2016-03-02 18.07.26Before we begin…

  • Many of the professional recipes have you starting out with a roux. This is one of the recipes that Grandma contributed to the website. See optional roux note if you want to experiment.

Mother Sauces

  • BECHEMEL
    Take ¼ C each flour and butter, and heat until it starts to brown
    Whisk in 2 C of whole (hot) milk gradually – ¼ C at a time
    Stir to completely incorporate before adding more milk
  • MOURNAISE
    Add shredded cheese to your Bechemel
    ½ C cheddar and ½ C Gruyere

For basic Mac and Cheese mix cooked pasta in with your Mournaise

When ready to serve, top with Panko and bake at 350º for about 20 minutes


Grandma’s Mac and Cheese

This is on a separate page. Use the above link (or click here) to view the recipe.

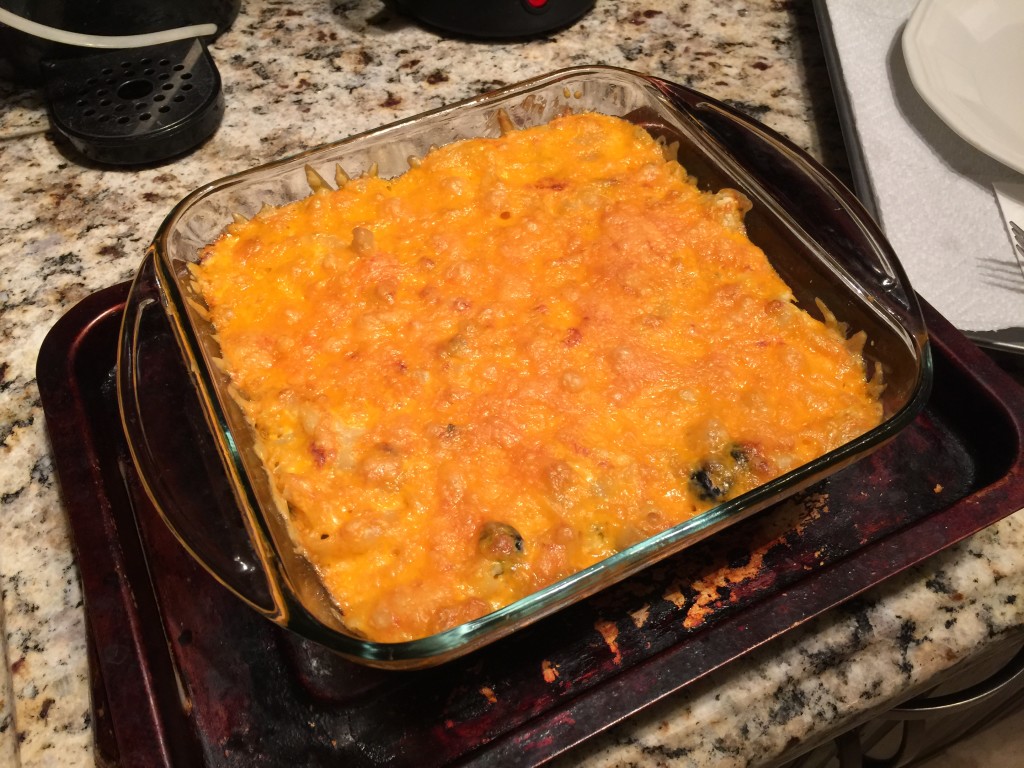
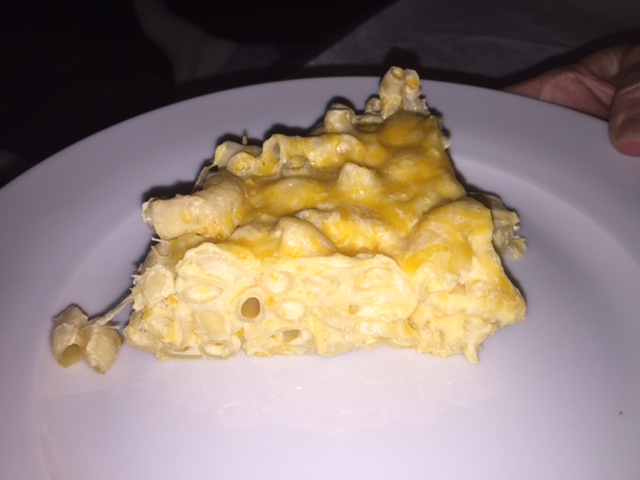
Grandpa’s Mac and Cheese

{CAPTION}Ingredients

  • 4 C dried macaroni pasta (large)
  • 2 eggs
  • 1/2 stick butter (4 TBL)
  • 1/4 C AP flour
  • 2 C whole milk
  • 1/4 C Dijon mustard
  • 1 LB fresh sharp cheddar
  • 1/2 tsp salt – 1/2 tsp pepper
  • 1/4 C black olives (rough chop)
  • 1/2 onion (diced)

Step by Step

  1. Preheat oven to 350º
  2. Cook the macaroni most of the way (al dente)
  3. Drain and set aside
  4. In a small bowl, beat the eggs and set aside
  5. Rough chop the olives and put into large mixing bowl
  6. Grate cheese and add to the olives
  7. Add salt and pepper into the mixing bowl
  8. Measure milk, mustard and onion and set aside
  9. Put butter and flour into the bottom of a heavy stock pot
  10. Cook over medium-low heat until flour barely starts to brown
  11. Add the onion into the stock pot
  12. Mix in the milk and the mustard
  13. Cook until it starts to thicken (5-7 minutes)
  14. Reduce heat to low
  15. Temper the hot sauce into the egg mixture – slowly – whisking constantly
  16. After 1/4 has been added to the eggs, whisk it back into the stock pot
  17. Add in the cheese and olives and stir until mixed
  18. Add the drained macaroni and mix well
  19. Serve immediately

Mushroom Mac and Cheese

INGREDIENTS

  • 1 can Cream of Mushroom soup
  • 1 tsp cumin
  • 1 C Shredded SHARP cheddar
  • 1 C Shredded Swiss cheese
  • 1/2 stalk de veined and chopped celery
  • 1/2 tsp allspice
  • Elbow macaroni
  • Sprinkle with fried onions and bake 375° about 30 minutes

STEP BY STEP

  1. Cook macaroni

Basic Mac and Cheese

macINGREDIENTS

  • 4 C uncooked large elbow macaroni
  • Optional: 1 C uncooked cauliflower pieces
  • 2 C Panko bread crumbs
  • 8 TBL butter
  • 6 TBL All-Purpose Flour
  • 2 tsp Dried Mustard
  • 2 tsp Spicy Paprika
  • 1 tsp salt
  • 1 or 2 dashes Tabasco
  • 5 CU 1/2 and 1/2 (or whole milk)
  • 1 C Philly Cream Cheese
  • 2 C Colby Cheese (grated)
  • 2 C Monterey Jack Cheese (grated)

STEP BY STEP

  1. Cook pasta al-dente (about 8 minutes for thin pasta, longer for thicker pasta)
    Put cauliflower in half way through – about 4 minutes
  2. Toss 2 TBL melted butter with bread crumbs. Mix well. Set aside
  3. Drain pasta and melt 5 TBL butter in emptied pot. Melt till foam subsides.
  4. Whisk in all-Purpose flour. Cook till a tawny color.
  5. Add Worcestershire, Paprika, dried mustard, salt and Tabasco
  6. Add milk and bring slowly to a boil stirring constantly.
  7. Add cream cheese
  8. Reduce heat and cook 3-5 minutes or until thickened.
  9. Stir 3/4 of the cheese into the pasta
  10. Mix with cream cheese mixture
  11. Transfer to baking dish and top with bread crumbs mixed with the remaining cheese.
  12. Bake for 15-20 minutes @ 350 degrees
  13. Broil 2 more minutes while still on the middle rack.
  14. Let set 5 minutes before cutting / serving

VARIATIONS

  • Ten Cheese Mac and Cheese
    • 2 C Italian Blend Shredded Cheese: Provalone, Mozzarella, Parmesan, Romano, Assayago
    • 2 C Mexican Blend Shredded Cheese: Colby, Monterey Jack, Chedder, Manchego
    • 1C Whipped Cream Cheese (used later)
  • Create roux with butter, flour, onion, Worcestershire, paprika
  • Put chopped scallions in the mix
  • Add 4 C Half and half
  • Cook pasta, toss with 3/4 of the shredded cheese
  • Put mixed pasta, scallions and cheese into baking dish
  • Pour cream cheese over top
  • Topping 2 C cheese blends, french fried onions
  • 25 minutes @ 350º

Macaroni and Cheese by Lydia’s Italy

Mix together one cup each grated cheddar cheese and grated fontina cheese
Pour enough milk in to see the visible milk line through the cheese . Kind of like you would do if you were making a quiche
And several leaves of sage and one Bay leaf
Set aside for one hour
Put in stove-top / oven-safe casserole dish at low heat
start cooking in salted water big elbow macaroni or rigatoni noodles . Cook only al dentė

Topping
Coarsely great part of a French loaf
Melt butter in the pan
And bread crumbs to toast
Set aside to cool

Using slotted spoon or spider strainer to bring pasta into cheese mixture. Don’t worry about completely straining because you want some of the pasta water mixed in.
Cook together for a few moments stirring occasionally

Toss grated Parmesan in with the breadcrumbs

In greased baking dish, sprinkle some breadcrumb mixture in the bottom.
Spoon noodle mixture onto breadcrumbs as the next layer removing leaves
Top pasta with more breadcrumbs
Bake at 425° uncovered about 25 minutes


Stovetop Mac and Cheese – ATK

  • 1.5 C water
  • 1 C milk
  • Bring water and milk to a low boil, then reduce heat
  • Add 8 oz (weighed) elbow macaroni
  • Simmer 6-8 minutes
  • Add 1 C Deluxe American Cheese – bulk grated, not prewrapped
  • Take off heat
  • Stir in 1 C shredded Extra Sharp Cheddar
  • Add 1/2 tsp Dijon mustard and cayenne pepper to taste
  • Cover and let meld – serve hot

Mac and Cheese – ATK

  • 1 lb pasta
  • 3 tbl butter
  • stale bread
  • 1/2 tbl dried mustard
  • 1 tsp salt
  • ¼ tsp cayenne
  • 5 cu milk
  • ½ lb sharp chedder
  • ½ lb Monterey Jack
  1. Cook pasta in plenty of water to al dente. Make bread crumbs with stale bread strips, put in blender w/3 tbl butter, pulse to 1/8” pieces (set aside). Drain pasta. In pot add 5 tbl butter and melt till foam subsides, whisk in 6 tbl flour, cook until tawny color, add ½ tbl dried mustard, 1 tsp salt, ¼ tsp cayenne and 5 cu milk. Bring to boil, reduce heat and cook 3-5 min till thickened. Stir into sauce, ½ lb sharp chedder, ½ lb Monterey jack, toss in pasta and cook for 6 min. Transfer to baking dish, top w/bread crumbs. Broil 2 minutes on middle rack.
  2. Let set 5 min, then serve.

Mac and Cheese – Composite

1 CU uncooked pasta (or 2 CU cooked)
1 CU Milk
1 CU diced French bread
Onion (diced)
¼ tsp cayenne
1/2 tsp Mustard
1 TBL SALTED Butter
2 TBL flour
Bread crumbs
1/4 CU each Cheeses (Sharp Cheddar, Mozzerella or Monterey Jack, Parmesean)

Instructions

1. Cook pasta in plenty of water to al dente.
2. Make bread crumbs with French bread,
put in blender w/ 3 tbl butter, pulse to 1/8” pieces (set aside).
3. Drain pasta. In pot add 2 TBL butter and melt till foam subsides,
add grated onion and cook until it starts to turn translucent
whisk in 2TBL flour, cook until tawny color, add ½ tsp dried mustard, scant salt, ¼ tsp cayenne and 1 cu milk.
4. Bring to boil, reduce heat and cook 3-5 min till thickened.
5. Stir into sauce – grated cheeses,
toss in pasta and cook for 6 min.
6. Transfer to baking dish, top w/ bread crumbs.
7. Bake 10 minutes at 425 degrees or until the cheese/bread starts to brown

Let set 5 min, then serve.

Steve’s Chicken Burrito

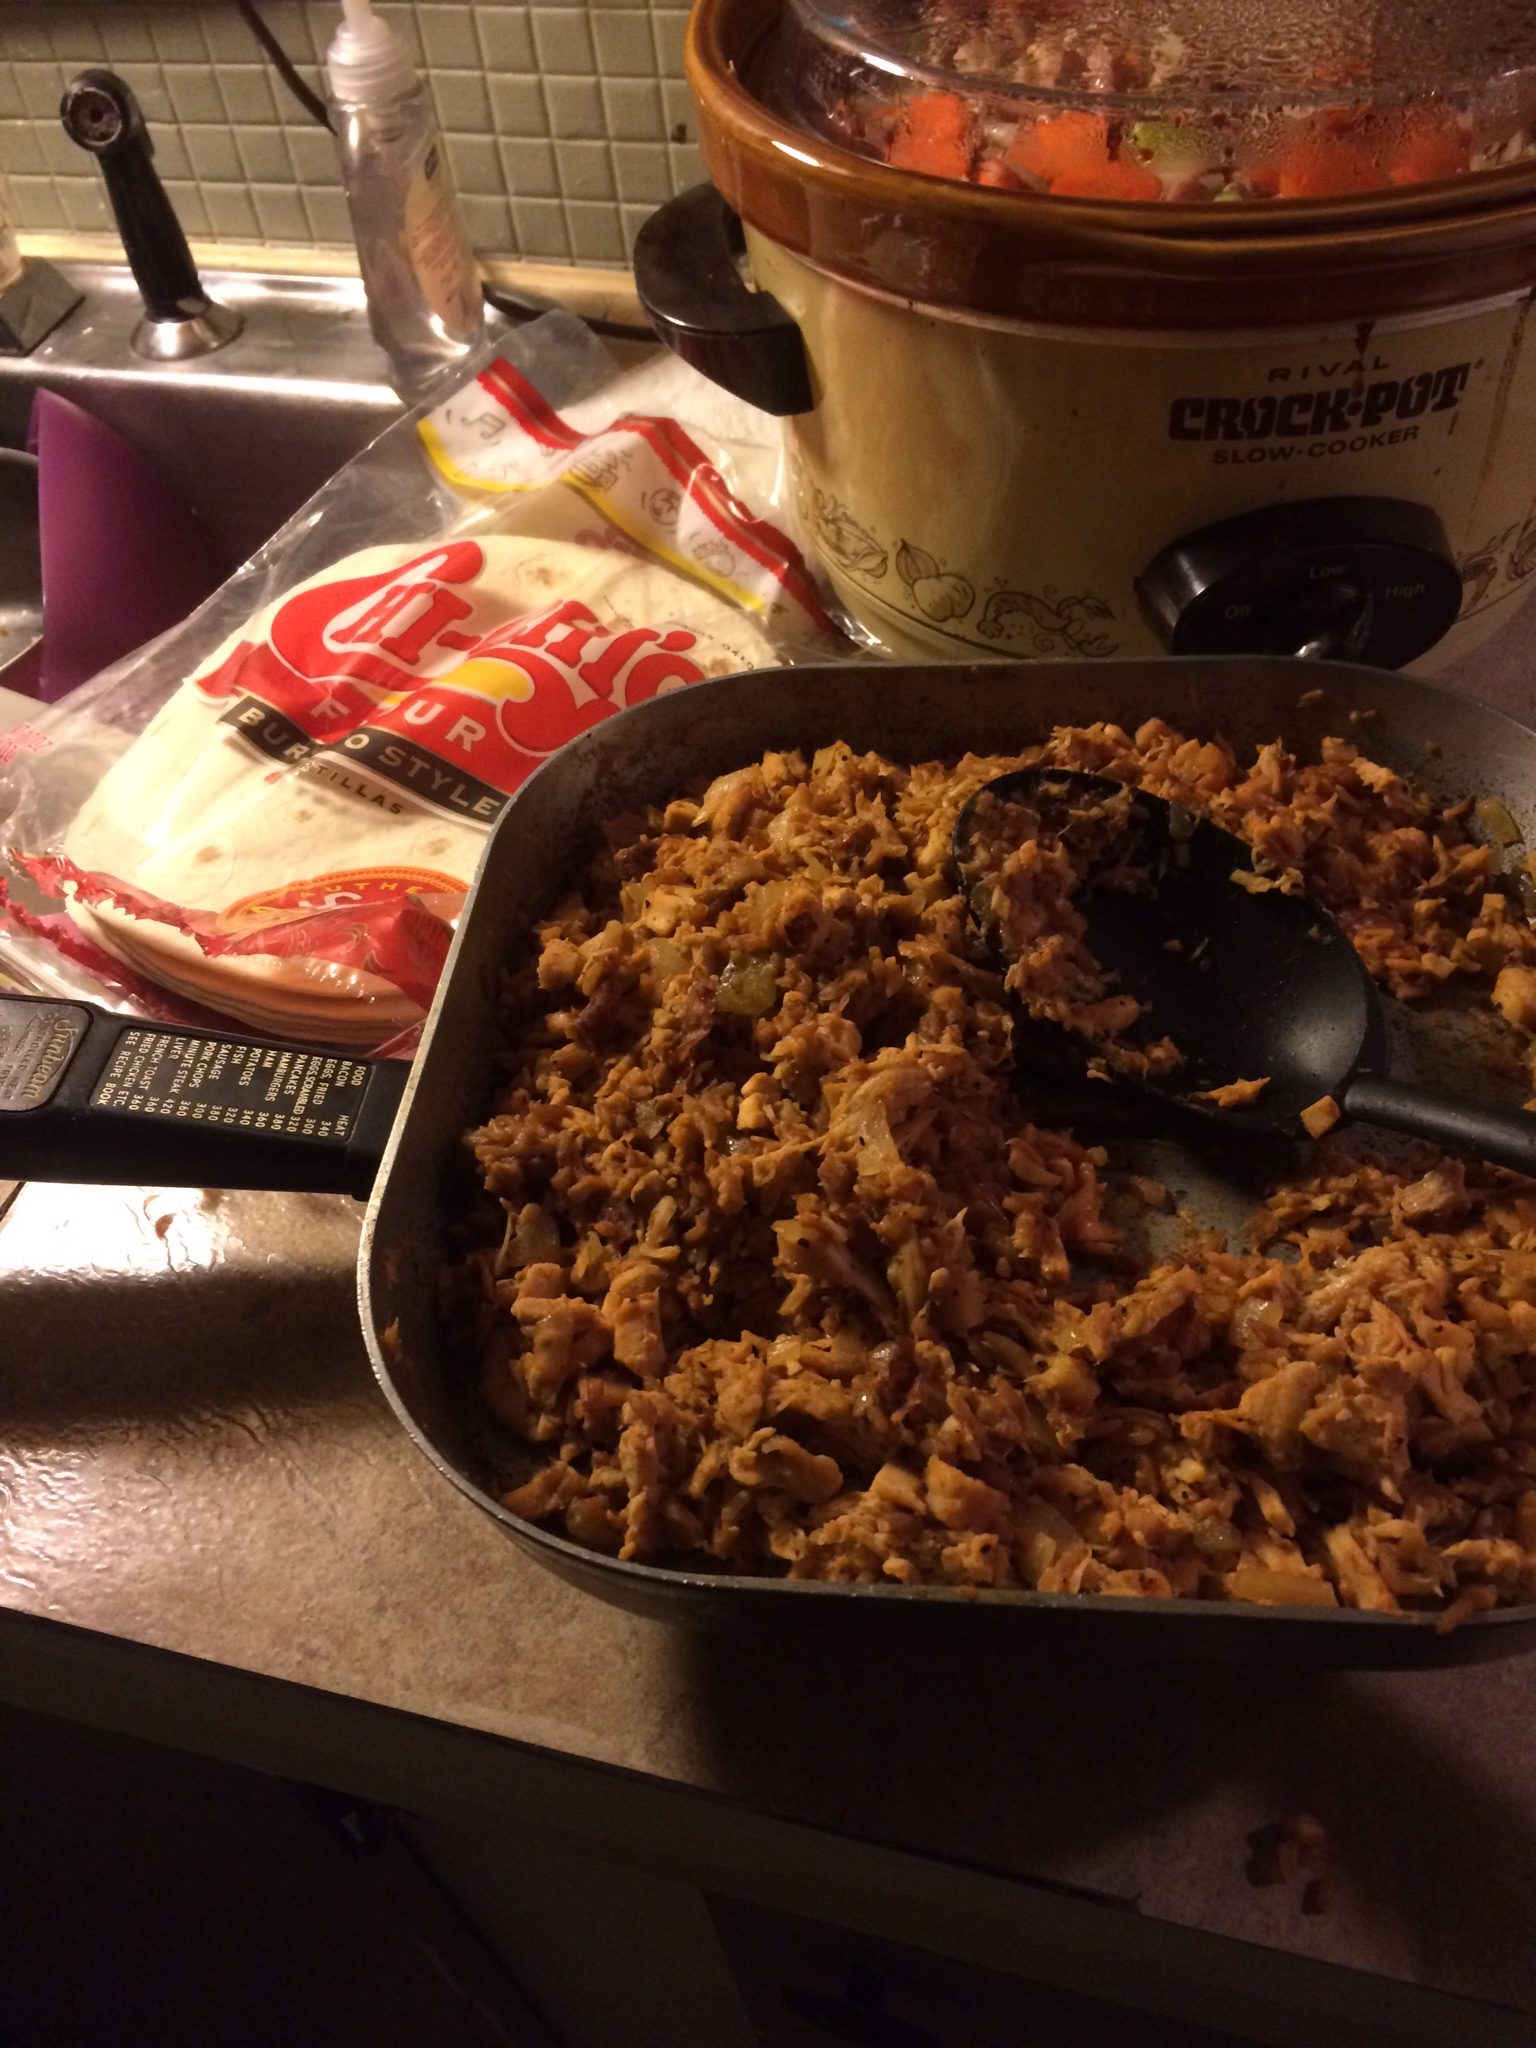
{CAPTION}Ingredients

  • 1/2 LB shredded precooked chicken
  • 1 onion
  • 2 Roma Tomatoes
  • 1 or 2 jalapeños (optional)
    – Seeds and veins removed
  • 1 TBL tomato paste
  • 1 taco seasoning packet

Step by Step

  1. Brown the chicken in 1 TBL butter
    (Ground chicken is OK, but not as good)
  2. Add the onion
  3. Continue to cook 5 minutes until softened
  4. Add the tomato paste and (optional) jalapeño
  5. After 5 minutes, add the seasoning packet
  6. Cover and simmer for 30-60 minutes
  7. Wrap in a tortilla.
    Can’t find them in the grocery store?
    CLICK HERE for Grandpa’s tortilla recipe:

Alternate Preparation

  1. Buy a whole chicken and remove the stuffing packet and rinse it under cold water
  2. Put the chicken in a crockpot with the onion and jalapenos and tomato paste
  3. Mix in 1 C of water or broth
  4. Simmer for 6-8 hours

Steve used the same skillet that his dad had been using for 40 years.

Orange Citrus Salad

Chef Notes

  1. Avocado creama – Avocado, fresh mint, salt, EVOO, pepper, Sour cream, lemon juice – Muddle stick in blender – Refrigerate up to 24 hours
  2. pickled onion rings (Hot vinegar, sugar, 2 minutes)
  3. Grapefruit, oranges, SLICES
  4. Add Kalamati olives and garlic olives
  5. Roasted beets
  6. Drizzle with avocado creama
  7. Top with feta cheese and pickled onions
  8. Finally top with sprigs of mint, salt and pepper
  9. EVOO on top

Pasta Fagioli

Ingredients

  • 1 TBL EVOO
  • 1/2 Onion – chopped
  • 4 cloves Garlic – minced
  • 1 stalk Celery – chopped
  • 1 pkg Crushed Red Pepper Flakes
  • 1/2 C white wine
  • 2 C chicken broth
  • ± 2 C tomatoes
  • 1 C Elbow macaroni or other pasta
  • 1 can Cannelloni beans
  • Parsley and/or cilantro

Step by Step

  1. Sweat garlic, onions and celery in 1 TBL EVOO
  2. Add crushed red pepper flakes
  3. De-glaze with white wine
  4. 1 can Tomato pieces with juice
  5. Chicken broth
  6. Bring to a boil
  7. Simmer for 60 minutes
  8. Add elbow macaroni, cook another 10 minutes
  9. Cannelloni beans – Cook for 5 more minutes
  10. Parsley and/or cilantro
  11. Salt to taste


Boston Cream Pie

Ingredients for Vanilla Cream filling
Make this first, because it will have to cool for two hours after creation

  • 3 egg yolks
  • 6 TBL granulated sugar
  • 1 1/2 C whole milk
  • 3 TBL corn starch
  • 1 1/2 TBL butter
  • 1 tsp vanilla

Step by Step

  1. Cream together yolks and sugar
  2. Mix milk and corn starch
  3. Mix together milk and sugar mixtures
  4. Put all into a soup pan and add cold butter
  5. Bring up to a boil, then reduce heat and simmer for another 60-90 seconds
  6. Remove from heat and let rest for three minutes
  7. Pour through a mesh strainer to remove any lumps – Use a spatula to help
  8. Mix in vanilla and cover with plastic wrap – press wrap down onto surface of the pudding
  9. Let chill two hours

Ingredients for Cake
Make this next because it will have to cool for at least 30 minutes after creation

  • 3 large eggs
  • 1 C granulated sugar
  • 1 1/2 C AP flour
  • 1/2 tsp salt
  • 1 1/2 C baking powder
  • 6 TBL butter
  • 1/2 C whole milk
  • 1 tsp vanilla extract

Step by Step

  1. Cream together eggs and sugar
  2. In separate bowl, sift together flour, salt and baking powder
  3. Melt butter and whisk together with whole milk
  4. Mix milk mixture with egg mixture
  5. Add vanilla
  6. Fold in flour mixture and stir only to moisten MOST of the mixture – do not overmix
  7. Fill greased muffin cups half way with prepared mixture
  8. Bake at 350º for 10-12 minutes or until tops start to brown
  9. Remove from oven and set aside to cool for at least 30 minutes

Ingredients for Chocolate Ganache

  • 1/2 C heavy cream
  • 1 TBL cocoa
  • 3 TBL granulated sugar
  • 1 tsp salt
  • 4 oz semi sweet chocolate
  1. Bring heavy cream to a simmer – NOT a boil
  2. Mix cocoa with the sugar and salt
  3. Add cocoa mixture to cream
  4. Add chocolate to the cream
  5. Stir until smooth, then remove from heat

Assembly

  1. Cut cakes in half using a NON-SERRATED knife – creating a top and a bottom
  2. Spread vanilla cream on the bottom
  3. Put the top onto the cream
  4. Spread chocolate ganache onto the top
  5. Optionally put some sprinkles on the top for color
  6. Repeat for each one
  7. Best when refrigerated


Brown Sugared Carrots

Ingredients

  • 12 carrots
  • 2 T butter
  • 2 T brown sugar
  • 1 T molasses
  • 1 sprig of rosemary
  • Salt, pepper

Step by Step

  1. Peel the 12 carrots and halve or quarter into long spears
  2. Heat butter, sugar and molasses in a pan
  3. Add the carrots and a splash of water
  4. Add salt and pepper and the sprig of rosemary
  5. Cook about 3 minutes
  6. Add splashes of water as necessary to keep things from burning
  7. Plate caramelized carrots
  8. Remove the rosemary and discard
  9. Top with fried carrot tops

Fried Carrot Tops

  1. Heat 2 TBL grapeseed oil and 1 tsp sugar to shimmering
  2. Fry carrot tops until browned, but not black
  3. Set on waxed paper to drain and cool.

Chocolatey Hot Chocolate

Ingredients

  • 1⁄2 cup sugar
  • 1⁄3 cup cocoa mix (recipe below)
  • 1⁄3 cup water
  • 1/4 C Hershey’s baking chocolate chunks
  • 4 cups milk
  • 1 teaspoon vanilla

Step by Step

  1. Stir cocoa mix and sugar in a pot.
  2. Add water and stir.
  3. Bring to a boil over medium heat. Boil two minutes.
  4. Put chocolate chips into the mixture and stir until dissolved.
  5. Add milk and vanilla.  Serve.

Cocoa Mix

This can be prepared and stored for up to two months

  • 300 gm confectioner sugar
  • 200 gm cocoa powder
  • 100 gm Whey protein powder
  • 300 gm nonfat dried milk
  • 1 TBL corn starch
  • 1 tsp canning salt (or other fine salt)
  • 1 pinch of cayenne pepper

Sugared Pecans

Ingredients

  • 1/2 stick butter
  • 3 egg whites
  • 1 C sugar
  • 2 C almonds
  • 1/2 TBL salt

Step by Step

  1. Line a baking sheet with aluminum foil
  2. Put into oven at 350º just until butter melts
  3. Beat egg whites until they are soft peaks
  4. Toss in white sugar and salt
  5. Pour pecans into the egg whites
  6. Toss to mix
  7. Pour almond mixture onto buttered tray
  8. Spread across surface of baking tray
  9. Bake for 20 minutes
  10. Take tray out and stir/toss
  11. Bake another 10 minutes

Sweet Potato Pie

INGREDIENTS

  • 3 steamed medium sized sweet potatoes (cubed and steamed 20 minutes) 25-30 oz – Remove the flesh from the potatoes – do not use the skin for pie
  • 6 TBL softened butter or half lard, half butter
  • 1/2 C sweet condensed milk
  • 1 tsp vanilla
  • 3 egg yolks & 2 eggs – beaten
  • Seasoning
    • 1 tsp CinnaSugar
    • 1/2 tsp ground or grated ginger
    • 1/2 C granulated white sugar
    • 1/2 C brown sugar
    • scant allspice
    • salt
  • candied pecans or walnuts – lightly crushed (or into pie shell)
  • juice and zest from 1 orange or lemon

STEP BY STEP

  1. Mix everything in a food processor
  2. Pour into an uncooked 9″ pie shell (prepared or see below)
  3. Sprinkle crushed pecans or walnuts over top
  4. Drizzle with warm maple syrup
  5. Bake on bottom rack at 325º for 50 minutes
  6. Internal temp should be 160-180º :: ideally 170º
  7. Wait one hour to slice

Serve with whipped maple topping

  1. 1 C heavy whipping cream
  2. 1/4 C confectioner sugar
  3. 2 TBL maple syrup

Crust

  • 1 C AP flour
  • 1 tsp salt
  • 1/4 C chopped pecans
  • 1/2 C shortening
    • Cut  together till it is mostly pebbled
  • 1/4 C ice water
  • Cut together with knives or similar, don’t use your fingers – it’s important to keep the crust cold
  • Roll or press into a pan
  • Prick bottom with a fork, and prebake for 10 minutes @ 400º

Chicken Paillard Sandwich

Paillard means that it is flat because you have pounded the heck out of it with either a meat seasoning hammer or a small cast iron skillet. The reason for flattening the chicken breast is that it will cook more quickly and it will cook evenly.


INGREDIENTS

  • Chicken Breast – Lightly oiled
  • 1 TBL EVOO
    MARINADE – MIX IN A BOWL THE FOLLOWING:
  • 1 tsp sesame oil
  • 1 TBL Dijon mustard
  • 1 tsp granulated garlic
  • 1 TBL vinegar
  • 2 TBL soy sauce
  • 2 tsp Chinese 5 spice powder
  • 1 TBL granulated sugar
  • 1/4 grated onion

STEP BY STEP

  1. Start in the morning
  2. Lightly oil chicken breast
  3. Put into a heavy duty baggie
  4. Pound with a meat hammer or cast iron skillet or soup can till about 1/4 in thickness
  5. Put into a new baggie (or bowl) and cover with marinade
  6. Agitate about every two hours
  7. After 6-8 hours, pat the chicken lightly with paper towel and discard the marinate.  It can go down the garbage disposal.
  8. Put a few drops of olive oil on a skillet, and turn it to medium heat.
  9. Once the oil starts smoking slightly, sear the chicken in a hot skillet
  10. This will only take about 3 minutes on the first side, and 2 minutes on the second side.
  11. Serve on flatbread or a bun or bread with mayo, lettuce and tomato

Alternately, after Step 7 you can dip the breast in egg and then in bread crumbs.  This will make more of a steak that you can serve flat on a plate with vegetables and mashed potatoes on the side.


Rice

Thanks to Martha Stewart, Alton Brown and Rachel Rae for parts of info included on this page.

White Rice vs Brown Rice

  • The hull is inedible.  It is removed from the rice.
  • Brown rice has not been milled and cooking time needs to be longer.  It has more nutrition than white rice.
  • White rice has had the husk removed, and just the bran and endosperm remain.  This is usually enriched.

Long, Medium and Short

  • Long rice is high on amylose, and tends to dry out if kept as leftovers.  It cooks up fluffy, and not sticky so is not good for sushi.
  • Medium and Short rice have more amylopectin and cook up creamier.
  • Short tends to be sticky and is good for sushi.

Jasmine Rice

  • Long grain rice
  • Very aromatic
  • Used in rice pudding
  • Used a lot in Asian cooking

Long Grain White Rice

  • Husk removed
  • Bran and germ remain
  • Most common in the United States

Basmati Rice

  • Extra long grain
  • Delicate nutty flavor
  • Aged
  • Cooks long
  • Used in Indian cooking

Long Grain Brown Rice

  • Whole grain, although husk is removed
  • Bran and germ is intact

Short Grain Brown Rice

  • Cooks best with absorption cooking
  • Nutty flavor

Sushi Rice

  • Short round grain rice
  • Also called glutinous or pearl rice
  • Very starchy and sticky
  • Here is a link to one of Grandpa’s Recipes about Sushi

Arborial Rice

  • Short fat grain
  • Used for Risotto
  • Used in Italian cooking
  • High starch, so it is great in rice pudding
  • Other similar rices are Vilone Nano and Carnaroli rice
  • – Yedo denado . Best for risotto . Short grain

Black Rice

  • Also called purple or forbidden rice
  • Chinese legend only available for emperors
  • Anti-oxident properties

Bamboo Rice

  • Bamboo rice is a type of rice popular in Asia, and it is made by infusing the grains with juice squeezed from bamboo plants. This action gives bamboo rice its distinctive green color and also adds a sticky consistency, so you might find bamboo rice to be a good choice for making sushi.

Wild Rice

  • Not really rice.  It’s seeds from marsh grass.

Cooking Rice

French Method of Cooking

  1. Boil large pot of salted water
  2. Rinse 1 C long grain rice – very well
  3. Add rice to the boiling water
  4. Boil until tender – approx 11-12 minutes
  5. Strain rice, shaking a couple of times
  6. Put into a bowl with 1 TBL butter, salt and pepper

Rice Cooker

  1. 2 C jasmine rice
  2. 2 C cold water
  3. Close lid and press the COOK button
  4. Finishes in about 55 minutes

Cooking Brown Rice

Since this must be cooked longer, it tends to scorch.  Here is a good recipe.

  1. Rinse 3/4 C brown rice – short or medium grain
  2. Bring 1 1/4 C water up to boiling – add 1/2 tsp salt
  3. Pour over rinsed rice and stir in 1 TBL melted butter
  4. Put into baking dish or Dutch oven – and cover with lid or foil tightly
  5. Bake at 375º for one hour
  6. Let rest 5 minutes then fluff with a fork

Brown Rice Dressing Mix

  • 3 slices of bacon – rendered till crispy, then broken into pieces – set aside
  1. 1/4 C red onion – minced and cooked in bacon grease over low heat
  2. Deglaze with 1/4 C white wine vinegar
  3. Add 1/4 C chicken broth
  4. Mix together 1 tsp Dijon, 1/2 tsp salt, 1/2 tsp sugar and scant black pepper
  5. Whisk mixtures together and add back in bacon and brown rice (recipe above) plus 1 tsp fresh dill
  6. Serve as a side

Standard Method of Cooking

  1. Bring 1 C of salted water to boiling
  2. Add 1 C rice and stir
  3. Return to a boil
  4. Cover, reduce heat and simmer for 16 minutes covered
  5. Add 1 TBL butter and 1/2 tsp salt to the rice at the 8 minute mark
  6. Finish cooking
  7. Take off the heat, leave covered, let rest ten minutes
  8. Fluff with a fork and cover until ready to serve

Best Burrito Ever

If you’ve ever wanted to use left-over filet mignon, here is the ultimate use.  No filet?  Use any good piece of cooked beef.

INGREDIENTS

  • 1-2 oz Left-over beef
  • Optional: thinly sliced ham
  • Shredded cheese – Mexican blend
  • Salsa – strained for about 30 seconds
  • Tiny bit of minced cilantro

STEP BY STEP

  1. Spread a handful of shredded cheese over a flour tortilla
  2. Lay down (optional) ham over top of cheese
  3. Cut the filet in VERY thin slices against the grain
  4. Lay the pieces in a row
  5. Microwave for 60 seconds
  6. Roll up and serve with salsa

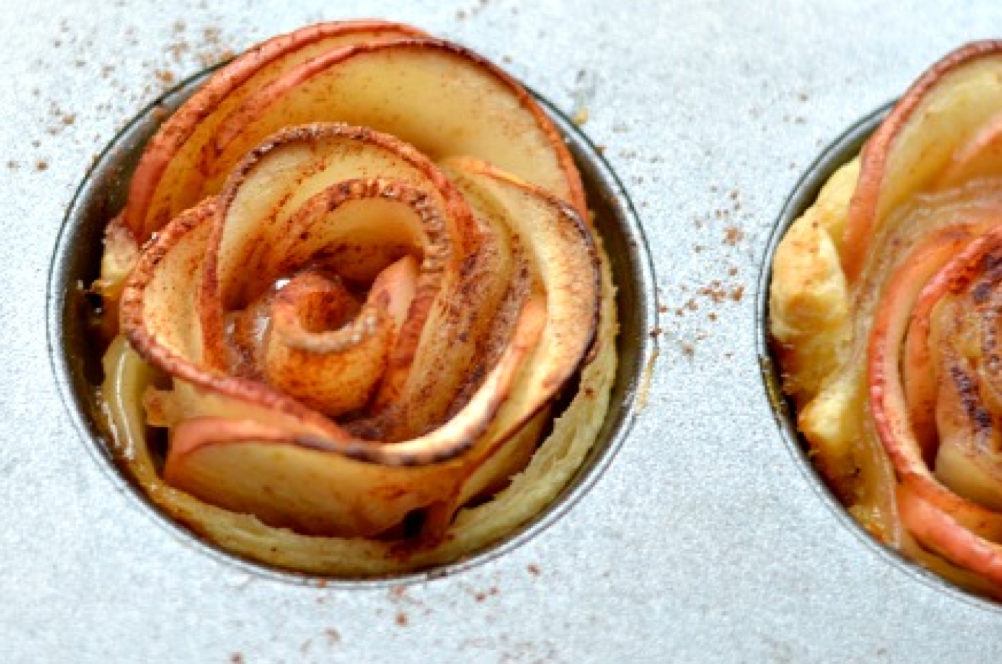
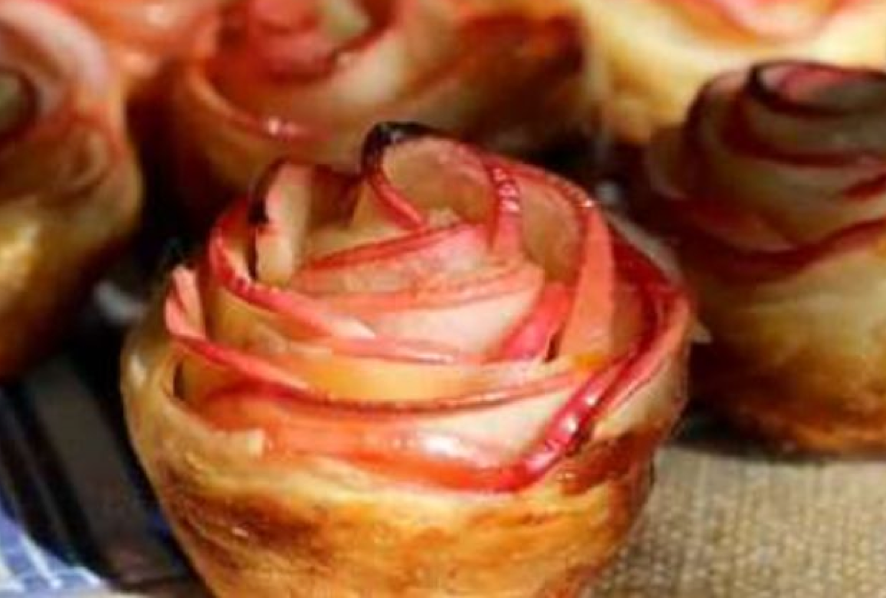
Baked Apple Roses

Baked Apple Roses

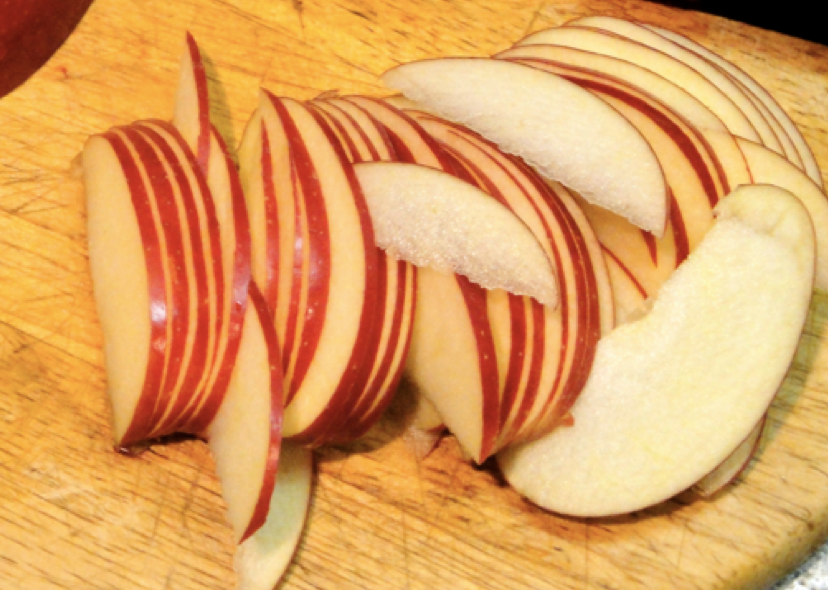
Cut apple in half and cut seeds out
Slice as thinly as possible
Soak on 1 C water and 1/4 C lemon 10 min
Microwave 3 minutes, then drain

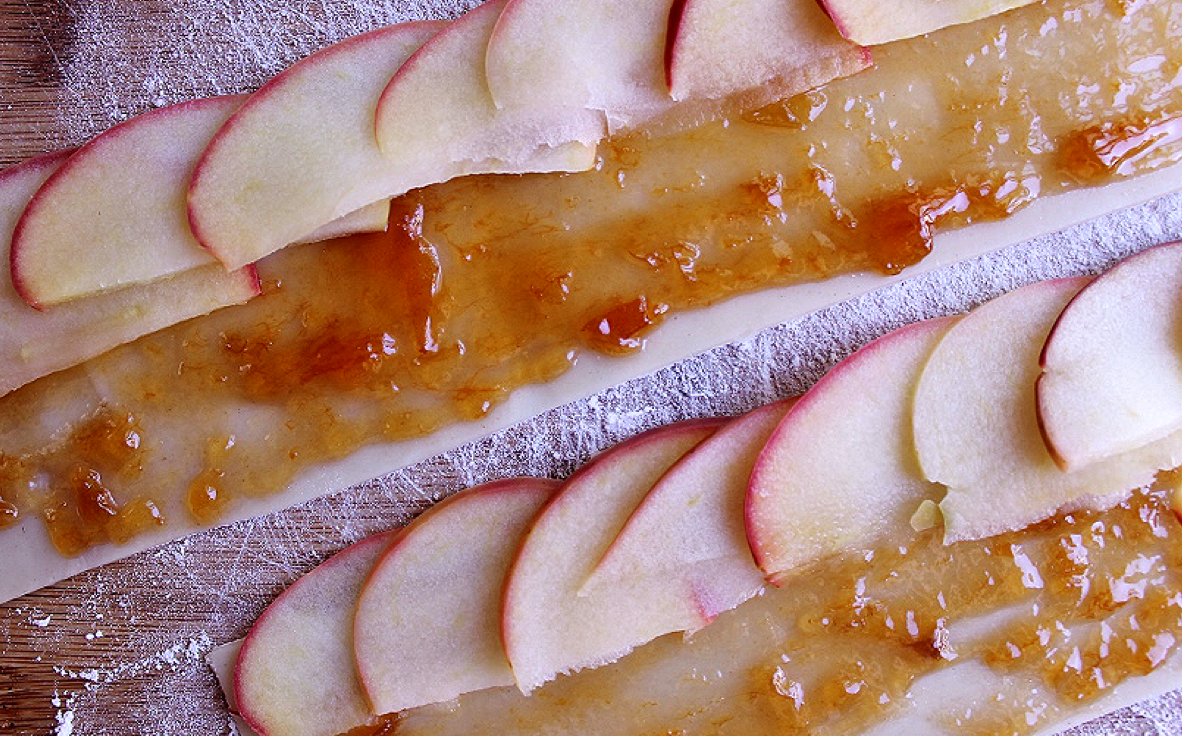
Mix 3 TBL apricot preserves with 2 TBL water

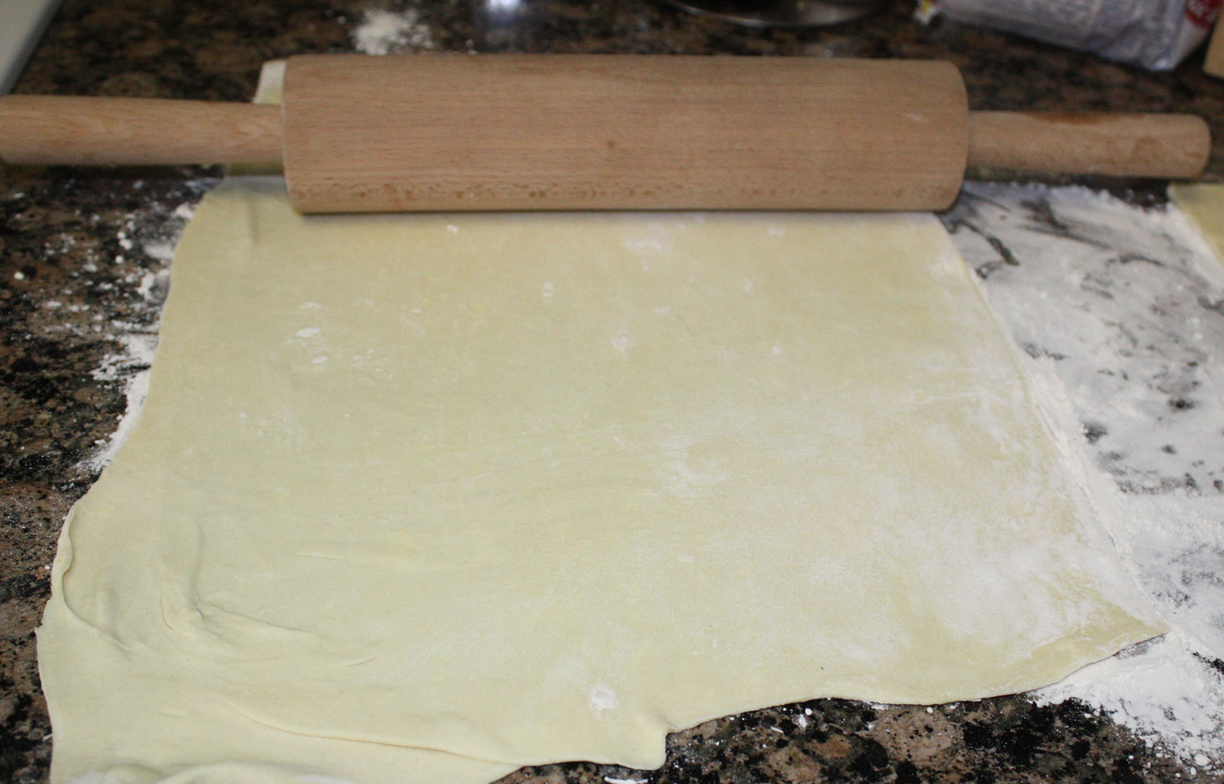
Roll puff pastry to about twice its size
Cut into 1.5 inch strips
Stagger apple so that flat side is along the middle of the strip – red sticking out
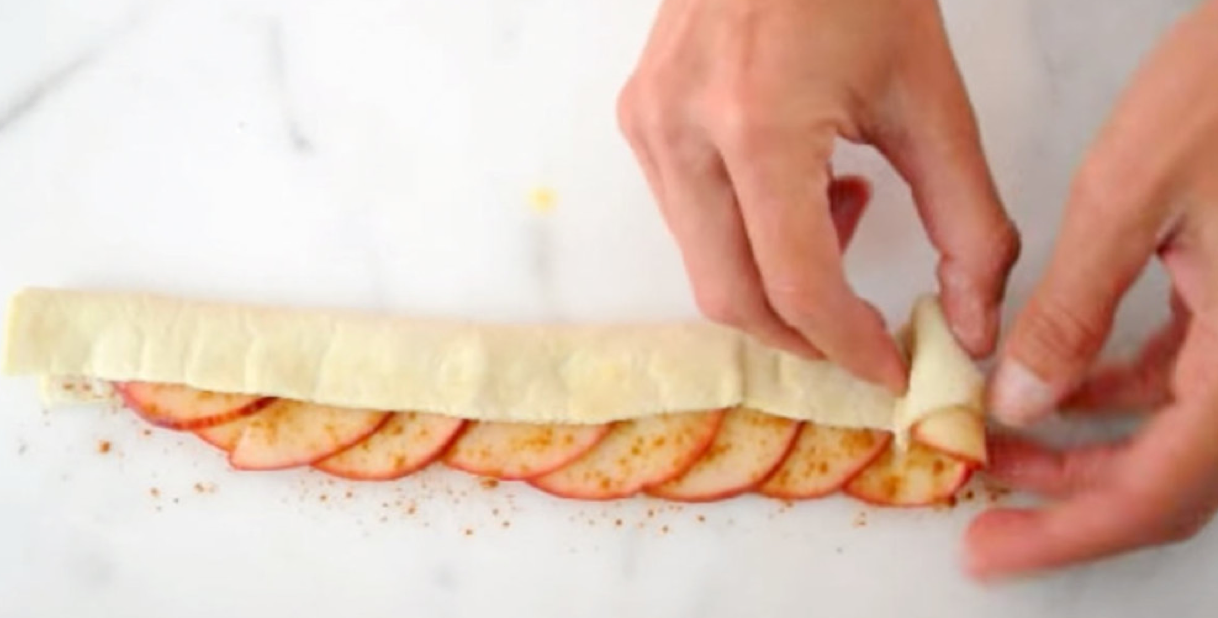
Sprinkle with Apple pie spice OR Grandpa’s CinnaSugar®
Fold up edge to cover flat line of Apple
Roll
Put into muffin tin
Baker 350° for 35 minutes
Sprinkle with powdered sugar

Video exists in messenger

Robert@RobertAndrews.NET

apple_1 apple2 apple3 apple4b apple4 apple5
CLICK HERE for more great recipes from TipHero.


Baked Apple Roses
Almost too Beautiful to Eat. ALMOST!

Baked Apple Roses

Almost too Beautiful to Eat. ALMOST!

Posted by Tip Hero on Monday, October 5, 2015

Tip Hero Asmati Ben a couple ideas. aluminum foil like you suggested half way through baking. Also putting them on a lower baking rack in the oven would help. Could also experiment with spraying them periodically with a little water/oil.

Eggs in Clouds

Tasty Here’s the recipe:
Separate the yolk from as any egg whites as you are making. In a chilled metal bowl, whisk the whites until stiff peaks form. Mix in whatever you want.

Spoon the whites into even piles on a baking sheet and create a well in the center of each pile with the back of the spoon.

Bake at 450F for 3 minutes.

Put a yolk in each well, bake another 3 minutes at 450F.

Pin it for later: http://bit.ly/eggsnclds

Cinnamon Rolls and Monkey Bread

Cinnamon Rolls and Monkey Bread

This is my own recipe.  Others will be similar, but this one will serve your well.  The batter is the same.  The difference is how the bread is assembled.  The first ten steps are the same.  The difference starts at Step Seven.

Monkey Bread allegedly gets its name because monkeys tend to clump together at night, so all you see are the tops of little monkey heads. Anyway, that’s my story, and I’m stickin’ to it.

YEAST SPONGE

  • 3 TBL honey – optional:  granulated sugar
  • 2 TBL yeast
  • ½ C warm water – more or less

DRY INGREDIENTS

  • 2 C AP flour
  • 1 C whole wheat flour
  • 1/3 C granulated sugar
  • 1 tsp salt

1 extra C AP flour for Step 4 –  Set aside

WET INGREDIENTS

  • 1 C warm lowfat milk – more or less
  • 1 TBL
  • 2 TBL Grandpa’s CinnaSugar®
  • 2 TBL yeast
  • 6 TBL softened butter
  • 2 egg yolks
  • Egg white set aside for later use

FILLING

  • 1/3 C granulated sugar
  • 1/3 C dark brown sugar
  • 1/2 C heavy cream
  • 1/4 C Grandpa’s CinnaSugar®
  • 3 TBL softened butter
  • OPTIONAL:  Crushed Pecans
  • OPTIONAL:  3/4 C raisins or Craisins

FROSTING – OPTIONAL

  • 2.5 C confectioner sugar
  • 2 TBL softened butter
  • 1 tsp vanilla
  • 1 tsp orange zest
  • whole milk – 1 tsp at a time

Alternately, you can use Pillsbury biscuit dough and cut each biscuit in quarters (half and then half again)

STEP BY STEP

  1. PREPARE YOUR SPONGE IN A SMALL GLASS BOWL
    • Combine sugar, yeast and warm water
    • Set aside for 15 minutes
    • If it does not get puffy and bubbly, throw it out.  Your yeast is too old.
  2. COMBINE DRY INGREDIENTS FOR DOUGH
    • Mix 3 C of your flours
  3. INITIAL COMBINATION OF WET AND DRY
    • Add your sponge and wet ingredients to the dry ingredients
    • Mix to combine
  4. SPOON IN DRY INGREDIENTS
    • Add your reserved flour spoon by spoon until the ball is formed and firm or until all the flour is gone.   The ball should be a little on the wet side
    • Add pecans or raisins – refrain from adding both
    • Knead by hand for 5-7 minutes more
    • Shape and put into greased bowl.  Cover bowl with plastic, and let dough rise for 30 minutes
  5. REFRIGERATE OVERNIGHT
    • This gives a chance for all of the flavors to completed combine
    • Alternately, let rise 4 hours on the counter
  6. NEXT MORNING PREPARE YOUR FILLING
    1. In Bowl #1 combine half your sugars plus half your CinnaSugar plus 1 stick melted butter.  This should be very wet.
    2. In Bowl #2 combine the rest of your sugar, and CinnaSugar  – leave dry – do not add melted butter
  7. DECIDE WHAT YOU WANT TO CREATE
    1. Decide if you want MONKEY BREAD or CINNAMON ROLLS

STEP BY STEP FOR MONKEY BREAD

The first SEVEN STEPS are the same for both recipes.

  1. Roll dough into a long tube
  2. Put the melted butter solution into a large mixing bowl.
  3. Put the sugar, cinnamon and nutmeg in a paper bag.
  4. Cut off pieces of the tube and roll them in a ball so that you have a ball just about the size of a really big grape… you know the kind.
  5. Put the balls into the butter bowl
  6. Once all balls are cut, toss them to coat all balls evenly.
  7. Drop into the bag containing your cinnamon mixture and mix to cover
  8. Prepare 1 shallow VERY WELL GREASED baking pan.
    • Ideally a bundt pan is used, but not everyone has one of those handy.  You don’t want to use a deep baking dish though, or they will not cook all the way through.
  9. For an extra coating, melt together ½ C brown sugar, 2 tsp cinnamon, and 2 TBL butter
  10. Pour evenly over into bottom of your pan.  Sprinkle crushed pecans
  11. Put the balls into the pan
  12. Spoon half remaining wet mixture over top
  13. Sprinkle half dry mixture over top as well
  14. Squish the balls a bit to make sure they are all evenly distributed
  15. Cover with a towel and let rise in a warm place or the warming tray of your oven until doubled in size (about an hour)
  16. Preheat oven to 350º and bake 30 minutes
  17. Spoon remaining wet mixture over top
  18. Sprinkle dry mixture over top as well
  19. Bake another 10-20 minutes – or 190º internal temperature
    • pull out if top starts to blacken
  20. Invert onto a serving plate and let cool 10 minutes.  Serve with forks

STEP BY STEP FOR CINNAMON ROLLS

The first SEVEN STEPS are the same for both recipes.

  1. On a floured surface, roll dough into a kind of flat rectangle
  2. Fold the rounded sides toward the center, and roll again
  3. Repeat one more time.  You should now have a nearly perfect rectangle.
  4. In Step 6 above, combine both mixtures into a single mixture.
  5. Spread mixture over your rectangle leaving about 1/2 inch dry edge
  6. Roll into a tube starting with the side opposite the dry edge.  Roll as tightly as possible 
  7. Use egg wash on the unbuttered edge to seal the roll
  8. Using dental floss, cut the tips off
  9. Cut into half, then half again
  10. At this point, you will have four rolls. Estimate thirds and cut each of the four rolls into thirds – so you have twelve equal pieces
  11. Place (cut side down) into a well-greased 9×12 baking dish
  12. Cover with a towel and let rise in a warm place or the warming tray of your oven until doubled in size (about an hour)
  13. Preheat oven to 350º and bake 15 minutes
  14. Remove and sprinkle CinnaSugar over top
  15. Bake another 10-20 minutes – or 190º internal temperature
    • pull out if top starts to blacken
  16. Cool on wire rack for 10 minutes.  Serve frosted or not
  17. OPTIONAL:  FROST THE CINNAMON ROLLS
    1. Combine sugar, butter, vanilla and orange zest
    2. Add milk ONLY until consistency will spread easily
    3. Spread over each roll and serve warm

FROSTING

  • 2.5 C confectioner sugar
  • 2 TBL softened butter
  • 1 tsp vanilla
  • 1 tsp orange zest
  • whole milk – 1 tsp at a time


Cindy’s Eggs

INGREDIENTS

  • Tomato pieces
  • Frozen chopped spinach
  • Optional sliced ham
  • Cheese
  • Egg
  • More Cheese

STEP BY STEP

  1. Grease a muffin ring (or steel tuna can)
  2. Preheat your skillet to about 350º
  3. Put in about 1/4 C tomato pieces (heated)
  4. Put in 2 TBL chopped spinach (heated)
  5. Put sliced ham in, if you wish
  6. Push it down so it is all kind of flat
  7. Sprinkle in some cheese, and make a well in the center
  8. Break your egg yolk/white into the well
  9. Sprinkle on a bit more cheese
  10. Cover with a mixing bowl and pour about 1/2 C water into the hot pan
  11. Let cook 4 minutes
  12. Meanwhile toast two pieces of bread
  13. Carefully remove your ring (with the egg) to the top of your toast
  14. Remove the ring and serve


HTML Snippets Powered By : XYZScripts.com