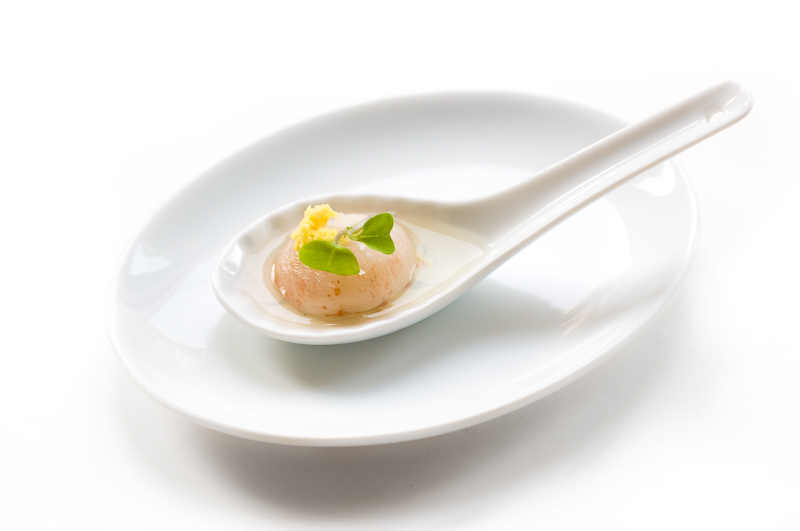
Middle-Eastern Dolma

You may have had them at a Greekfest or other ethnic event, but you have probably never tried to make them.  Here is a recipe that is pretty easy to get right.  In Istanbul, their local bus is called a Dolmush. That is because it is packed to bursting.  We actually saw this in real life.  Here is a  popular side dish.    You can <a href=”http://www.amazon.com/Orlando-California-Grapes-Leaves-Ounce/dp/B001KW8JF0/ref=sr_1_1_a_it”>BUY GRAPE LEAVES</a> from Amazon or your local grocery.

Fresh leaves are always better, but in the early summer, when you don’t have dark leafy greens to roll your dolma, you can use the commercial grape leaves at the link, or you can stuff zucchini, eggplant or tomato or peppers.

INGREDIENTS

  • 2 cups par-cooked rice
  • 1 lb raw beef
  • 1 Onion
  • 2 Tomatoes
  • Curry to taste
  • Chile pepper spice
  • Garlic to taste
  • Lemon & lime juice to taste

STEP BY STEP

  1. Mix all ingredients together in large bowl.
  2. Put mixture on leaves, and roll up tightly.
    It doesn’t have to be TOO tightly, cause the rice will continue to expand – filling the wrap.
  3. Put stuffed leaves in a pot and cover with half-water and half-broth.
  4. Put plates or weights on top to weigh down leaves so they don’t float.
  5. Put cover on pot.
  6. Bring to boil, reduce heat, and simmer on medium-low heat for 30-45 minutes.
  7. Watch for leaves to swell up as a sign that your dolma is fully cooked.
    If you leave them too long, they may split.
  8. Let sit for 15 minutes, and serve warm with lemon sauce

LEMON SAUCE – Avgolemono – BRIEF

  1. While your Dolma finish cooking separate two eggs
  2. Without going into details, set up a double boiler and start heating up the zest and juice from two lemons
  3. Before the mixture gets too warm, add 2 TBL cold butter to the mixture
  4. Add the yolks, but set aside (refrigerate) the whites for other uses
  5. Whisk your yolks into the juice along with 2 TBL warm (not hot) water
  6. Add a pinch of salt and a pinch of ground chili pepper or cayenne pepper
  7. Drizzle over top of your Dolmas when you serve them

NOTE: It is not “proper” but I like a little side dish of the lemon sauce for dipping.

Yorkshire Pudding

In America, these are called simply POPOVERS.

INGREDIENTS – By Measure

  • 2 CU (120 g) of plain flour
  • 2 C (200 ± g) lowfat or whole milk – do not use skim
  • 4 egg yolks (200 ± g)
  • About 1/2 tsp salt, 1/2 tsp pepper
  • 3 TBL beef or chicken roast drippings
    (or 1 chopped piece of bacon in the bottom of the pan)
  • Optional:  1-2 TBL chopped thyme, tarragon or chives

STEP BY STEP

  1. Use a sieve to sift the flour and salt into a bowl.
  2. Create a “well” or a hole in the middle of the flour.
  3. Break the eggs and place them in the hole.
  4. Mix the eggs and flour thoroughly, but do not overmix
  5. Add the milk. Try to make a smooth mixture with everything
  6. Let mixture rest for 60 minutes in the fridge
  7. About 25 minutes before serving, place skillet in a COLD oven
  8. Preheat oven and large cast iron skillet to 450 degrees F or 220 C.
    If using chopped bacon, keep an eye on it so it does not burn, but does completely render
  9. If not using bacon, cover the bottom of a HOT cast iron skillet with 3-4 TBL roast drippings.  Add butter if necessary.
  10. Wait until the oven comes up to heat. CAUTION: Oil will be very hot.
  11. Add the batter to the pan, filling to 3/4 from top.
    It should sizzle as you pour it.
  12. Close door and turn heat down to 425.
  13. Bake for about 25 to 40 minutes minutes – until raised and browned
  14. Let the pudding rise and get golden brown in color, but not black
  15. Remove from oven and serve immediately.
  16. If the pudding sits for a while or if you wait, the pudding may get soggy, and fall in the middle

VARIATIONS

  • see also POPOVERS and “Dutch Baby”
  • Yorkshire pudding is a tradition staple food in British Sunday dinners. It’s mainly served as a side dish, usually served with beef roast or chicken.

Lettuce Tie-up and Lettuce Wraps

Lettuce Tie-up
Three twelve inch pieces of butcher’s string per person
Three outside leaves per person of Romain or Bibb lettuce
Julienned cuts (or peels) of any five of the following:
– Cucumber
– Cucumber peel
– Bell pepper
– Parsley (chopped)
– Cilantro (chopped)
– Pickle
– Chive
– Cheese
– Salt / pepper (sprinkle to taste)
– Deli, regular or Chinese mustard
– Ground red pepper

OR MAKE UP YOUR OWN TOPPINGS

  1. Spread mustard on top part of leaf
  2. Add selected five ingredients
  3. Roll as tightly as possible, make sure not to burst the leave
  4. Tie lightly near the middle with one length of butcher’s string
  5. Trim excess string
  6. Cut off the white end and discard
  7. Serve aside any meat dish


Baked Squash

INGREDIENTS

  • 1 squash – acorn, butternut or pumpkin
  • 1/2 CU grated Parmesan cheese
  • 2 TBL EVOO

STEP BY STEP

  1. Cut squash into 3/4 inch cubes
  2. Toss with EVOO
  3. Sprinkle with salt
  4. Spread onto baking pan
  5. Bake at 350 degrees for about 30 minutes
  6. Flip pieces to other side and cook anothe 20 minutes
  7. OPTION:  If you want to, you can remove the skin and puree, then continue with this recipe
  8. Place pieces or puree in greased baking bowl and top with cheese
  9. Bake 8-10 minutes at 350 degrees

Baked Buffalo Chicken Wings

INGREDIENTS

  • 1 TBL garlic powder
  • 1 3/4 teaspoons salt
  • 1/4 teaspoon fresh-ground black pepper
  • 1 1/2 teaspoons cayenne
  • 4 pounds chicken wings
  • 3 tablespoons cooking oil
  • 2/3 cup mayonnaise
  • 1/3 cup sour cream
  • 1/4 pound blue cheese, crumbled (about 1 cup)
  • 2 scallions including green tops, chopped
  • 5 teaspoons vinegar
  • 1/4 cup ketchup
  • 1 tablespoon Tabasco sauce
  • 8 ribs celery, cut into sticks

STEP BY STEP

  1. Heat the oven to 425 degrees F.
  2. Mix together in a paper bag the garlic powder, pepper, salt and cayenne pepper powder
  3. In a large bowl, toss the thawed wings with the cooking oil
  4. Put into the paper bag and shake until coated – save any excess powder in the bag
  5. Arrange the wings in a single layer on two large baking sheets.
  6. Bake until just done, about 35-45 minutes.
  7. Meanwhile create your dipping sauce: In a medium glass or stainless-steel bowl, combine the mayonnaise, sour cream, blue cheese, scallions, and ONLY ONE teaspoon of the vinegar
  8. To coat your cooked wings, in a large bowl, combine the ketchup, the remaining 4 teaspoons vinegar, the Tabasco sauce, and the remaining powder from the bag – ALTERNATE:  Simply use Frank’s Red Hot Cayenne Pepper Sauce
  9. Add the wings and toss to coat.
  10. Serve the wings with the celery sticks and blue-cheese dressing alongside.

MENU SUGGESTION

  • Pair these wings with more finger food. Corn on the cob would go nicely.
  • Roasted potato wedges are a good alternative and can be cooked alongside the wings.


Eggplant Babaganoush

INGREDIENTS

  • 1 eggplant
  • 2 cloves garlic (diced)
  • 5 TBL lemon
  • 4 TBL tahini
  • 1 sprig parsley
  • Salt

STEP BY STEP

  1. Wash outside of eggplant.
  2. Perforate skin of eggplant multiple times with fork.
  3. Cook over hot but indirect heat for 8-10 minutes, or until charred and reduced in size
  4. Turn, continue cooking – About 30 minutes total. (or roast in 400 degree oven for 30 minutes)
  5. Wrap in plastic wrap, leaving stem exposed
  6. Cut off stem and squeeze from belly button, removing all the flesh
  7. Put flesh into a colander and let drain for 1/2 hour
  8. Add diced garlic, salt, lemon, parsley and tahini
  9. Blend well. A food processor helps a lot
  10. If bitter add 1 TBL honey
  11. Serve with pita chips

Asian Noodle Salad

INGREDIENTS for the SALAD

  • 3 cups Napa cabbage (sliced thinly)
  • 1 small red pepper (chopped)
  • 1 bunch scallions (chopped)
  • 1 small orange pepper (chopped)
  • 1 bunch fresh cilantro (chopped)
    TO FINISH
  • 2 tablespoons of toasted sesame seeds
  • 1 lime
  • 1 lb Udon noodles

SPECIAL ASIAN SAUCE

  • 1/2 cup water or chicken stock
  • 1/2 cup peanut butter – smooth or chunkey
  • 1/4 cup red wine vinegar
  • 2 tablespoons dark soy sauce
  • 2 teaspoons sugar
  • 1 tablespoon hot sesame oil
  • 1/4 cup minced fresh ginger
  • 1 large garlic clove, minced

Put all of the sauce ingredients in a food processor and blend until smooth.

STEP BY STEP

  1. Combine sauce ingredients and put in microwave safe glass container
  2. Combine all salad ingredients except the lime and Udon Noodles
  3. Cook Udon Noodles according to instructions
  4. Set aside 1 tsp sesame seeds
  5. Toss prepared salad ingredients with the juice from one lime
  6. Toss everything with The Sauce
  7. Sprinkle with sesame seeds


Rowena’s Shoe Peg Salad

This recipe has been provided by Rowena Stallings – on the condition that it NEVER be brought to one of the First Church Potlucks by anyone other than her.

INGREDIENTS

  • 1 can (No.2) Le Sueur Peas
  • 1 can Shoe Peg White Corn
  • 1 cup celery (cut fine)
  • 1 bunch green onions (cut fine)
  • 1 small jar Pimientos (chopped ones)

Dressing:

  • 1/3 cup Salad oil
  • 3/4 cup sugar
  • 2/3 cup Vinegar

STEP BY STEP

  1. Mix dressing together, Pour over Vegetables.
  2. I heat the Dressing just to dissolve the sugar.
  3. Marinate for several hours or over night.

Have fun eating !!!
See you at church.
Rowena

Green Dip

I got this as an appetizer at a Phoenix restaurant. This is my recreation of this recipe.

INGREDIENTS

  • 1 block Cream cheese – just a few degrees above room temperature
  • 1/2 C Sour cream
  • 1 C Yogurt
  • 1 tsp White pepper
  • 1 Vadallia Onion – minced
  • 1 C Cilantro chopped small
  • 1 tsp Salt
  • 3 Artichoke hearts – minced
  • 1 tsp Garlic – minced
  • 3 Green onions – diced small
  • 1 C Shredded sharp cheddar cheese
  • 1/2 C shredded Mozzarella cheese

STEP BY STEP

  1. Heat your cream cheese just 15 seconds in the microwave
  2. Mix your sour cream, yogurt and white pepper into your cream cheese
  3. Mix in onion, cilantro, salt artichoke, green onions and garlic
  4. Mix in your cheeses
  5. Microwave another 15-20 seconds
  6. Mix again and serve with toast points or bread sticks


Potato and Cheddar Cheese Soup

soupINGREDIENTS

  • 2 strips sliced bacon, cut into pieces
  • 1/2 onion – chopped
  •  2 large russet potatoes – peeled and chopped ( see note below )
  • 2 cups water
  • 1/2 teaspoon salt
  • 3 ounces cheddar, grated – about 1 cup)
  • 2 TBL chopped chives or scallion tops

STEP BY STEP

  1. In a large saucepan, cook the bacon until crisp
  2. Remove the bacon and set aside on a paper towel
  3. Pour off all but 1 tablespoons of the bacon fat
    If you don’t have 1 tablespoons, add a bit of canola oil
  4. Reduce the heat to low
  5. Add the onion and cook until softened – about 5 minutes
  6. Stir in the potato pieces until they start to brown
  7. Add water and salt and bring to a boil
  8. Simmer, stirring occasionally, until the potatoes are tender, 15 to 20 minutes
  9. If you want a creamy soup, pour the soup into a blender and puree
    For a more rustic soup, use a potato masher to do most of the work.
  10. Return the potatoes to the pan
  11. Still over low heat, add the cheese bits and stir until melted
  12. Remove the pan from the heat
  13. Taste the soup and season with salt, pepper or cumin to the desired taste
  14. Serve the soup topped with the bacon and chives, and a dollop of sour cream

MORE STUFF YOU NEED TO KNOW

  • Boiling potatoes have less starch than baking potatoes and consequentially hold together better when boiled. This is why they are used in dishes such as potato salads. Not in this soup, though. Since we want most of the potato to break down into smaller pieces and thicken the soup, baking potatoes are preferred.
  • For Vichyssoise, prepare soup as above, then add 1/2 cucumber – peeled and seeded and 1 TBL  light cream.  Let soup chill, then add Vichy ingredients and blend in a blender until smooth.  Refrigerate several hours.  Garnish with chopped chives.
  • SAFETY TIP:  If you blend your hot soup, DO NOT put the lid tightly on the blender.  The explosion of hot air will spread hot potato soup all over your kitchen, ceiling and face.  Leave the lid off, and cover the top with a heavy towel or wash cloth.


Picadillo

Picadillo is a mixture of ground pork or beef, onions, garlic and tomatoes. It is frequently used as stuffing for a Chile Relleno

INGREDIENTS

  • 1/4 lb. lean ground beef
  • 1/2 lb ground pork
  • 1/2 cup ready made sofrito – See Recipe
  • 1/4 cup diced bell pepper (green and yellow or red)
  • 1/4 cup chopped cilantro (1/8 bunch)
  • 1/4 cup sliced olives
  • salt and pepper to taste
  • 1 TBL tomato paste to thicken if necessary – Should be kind of like meat loaf

STEP BY STEP

  1. Brown the ground beef and pork
  2. Add Onions and cook until start to brown
  3. Add sofrito and peppers
  4. Add the olives, capers, salt and pepper, and tomato sauce.
  5. Add chopped cilantro
  6. Cook another 5-10 minutes IF NECESSARY to cook down any extra liquids.

MORE INFO

  • Picadillo needs to be moist but not runny, so not a lot of tomato sauce is used. But if you are serving it as a side dish use more tomato sauce. Usually a dish like this uses more sofrito, but I like to see the chopped spices so I reduce the amount of sofrito and add chopped ingredients – more like a pico de gallo.

Quick Refried Beans

Someimes all you want is quick and easy. Still… don’t just open a can of beans and have at it. After all, would you open a can of Tuna Fish and use it plain to make a Tuna Fish Salad Sandwich? Anyway, here is a quick recipe guaranteed to make life better.

INGREDIENTS

  • 1 can refried beans
  • 1/2 onion – chopped small
  • 1 clove garlic – minced
  • 1 TBL EVOO
  • Liquid – water is OK, reserved liquid, stock or broth is better
  • 1/2 CU Cheddar or Asadero Cheese

STEP BY STEP

  1. Brown onions in oil
  2. Add garlic
  3. Add beans and all other ingredients except cheese
  4. Add cheese at last minute and stir in

Tips: Guacamole – COLLECTION

Grandpa’s Guacamole

Grandpa’s Guac

Other Guacamole Recipes

Quick Guacamole

Quick Guacamole

Avocado – Tips and Tricks

Tips: Avocado

Canyon Ranch Copy Cat Guacamole

Canyon Ranch Guacamole – Copy Cat

Chipotle’s House Spicy Guacamole – Copy Cat

Chipotle’s House Spicy Guacamole – Copy Cat

Guacamole Deviled Eggs

Guacamole Deviled Eggs

Avocado Salsa

Avocado Mousse

Avocado Salsa

Take Guacamole (above) and blend with a bit of tomato water and heavy cream


Chunky and Creamy Guac

  1. Use a fresh avocado, remove from skin and mash in a bowl
  2. Add 1 TBL lime juice immediately
  3. Minced red onion, minced garlic, chopped cilantro, Choloula (to taste), 2 jalapenos (seeds and veins removed)
  4. Mix well
  5. Put into a bowl and then cover TIGHTLY with plastic.  Press onto the guac
  6. Serve with fresh chips

Pico de Gallo

Pico de Gallo translates as “Beak of the Rooster.” It is a sharp tangy staple and a great side to any Mexican recipe.

INGREDIENTS

  • 2 medium tomatoes, seeded and finely diced
  • 1 medium red onion, finely diced
  • 2 tablespoons olive oil
  • 1/4 cup fresh lime juice
  • 4 serrano or jalapeño chilies, seeded and finely diced
  • 2 tablespoons minced fresh cilantro
  • 2 tablespoons tomato juice
  • 1/4 teaspoon salt
  • 1/8 teaspoon freshly ground pepper

STEP BY STEP

  1. Mix all ingredients in large bowl.
  2. Cover and refrigerate until ready to use, but let marinate at least an hour.

VARIATIONS

  • Serrano and jalapeno chilies are available in most supermarkets. Store up to a week in a plastic bag in the refrigerator.
  • You may also find the dark green shiny poblano. This chili is milder, but must be roasted and peeled before using.

FROM SCANNED NOTES:

RECIPE
Pico de Gallo
4 medium tomatoes, diced
11/2 cups canned, diced tomatoes
1/2 cup diced red onion
3 tablespoons chopped scallions
1/2 cup diced yellow bell pepper
1 tablespoon diced jalapeno pepper
1/4 cup chopped cilantro
11/2 tablespoons fresh lime juice
1 teaspoon salt
1/4 teaspoon black pepper
1/2 teaspoon dried oregano leaves
1/4 teaspoon garlic powder
Place all ingredients in a food processor and mix briefly.
~
Makes 3 cups salsa, each 2-tablespoon serving containing approximately:
1 O calories
2 gm. carbohydrate
Trace fat
O mg. cholesterol
Trace protein
122 mg. sodium
Trace fiber
3/99

Scratch Refried Beans

Americas Test Kitchen did some extensive testing and determined that there is just no competing with the commercial canned beans that are available today. We trust them, so you can feel confident that you can use canned beans and this recipe will work well, although by pure definition they are not.   If you want to REALLY start from scratch, start at the next section… otherwise, jump to the INGREDIENTS header.

REPLACING THE CANNED BEANS WITH TRUE SCRATCH BEANS

  1. Wash 1 C each of dried pinto beans, black beans, white beans, kidney beans
    Do this just before you go to bed.
  2. Soak the beans for 8-12 hours in lots of cold UNSALTED water with 2 TBL white vinegar added
    Adding salt at this point will toughen the skins of the beans.
  3. Drain the beans one last time, and put the hydrated beans into 3 C water and 1 C chicken broth
  4. Add 2 strips of bacon
  5. Bring liquid to a boil, then reduce to a simmer for 1-2 hours
  6. If necessary, add more chicken broth – beans should stay covered
  7. Beans are done when they are tender, not crunchy
  8. Add 1 tsp each ground paprika, oregano,
  9. Add 1/2 tsp each ground garlic, cumin, ground chipotle chili, ground cayenne pepper
  10. Add 1/2 C canola or safflower oil
  11. Crush using a potato masher
  12. Drizzle small amounts of oil as needed for consistency
  13. Beans can now be put into jars, leaving 1 inch headroom in the jar
  14. Top off jar with chicken broth, leaving 1/2 inch headroom in the jar
  15. Refrigerate for up to one week, or use a pressure canner for a longer shelf life.

INGREDIENTS for Finishing and Serving your Beans

  • 2 cans whole pinto beans or 3-4 C homemade beans – See recipe above for Dry Bean Processing
  • 2 strips bacon
  • 1/2 onion – chopped small
  • 1-2 arbol chilies – dried, but still flexible – not brittle
  • 1 clove garlic – minced
  • 1 jalapeno – minced – optional
  • 2 TBL EVOO
  • 1/2 tsp ancho chili powder
  • 1/2 tsp cumin
  • 1/2 tsp salt
  • 1/2 tsp oregano
  • Liquid – water is OK, reserved liquid, stock or broth is better

STEP BY STEP

  1. Chop bacon and render in hot pan, then a bit of EVOO and diced onions
  2. Add jalapeno and garlic, if using – avoid breathing in fumes
  3. Add pinto beans and all other ingredients
  4. Once heated through, smash beans with fork or potato masher – Personal preference applies – smooth or with chunks remaining
  5. Add liquid for consistency

VARIATIONS

  • It is traditional to use pinto beans, but using half black beans adds a wonderful dimension
  • Render out all fat from two pieces of bacon
  • Add 1/4 C grated manchego cheese just before serving


Curing your own Olives

Here is a collection of information that you may find helpful.

  • VIDEO – Part 1 – – Collect olives
    The video does not give too much information.  What we saw in Spain was people setting tarps below the trees, then shaking them or blowing them with a leaf blower.  Once on a tarp, the olives can be easily gathered.
    .
  • VIDEO – Part 2 – – Score and brine 1 CU salt per gallon of water
    This video shows each olive being scored individually.  Very labor intensive.  A quicker way is to just rap them lightly with a hammer or mallet, then toss them into the brine.
    .
  • VIDEO – Part 3 – – Change brine weekly
    This is a surprisingly important step.  If you don’t change the brine, your olives become stagnant and will take on a kind of musty and dirty taste.
    .
  • VIDEO – Part 4 – – Try one in 15 weeks – If too bitter, brine three more weeks
    Our friend in Velez brined his olives for only two weeks.  We tried them, and they were pretty awful, but he likes them that way.  “It’s an acquired taste.”

Another site that I found said to soak them in clear water for the first few weeks, changing the water every couple of days.  What I did was change the water every 2-3 days for the first three weeks, then change to a weekly brine after that.  I don’t know why, it just seems right, so that’s what I’m going to do.

I also found one recipe that put chopped up lemon pieces, a bit of oregano, garlic and cumin, and some vinegar into the brine.  Add these if the mood strikes you.  Also, adding some whole dried peppers would  give your olives a bit of a bite.  I personally like the lemon peel idea.

Here is one more video that offers an alternate method, and some good insights:

All things considered, here is what I plan to do:

  1. Go through your olives and remove any that are shriveled or blemished
  2. Clean the good olives using LOTS of water
  3. Smack the olives to break the skin to allow the brining solution access to the meat of the olive.
  4. Heat 1 gallon of water to near boiling, and add 2 CU ice cream maker salt
    NOTE: This is NOT edible, but then again, neither is lye.  It will be rinsed off by the time we are done.
    Melt the salt in hot water, then pour through a coffee filter to remove the gravel, grit, etc.
  5. Pour to cover the olives, using a plate to completely submerge them. See Video Parts 2 and 3 above.
  6. One time per week (same time) drain the water and repeat step 4 – Do this for four weeks… mark your calendar
  7. Step 5 is intended to remove much of the bitterness
  8. After the first four weeks move to a phase that is intended more to preserve and clean the olives
    NOTE: To be sure grit is gone, rinse them in a bowl of standing water. Remove by hand, not by dumping, into a colander.  Discard grit in the bottom of the bowl, and put olives back into their brining container
  9. Heat 1 gallon of water to near boiling, and add 1 CU food-quality course sea salt
  10. Recover olives, completely submerging them
  11. Do this for ten more weeks.
  12. Rinse and taste an olive. If the olive still tastes bitter, repeat steps 9, 10 and 12 for two more weeks.
  13. Once the olives are to your liking either can them or refrigerate them.
  14. To refrigerate them, heat 1 gallon of water, and add 1/2 CU course sea salt (Proportionally adjust amounts if necessary)
  15. Put olives in a canning jar and refrigerate.
  16. They should keep refrigerated for up to two months.

NOTES FROM SPAIN

Start with 2 C oil dried black olives con hueso
Add eight cloves crushed garlic
Orange zest . Not the pith
Crushed red pepper flakes
Fennel seed powder
Liberal amount of EVOO
Toss together and marinate 48-72 hours
Remove garlic
Put into a jar
Store in fridge for up to 4 weeks\

Basic Ceviche

This is a very easy ceviche recipe that you can do as a side dish, an appetizer, or even an entire meal. We made this with our friend Cinthia while living in Velez-Malaga, Spain.  Ceviche is very flexible as long as your ingredients are extremely fresh.  Below is a good video from AllRecipes about ceviche.

INGREDIENTS

  • This recipe must be made at least 2 hours ahead of time – 4 hours is better
    PROTEINS
  • 1-2 LB FRESH  Mahi (Tuna) or other delicate white fish
    – cut into 1/4 – 1/2 inch pieces
    – You can also use Rock Fish, Sea Bream, Grouper, Seabass, Halibut, Talapia, Cod or Red Snapper – cut thinly and blanched 30 seconds
    – DO NOT use swordfish or tuna, as these are long-lived fish and are more likely to have parasites
  • Scallops – blanched*  20-30 seconds
  • Shrimp – blanched*  20-30 seconds
  • Crab – blanched* 20-30 seconds
  • Squid or Octopus – blanched* 20-30 seconds
    * Blanched means that you plunge it into boiling water for about 30 seconds, and then remove it to an ice bath to stop the cooking.
    REQUIRED VEGETABLES and LIQUIDS
  • One Lemon and one lime – zest and juice
  • 1 C FRESH real lime juice (this is because the acidity is well-controlled)
  • 1 TBL tomato juice or green tomato
  • Cucumber – Small cubes
  • Roma Tomato – Deseeded and chopped fairly small
  • 1/2 red onion – Chopped fairly large – blanched 30 seconds
  • Cilantro – Rough chopped
  • Jalapeño or Serrano – minced (hotter: habañero)
  • Chives – Cut into 1/4 inch strips
  • 1 tsp salt
  • EVOO
  • Additions:  Red onion slivers, Passion Fruit, Papaya, Pineapple, Mango, Kumquat, Plums,
    OPTIONAL INGREDIENTS
  • Spice it up with a squirt of Siracha
  • Radish
  • An easy option is to buy a good pico de gallo and use in place of the vegetables listed above.

SELECTING THE RIGHT FISH

CLICK HERE FOR TIPS ON BUYING A FRESH FISH

STEP BY STEP

  1. Cut fish into 3/4 – 1 inch pieces
  2. Place fish pieces in a glass bowl
  3. Blanche all raw seafood for no more than 30 seconds, then plunge into ice water to stop the cooking process
  4. 1/2 fresh squeezed lime juice – enough to cover
  5. Sprinkle with a bit of salt and set aside for 10-20 minutes
  6. Dry Pack Scallops are another good thing to use in your ceviche.
     – – – To find out why Dry Pack are better than Wet Pack,  CLICK HERE.
  7. Optional: Plunge shrimp (deveined) and other seafood into boiling water for 30 seconds, then into ice water.  I actually prefer this step.
  8. In a second large mixing bowl, combine the following:
  9. Cut 1 red onion into very thin julienne strips
  10. 2-3 large tomatoes – thinly slice tomato flesh, discarding seeds and juice
  11. Finely chop 2-4 TBL  EACH – Depending on taste
    – Optionally: strips of pepper – mild or hot
    – green olives – quartered
    – parsley – chopped
    – cilantro – some chopped, some fairly whole
    – celery pieces (1 stalk, ribs removed before cutting)
    2 TBL EACH
    – ketchup
    – EVOO (emulsified with whisk)
    – Worcestershire sauce
    – oregano and salt to taste
    – minced garlic
  12. Combine all of the above in the glass bowl and refrigerate for AT LEAST 2 hours, but for as long as five.  Not longer though, they will become chewy.
  13. Serve topped with slices of avocado, cubed papaya or mango, salt, pepper, and chopped cilantro

If you want to see a ceviche recipe in action, use the below video.

Amuse Bouche

WHAT IS AN AMUSE BOUCHE?

This amuse bouche is classic. Small and for the individual.

An amuse bouche, also called an amuse gueule.  The direct translation is something to amuse your mouth.  It is a tiny bite-sized morsel traditionally served before the first course of a meal.  It does not have to be related to the upcoming meal, but it can be.

An amuse bouche is different than an appetizer, in that they are not ordered from a menu, but are at the discretion of the chef. The treats sometimes differ for each person at the table.  Guest should be able to eat them in ONE bite. If two bites, it is on the verge of too big.  Three bites is an epic fail.

These are sometimes accompanied by a complementing wine, and are served as an excitement of taste buds to both prepare the guest for the meal and to offer a glimpse into the chef’s approach to cooking.
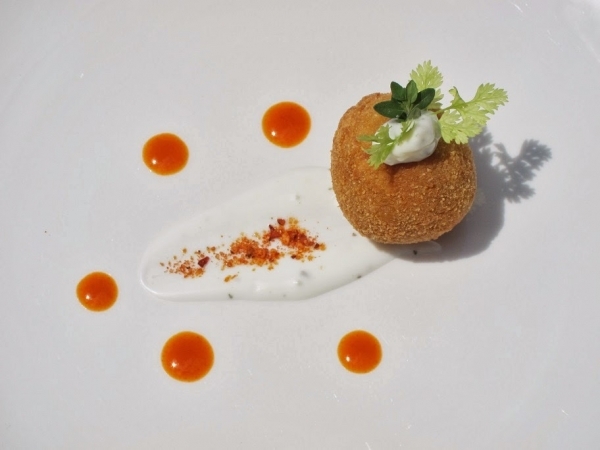
This amuse is complex, but still is only one bite, when you get right down to it.

Whatever strikes your fancy.  Here are a few examples:

INGREDIENTS

  • Chocolate strawberry
  • Toothpick with blueberry and raspberry
  • Chocolate waver with fancy white chocolate design
  • One scallop with passion fruit jelly
  • Smoked salmon on cracker
  • Lokum
  • Bitter chocolate truffle


The below amuse bouche is one of my favorites.  Ideally this would be for a table of ten people.  It would spark discussion, and allow the chef to show off some of their culinary skills to their diners.  This does, however, offer the possibility of disappointment in being the last to choose, but that is part of the fun.

amuse3


Read more on WikiPedia.

HTML Snippets Powered By : XYZScripts.com