Chinese Sauces – Yakisoba Copy Cat

Yakisoba Sauce

This sauce is difficult to find, so here is a recipe to make your own

INGREDIENTS

  • 1/4 C Ketchup
  • 1/4 C soy
  • 2 TBL Worcestershire
  • 1-1/2 TBL brown sugar
  • 3 Cloves garlic
  • 3 Anchovies – rinsed
  • 1 tsp rice wine vinegar

NOODLES

  • Yakisoba – very good, but hard to find
  • Lomein – similar to yakisoba if prepared properly
  • Soba – buckwheat
  • Udon – Wheat
  • Somen
  • Ramen

Healthy Alfredo Sauce

This is a really easy recipe, fairly healthy, and you will get restaurant quality Alfredo sauce.

INGREDIENTS

  • 2 TBL shallot or onion – minced
  • 2 TBL butter
  • 2 cloves garlic – minced
  • 2 TBL AP flour
  • 2 egg yolks
  • 1/2 C Parmesan cheese
  • 1 C milk
  • 1/2 C light sour cream

STEP BY STEP

  1. Melt the butter in a sauce pan
  2. Add the minced onion/shallot and garlic
  3. Immediately add the flour and stir until it is well combined and starts to cook
  4. Add 1/2 of the milk – Stir to dissolve clumps
  5. Mix the egg yolks, Parmesan in with the milk
  6. Heat mixture over medium-low heat
    – DO NOT BRING TO A BOIL – Maximum 200º
    – As soon as you see a couple bubbles form, it is done
  7. Add the rest of the ingredients (except the sour cream)
  8. At the last minute, add the sour cream

Top pasta with your choice of grated cheddar, diced chicken, parsley, bacon pieces, sauteed mushrooms, peas, etc


Scratch Marinara / Bolonaise

INGREDIENTS

  • 8 Roma Tomatoes
  • 1 Small sweet onion – diced
  • 1/2 C Red wine
  • 1/2 C chicken, vegetable or beef stock.
  • 3 cloves of garlic – minced
  • 2 TBL EVOO – whisked in to emulsify
  • 1 TBL Basil
  • 1 TBL Oregano
  • 1 tsp Thyme
  • 1 tsp Rosemary
  • 1 bay leaf
  • Salt and pepper

To make Bolonaise Sauce add these meats, cooked

  • 6 oz sirloin – coarse grind
  • 6 oz chuck (shoulder) – coarse grind
  • 6 oz pork butt – coarse grind
  • 4-6 oz thick cut bacon

STEP BY STEP

  1. Tomatoes are in season April through August – the hot summer months
    Use tomatoes during those months.  During the cooler times, see make BASIC MARINARA.
  2. Cut an X in the top of the tomato
  3. Plunge into boiling water – simmer for two minutes
  4. Plunge into ice water – let cool for two minutes
  5. Skin should peel off easily
  6. Squeeze the tomato and squeeze out the seeds
  7. Discard the seeds, which can be bitter, and put the flesh into a stock pot
  8. Add all other ingredients to the pot
  9. Bring to a high simmer, then reduced to a low simmer
  10. Let cook on the stovetop for at least an hour, preferably two.
  11. Halfway through, use a potato masher to break up to tomato pieces
  12. Can the sauce to carry you through the winter months, or
    Let cool, and store in zip lock bags.  Freeze flat (on a tray) so they stack efficiently in the freezer.

NOTES

  • Ask at the supermarket for bruised tomatoes at a discount
  • Keeps for a year or two if properly canned, or two weeks in the refrigerator
    Buy in bulk when the tomatoes are on sale and CAN YOUR OWN TOMATOES.
  • Use this as a base, then add your own variations:  more basil or mushrooms or cheese… Whatever
  • This is a great use to get rid of your tired veggies
  • If you have the hard rind from Parmesan cheese, throw it in for flavor.  Remove it before freezing or canning.
  • This is a great place to throw whole and intact chicken or rib bones.  Be VERY CAREFUL to not leave bone pieces behind.
    Better yet, create SCRATCH STOCK from the bones, and then use 1/2 C of your own homemade stock

Chef Notes

  1. EVOO in a hot pan, smashed garlic – skin and all
  2. 4 ripe Roma tomatoes – cross top – boil and remove skin
  3. Smash and chop the tomatoes
  4. Add a bit of water, black pepper, salt, parsley and basil
  5. Add optional chili pepper
  6. Spaghetti al dente in with sauce
  7. Add fresh basil – toss together
  8. Plate and top with Parmesan cheese

Heirloom Tomato Snack

INGREDIENTS

  • One heirloom tomato per person
  • EVOO
  • Salt and pepper
  • Brown sugar

STEP BY STEP

  1. Cut your tomato into nice thick slices
  2. Drizzle with EVOO
  3. Sprinkle with salt and pepper
  4. Sprinkle with brown sugar
  5. Bake at 400º for about 5 minutes

TAKE IT ONE STEP FURTHER

  1. Cook another 15 minutes
  2. Remove the skin
  3. Crush up tomato
  4. Mix with mayonnaise
  5. You now have Tomato Aioli which is great on toast.


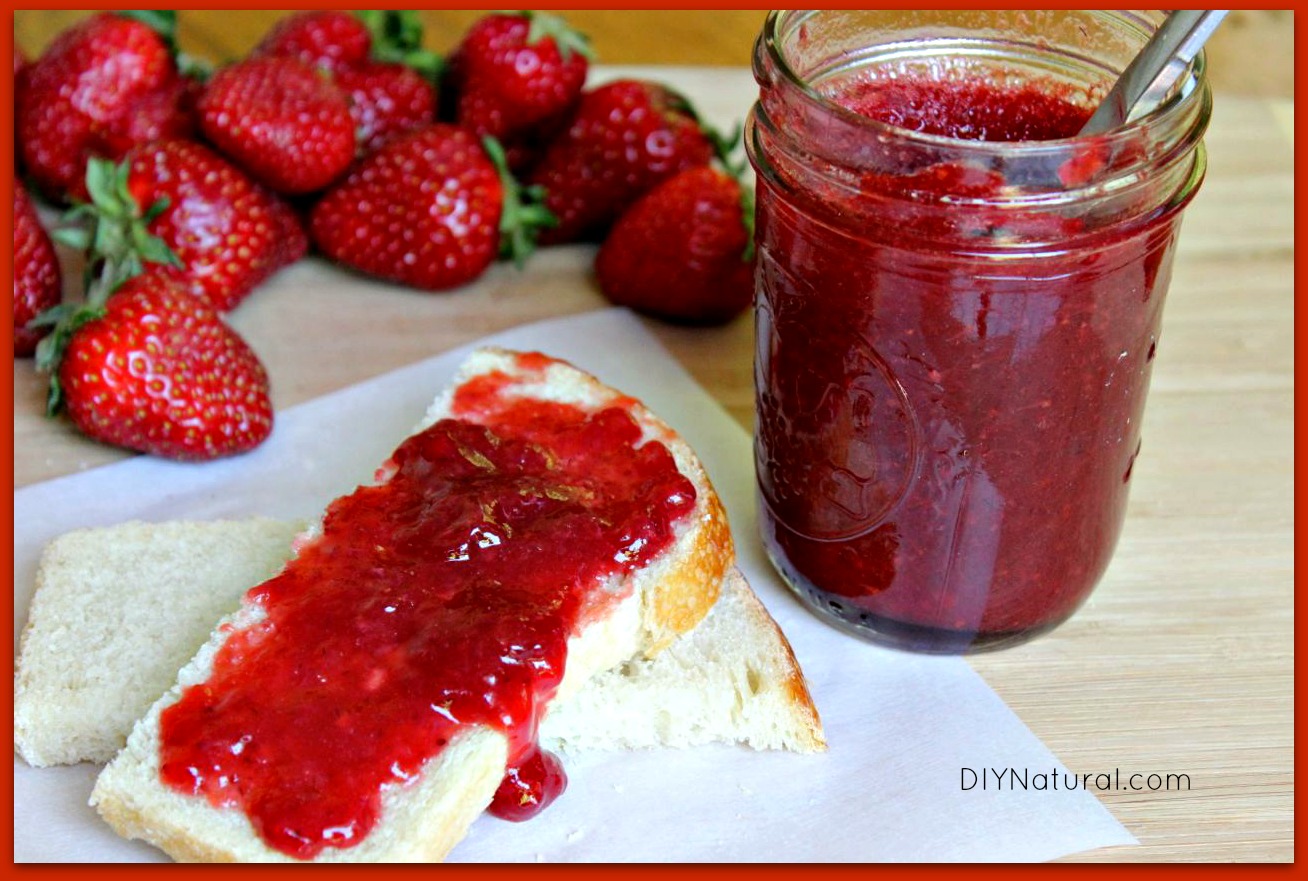
Fruit Preserves

INGREDIENTS

  • 4 C Strawberries
  • 2 C Raspberries
  • 2 C granulated sugar
  • Pectin
  • Zest and juice from one orange
  • zest and juice from one lemon

STEP BY STEP

  1. Clean and cut strawberries
  2. Raspberries
  3. Add sugar
  4. Add orange and lemon zest and juice
  5. Toss them together, breaking apart and mash, but not puree… not yet anyway
  6. Set aside to mascerate
  7. Heat up 3/4 C water and add 1 packet pectin – about 1 C powder
  8. Bring to a near boil and simmer until it thickens
  9. Puree about 2 C of your macerated fruit
  10. Break up the remaining fruit to your personal taste
  11. Mix puree, pectin and remaining fruit in a large bowl
  12. Put it in the fridge for at least two hours


Scratch Gravy

Use homemade stock as your base.

  • Starches:  Cornstarch and AP flour (low protein is better – like cake flour)
  • Root Starches:  Clear – not good for gravy:  Potato, arrowroot, tapioca

INGREDIENTS

  • 2 TBL Butter or fat droppings
  • 2 TBL Flour
  • 1 C  Homemade or Canned Stock
  • 1 bay leaf
  • Once this has cooked, you will need
  • 1 TBL Corn Starch
  • 2 TBL WATER
  • 1/2 C Homemade or Canned Stock

METHOD ONE:  STEP BY STEP

  1. Take 2 TBL butter
  2. Mix and cook on medium heat until it starts to brown.
  3. Add 2 TBL AP flour and whisk continually until smooth, and it starts to brown
  4. Whisk  in 1/4 C room temperature stock and whisk until smooth
    Use a whisk with many tines for better mixing
  5. Stir until starts to “kind of” brown
  6. Add another 1/2 C stock and 1/2 C water
  7. Return to a near boil
  8. Mix 1 TBL corn starch with 1/4 C cold stock
  9. Drizzle in while whisking continually
  10. Continue to stir with whisk until thickened.
  11. Reduce heat to low and whisk occasionally for about 20 minutes
  12. If you have lumps, run it through a sieve.

METHOD TWO:  milk gravy aka sawmill gravy

  1. For 2 C Sawmill Gravy
  2. Fry up bacon, chicken fried steak or sausage in a cast iron skillet
  3. Dump all except 2 TBL fat into the pan, keeping all the bits
  4. Add 4 TBL AP flour
  5.  Whisk for 2-3 minutes
  6. Take off the heat and slowly add 2 C milk while whisking continually
  7. Put back over high heat and bring up to a simmer
  8. Switch to a wooden spoon to finish up
  9. As soon as it starts to simmer, it is done.  It will not thicken any more over the heat.  It will thicken as it cools
  10. Serve over top of biscuits topped with sausage


Mushroom and Red Wine Steak Sauce

INGREDIENTS

  • 2 C Crimini mushrooms
  • 4 TBL Butter
  • 6-8 Shallots
  • 1 sprig Thyme
  • ¼ C Red wine

STEP BY STEP

  1. Clean mushrooms, then remove
  2. Quarter mushrooms
  3. Melt butter in hot saute pan
  4. Brown mushrooms
  5. When they start to caramelize, add halved shallots
  6. When shallots start to appear cooked, add garlic and thyme
  7. When garlic smell starts to fill the room, add red wine
  8. Salt and pepper to taste
  9. NOTE: Don’t add salt early, as it impedes caramelization
  10. Add 2 TBL more butter to finish
  11. Spoon over steak

Pan Sauce for Chicken

INGREDIENTS

  • Aeromatics
    • Onion
    • Ginger
    • Garlic
  • Liquids
    • White wine
    • Orange juice
    • Water
    • Chicken Stock
  • Flavor Builders
    • A sprig of rosemary (removed after cooking)
    • A sprig of thyme (removed after cooking)
    • Cilantro
    • Capers
    • Parsley
  • Finish with Richness and Depth
    • Butter

STEP BY STEP

  1. After you finish cooking your chicken, add some minced shallots and grated garlic.
  2. After they have softened, add a splash of wine to deglaze the pan.
  3. As soon as deglazed, add some flavor builders.
  4. Once the smell of them is filling the room, add 2 TBL of beef stock and capers
  5. Let it come up to a boil, then add 2 TBL of butter and parsley to bring everything together.
  6. This entire process should not take more than 4 minutes.


LG – Sour Orange Marmalade

12 Jar – Overview

This recipe makes a BUNCH of marmalade.  Enough to last you through to next season.  If you just want enough jars to last you for a couple of months, CLICK HERE for the amounts used to make a smaller batch.

Marmalade is traditionally made with Seville oranges (also called sour oranges) which are FAR too sour to eat. They do, however, have a high amount of pectin in them. With the proper amount of sugar, this makes a great marmalade base to which other fruits can be added.  Prep your oranges the day before, so they can soak overnight.  Total hand-on time for this recipe is 3 – 4 hours, so make sure that you allow yourself enough time to cook safely.

PREPARATION

  • Wash 9 Seville oranges thoroughly and two lemons.
  • Peel the orange skin using a peeler.  Don’t peel too deeply, you do not want the white (pith) which tends to be bitter.  The orange peel will remain in the marmalade after cooking.
  • Cut apart, discarding any bad spots
  • Separate the innards and pith from the outermost orange peel.  Keep the innards and tie them into a cheesecloth bag.

OVERNIGHT SOAK

  • Pulse pips and guts in food processor
  • Place 2 C Pips, guts, seeds, membrane – innards into  4 C of water
  • Pulse peel in food processor – only briefly
  • Place 2 C peel into a second bowl containing 4 C of water

You should put the cut up and pulsed skin and innards into bowls covered with water overnight in the refrigerator.  This will soften them so that the pectin is more easily released.

FIRST BOIL (90 MINUTES)

  • Strain innards, pouring the soaking water into your stock pot
  • Put innards into a cheesecloth – a bouquet garni – and secure with a string, keeping the end available for easy removal.
  • Pour water and peel into your stock pot
  • Add 1 C orange juice into your stock pot
  • Bring up to boil, then reduce heat to simmer
  • Skim foam as necessary.  Stir with a WOODEN spoon.  Metal will react with the acids in the orange
  • Simmer for 90-120 minutes over low heat – this will release much of the pectin
    If the oranges have not been soaked for at least 8 hours, go ahead and simmer for 120 minutes.

The seeds contains the pectin, and will be discarded after about 90 minutes. The outer orange peel will become the meat of the marmalade. I prefer to dice half and mince half of the rind, so that you have a variety of sizes of orange rind in your marmalade.

Definition: bouquet garni – A bag (frequently in a cheesecloth) that is used for infusions, and removed later as the recipe progresses. CLICK HERE to read more.

NOTE: DO NOT ADD SUGAR YET.  If you add sugar too early, it will freeze the production of pectin, and your jam may not set properly, so don’t add it until after the 90 minute boil.

SECOND BOIL (HEAT TO 221º F – 105º C )

  • Remove pips and pith in the mesh bag at 208º. Use a tongs to squeeze the juices from the bag back into the pot. Discard the bag.
  • Increase heat and stir to dissolve. If sugar is added too soon, peel may become tough. Wait until temperature reads at least 210º
  • BRING HEAT UP TO 210º BEFORE ADDING SUGAR
  • 5 C granulated sugar
  • 1/4 C Karo Syrup
  • 2 TBL lemon juice
  • Add the Second Boil ingredients slowly, stirring continually
  • As soon as it starts boiling, stop stirring.  Stir very infrequently.
  • IMPORTANT NOTE:  Until most of the water boils away, the sugar may stay at 215º for about 20 minutes.  Once it hits 216º it will increase about one degree per five minutes.
  • Keep heating until the temperature reaches 221º This could take up to an hour. I’ve had success with 119º but only marginally.  Be patient and wait until it reaches full jell temperature.  A few minutes will make all the difference.  If possible, use a calibrated thermometer (or a scientific thermapen) to make sure your thermometer is not off by 2-3 degrees.
  • Meanwhile, sterilize canning jars. Details not included on this page.
  • When 221º is reached, remove the pot from the heat and let rest for 10 minutes.  Skim off any scum or foam.
  • Orange rind will rise to the top.  Stir the rind back into the mixture before canning.
  • Put into canning jars and cover with a lid put into hot water for at least 60 seconds.  When properly canned and cooled, this will last you for about a year.

NOTE:
Temperature will plateau at 215 for quite awhile – for as long as 20 minutes
After that, you will get 1º increase in temperature about every 5 minutes
Be patient.

MORE INFORMATION

Alternative Recipes

There are SWEET ORANGE marmalades which do not use as much sugar as this recipe. CLICK HERE for Alton Brown’s recipe for Sweet Orange Marmalade, or USE THIS LINK for Strawberry Marmalade.

A Word of Caution

A word about POT SIZE. The first time I made this I nearly boiled over. It was a constant battle between foam and the size of my pot. This will foam up about 400% of its size.  NO KIDDING.  Make sure you use a pot large enough, or you will end up with a huge dangerous mess.  This does not ALWAYS happen, but you can be prepared if it does.

I reuse my canning lids. If they fail to seal, I eat that jar first. Put an X on the failed lid so you don’t save it after the jar is empty. If they seal, they will generally not fail after cooling.  I prefer to use the small canning jars, because once exposed to light and air, the marmalade starts to lose its flavor.

The canned jars will last longer if you process them in a water bath for 10 minutes after putting into jars.

        1. Put marmalade into sterilized canning jars
        2. Soak lids about 60 seconds in boiling water
        3. Wipe rim clean and put lids on
        4. Tighten only finger tight
        5. Submerge in water (1″ over top) and process 10 minutes
        6. Cool (undisturbed) on the counter

What is shown in the photos are quantities to make two entire large batches of marmalade.

Optional Ingredients

Optional ingredients reserved for the very end:

Minced strawberries, blueberries, rhubarb, shredded carrot, or other contrast

Chemistry

If you do not use enough sugar, the liquid will be unable to reach 221º (as water only gets 212º) and it will NEVER set. Sugar can get up to 300º   If you try to decrease the calories, and use a marginal amount of sugar, you may heat it too long and you will get inverted sugar which has a longer shelf life, but is similar to high fructose corn syrup and is not as good for you as regular sugar.

Realistically, if you don’t have a thermometer, you can test the gel level but putting glass plates in the fridge, and then dripping jam onto the plate to see if it runs or just sits there.  CLICK HERE

  1. If desired, after the temperature has reached 221º you can mix in some contrast fruit such as minced strawberry – but something that is ready to eat just as it is. Don’t use anything that needs cooking or softening.
  2. Pour into canning jars. If you completely can the marmalade, it should last for up to a year. Otherwise, refrigerate it for up to six months. I personally just put them on my shelf for up to a year, but if you do this, proceed at your own risk.

If your marmalade does not set, it is still good for steamed marmalade pudding, marmalade tarts, marmalade ice cream and much more. CLICK HERE if your marmalade did not set properly.
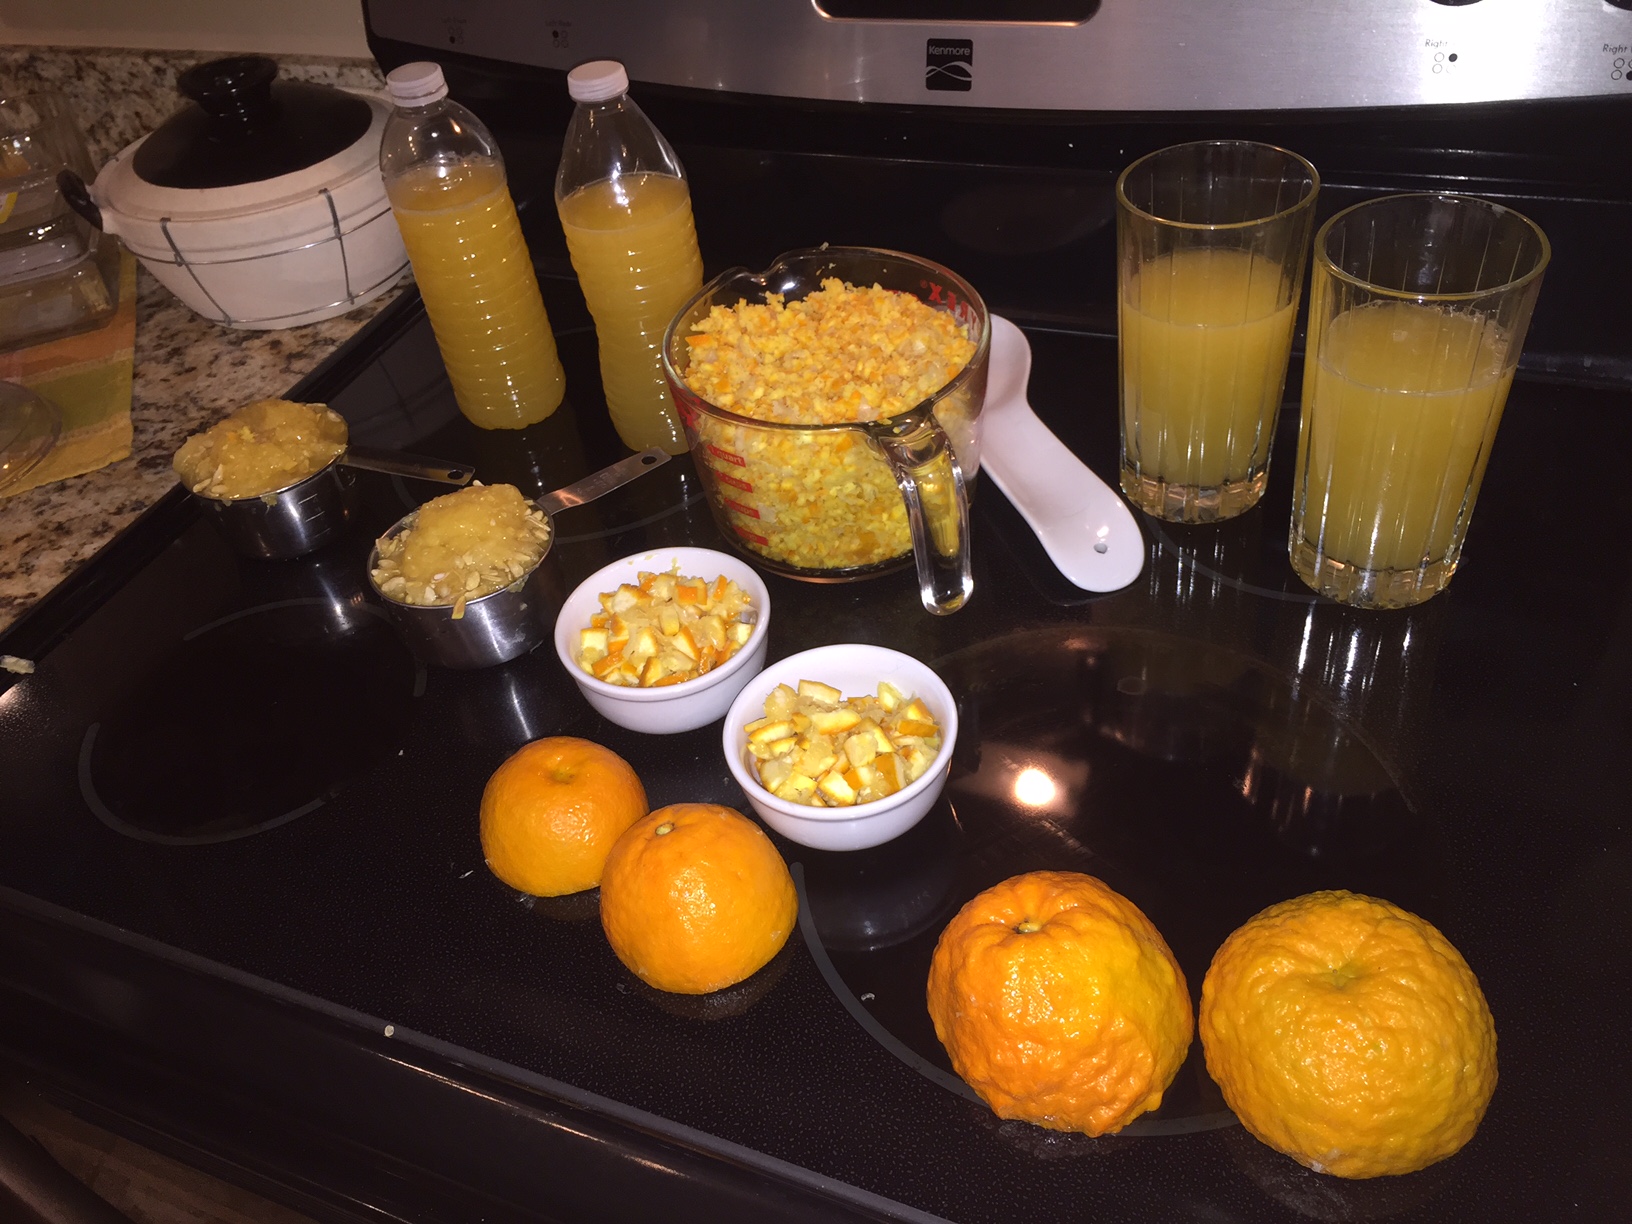
Bottom right: Some of your oranges may be older and nubbly. You will need juice from many oranges, but the peel that you want to use is from about eight oranges that have fairly smooth skin.

Top right: To get the amount of pips and pith that you need for the larger sized recipe, you will have to juice a lot more than eight, but just throw the extras into the trash.
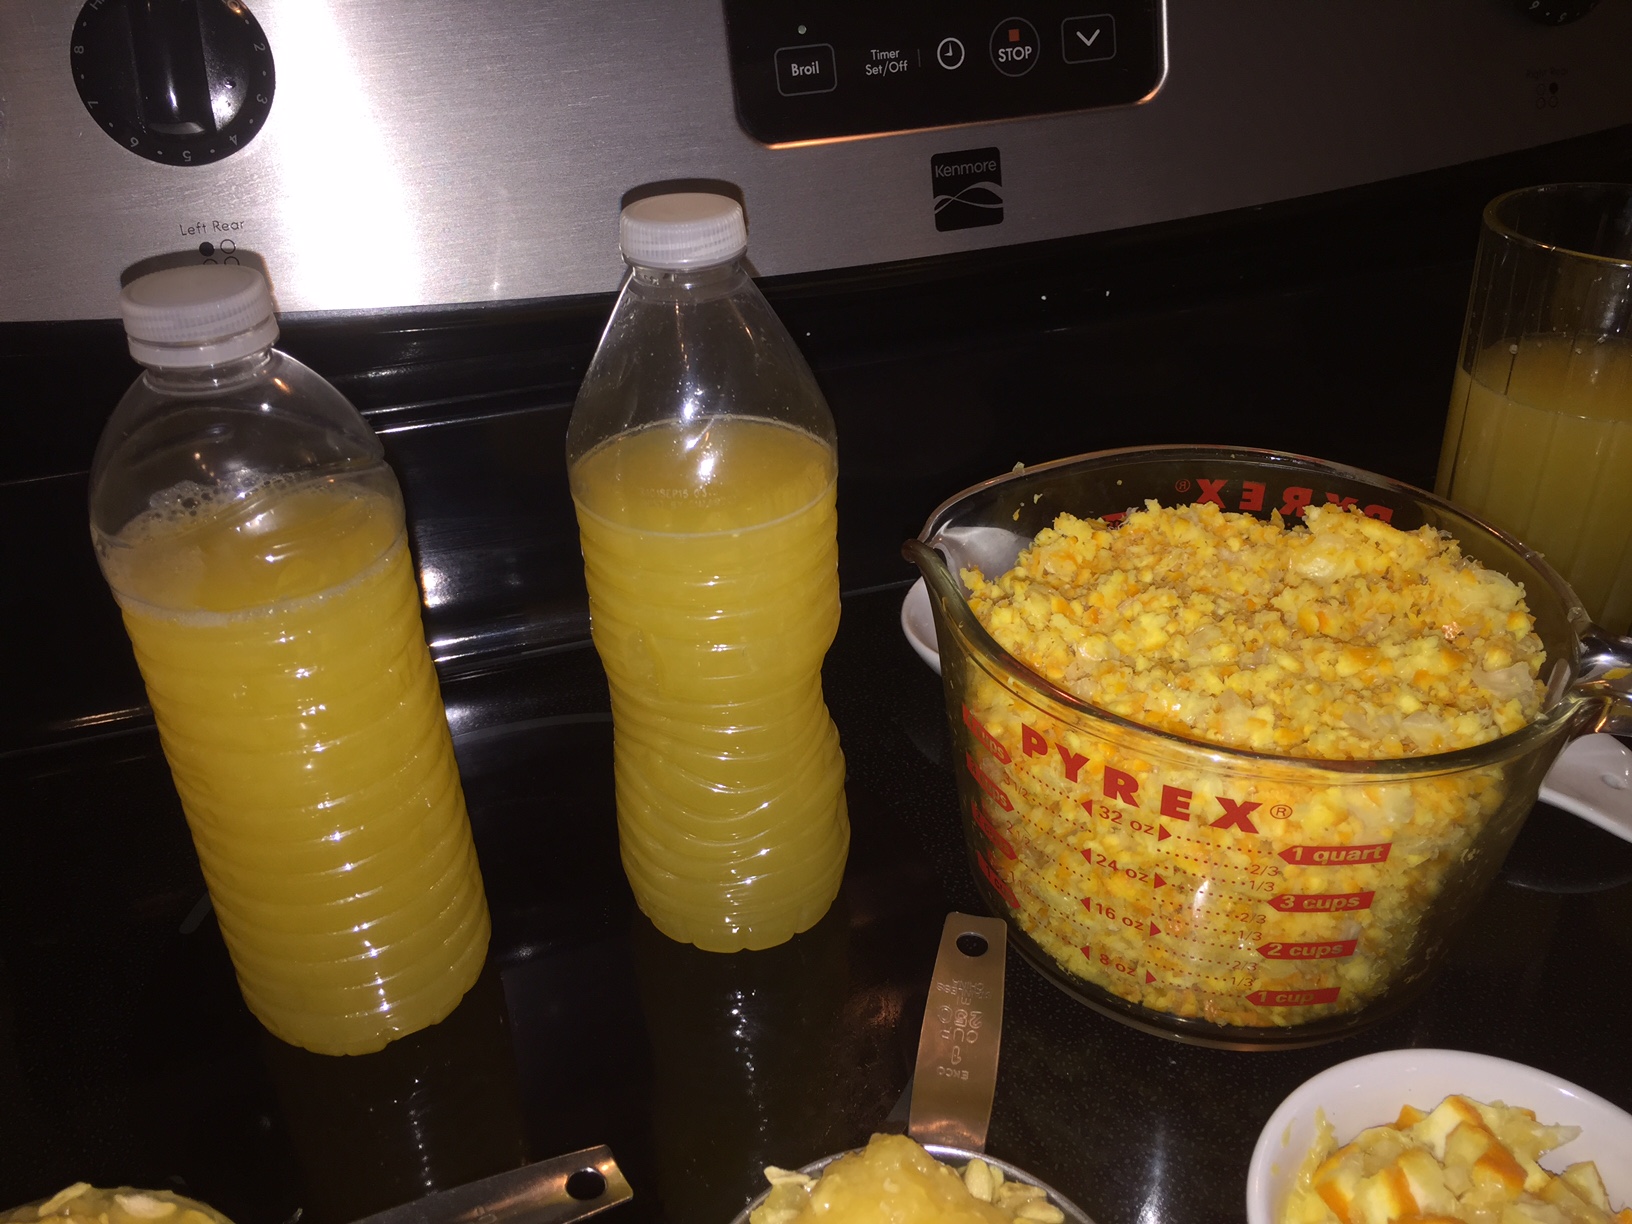

The ingredients freeze really well. Hot pack canning is another good option. If you freeze, be sure to leave an inch of headroom in your water bottles.

Another photo

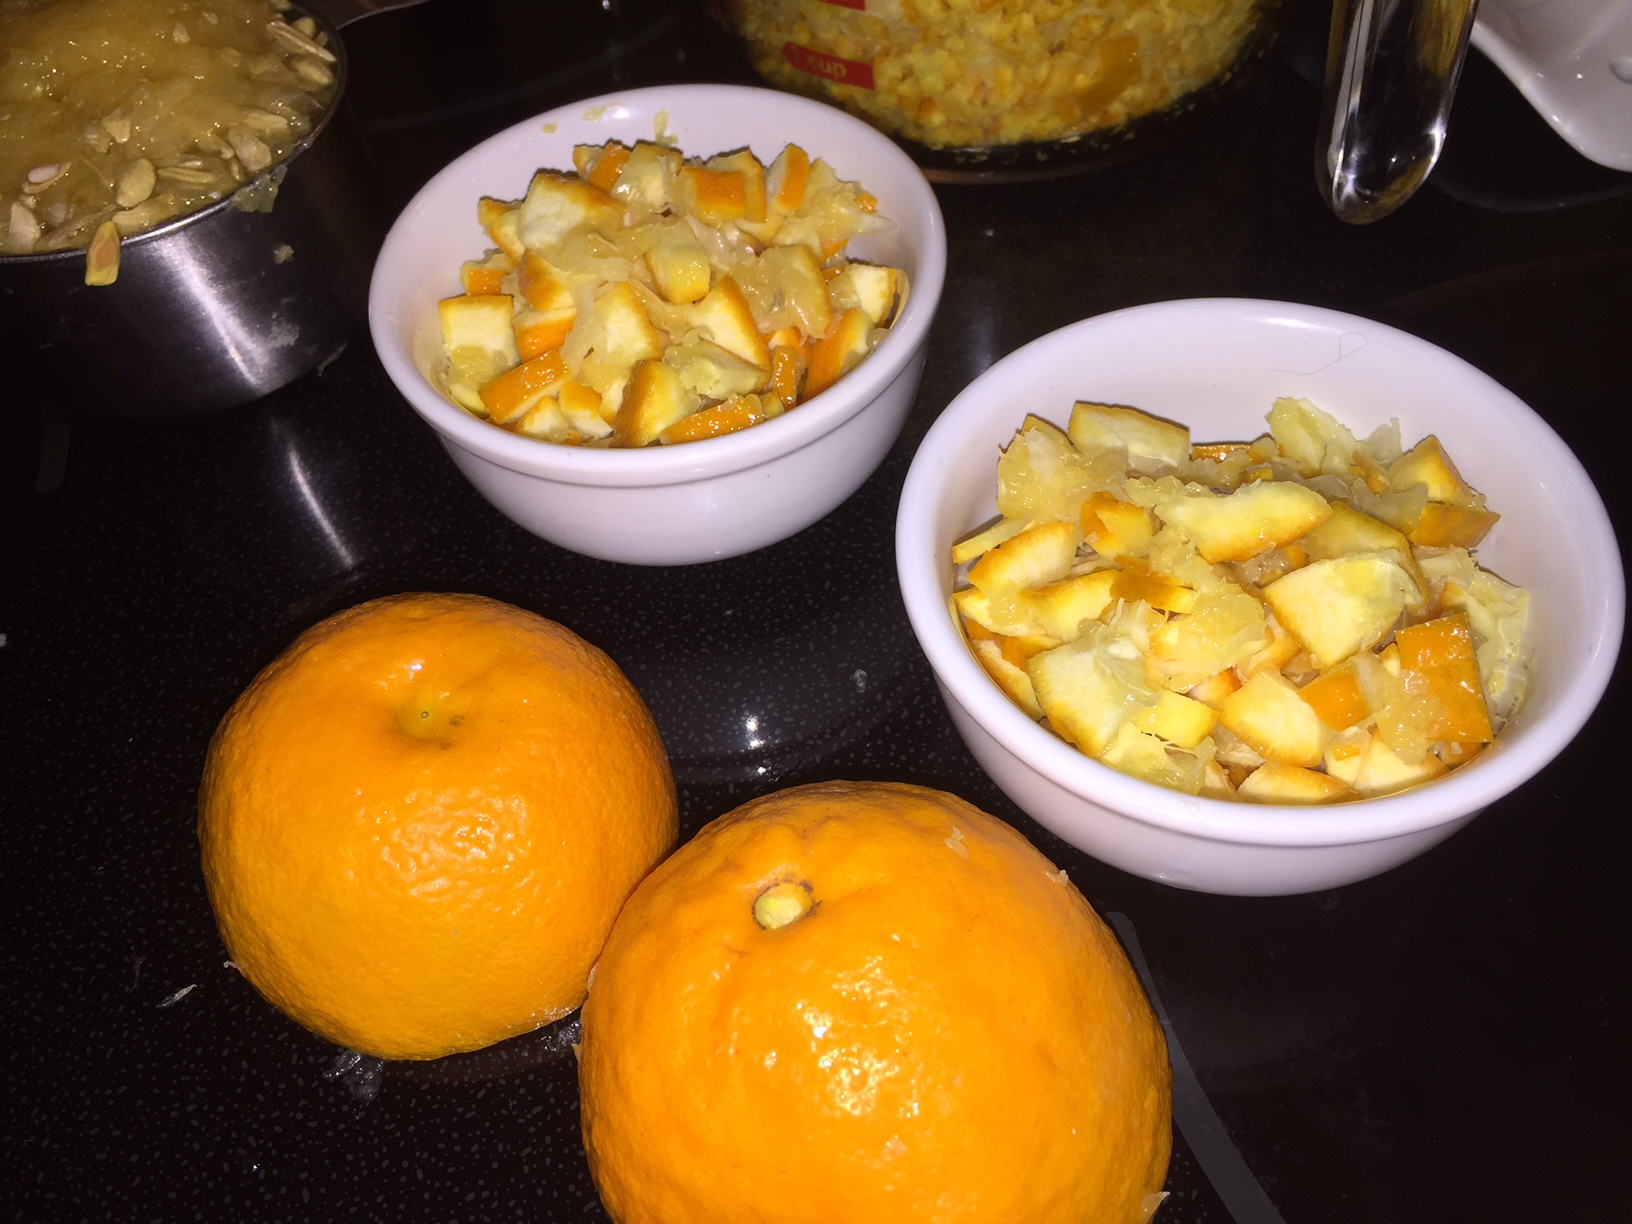
This photo gives you a good close up of the smoother skinned oranges and the older nubbly ones. The juice from the older oranges is perfectly usable, but the skin will be a bit more bitter than the younger oranges, so get rid of them.

I prefer just a few larger dices of orange, but most of the skin that I use is minced in a food processor.

Another good way to do it is with a zester. It takes more oranges, but you can leave the white pith behind, which actually gives you a better end product.

( Previously called 903 Sour Orange Marmalade)
Gravy Recipes

Gravy is generally a 4-4-2 recipe (4 TBL flour, 4 TBL butter, 2 C milk) Use this as your base and then experiment from here. Just remember to whisk almost continually.

Grandpa’s Pan Gravy

– 2 tablespoons butter
– 2 tablespoons flour
– 1 TBL EVOO
– 1 C beef stock
– 1 tsp thyme
– 2 TBL white wine

1. Combine and brown in skillet making a roux
2. In a separate bowl, mix 1 TBL corn starch in with 1 C beef stock
3. Add beef stock to your roux and whisk together
4. Add black pepper
5. As it thickens, add 1 tsp Dijon mustard
6. Strain if necessary

For white gravy, substitute buttermilk for the beef stock


Grandpa’s Sausage Gravy

1. In a separate pan brown pieces of sausage or pork
2. Add chopped bell pepper, celery, and onion to taste
3. Add crushed garlic
4. Add your 1 C beef stock and 1 bay leaf
5. Simmer while you do the next steps

– 2 tablespoons butter
– 2 tablespoons flour
– 1 TBL EVOO

6. Combine and brown in skillet making a roux
7. In a separate bowl, mix 1 TBL corn starch in with 2 TBL water
8. Add beef stock to your roux and whisk together
9. Add black pepper
10. As it thickens, add 1 tsp Dijon mustard
11. Strain if necessary


Easy Gravy

Ingredients
3/4 CU vegetable, safflower, or sunflower oil (not olive)
1 CU flour

Instructions
1. Combine in heavy pan or skillet and whisk together
2. Heat SLOWLY over low heat.
3. Bring to a near boil.
4. Stir constantly with wooden spoon (not metal)
5. Heat until darkened – approx 20 or more minutes
6. As it thickens, add 1 tsp Dijon mustard
7. Strain if necessary


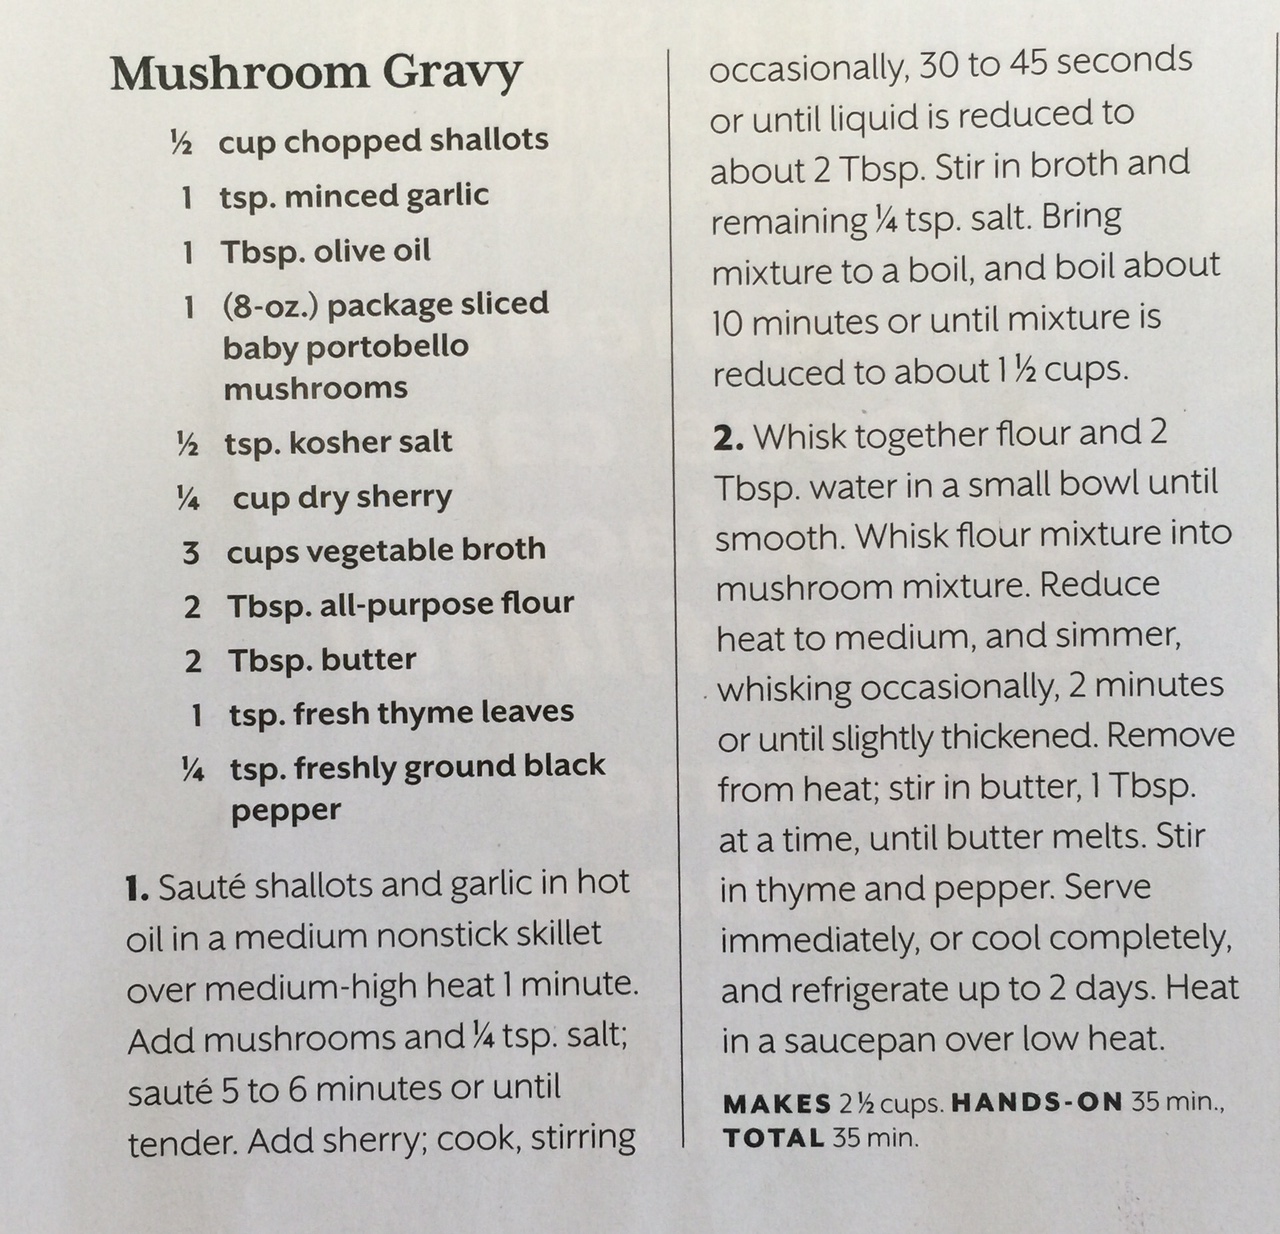
Mushroom Gravy

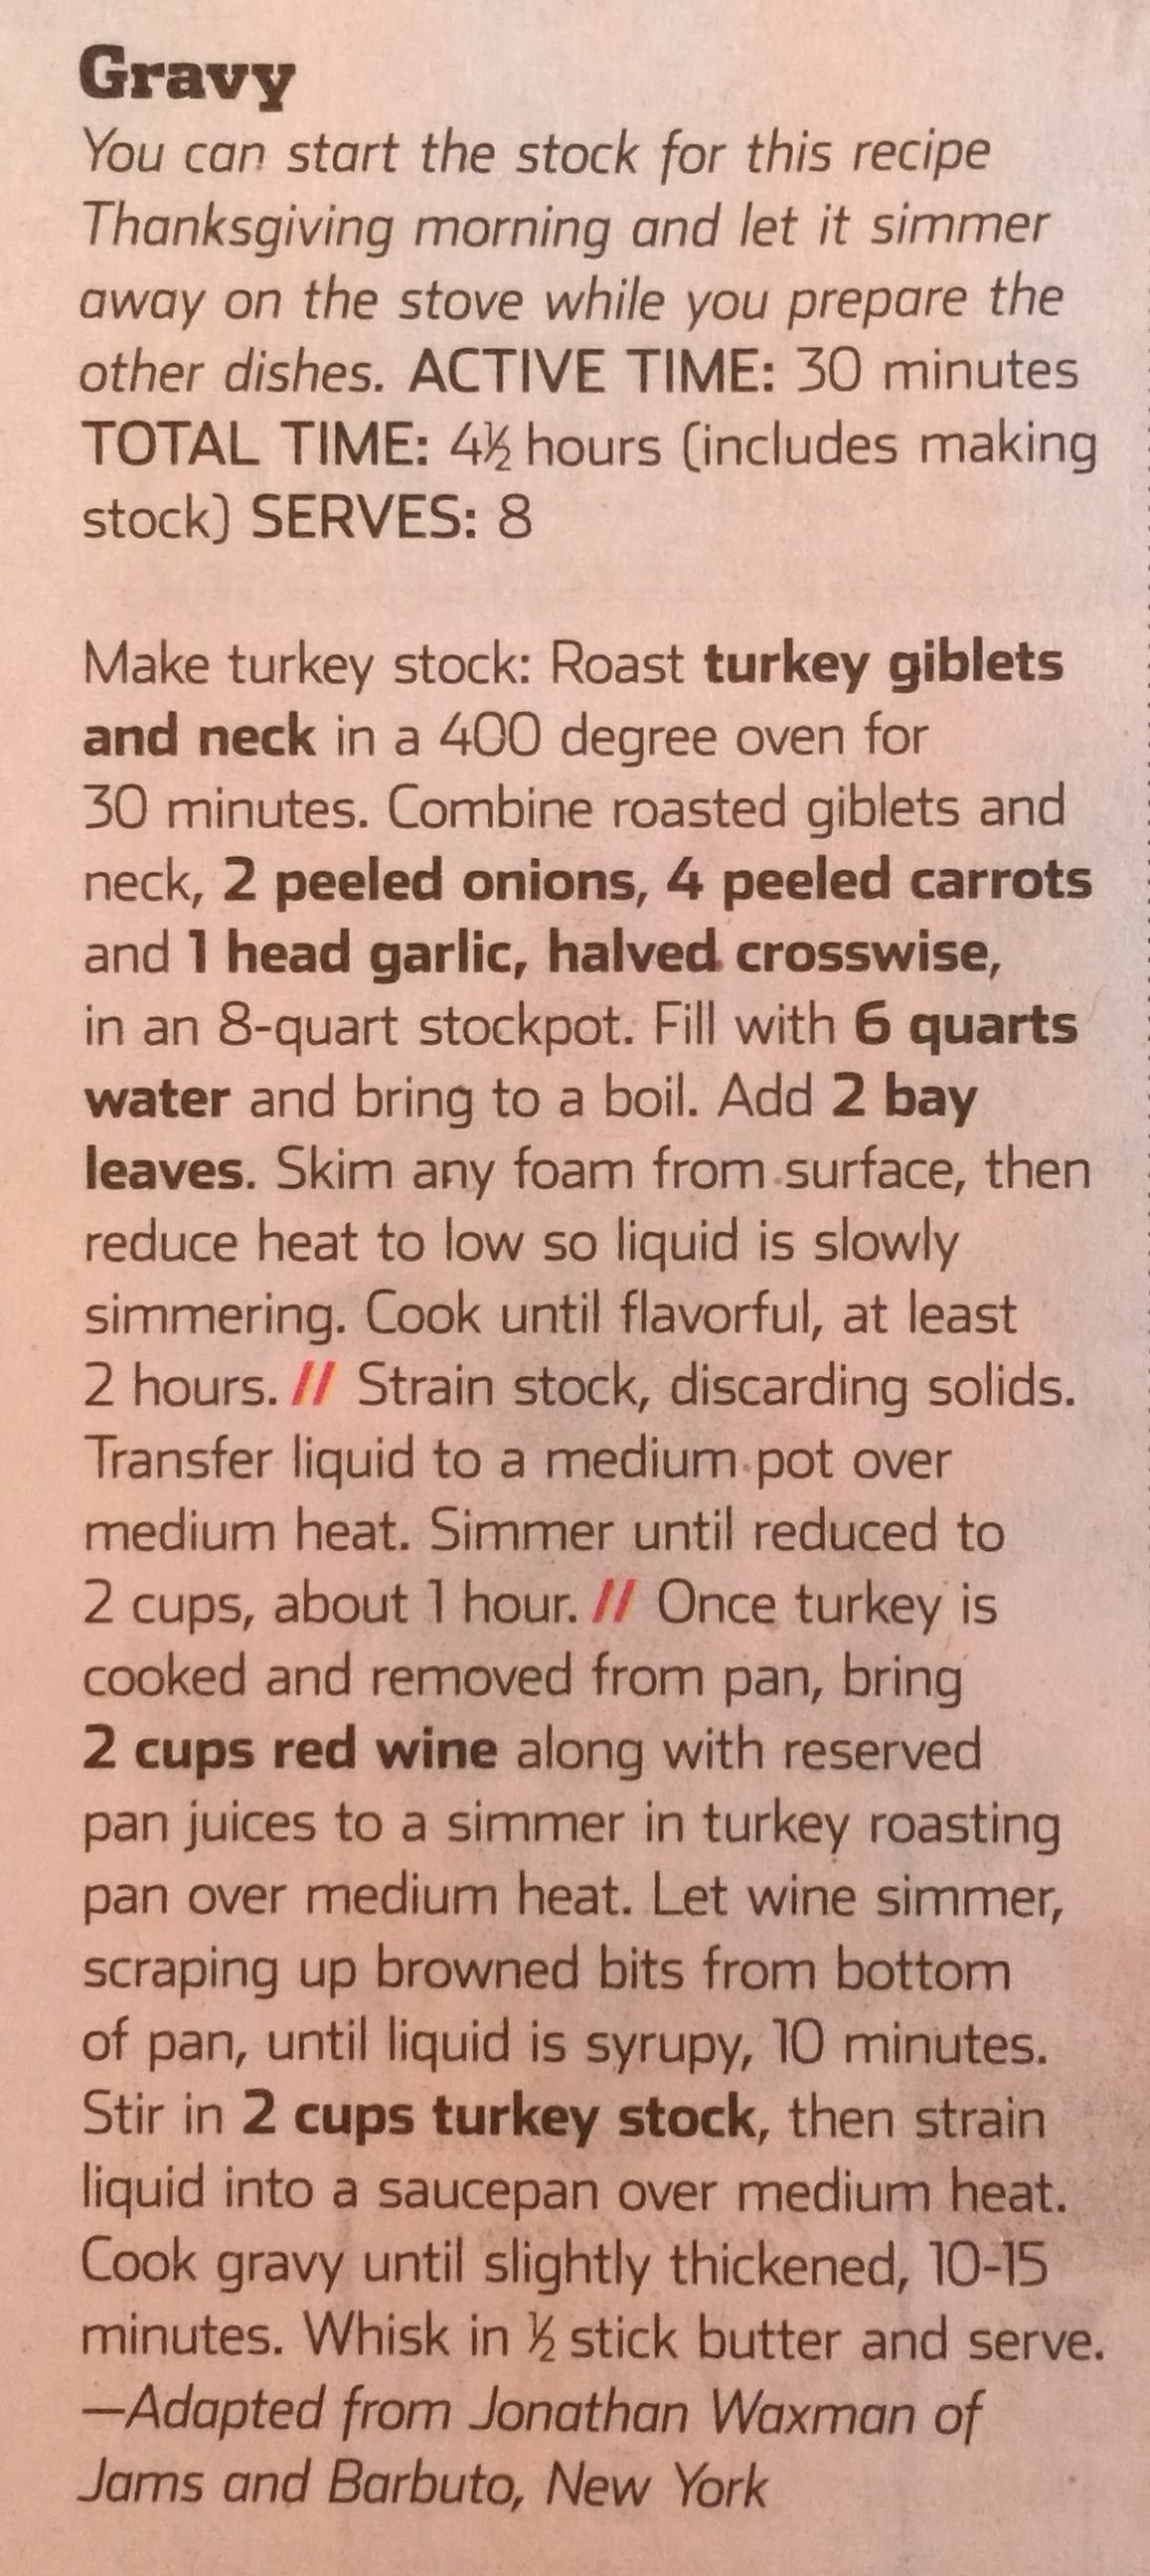
Basic Turkey Gravy

Gravy

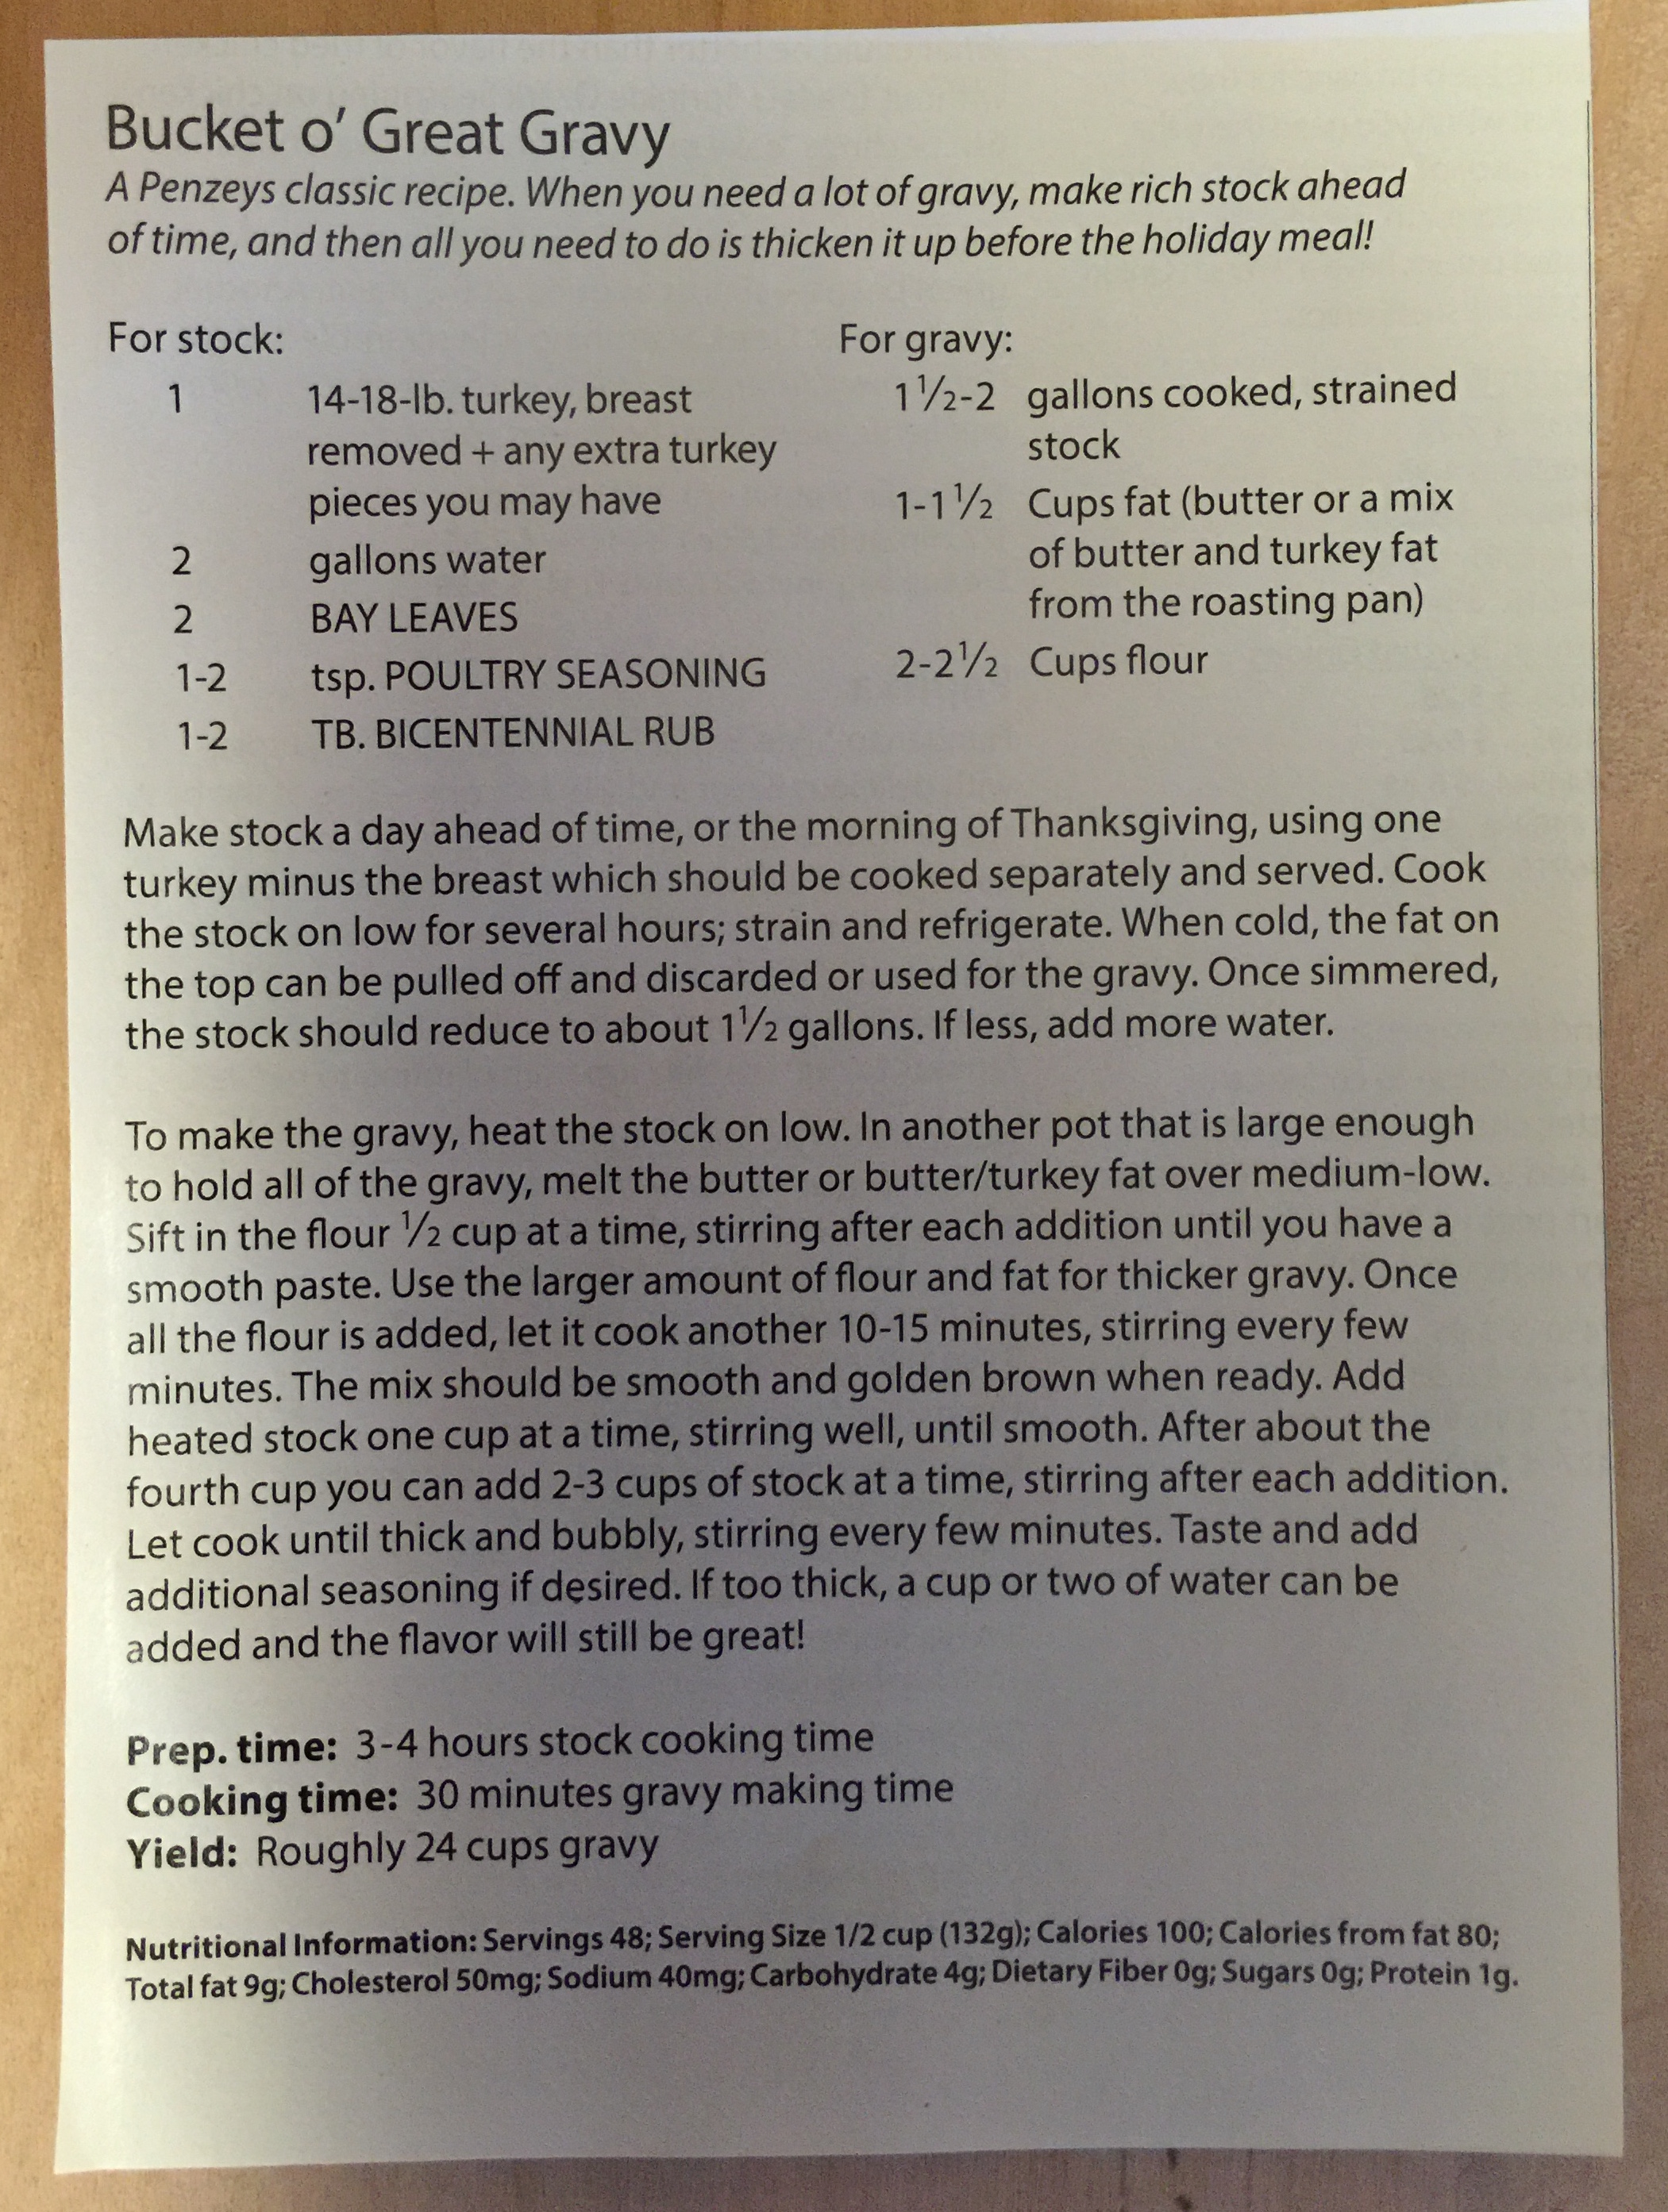
Bucket O’ Gravy

2015-12-31 17.27.20


Hot Dog Toppings

For an interesting twist on standard hot dogs, wrap the dog in a piece of thin bacon. Grill as always.

Serve on a bocadillo, boillito, or telero with the edges cut and then grilled.

2015-12-31 17.13.26

Other topping combinations:

  • Refried Beans
  • Mayo, salt, pepper, lime, choloula
  • Red onion
  • Avocado, cilantro, jalapeño

Hot dog measuring: 7 to 1 is 7 hot dogs her pound. 10 to 1 is ten dogs to a pound. 2 to 1 dogs are HUGE half-pound hot dogs.


Bolognese Marinara Sauce ~~ 5


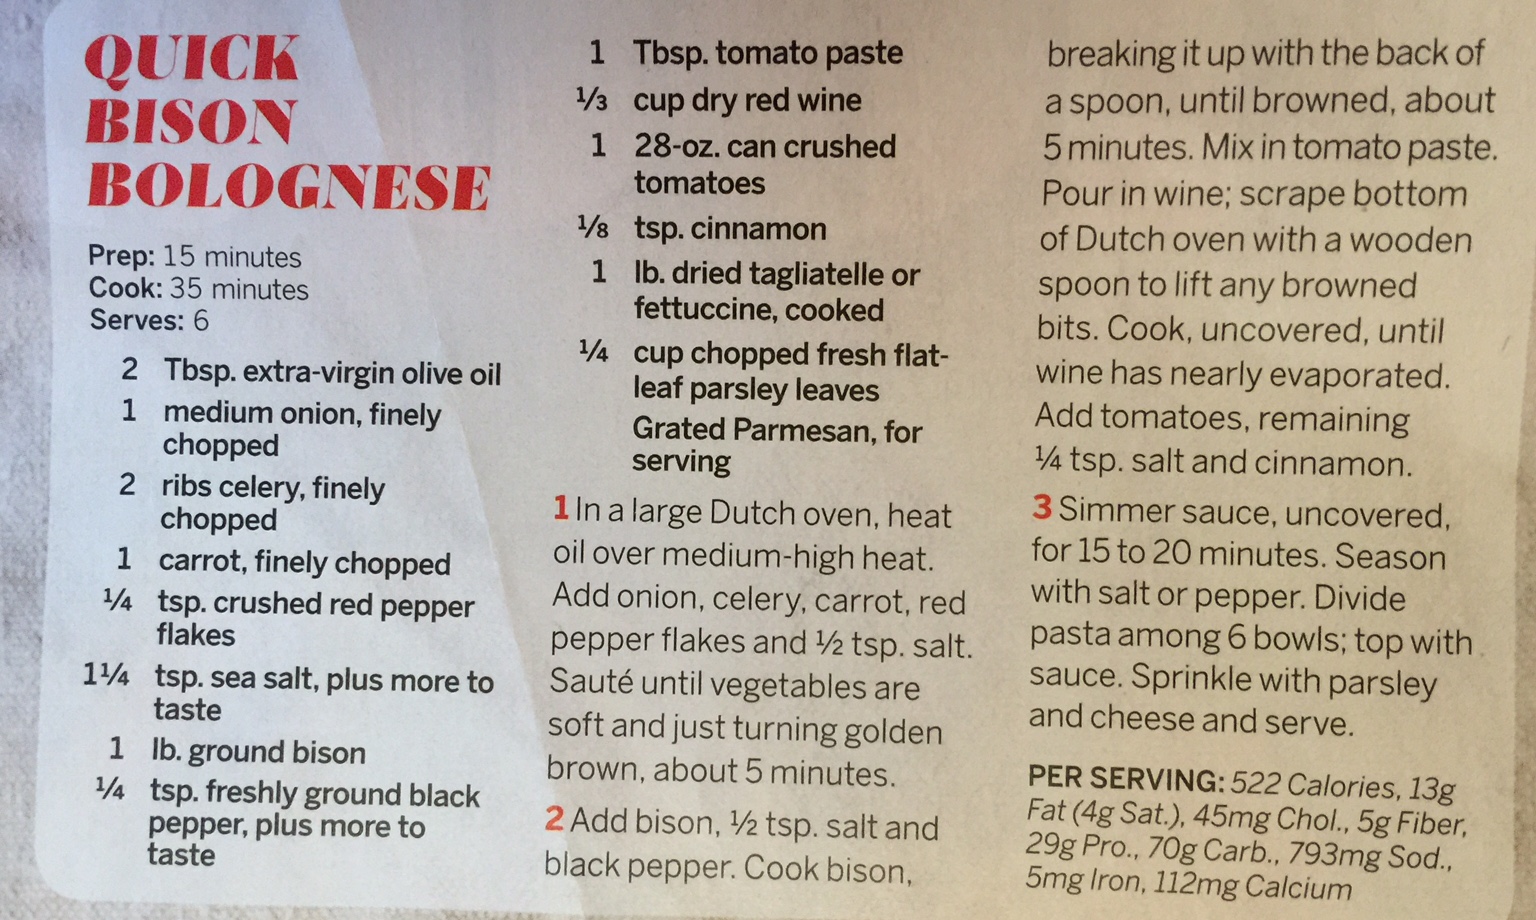
Quick Bison Bolognese


This recipe says to use bison, but I prefer half ground pork and half 80/20 ground beef.


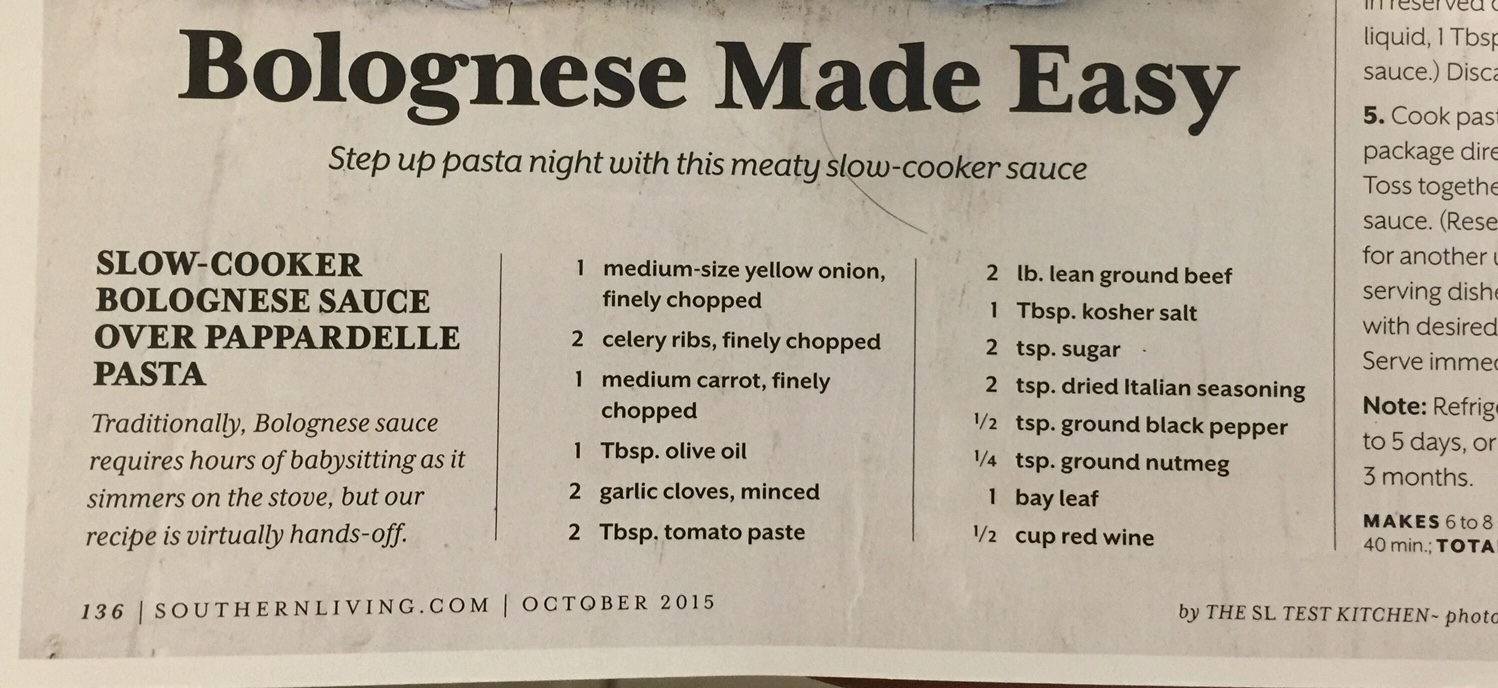
Bolognese Made Easy

CLICK EITHER IMAGE FOR AN ENLARGEMENT


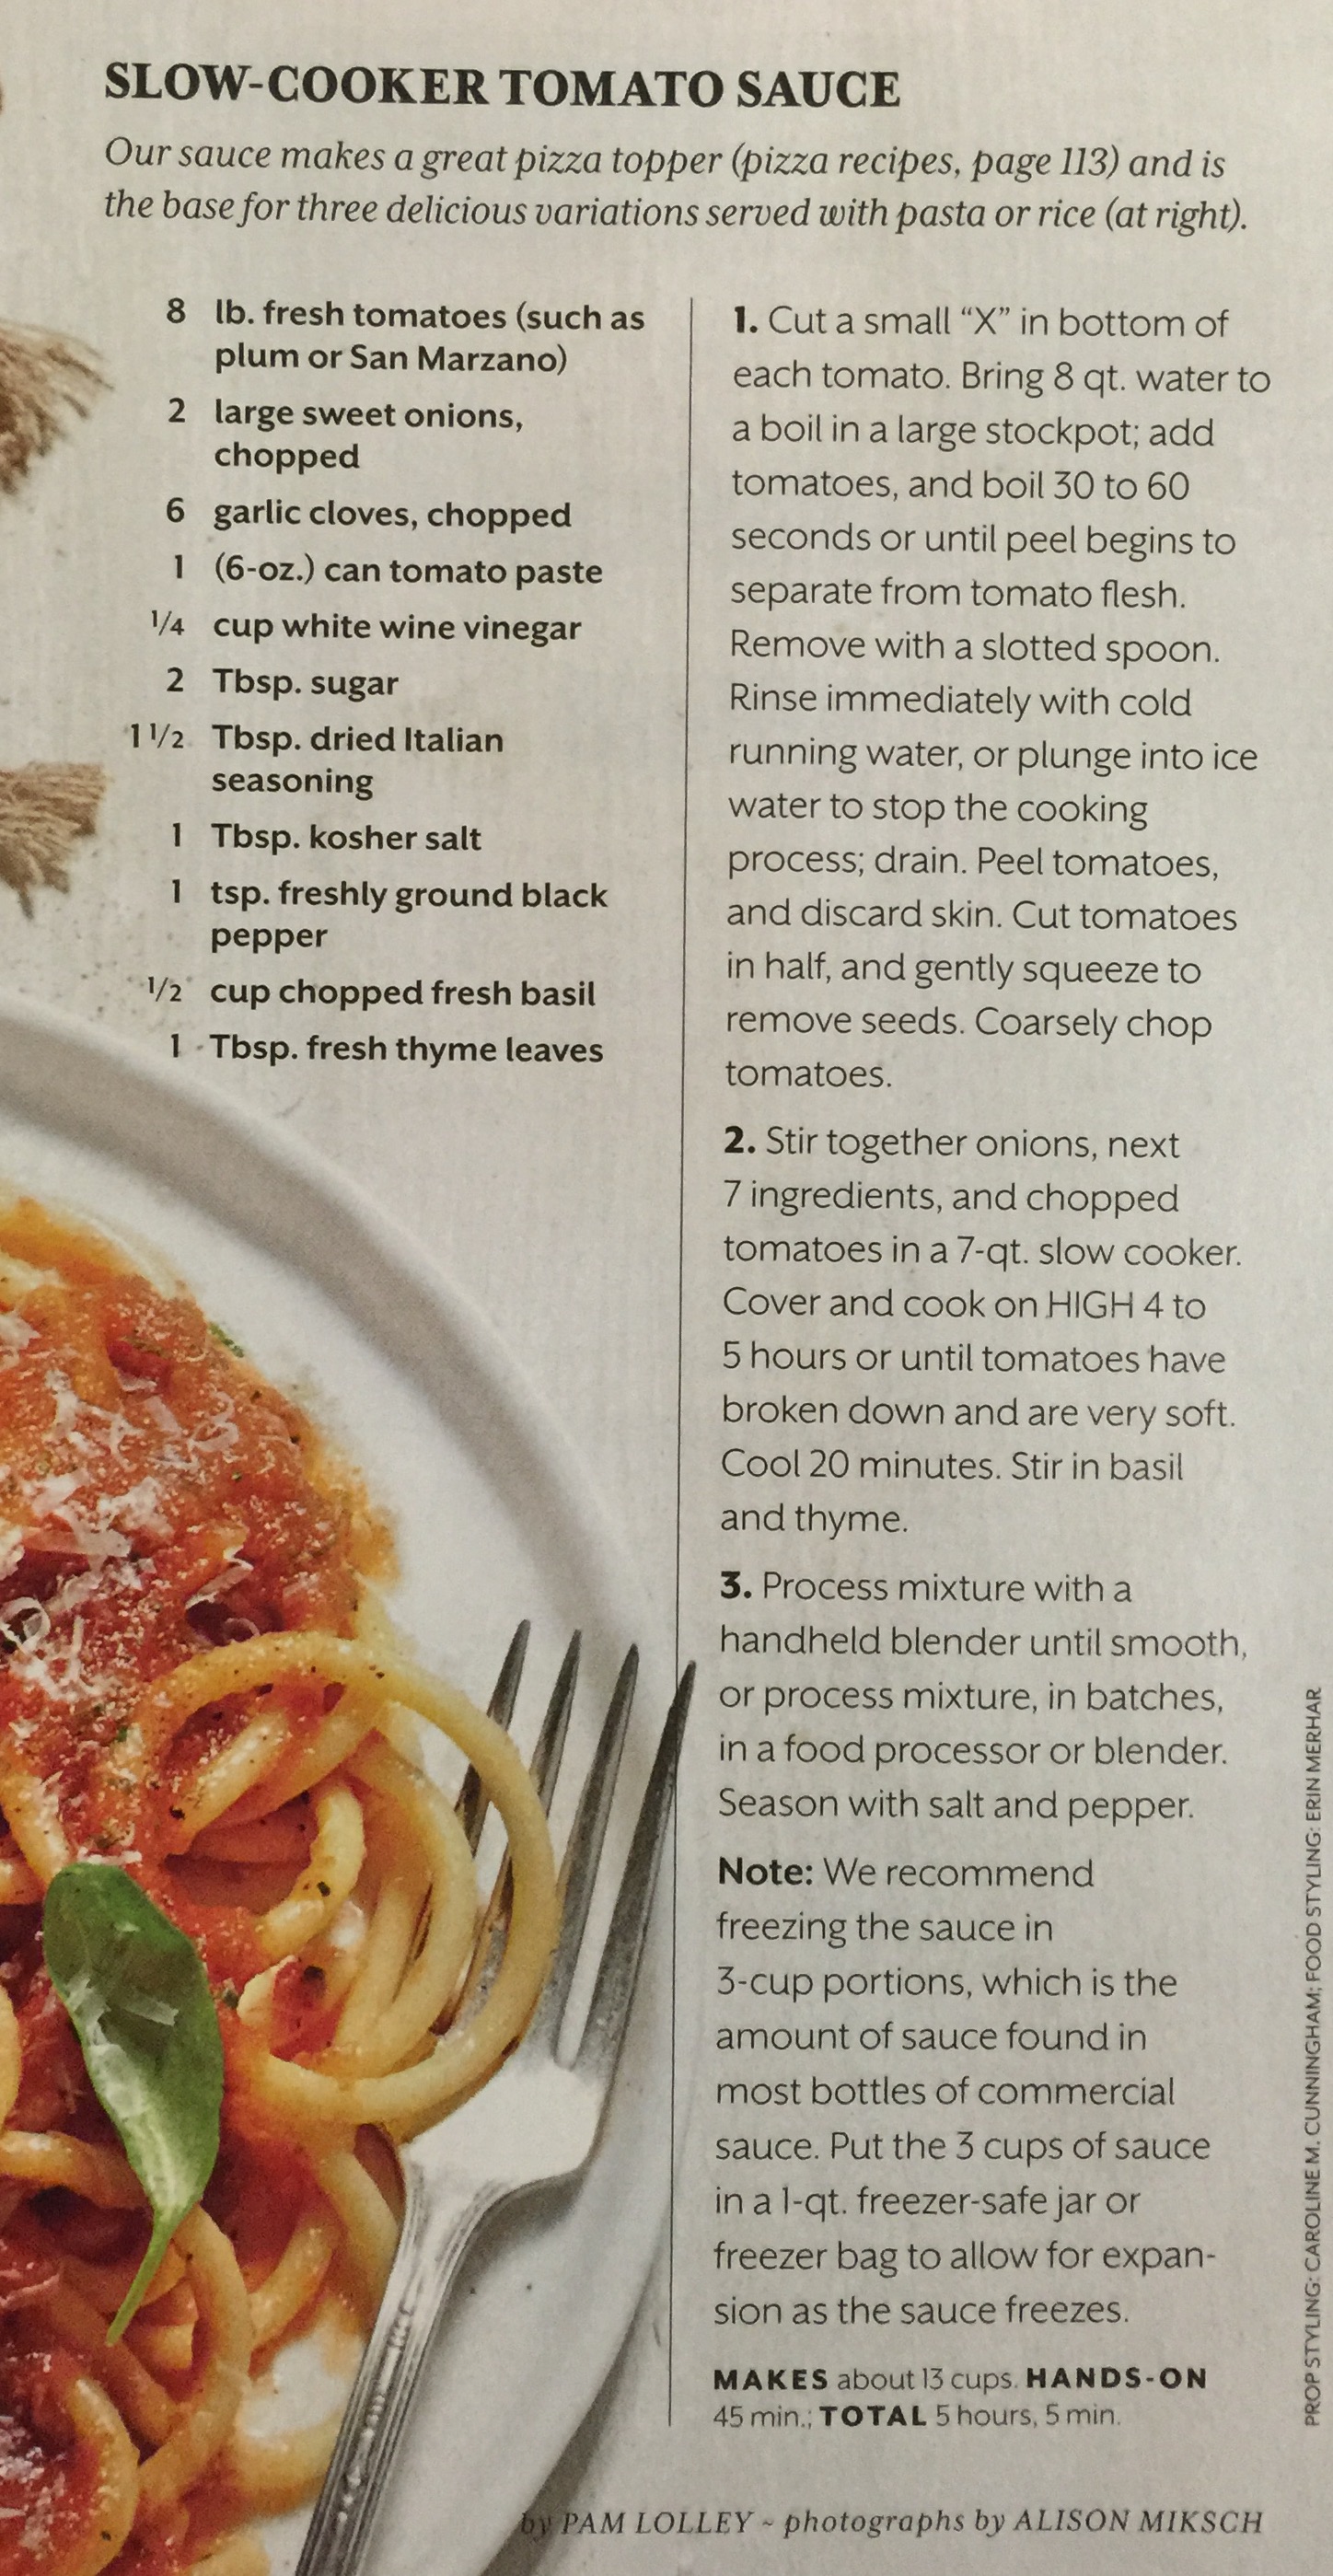
Basic Bolognese


CLICK IMAGE FOR AN ENLARGED AND CLEARER IMAGE.


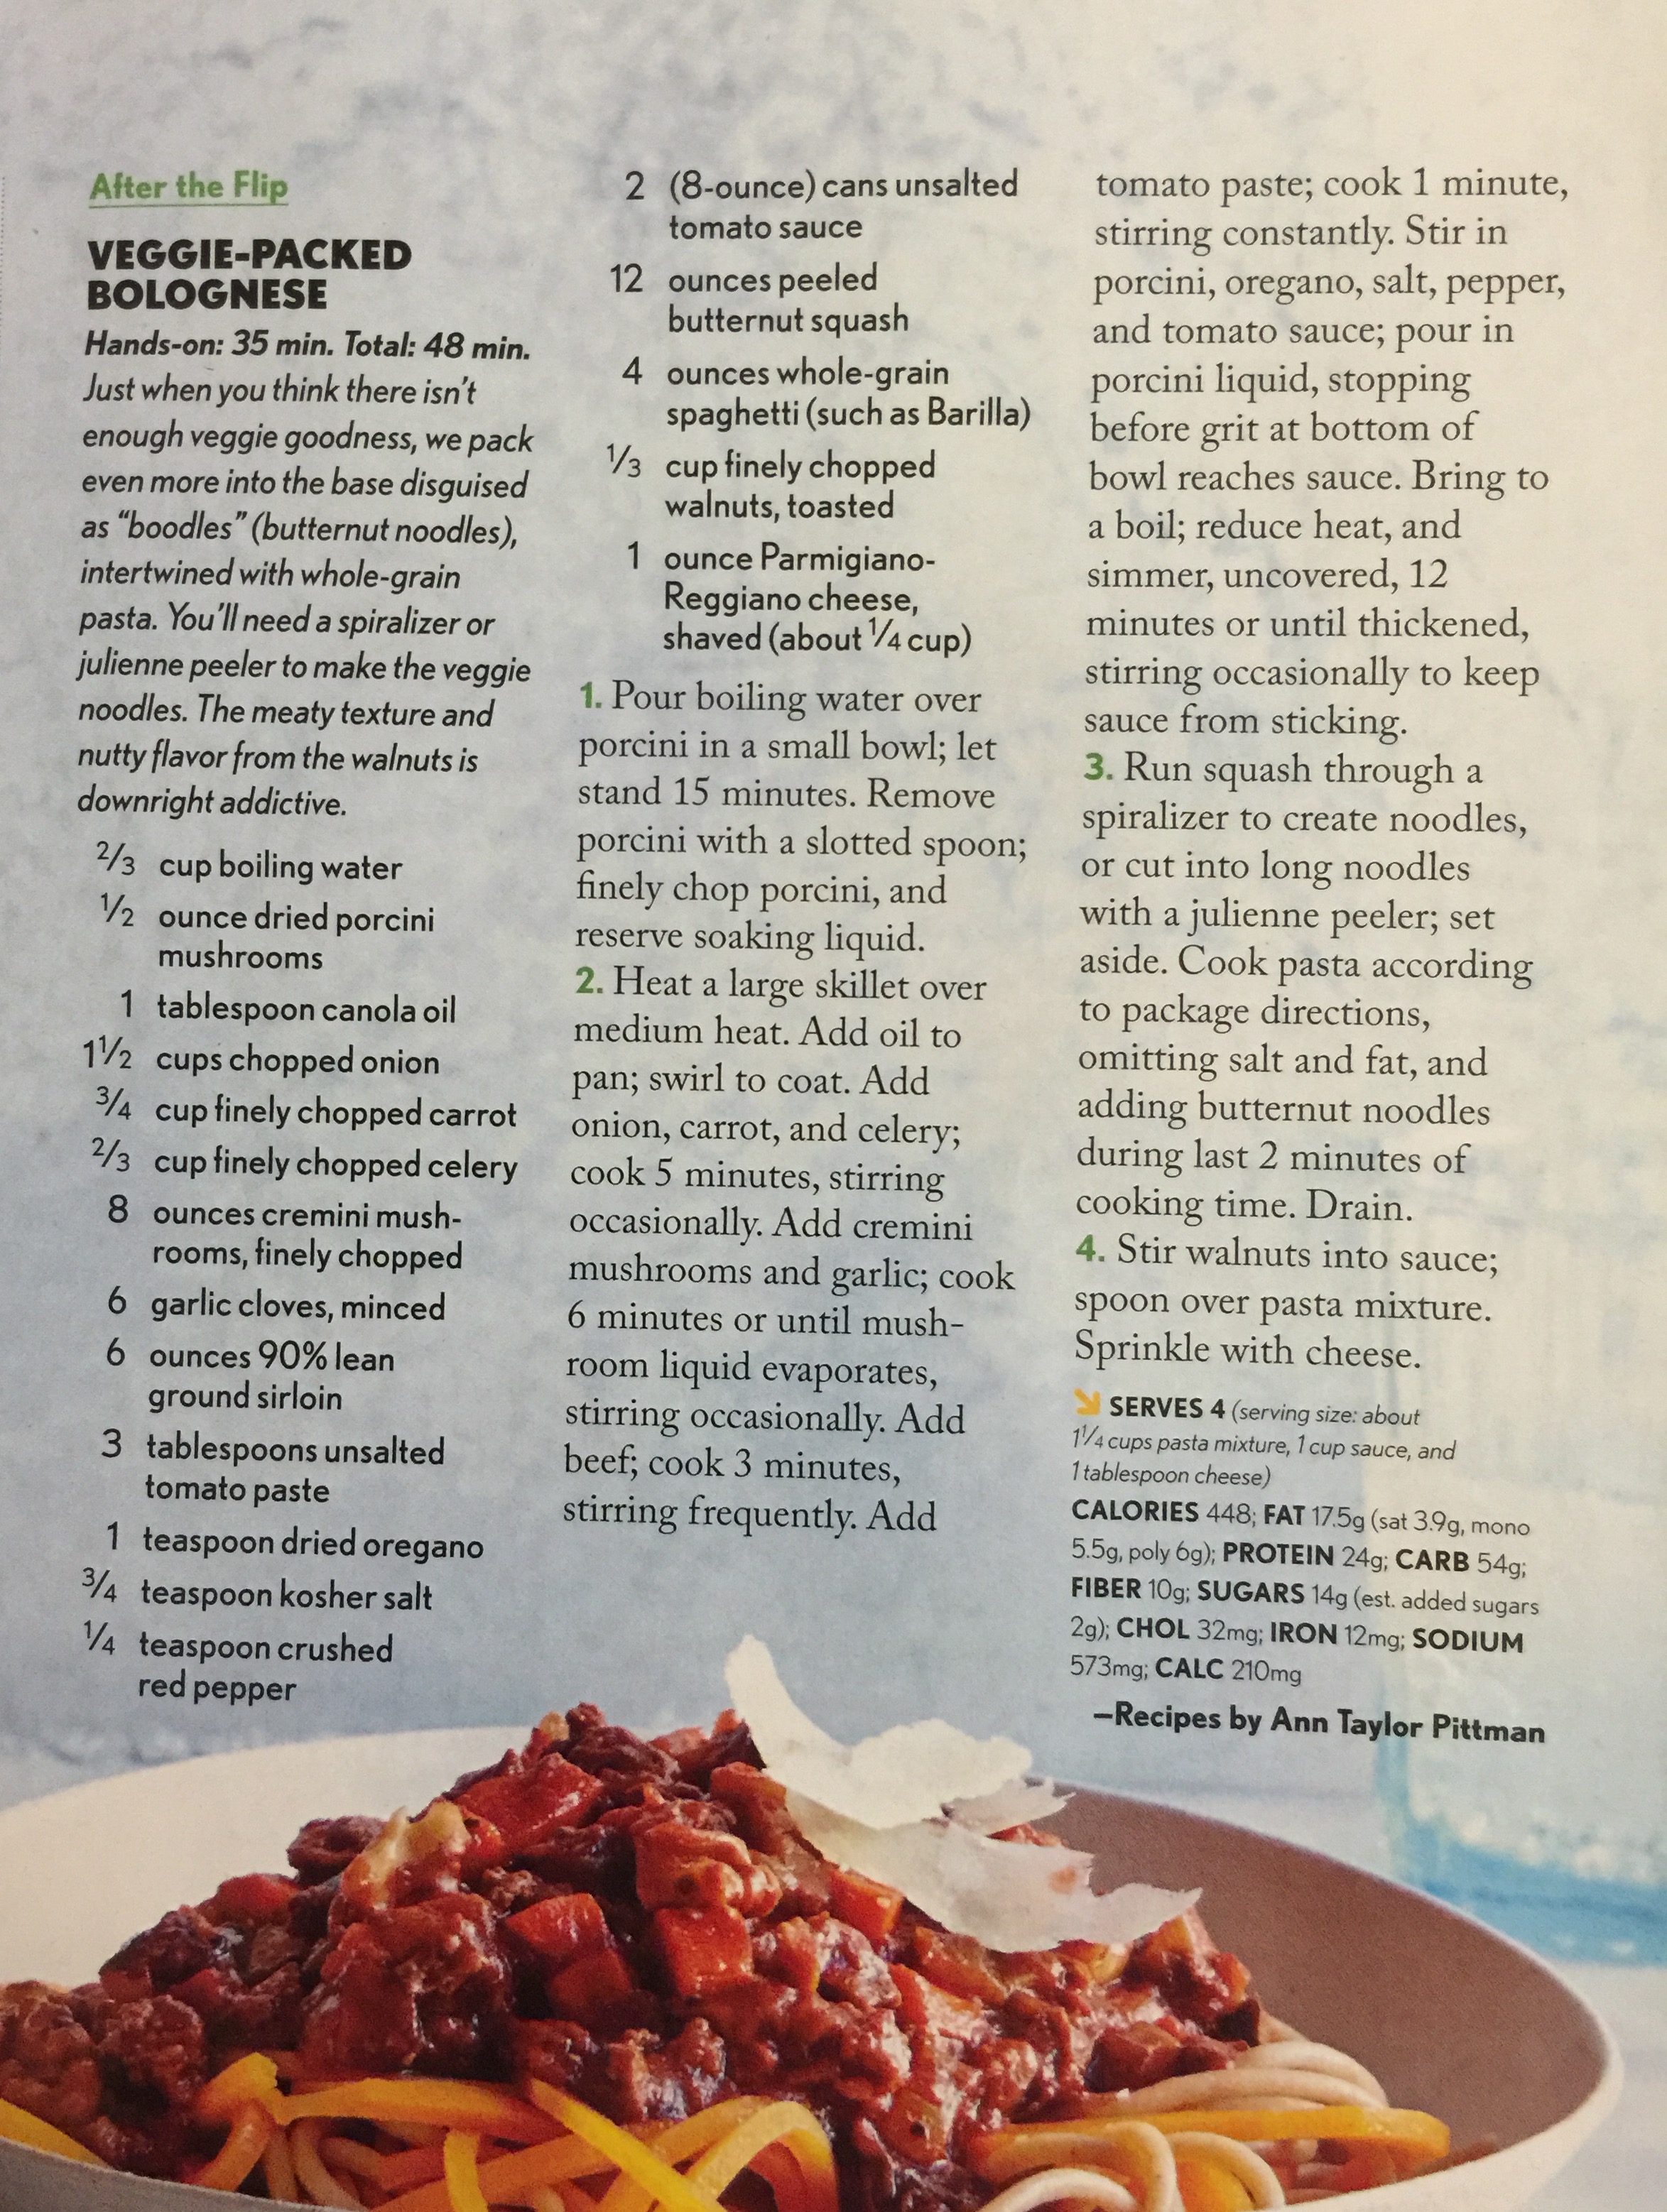
Veggie Packed Bolognese


Grandpa’s Bolognese Sauce

  1. Heat 2 TBL EVOO in baking pot
  2. Add 1 grated onion
  3. … Salt, Bay leaves
  4. … Celery and julienne strips of carrots
  5. … Mix 1 LB your choice of raw ground meat with 1 cup white wine
  6. Add ground meat into pot
  7. Break it up, season and stir occasionally
  8. And a pinch of cinnamon
  9. After meat has browned add one large can crushed tomatoes
  10. Add equal parts tomato sauce and water to make it as soupy as you prefer
  11. Let simmer 30 minutes
  12. Cook fettuccine
  13. Strain lightly and put back into cooking pan
  14. Put into tablespoons butter, do not stir yet
  15. Put in as much sauce as you like
  16. Mix all together
  17. Place up and top with grated Parmesan cheese

Grandpa’s Arghhhh Powder

This is something that I like to use for pizza toppings and to add an extra bit of heat to hot wings. It has the heat of crushed red pepper, but doesn’t get stuck in your teeth and gums. Just a bit of salt enhances the flavor too.  This is also good for meat seasoning.

INGREDIENTS

  • 1/2 C ground cayenne pepper
  • 1/2 C ground red pepper
  • 1/4 C sumac
  • 1/2 C salt (fine or course)
  • 2 TBL celery salt
  • 2 TBL garlic powder
  • 2 TBL onion powder
  • 2 TBL garlic powder
  • 1 TBL black pepper
  • 1 TBL cumin

Mix all of the above together well and store in a sprinkle jar.


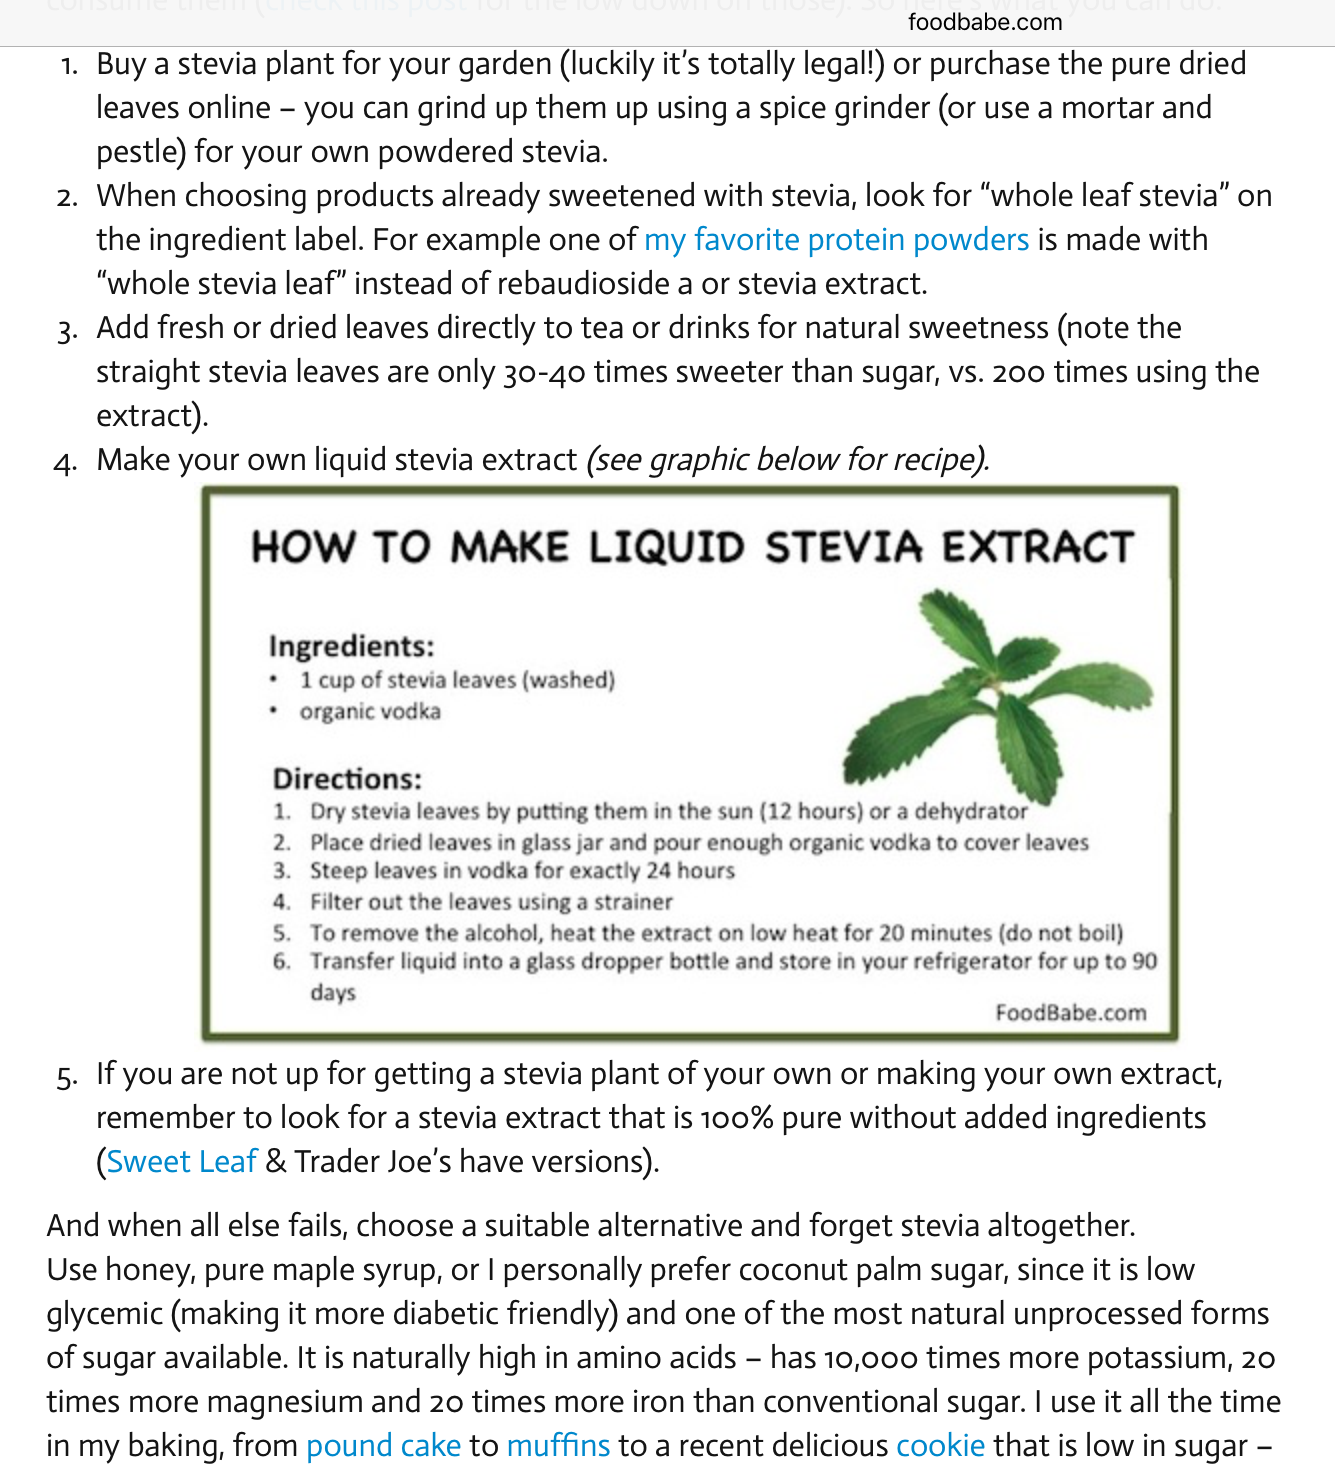
Make your own Stevia

From the FoodBabe.com –

Stevia is a sweetener made from a plant, so theoretically it should not be bad for you, but keep in mind that arsenic is made from apple seeds. Also, I would not want to eat poison ivy or hemlock, which are also plants, but alas I digress. The FDA has deemed stevia (after my lobbying) an acceptable artificial sweetener. That being said, I’ve decided to use it for myself. I eat much of my own food, and the result is I am starting to swell up like a tick. Yech! I need to lose weight. I bought some from Amazon.com to give it a try. After that is gone, perhaps I will try this method. Meanwhile, if you want to read more about stevia, you can read all about it on Wikipedia.

2015-11-20 08.41.01

HTML Snippets Powered By : XYZScripts.com