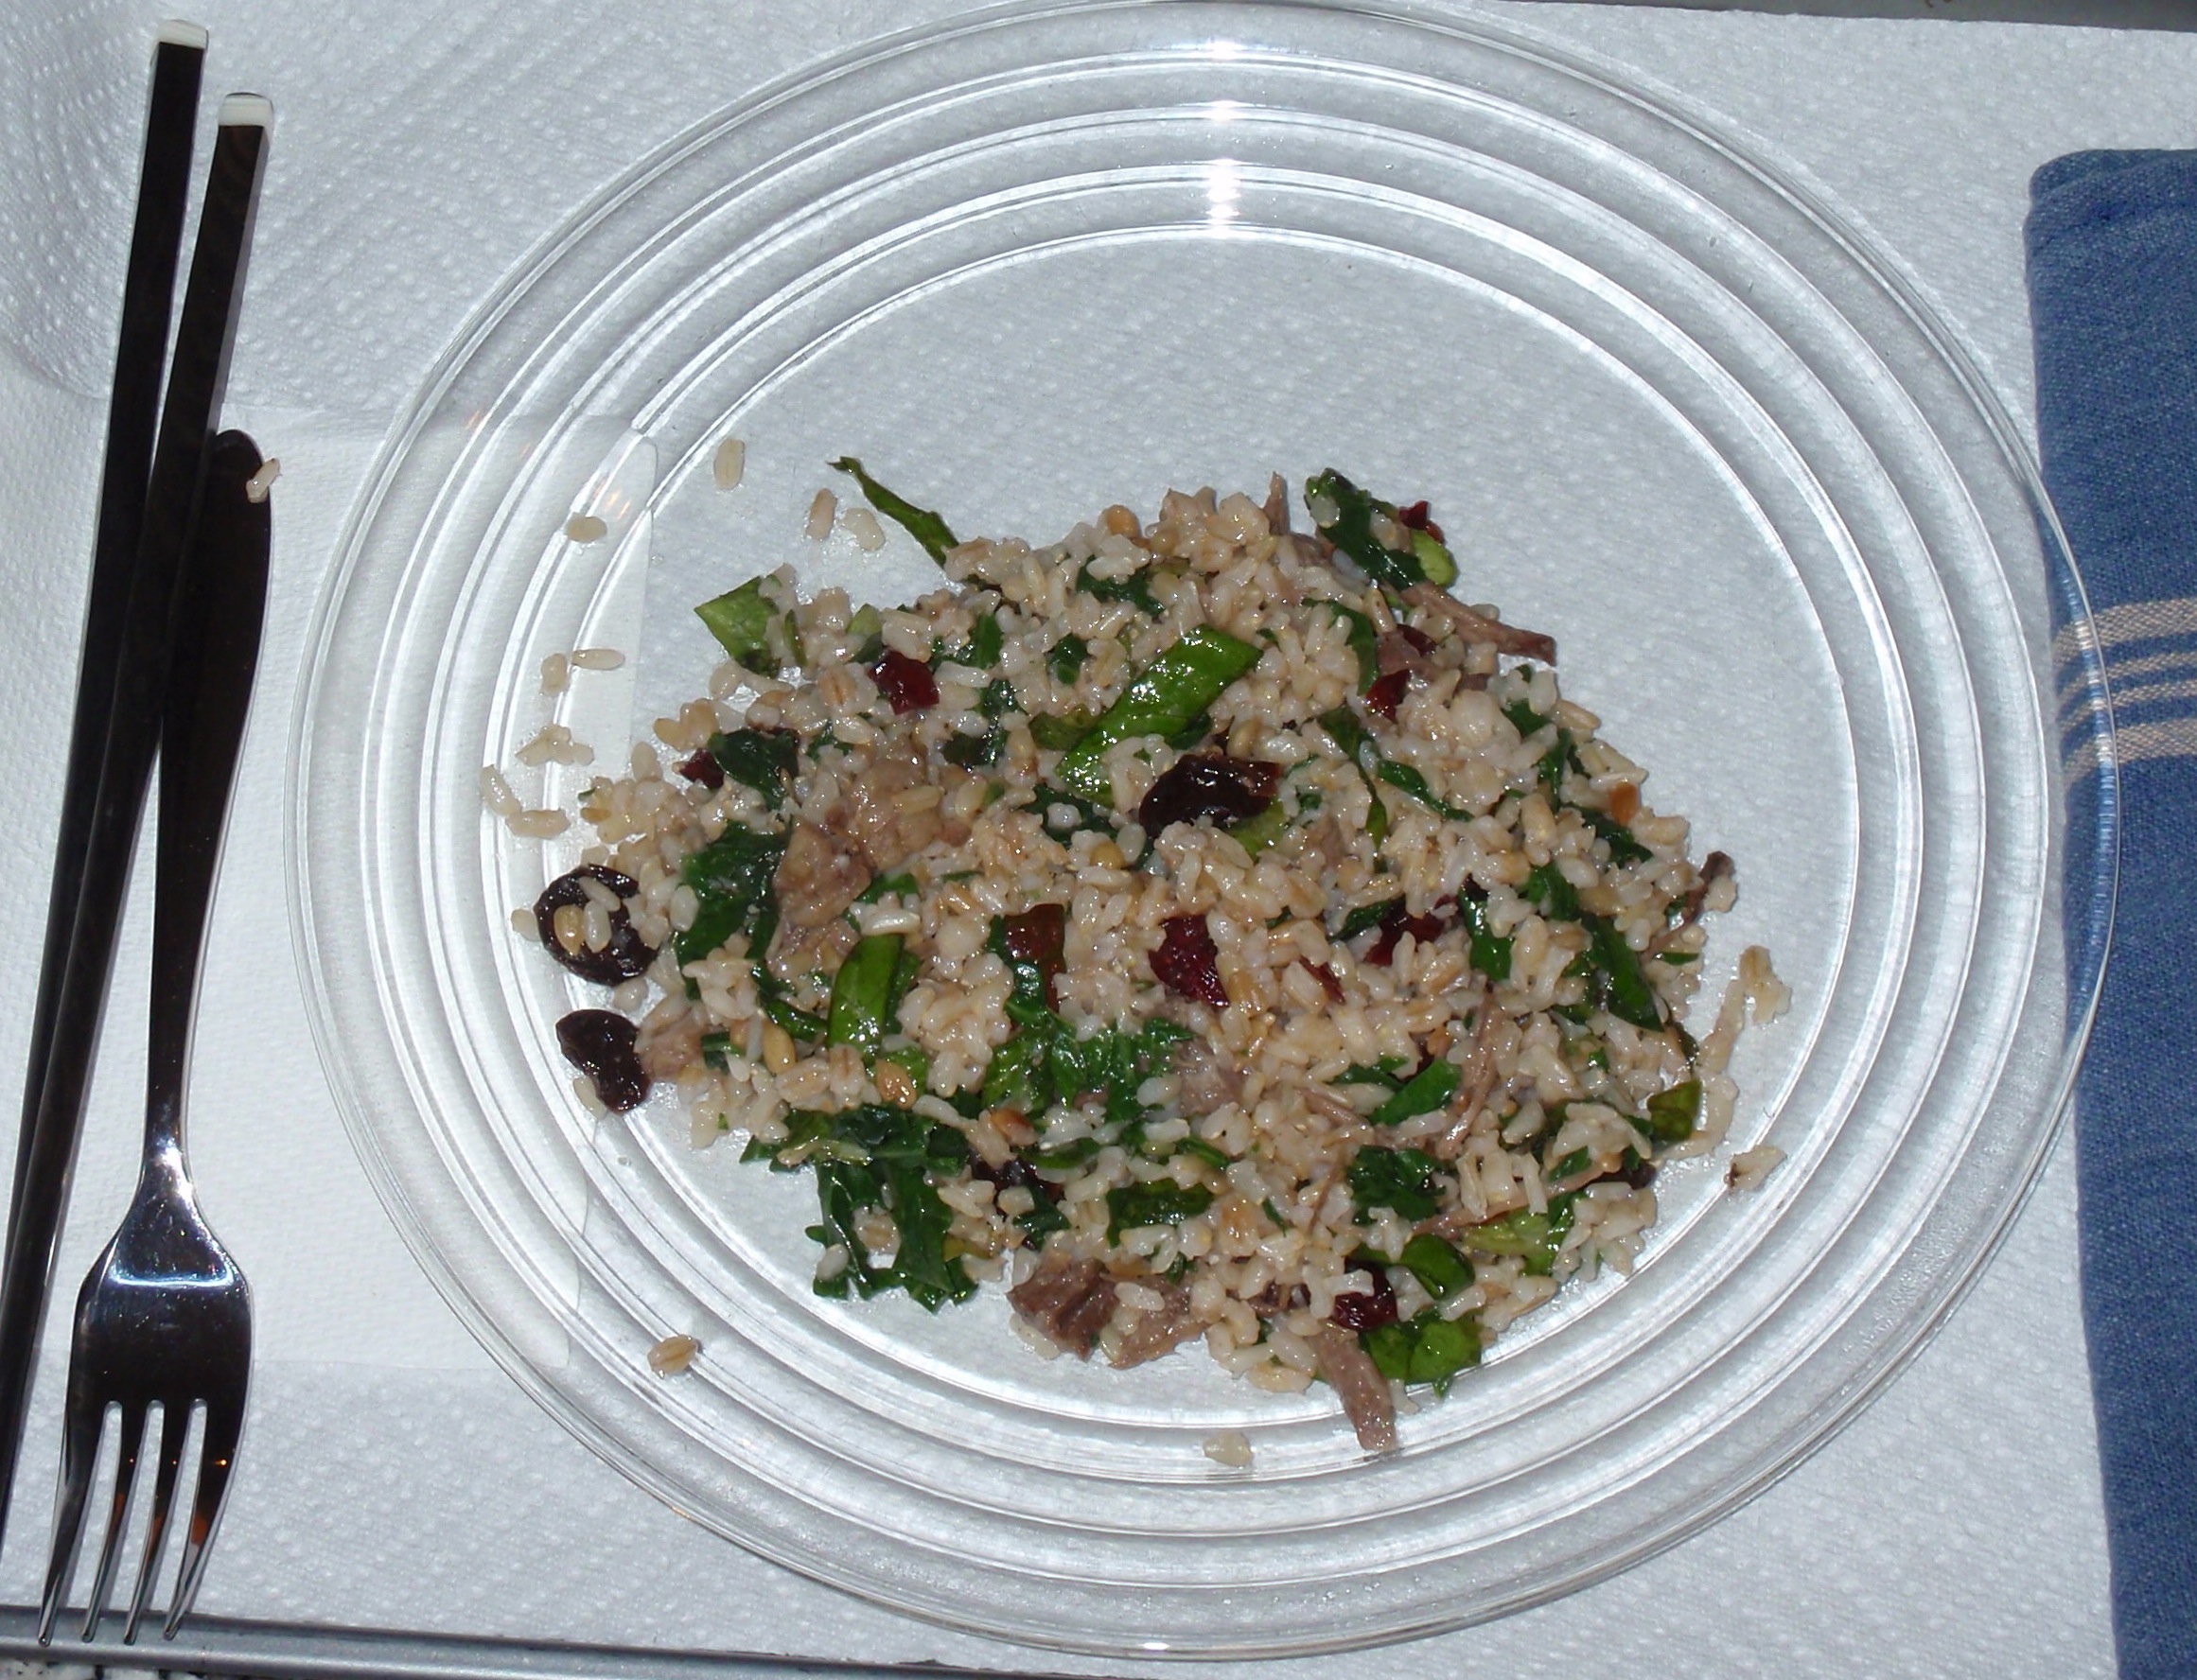
Velez-Malaga Lomo Cerdo Picante

When we lived in Spain for two years, we had a “favorite” Chinese restaurant that we frequented while living in Velez-Malaga, Spain. Nie Xun Zhie (locally called Xi Xie) was a very authentic Chinese restaurant, where they all spoke… you got it… Spanish.. This as close as I can recreate to my favorite dish that I got every time we went there.

INGREDIENTS

  • Whole grain rice (not quick cook)
  • 1 carrot (julienne strips then diced – aka riced)
    MEAT TOPPING
  • 1 thin Pork cutlet
  • 1/2 onion (thinly sliced)
  • 1 stalk celery (diced)
  • 5 small hot chili peppers (minced)
  • 1 clove garlic (diced)
  • EVOO
  • diced scallion
    SAUCE
  • 1 tsp (to taste) Siracha
  • 2 TBL Soy sauce
  • 1 TBL tomato paste
  • 1 TBL Corn starch
  • 2 TBL Rice Wine Vinegar
  • 1 tsp Sugar
  • zest and juice from one lime

STEP BY STEP

  1. Start rice cooking. This will take about 30 minutes.  Stir rice at 15 minutes, then continue with preparation.
  2. 15 minutes from completion of rice, heat oil in saute pan
  3. Sweat onions over low heat
  4. When the onions START to become translucent, add celery
  5. Stir to combine (30 seconds) then add chili peppers
  6. Stir to combine, then add garlic
  7. Cook 1 more minute, then remove from heat

Once you become familiar with this recipe, you can start Step 8 at the same time as Step 2

  1. Heat cast iron skillet to high heat
  2. Sear pork over high heat in lightly oiled pan just until edges start to curl
  3. Flip and cook about half the time the other side cooked
  4. Remove from heat and place on cutting board to let juices redistribute for about 5 minutes.
  5. Cut pork into thin strips, then into small cubes, then mince a bit more
  6. Combine both onion mixture and pork into saute pan over LOW heat
  7. Put carrots into skillet pork was cooked in and put over medium heat
  8. Mix soy, corn starch and sugar in small bowl
  9. Mix in with pork mixture and stir until it starts to thicken
  10. Mix riced carrots into the rice, reserving some for garnish
  11. Server mixture over rice and top with carrot rice and scallions
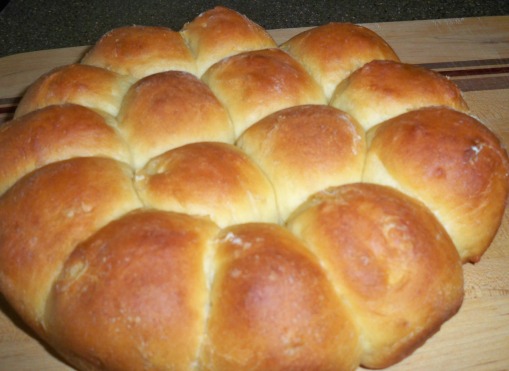
 

Asian Salad

INGREDIENTS

  • 1 CU Napa cabbage (sliced thin)
  • 1/2 CU red cabbage (sliced thin)
  • 1 CU Chicken scraps (shredded)
  • 1 TBL scallions (chopped)
  • 1 TBL carrot slivers
  • 2 TBL cilantro (chopped very roughly, include stems)
  • wasabi root (or powder) to taste
  • 1 tsp ground ginger (optional)
    TOPPING
  • 1 TBL cashews (optional) OR 1 TBL peanuts (optional) OR 1 TBL almond slivers (optional)

Top with COCO’S ASIAN SESAME DRESSING – to taste – or simple Asian Dressing listed below

STEP BY STEP

  1. Put serving plate into refrigerator
  2. Toss all ingredients
  3. Add dressing and toss again
  4. Remove plate from refrigerator
  5. Serve cold on top of soba noodles (or other Chinese noodles)
  6. Top with cashews, peanuts or almonds

ASIAN DRESSING

  • 1 TBL soy
  • 1 TBL sesame oil
  • 1 TBL rice wine vinegar
  • 1 tsp sugar
  • 1 tsp Yakisoba sauce or Asian Fish Sauce
  • 1 tsp poppy seeds

Asian Noodle Salad

INGREDIENTS for the SALAD

  • 3 cups Napa cabbage (sliced thinly)
  • 1 small red pepper (chopped)
  • 1 bunch scallions (chopped)
  • 1 small orange pepper (chopped)
  • 1 bunch fresh cilantro (chopped)
    TO FINISH
  • 2 tablespoons of toasted sesame seeds
  • 1 lime
  • 1 lb Udon noodles

SPECIAL ASIAN SAUCE

  • 1/2 cup water or chicken stock
  • 1/2 cup peanut butter – smooth or chunkey
  • 1/4 cup red wine vinegar
  • 2 tablespoons dark soy sauce
  • 2 teaspoons sugar
  • 1 tablespoon hot sesame oil
  • 1/4 cup minced fresh ginger
  • 1 large garlic clove, minced

Put all of the sauce ingredients in a food processor and blend until smooth.

STEP BY STEP

  1. Combine sauce ingredients and put in microwave safe glass container
  2. Combine all salad ingredients except the lime and Udon Noodles
  3. Cook Udon Noodles according to instructions
  4. Set aside 1 tsp sesame seeds
  5. Toss prepared salad ingredients with the juice from one lime
  6. Toss everything with The Sauce
  7. Sprinkle with sesame seeds


Mexican Meatball Soup

Studded with zucchini, corn, and tomatoes, this hearty soup is comforting, especially on chilly evenings. Oregano flavors both the liquid and the meatballs.

INGREDIENTS

  • Your choice of 12 meatballs
  • 1 TBL cooking oil
  • 1 small sweet onion, chopped
  • 1 jalapeno pepper, seeds and ribs removed, chopped
  • 1 medium zucchini – cut into 1/2-inch dice
  • 2 1/4 tsp dried oregano, or 1 TBL chopped fresh oregano
  • 1/4 tsp ground cumin
  • 1 cup fresh or frozen corn kernels
  • 1 TBL lime juice
  • 1 QT chicken broth or homemade stock
  • 2 C water
  • 1-1/2 C drained canned diced tomatoes
  • 1 tsp salt
  • 1/4 tsp fresh-ground black pepper

STEP BY STEP

  1. Start oil heating in a large pot.
  2. Add the onion and half the jalapenos and saute about 5 minutes.
  3. Add the zucchini, half of the oregano, and the cumin
  4. Cook about 3 minutes.
  5. Meanwhile, make your meatballs.
  6. See Grandpa’s Meatball Recipes and choose which meatball you want to create.
    Our preferred meatball for this recipe is a Mexican Meatball.
  7. Add the broth, water, tomatoes, salt, and pepper
  8. Bring to a simmer, and simmer for 15 minutes.
  9. Add the meatballs and corn to the soup and simmer until the meatballs are just done, about 5 minutes.
  10. Stir in the lime juice and the remaining oregano.


Pasole / Posole / Pozole / Pazole

Pasole is a Mexican tradition. Making Pasole is kind of like saying you are making a Casserole.  The recipe contains hominy, and all other ingredients are based on family tradition.  Here is one recipe out of thousands.  A video from Your Life A to Z follows.

INGREDIENTS

  • 2 C white hominy ( nixtamal )
  • 1/4 C each – Shredded chicken and pork
  • 6 tomatillos
  • 3 jalapeño peppers
  • 2 poblano peppers
  • SPICES:  Oregano, cumin, diced onion
  • GARNISH OPTIONS:  Sour cream, fresh cilantro, halved tostada shells, shredded lettuce, julienne radish, onion slivers, arbol chilies, oregano, green onion

STEP BY STEP

  1. Start hominy boiling in salted water
  2. Simmer for 2-3 hours
  3. Meanwhile, wash tomatillos, and peppers
  4. Cut off stem and put into a blender (deseed peppers to decrease spice level)
  5. When hominy has finished cooking strain – reserving liquid
  6. Put hominy into soup pan
  7. Add just enough of the hominy water to allow the blender to fully process the peppers and tomatillo
  8. Combine hominy and pepper mixture in soup pan, and simmer 45-60 minutes
  9. Top with sour cream and cilantro leaves
  10. Serve with corn chips


Parker House Rolls

parkerINGREDIENTS TO MAKE ABOUT 24 ROLLS

HALF RECIPES ARE SHOWN IN PARENTHESIS

    • STEP ONE – Mix and proof
  • 1/2 C warm water
  • 1 pkg yeast ( or 1 TBL )
  • 2 TBL honey
    (HALF: 1/4 C, 2 tsp, 1 TBL)

    • STEP TWO – Heat to scalding
  • 1/2 C milk
  • 5 TBL butter
  • 2 tsp salt
  • 3 TBL sugar
    (HALF:  1/4 C, 3 TBL, 1 tsp, 2 TBL)

    • STEP THREE – Mix in glass bowl
  • 3 eggs, beaten
  • 1/4 milk powder (ideally buttermilk powder)
  • 1/4 C shortening
  • OPT: 1/2 C sourdough starter
    (HALF:  2 eggs, 2 TBL powder, 2 TBL shortening,1/4 C starter)

    • STEP FOUR – Create dough-
  • 2 C AP flour (or half AP / half wheat flour)
  • More flour if needed to make the dough not too sticky
  • Reserve 2 C more AP flour
    (HALF:  1 C flour, and add more as necessary)

STEP BY STEP

    1. Mix Step One ingredients
      • Let rise for about ten minutes
    2. Meanwhile, put Step Two ingredients into sauce pan, and bring to a high simmer
      • Set pan aside to cool to just “warm”
    3. Mix Step Three ingredients in a glass bowl
    4. Add warm milk mixture
    5. Next mix the yeast mixture into the milk mixture
    6. Put into stand mixer, or use your bowl
    7. Mix, and add flour until it starts to form a dough ball
    8. Then knead on a floured surface
    9. Add more flour to your floured surface  if necessary until the dough ball becomes only a little bit sticky
    10. Transfer to a greased bowl and lightly oil the top of the ball
    11. Let rise to twice the bulk  – about 30 minutes
      • IDEALLY:  Move to the fridge and let rise at least 8 hours.  Even overnight is OK
    12. Flatten with your fingers on a floured surface.  Kind of flat, but still about 3/4 inch thick.
    13. Cut into disks
    14. Place on baking sheet or pie pan with sides not quite touching
    15. Brush the top with butter
    16. Cover and let rise again for 1/2 to 1 hour in warm place.
    17. Bake 12-15 minutes in 400 degree oven.
      . . . Another source says 350° for 30 minutes
      . . . Just watch closely and remove when browned
    18. Brush top with more melted butter
    19. OPT:  Sprinkle with a bit of coarse sea salt

Very Thin Tortillas – Mu Shu

Authentic Mu Shu Pancakes

I don’t like the thicker tortillas that you find in the grocery store.  Here is a fairly simple way to make thin ones.  These also work well for Mu Shu pancakes.

INGREDIENTS

  • 1 cup sifted flour
  • 1/2 cup  very hot water
  • Scant salt

STEP BY STEP

  1. Mix flour and salt, then add extremely hot water
    What I do is put flour and salt in a food processor, and then drizzle in hot water until it starts to come together.
    The hot water breaks down the gluten so that they roll easier and flatter
  2. After adding the boiled water, drizzle in cold water until dough comes together.
  3. Mix adjusting water until dough is like playdough
  4. Wrap in plastic and let set for 30 minutes
  5. Prepare a medium-hot skillet – Cast iron is my preference – NO OIL
  6. Roll a log, and then cut in half, then in half again, then in thirds – You will have 12 pieces
  7. Roll into balls, and then flatten into thick disks – hockey pucks
  8. Brush sesame oil onto the top of HALF of them
  9. Stack two disks (oil in between) and roll out until about 7 or 8 inches in diameter
  10. Put a pair into a non-greased skillet on 350-400º for 30 seconds
  11. When the edges start to become translucent (about 30 seconds) flip the pancakes as a pair
  12. Cook the second side for about 30 more seconds
  13. Flip the two together and cook the first side again for only 10-20 seconds more
  14. Remove the pancakes to cool just a little bit, then separate
  15. See tips below on keeping them from drying out

To keep Mu Shu Pancakes from Drying Out

  1. Place finished pancakes in shallow covered bowl – like a glass pie pan
  2. Put microwave-heated wet cloth at the bottom of the bowl
  3. Put a plate on top of the cloth so the pancakes do not become soggy
  4. Cooked side always goes up.
  5. Put a pan lid on top of the bowl to keep the moisture in.


Mu Shu Pancakes – Video

Here is a video that shows how to roll the pancakes together. It is kind of hard to visualize above.  They fold the pancakes into quarters.  Although that is very common, I don’t like that because they tend to stick together that way.

Mu Shu Crepe Pancakes

INGREDIENTS

  • 3 TBL melted butter
  • 1 C whole milk
  • 1/2 C flour
  • 1/2 tsp salt
  • 2 eggs

STEP BY STEP

  1. Pulse together flour, salt, eggs and butter
  2. Add milk, and pulse just to mix
  3. Strain using a fairly coarse strainer
  4. Let batter rest for 30 minutes to let the glutens relax
  5. Cook in buttered crepe pan until cooked, but not browned
  6. Stack on plate to store and serve

Finish on a floured surface. If you have a scale, 120 – 130 mg ball of dough is perfect for pancakes. Roll balls, then cover and set them aside for 30 minutes

Three Grain Veggies

Three Grain Veggies
Three Grain Veggies

Grandpa created and submitted this recipe to The International Rescue Committee for inclusion in its Gila Farm Cooperative CSA Newsletter. This is a program that we subscribed to, and prepaid for, which gives the farmers money for seeds. Throughout the coming year, we get all sorts of greens and other produce fresh from the farm.

This is also great if you are traveling and get a chance to sample the street side farmer stands or a local farmers’ market.

INGREDIENTS

  • 2 TBL brown rice
  • 2 TBL barley
  • 2 TBL basmati rice or other white rice
  • 8 leaves Spinach
  • 4 leaves Kale
  • 4 leaves Collard Greens
  • 1 Radish
  • 8 Golden Raisins (Grocery)
  • 8 Dried Cherries (Costco)
  • 1/4 CUP leftover chicken, beef or pork – shredded

STEP BY STEP

  1. Wash each ingredient with full immersion, then dry the veggies and leaves, discarding the water.
  2. Prepare the large bowl with iced water for cooling the heated greens
  3. Rinse rice until water runs clear.
  4. Mince radish
  5. Tear stems off spinach and tear leaves into bite sized pieces.
  6. Cut Collard Green and Kale stems off, and discard stems
  7. Heat a large pan with a little water in it.
  8. When water begins to show “hot water bubbles” put in Kale and Collard Greens and cover for 30-60 seconds.
  9. Dump Greens into ice bath to stop cooking and wilting process.
  10. Dry or spin cooled greens, then discard water in bowl, rinse and dry to use in the next step.
  11. Cut uncooked spinach into julienne strips
  12. Chop cooked greens into medium sized pieces
  13. Combine all ingredients in clean bowl and toss gently.
    COOK RICE
  14. Measure rice (eg 1/2 Cup) and place in pan on stove to begin heating and browning
  15. Heat 2x the amount of rice (eg 1 Cup) of water in the microwave until it begins to boil
  16. Pour in with browning rice and add salt to taste
  17. Turn heat as low as possible, cover and wait… you cannot hurry rice.
  18. Stir to keep from sticking every 10 minutes
  19. In 40 minutes, dump rice into a colander, discarding whatever water has not been absorbed.
  20. Toss gently with all other ingredients and serve hot

COMPOSTING MADE EASY

If you wish to begin your own composting, the stems and bits from this recipe will be a good first ingredient. The City of Phoenix Waste Management cuts off the bottom, and drills holes in the sides of their trash barrels with broken wheels; and sells them for $5 each. These make excellent compost bins. Visit the recycle center at 37th Avenue and Buckeye Road to buy one.

Published in Grandpa’s Corner – IRC Volume 1, Issue 4

Po’ Boy Sandwich Roll

This creates a nice soft bollito that is great for making a po’ boy.

INGREDIENTS

  • 1 TBL dry yeast
  • 1 TBL Nonfat Dry Milk
  • 1/2 TBL Sugar
  • 1 tsp Salt
  • 2 C AP flour (I plan to try swapping 1 Cup of cake flour next time)
  • 1 C Hot Water (120-130 F)
  • 1/2 TBL Butter
  • 1/2 TBL cold water

STEP BY STEP

  1. Mix together 1 Cups flour, yeast, dry milk, sugar and salt
  2. Pour in the hot water and butter, mix well
  3. Add remaining flour 1/2 cup at a time. Switch to hook near the end of flour
  4. Add additional flour 1 TBL at a time to get to an elastic ball that is not TOO sticky, but better sticky than too dry.
  5. Knead on medium speed 2 for 10 minutes
  6. Turn dough out onto floured surface and knead with your hands, folding over and over until it is NOT sticky, and dough springs back when you push a finger into it.
  7. Shape into a ball, oil lightly, and place in large glass bowl at least 3x the size of the ball.
  8. Let rise until doubled in size – about 1 hour
  9. Turn out onto a lightly floured surface. Knead briefly to allow large bubbles to escape.
  10. Place pan of water in the oven
  11. Start oven preheating to 350º
  12. Divide into 2 pieces, shape into two torpedoes, and cover loosely with saran and let rise for another 60 minutes on top of the stove
    The dough should double easily in 45 min
  13. Brush dough with cold water, slash across the top and bake for 40 Minutes
  14. Rotate half way through for even color – do not over-bake
  15. Cool on a rack


Sofrito

Sofrito is a base for anything that uses tomatoes or tomato sauce. It just adds an extra dimension to your recipe.  It’s GREAT in any kind of marinara.

INGREDIENTS

  • Grandpa’s Thunder Powder – to taste
    MIRPOIX/TRINITY and FLAVOR VEGGIES
  • 1 onion (chopped fine)
  • 1 large Carrot
  • 1 stalk Celery
  • 3-4 garlic cloves (minced)
  • Optional red and green bell pepper
  • Cremini mushrooms – caramelized first – 15 minutes
  • Dry shitake – soak in boiling water, then strain – reserve liquid – destem
  • 1/2 C veggie or chicken stock
  • 1/2 C shitake strain (or 1/2 C more stock)
    ACID BASE
  • 1/2 C nice dark red wine
  • 1 TBL tomato paste
  • 2 TBL crushed tomatoes
    SACHET
  • Rosemary, sage, oregano

STEP BY STEP

  1. Saute onion, carrot, and celery in EVOO
  2. Simmer on low for about 8 minutes
  3. Optional at this point, add red and/or green bell pepper
  4. Add tomato paste and garlic and cook for another 3 minutes
  5. Add stock, wine and mushroom liquid
  6. Simmer until reduced and liquid begins to disappear
  7. Add San Marzano whole – mashed
  8. Use as you would Mirpoix or Trinity as part of another recipe

EXTRA INFO

  • Sofrito freezes very well
  • If you freeze it in an ice cube tray, you can break out the cubes and use them to flavor your spaghetti sauce bit by bit.
  • Optional to add above where you add the garlic
    • Red bell peppers
    • Green peppers
    • Cilantro
    • Ajicitodulces


Chili Tomato Sauce

Chili Tomato Sauce is good on sandwiches and pizza. On pasta, it can be a bit overwhelming, but if you are looking for that rush of endorphins; OK, yes… even pasta.

INGREDIENTS

  • 1 large red bell pepper
  • 1-3 fresh habañero peppers, depending on how hot you like it.
  • 1 small onion
  • 4 garlic cloves
  • 1 cup water
  • 1/3 cup of red wine vinegar
  • 1 tablespoon paprika
  • 1 teaspoon cumin
  • 1 teaspoon salt
  • 6 oz. tomato sauce

STEP BY STEP

  1. Roughly chop the bell and habanero peppers, onion and garlic.  Remove seeds.
  2. Combine all of the ingredients except the tomato sauce in a pan, bring to a boil, and simmer, covered, for 8 minutes.
  3. Puree the mixture in a blender. DO NOT put lid on blender, or it will literally explode.  Use a paper towel over the top
  4. Add the tomato sauce to complete.
  5. If you don’t want any heat, just eliminate the habaneros, and you will have a good flavorful chili sauce.
  6. Or if you prefer it just a little spicy, use jalapeños instead.  Seeds removed.

Quick Refried Beans

Someimes all you want is quick and easy. Still… don’t just open a can of beans and have at it. After all, would you open a can of Tuna Fish and use it plain to make a Tuna Fish Salad Sandwich? Anyway, here is a quick recipe guaranteed to make life better.

INGREDIENTS

  • 1 can refried beans
  • 1/2 onion – chopped small
  • 1 clove garlic – minced
  • 1 TBL EVOO
  • Liquid – water is OK, reserved liquid, stock or broth is better
  • 1/2 CU Cheddar or Asadero Cheese

STEP BY STEP

  1. Brown onions in oil
  2. Add garlic
  3. Add beans and all other ingredients except cheese
  4. Add cheese at last minute and stir in

Tips: Guacamole – COLLECTION

Grandpa’s Guacamole

Grandpa’s Guac

Other Guacamole Recipes

Quick Guacamole

Quick Guacamole

Avocado – Tips and Tricks

Tips: Avocado

Canyon Ranch Copy Cat Guacamole

Canyon Ranch Guacamole – Copy Cat

Chipotle’s House Spicy Guacamole – Copy Cat

Chipotle’s House Spicy Guacamole – Copy Cat

Guacamole Deviled Eggs

Guacamole Deviled Eggs

Avocado Salsa

Avocado Mousse

Avocado Salsa

Take Guacamole (above) and blend with a bit of tomato water and heavy cream


Chunky and Creamy Guac

  1. Use a fresh avocado, remove from skin and mash in a bowl
  2. Add 1 TBL lime juice immediately
  3. Minced red onion, minced garlic, chopped cilantro, Choloula (to taste), 2 jalapenos (seeds and veins removed)
  4. Mix well
  5. Put into a bowl and then cover TIGHTLY with plastic.  Press onto the guac
  6. Serve with fresh chips

Pico de Gallo

Pico de Gallo translates as “Beak of the Rooster.” It is a sharp tangy staple and a great side to any Mexican recipe.

INGREDIENTS

  • 2 medium tomatoes, seeded and finely diced
  • 1 medium red onion, finely diced
  • 2 tablespoons olive oil
  • 1/4 cup fresh lime juice
  • 4 serrano or jalapeño chilies, seeded and finely diced
  • 2 tablespoons minced fresh cilantro
  • 2 tablespoons tomato juice
  • 1/4 teaspoon salt
  • 1/8 teaspoon freshly ground pepper

STEP BY STEP

  1. Mix all ingredients in large bowl.
  2. Cover and refrigerate until ready to use, but let marinate at least an hour.

VARIATIONS

  • Serrano and jalapeno chilies are available in most supermarkets. Store up to a week in a plastic bag in the refrigerator.
  • You may also find the dark green shiny poblano. This chili is milder, but must be roasted and peeled before using.

FROM SCANNED NOTES:

RECIPE
Pico de Gallo
4 medium tomatoes, diced
11/2 cups canned, diced tomatoes
1/2 cup diced red onion
3 tablespoons chopped scallions
1/2 cup diced yellow bell pepper
1 tablespoon diced jalapeno pepper
1/4 cup chopped cilantro
11/2 tablespoons fresh lime juice
1 teaspoon salt
1/4 teaspoon black pepper
1/2 teaspoon dried oregano leaves
1/4 teaspoon garlic powder
Place all ingredients in a food processor and mix briefly.
~
Makes 3 cups salsa, each 2-tablespoon serving containing approximately:
1 O calories
2 gm. carbohydrate
Trace fat
O mg. cholesterol
Trace protein
122 mg. sodium
Trace fiber
3/99

Scratch Refried Beans

Americas Test Kitchen did some extensive testing and determined that there is just no competing with the commercial canned beans that are available today. We trust them, so you can feel confident that you can use canned beans and this recipe will work well, although by pure definition they are not.   If you want to REALLY start from scratch, start at the next section… otherwise, jump to the INGREDIENTS header.

REPLACING THE CANNED BEANS WITH TRUE SCRATCH BEANS

  1. Wash 1 C each of dried pinto beans, black beans, white beans, kidney beans
    Do this just before you go to bed.
  2. Soak the beans for 8-12 hours in lots of cold UNSALTED water with 2 TBL white vinegar added
    Adding salt at this point will toughen the skins of the beans.
  3. Drain the beans one last time, and put the hydrated beans into 3 C water and 1 C chicken broth
  4. Add 2 strips of bacon
  5. Bring liquid to a boil, then reduce to a simmer for 1-2 hours
  6. If necessary, add more chicken broth – beans should stay covered
  7. Beans are done when they are tender, not crunchy
  8. Add 1 tsp each ground paprika, oregano,
  9. Add 1/2 tsp each ground garlic, cumin, ground chipotle chili, ground cayenne pepper
  10. Add 1/2 C canola or safflower oil
  11. Crush using a potato masher
  12. Drizzle small amounts of oil as needed for consistency
  13. Beans can now be put into jars, leaving 1 inch headroom in the jar
  14. Top off jar with chicken broth, leaving 1/2 inch headroom in the jar
  15. Refrigerate for up to one week, or use a pressure canner for a longer shelf life.

INGREDIENTS for Finishing and Serving your Beans

  • 2 cans whole pinto beans or 3-4 C homemade beans – See recipe above for Dry Bean Processing
  • 2 strips bacon
  • 1/2 onion – chopped small
  • 1-2 arbol chilies – dried, but still flexible – not brittle
  • 1 clove garlic – minced
  • 1 jalapeno – minced – optional
  • 2 TBL EVOO
  • 1/2 tsp ancho chili powder
  • 1/2 tsp cumin
  • 1/2 tsp salt
  • 1/2 tsp oregano
  • Liquid – water is OK, reserved liquid, stock or broth is better

STEP BY STEP

  1. Chop bacon and render in hot pan, then a bit of EVOO and diced onions
  2. Add jalapeno and garlic, if using – avoid breathing in fumes
  3. Add pinto beans and all other ingredients
  4. Once heated through, smash beans with fork or potato masher – Personal preference applies – smooth or with chunks remaining
  5. Add liquid for consistency

VARIATIONS

  • It is traditional to use pinto beans, but using half black beans adds a wonderful dimension
  • Render out all fat from two pieces of bacon
  • Add 1/4 C grated manchego cheese just before serving


Curing your own Olives

Here is a collection of information that you may find helpful.

  • VIDEO – Part 1 – – Collect olives
    The video does not give too much information.  What we saw in Spain was people setting tarps below the trees, then shaking them or blowing them with a leaf blower.  Once on a tarp, the olives can be easily gathered.
    .
  • VIDEO – Part 2 – – Score and brine 1 CU salt per gallon of water
    This video shows each olive being scored individually.  Very labor intensive.  A quicker way is to just rap them lightly with a hammer or mallet, then toss them into the brine.
    .
  • VIDEO – Part 3 – – Change brine weekly
    This is a surprisingly important step.  If you don’t change the brine, your olives become stagnant and will take on a kind of musty and dirty taste.
    .
  • VIDEO – Part 4 – – Try one in 15 weeks – If too bitter, brine three more weeks
    Our friend in Velez brined his olives for only two weeks.  We tried them, and they were pretty awful, but he likes them that way.  “It’s an acquired taste.”

Another site that I found said to soak them in clear water for the first few weeks, changing the water every couple of days.  What I did was change the water every 2-3 days for the first three weeks, then change to a weekly brine after that.  I don’t know why, it just seems right, so that’s what I’m going to do.

I also found one recipe that put chopped up lemon pieces, a bit of oregano, garlic and cumin, and some vinegar into the brine.  Add these if the mood strikes you.  Also, adding some whole dried peppers would  give your olives a bit of a bite.  I personally like the lemon peel idea.

Here is one more video that offers an alternate method, and some good insights:

All things considered, here is what I plan to do:

  1. Go through your olives and remove any that are shriveled or blemished
  2. Clean the good olives using LOTS of water
  3. Smack the olives to break the skin to allow the brining solution access to the meat of the olive.
  4. Heat 1 gallon of water to near boiling, and add 2 CU ice cream maker salt
    NOTE: This is NOT edible, but then again, neither is lye.  It will be rinsed off by the time we are done.
    Melt the salt in hot water, then pour through a coffee filter to remove the gravel, grit, etc.
  5. Pour to cover the olives, using a plate to completely submerge them. See Video Parts 2 and 3 above.
  6. One time per week (same time) drain the water and repeat step 4 – Do this for four weeks… mark your calendar
  7. Step 5 is intended to remove much of the bitterness
  8. After the first four weeks move to a phase that is intended more to preserve and clean the olives
    NOTE: To be sure grit is gone, rinse them in a bowl of standing water. Remove by hand, not by dumping, into a colander.  Discard grit in the bottom of the bowl, and put olives back into their brining container
  9. Heat 1 gallon of water to near boiling, and add 1 CU food-quality course sea salt
  10. Recover olives, completely submerging them
  11. Do this for ten more weeks.
  12. Rinse and taste an olive. If the olive still tastes bitter, repeat steps 9, 10 and 12 for two more weeks.
  13. Once the olives are to your liking either can them or refrigerate them.
  14. To refrigerate them, heat 1 gallon of water, and add 1/2 CU course sea salt (Proportionally adjust amounts if necessary)
  15. Put olives in a canning jar and refrigerate.
  16. They should keep refrigerated for up to two months.

NOTES FROM SPAIN

Start with 2 C oil dried black olives con hueso
Add eight cloves crushed garlic
Orange zest . Not the pith
Crushed red pepper flakes
Fennel seed powder
Liberal amount of EVOO
Toss together and marinate 48-72 hours
Remove garlic
Put into a jar
Store in fridge for up to 4 weeks\

Filling for Chicken Tamales

INGREDIENTS

  • 8 black olives quartered
  • 1/4 cup julienne carrot
  • 1/2 cup minced onion
  • 1/4 cup thinly sliced poblano chile
  • 2 jalapeños sliced and deveined
  • 1 tsp oregano
  • 1 cup shredded chicken
  • 1/2 tsp liquid smoke (optional)
  • 1 cups shredded oaxaca cheese
  • 1 TBL Grandpa’s Jalapeño Chili Sauce or Tabasco
  • 2 TBL corn oil

STEP BY STEP

  1. Put the cheese in the refrigerator and save until ready to make the tamales
  2. Over medium high heat soften onion carrot and poblano in the corn oil
  3. Add remaining ingredients and remove from the heat
  4. Mix well
  5. When cooled spread masa on 16 large corn husks and then divide up filling and cheese
  6. Roll up
  7. Wrap in foil and steam for 1 hour.
  8. Serve with a bit of sour cream.


Lots about Sushi: with VIDEO

Sushi Toolbox

  • Dark soy sauce
  • Rice wine vinegar
  • Short grain rice
  • Nori – small sealed packages
  • Rice Spatula
  • Rolling Mats
  • Wasabi paste or powder
  • Pickled Ginger (Gari) – white (homemade) or pink

Sushi Rice

      • 2 C short grain rice (meshi)
        • AKA Sushi Rice, Glutinous Rice or Pearl Rice
          Very starchy and sticky OR if you can’t find any, add 1 TBL cornstarch to your rice
        • Rinse three times
      • 2 C water
        MIX BELOW – Use this after the rice has finished cooking
      • 3 T rice vinegar or Sushi seasoning vinegar (heated in microwave)
      • 1 TBL mirin
      • 2 TBL sugar
      • 2 tsp salt

STEP BY STEP

      1. Measure your amount of rice while it is dry
      2. Wash rice in a bowl of cold water
      3. Strain
      4. Repeat Steps 2 and 3 until water runs clear (total three times is usually OK)
      5. Mix pre-measured amounts of rice and water and let set for 30 minutes
      6. Cook rice according to directions
        OR Put rice into boiling water, simmer 15 minutes
      7. Remove from heat, cover and let rest 10 minutes
      8. Meanwhile, mix vinegar, mirin, sugar and salt
      9. Poke holes/wells into your rice with a spoon
      10. Pour over a wooden paddle onto rice … drizzle
      11. GENTLY fold cooked rice into vinegar mixture
        Stir around, don’t beat (fan with paper plate to help it cool more quickly)
      12. Keep your hands wetted
      13. Cover with plastic and let cool about 30 minutes on the counter.  Do not refrigerate

Rolling Tips and Tricks

      • Nori (海苔) is the Japanese name for edible seaweed and is frequently used for sushi across the world.  It is usually just referred to as seaweed.
      • Seaweed . Smooth and shiny goes toward the outside.  Rough side goes to the inside against the rice.
      • Use plastic wrap as a covering for your sushi mat
      • Press rice flat onto plastic
      • Dress with slices of cucumber, avocado, shredded imitation krab meat
      • Do not overfill
      • Tuck and roll
      • Dip knife and hands in water
      • Cut in half three times for 8 pieces or half, then thirds for six pieces.

Sushi Filling Options

  • Salmon
  • Shrimp
  • Tuna (mahi mahi)
  • Red snapper
  • Spanish mackerel
  • Scallop
  • Mushrooms
  • Avocado
  • Scallion
  • Sesame Seed
  • Caviar
  • Un
  • Fennel Leaves
  • … and actually whatever you want to wrap into it

Types of Sushi

      • Chirashizushi: “scattered sushi” – Sushi plus other things over rice
      • Oshizushi: “pressed sushi”. Also known as hako-sushi which means “box sushi”
      • Nigirizushi: “hand-pressed sushi” – Frequently like a salmon roll (See Nigiri below)
      • Makizushi – meaning “rolled sushi” – What most Americans visualize when they hear sushi
        Generally wrapped in Nori (seaweed), but can occasionally be wrapped in a thin omelette, soy paper, cucumber, or shsiso (perilla) leaves.

        • Hosomaki: “thin roll” – rice on inside, nori on the outside
        • Chumaki: “medium roll” – rice on inside, nori on the outside
        • Futomaki: “thick roll” – rice on inside, nori on the outside
        • Uramaki: “inside-out roll” – rice on outside, nori on the inside
        • Temaki: “hand roll” – cone-shaped roll
        • Tekkamaki:  Cut tuna into sticks, put nori on mat rough side up, put down rice then tuna

Nigiri

  1. Shape sushi rice into a bite-sized football, but don’t compress
  2. Schmear wasabi on fish, krab or shrimp
  3. Put wasabi against rice and squeeze only to merge all ingredients.  Do not over-compress

Westernized Sushi

        • Dragon Roll:  Eel, crab, cucumber with avocado on the outside
        • Tiger Roll:  Avocado, shrimp tempura, cucumber
        • California Roll:  Rice down on plastic covered mat, then nori, avocado, crab, cucumber. Roll wrap in rice sprinkled with sesame seeds
        • Rainbow Roll: An assortment of fish and avocado on top of a California Roll
        • Spider Roll: Soft-shell crab, cucumber, sprouts (or lettuce, roe, or avocado) and sometimes spicy mayo
        • Spicy Tuna Roll: Rice, tuna, mayo, and chili sauce wrapped in nori
        • Philadelphia Roll: Salmon, avocado, asparagus, and cream cheese wrapped in rice
        • Dynamite Roll: Yellowtail and/or prawn tempura, bean sprouts, carrots, avocado, cucumber, chili, and spicy mayonnaise
        • Teriyaki Roll: Nori, chicken, teriyaki sauce wrapped in rice
        • Boston Roll: Crab, salmon, and scallion wrapped in rice
        • Alaska Roll: Asparagus, and avocado wrapped in rice, topped with Smoked salmon
        • Scallop Volcano Roll: California roll topped with a baked scallop and mushrooms
        • Summer Roll: Sashimi and veggies inside wrapped in rice paper
        • Spicy Tataki Roll: Spicy tuna inside. Sashimi tuna and avocado outside.
        • Eel Avocado Roll: Rice, avocado, and eel wrapped in nori.  Topped with avocado
        • Seattle Roll: Cucumber, avocado, raw salmon, and smoked salmon wrapped in rice
        • Firecracker Roll:  Spicy scallop inside. Tuna and avocado outside
        • Yellowtail Roll: Yellowtail and scallion California roll.
        • Hawaiian Roll: Garlic and albacore inside. Wrapped in rice with avocado and albacore on top.
        • Mango Roll: Avocado, crab meat, tempura shrimp wrapped in rice, topped with mango slices, and creamy mango paste.
        • Classic Roll: Tuna, avocado, and cucumber wrapped in rice and nori
        • Futomaki Roll: Crab, egg, and vegetables wrapped in rice and nori

See www.Ranker.com for a list three times longer than the one above.

Extra Tips and Information

      • If you are going out for sushi, use these tips:
        • Smell should not be overly “fishy”
        • Weekends are when the fresh fish come in
        • Ask about source of their sushi
      • Japanese style sushi has the rice on inside
      • American style sushi has the rice in outside
      • Sashimi is considered by many to be a type of sushi made with raw high-quality fish or raw meat.  It is actually a completely different dish.
      • Sushi should be freshly but quickly killed, usually with a knife point to sever the brain stem
      • Bleeding fish in ice water immediately after killing keeps the meat clear
      • Wait several hours for rigor to start for a firmer flesh
      • Visit All About Sushi Guide for more information

Jacques Pepin Sushi Tray

      • Jacques Pepin made a sushi platter by putting down a layer of rice, and then cubes of salmon, cubes of tuna, small bay scallops, chopped black mushrooms, pieces of avocado (tossed in lemon juice to prevent browning), diced scallion, sesame seeds, caviar, uni, and fennel leaves.  He served wasabi and soy in a cup.  It was WAY easier than formal pieces of sushi and looked just beautiful.

Common Types of Sashimi

      • Salmon (Sake)
      • Squid (Ika)
      • Shrimp (Ebi)
      • Tuna (Maguro)
      • Mackeral (Saba)
      • Horse Mackeral (Aji)
      • Octopus (Tako) – Usually blanched or cooked
      • Whale Meat (Gei-niku)
      • Sea Urchin (Uni)
      • Scallop (Hotate-gai)
      • Puffer Fish (Fugu)
      • Yellowtail (Hamachi)
      • Fatty Tuna (Otoro)

      • You may also view my page for Dungeness Crab Cakes which was filmed at a class aboard the MS Rotterdam.
      • The below video was taken at the Phoenix Eats Trade Show, so has very little verbal description, but offers some very good video for rolling sushi.

Video from Kikoman

Bananas Foster: VIDEO

Thai Crab Salad Rolls

Sake Poached Scallops with Ginger

Bananas Foster

Food and Wine built a cooking class kitchen aboard the MS Rotterdam. With a class of nine, we cooked Thai Crab Salad Rolls, Sake Poached Scallops with Ginger and Bananas Foster. The results were incredible. Here is a summary of the 90 minute class.

This page has been repeated three times, for each of the above recipes.

This is a 45 minute video of a cooking class given aboard the Holland America MS Rotterdam on our way back from Spain.

Sake Poached Scallops with Ginger: VIDEO

Holland America Cooking Class

Thai Crab Salad Rolls

Sake Poached Scallops with Ginger

Bananas Foster

Food and Wine built a cooking class kitchen aboard the MS Rotterdam. With a class of nine, we cooked Thai Crab Salad Rolls, Sake Poached Scallops with Ginger and Bananas Foster. The results were incredible. Here is a summary of the 90 minute class.

This page has been repeated three times, for each of the above recipes.

This is a 45 minute video of a cooking class given aboard the Holland America MS Rotterdam on our way back from Spain.

HTML Snippets Powered By : XYZScripts.com